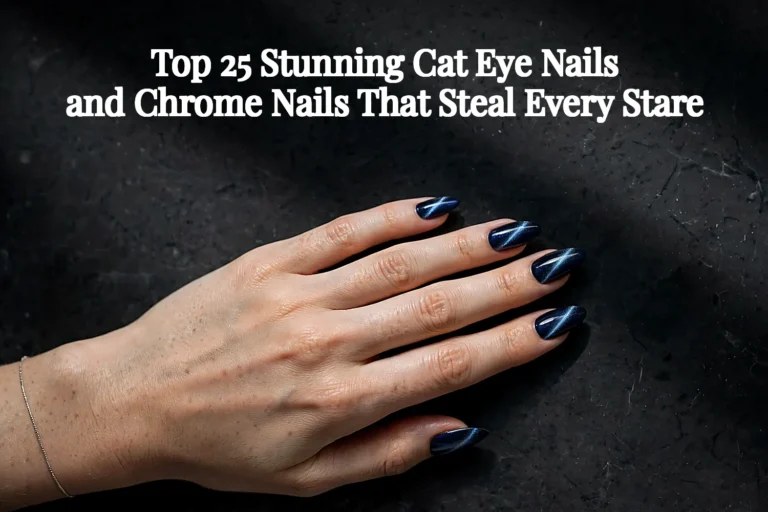
14 Stunning Christmas Nails That Steal Every Holiday Party

Christmas parties ask a lot of a manicure, since hands are everywhere, holding a glass, passing a plate, waving hello. A plain red still works, yet this season belongs to finishes that catch light in a new way, velvet shimmer, molten metal, glass that looks almost edible.
These fourteen christmas nails lean into texture and shine rather than tiny painted pictures, so each one feels fresh instead of familiar. Every set below comes with the shades, the steps and the details that make it last through a long night.
Pick the finish that matches your party, deep velvet for a formal dinner or bright chrome for dancing, and give yourself a quiet hour to paint it well. Good light, thin coats and patience do more than any expensive tool.
Table of Contents
- Magnetic Velvet Cat-Eye Red
- Aurora Borealis Chrome
- Molten Gold Drip on Black
- Shattered Gold Glass
- Stained-Glass Window
- Frosted Glass with Gold Flakes
- Candy Glass Translucent Red
- Holographic Tinsel Strands
- Icicle 3D Drips
- Matte Black + Gloss Snowflakes
- Crystal Gemstone Accent
- Red Chrome Mirror
- Sugar-Coated Matte
- Frozen Bubble Texture
- Frequently Asked Questions
- Time to Pick Your Showstopper
Magnetic Velvet Cat-Eye Red

A magnet dragged across wet polish pulls tiny metallic particles into a soft diagonal band, and the result looks like crushed velvet in deep red. The shimmer moves as your hand turns, so the colour deepens to near-black burgundy in shade and flashes bright cherry under party lights.
What You Need
Shape: Almond | Finish: Velvet shimmer | Time: 40 minutes
- Magnetic cat-eye polish in deep red
- Small nail magnet
- Base coat
- Glossy top coat
- Cuticle oil
How to Do It
- Apply base coat and let it dry fully.
- Paint one nail with a thick coat of magnetic polish.
- Hold the magnet close for ten seconds to shape the band.
- Repeat on each nail, then seal with top coat.
- Add cuticle oil once the polish is dry.
Work one nail at a time, because magnetic polish sets quickly and the band fades if the magnet arrives late. Keep the magnet steady rather than waving it, and a glossy top coat locks the velvet effect in place for the whole evening.
A velvet finish pairs beautifully with a glossy base, and these winter gel nail designs keep the shine going all season long.
Aurora Borealis Chrome
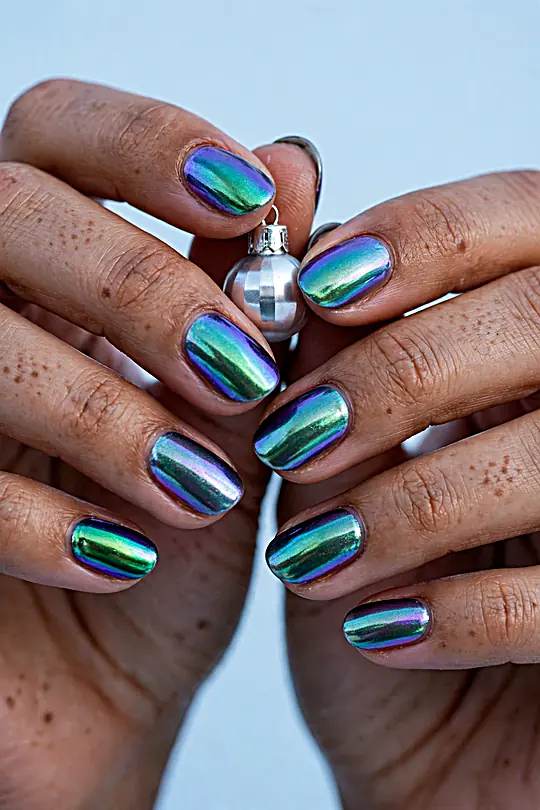
Chrome powder rubbed over a dark base creates a northern-lights effect that shifts green, violet and blue with every movement. The finish looks almost liquid, and a black base coat underneath makes the colours glow far brighter than a light one ever could.
A silicone applicator presses the powder into the nail more evenly than a fingertip, and a no-wipe top coat seals the shine without dulling it. Skip the regular top coat here, since its solvents can cloud the mirror finish within hours.
Powder tip: apply chrome powder over a tacky gel layer, never a fully cured one, so the pigment grips the nail instead of sliding off.
Match the shimmer to your eyes with these Christmas eye makeup ideas for a party look that ties together.
Molten Gold Drip on Black
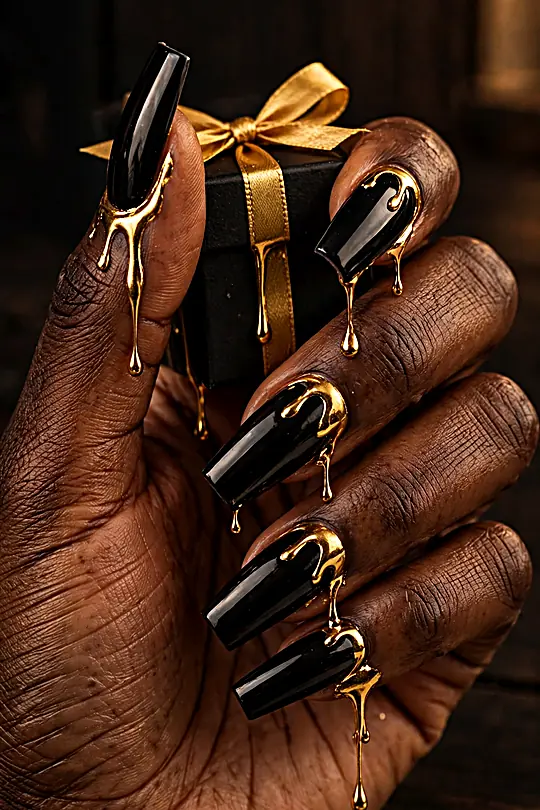
Liquid gold dripping down a glossy black nail looks like jewellery that melted in the best possible way. A thin liner brush draws each drip from the cuticle downward, and varying the lengths keeps the design feeling organic rather than stamped on.
At a Glance
Gold against black reads clearly even in dim light, which makes this set the most photographed of the christmas nails here. Keep the drips on two accent nails if a full set feels too bold for the office Christmas party.
If you love dramatic nails year round, these bold Halloween nail designs show how dark shades can steal a room.
Shattered Gold Glass
Your Kit
Shape: Short square | Finish: High gloss | Time: 35 minutes
- Nude base polish
- Gold foil flakes
- Tweezers
- Glossy top coat
- Nail file (180 grit)
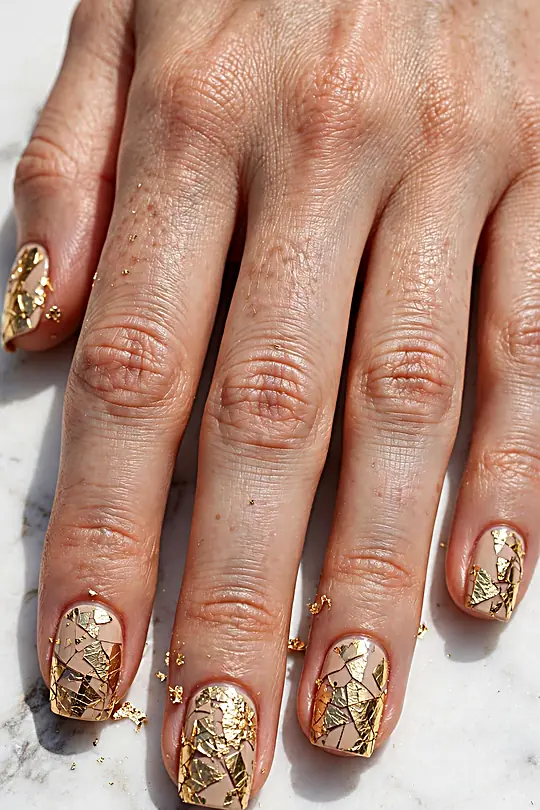
Cracked gold foil pressed onto a nude base looks like a gilded mirror that shattered beautifully. The trick is tearing the foil into small irregular pieces with tweezers, since neat squares read as craft paper while ragged edges read as real broken glass.
The Method
- Paint two thin coats of nude polish and let them dry.
- Brush a thin layer of top coat on one nail.
- Press gold foil pieces onto the tacky surface with tweezers.
- Seal with two coats of glossy top coat.
- File the free edge lightly to smooth any rough foil.
Pair the gold with a polished face using these makeup tips for women over 40 before the party starts.
Stained-Glass Window
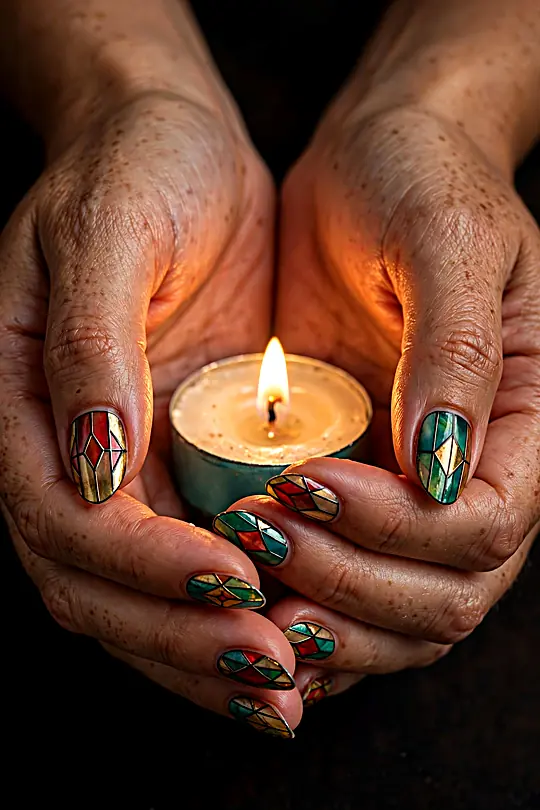
Tiny panels of jewel-tone colour separated by thin black lines turn each nail into a miniature church window. The effect needs patience rather than skill, since the lines only have to look straight at arm’s length, not under a magnifying glass.
A striping brush loaded with black gel polish draws the leading, and each colour panel gets filled with a small dotting tool. Red, emerald and gold make the most festive trio, while a clear top coat gives the whole window its glassy glow.
Short nails suit these holiday nails better than long ones, because the panels stay readable at a smaller scale. Keep the colour panels to three or four per nail, and the window stays elegant instead of turning into a busy mosaic.
Finish the look from head to toe with these winter hairstyles that frame a festive manicure perfectly.
Frosted Glass with Gold Flakes
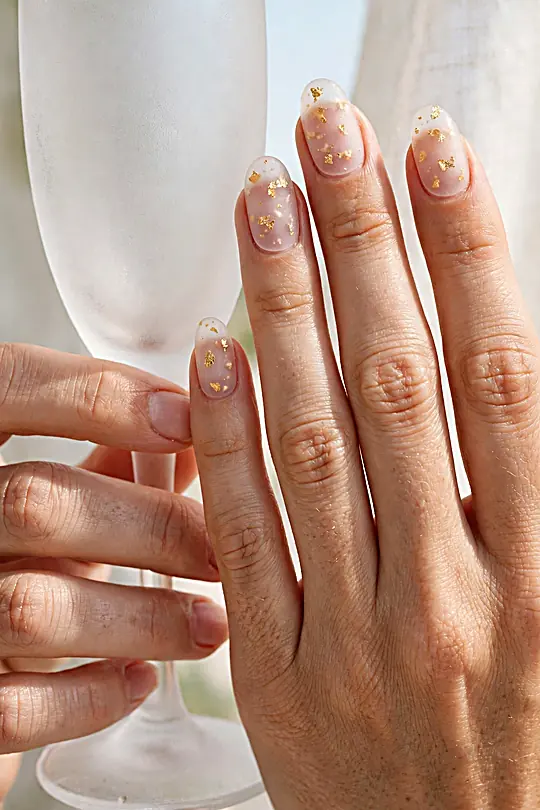
A milky translucent base with gold flakes floating inside looks like a snow globe shrunk onto the nail. The flakes catch light as the hand moves, and a frosted finish softens everything into a quiet glow rather than a loud sparkle.
Flake placement: scatter gold flakes while the base is still tacky, then press them flat with a silicone tool so the top coat seals smoothly.
At a Glance
Cold weather dries hands fast, so this winter skincare routine for dry skin keeps skin soft beside the sparkle.
Candy Glass Translucent Red
Step by Step
- Apply a clear base coat and let it dry.
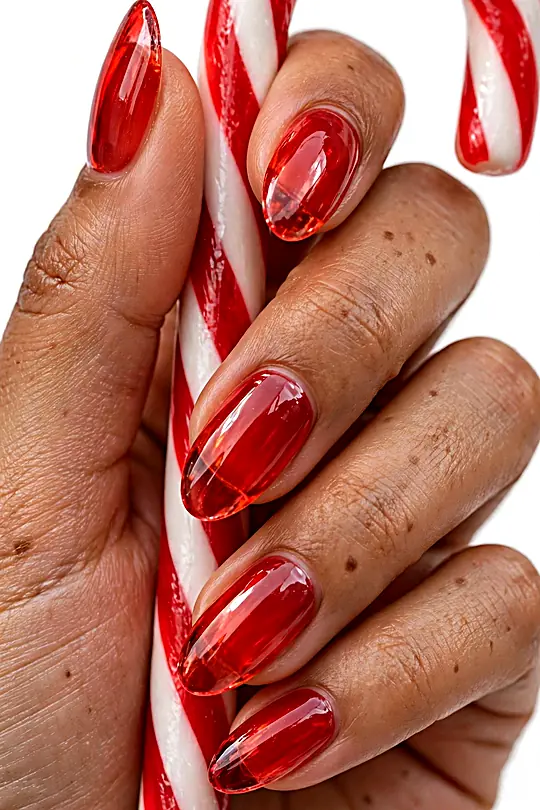
- Paint two thin coats of translucent red jelly polish.
- Add a third coat on the tips for a deeper gradient.
- Seal with a glossy top coat for the candy shine.
- Clean the cuticle line with a small brush and remover.
Jelly polish in translucent red turns the nail into a piece of hard candy, glowing from within rather than sitting on the surface. These christmas nails flatter every skin tone, and three thin coats build more depth than one thick coat ever manages.
Candy red nails deserve an outfit to match, and these holiday party outfits make the pairing easy.
Holographic Tinsel Strands
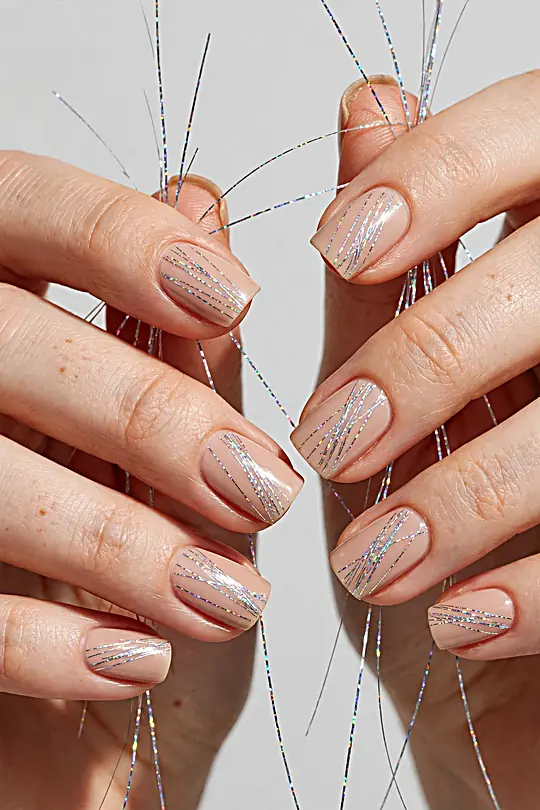
Fine silver lines laid diagonally across a nude base catch the light like tinsel on a tree. The strands need a steady hand but no artistic talent, since straight lines only have to run parallel, and a striping brush does most of the work.
The Lineup
Shape: Medium square | Finish: High gloss | Time: 45 minutes
- Nude base polish
- Silver holographic striping tape
- Small scissors
- Glossy top coat
- Tweezers
Tape trick: press striping tape onto the nail before the base fully dries, then trim the ends flush with small scissors for a clean edge.
Carry the sparkle into the new year with these New Year’s Eve outfits that love a holographic finish.
Icicle 3D Drips
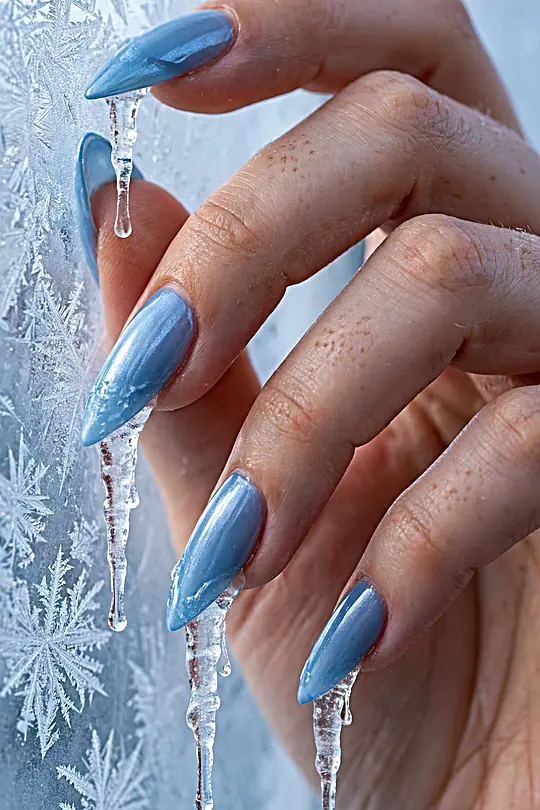
Raised clear drips hanging from the tips make the nail look frozen mid-thaw, and the 3D texture catches light from every angle. Builder gel shaped with a dotting tool forms each icicle, and a cold blue base underneath sells the winter story.
Keep the drips short, no longer than two or three millimetres past the tip, or the nails snag on fabric and hair. A matte top coat on the base with glossy drips adds contrast that makes the ice look even colder.
Gather These
Shape: Long stiletto | Finish: Matte base, gloss drips | Time: 50 minutes
- Icy blue polish
- Clear builder gel
- Dotting tool
- Matte top coat
- Glossy top coat
- UV lamp (for gel)
Icicles suit a polished party outfit, and these Christmas party outfits for women over 40 complete the look.
Matte Black + Gloss Snowflakes
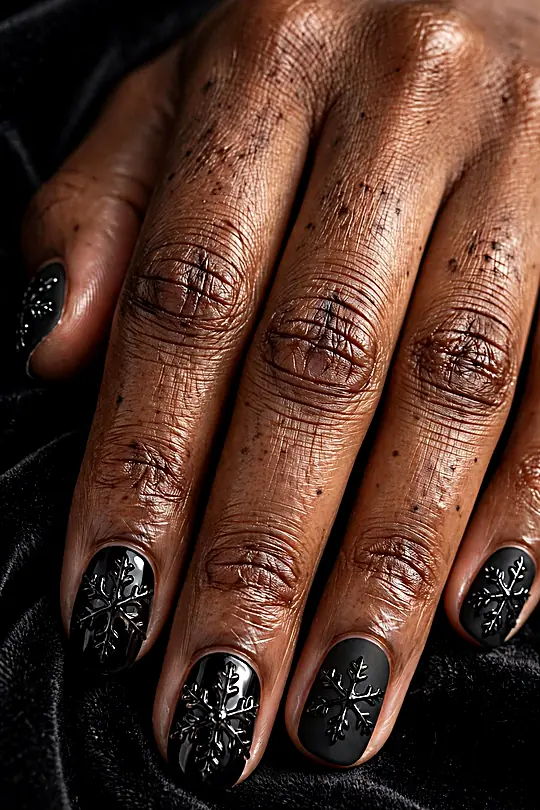
Snowflakes stamped in glossy top coat over a matte black base appear and vanish as the hand turns, like frost forming on a window. The contrast between the two finishes does all the work, so these christmas nails need no colour at all to feel festive.
At a Glance
Stamp tip: load the stamping plate with glossy top coat, not polish, so the snowflakes shine against the matte base without adding colour.
A black and white manicure looks sharp beside an elegant dress, like these Christmas dresses for women over 50.
Crystal Gemstone Accent
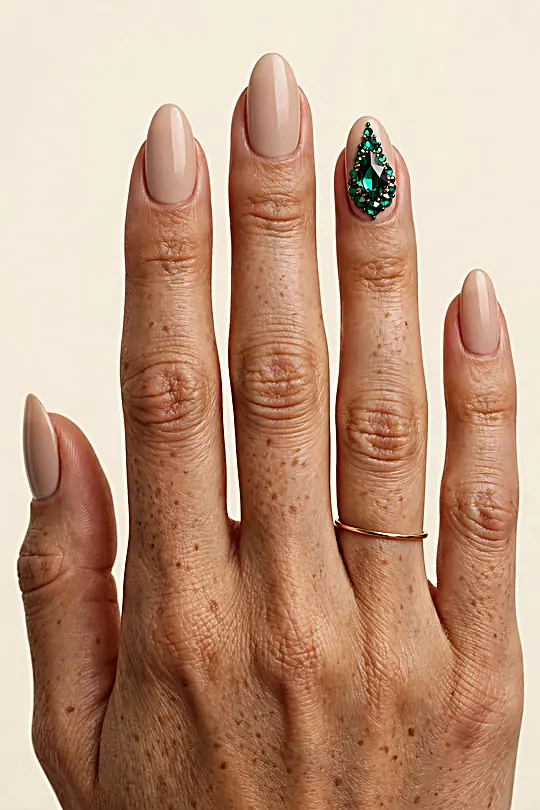
A single nail set with emerald crystals turns a simple nude manicure into something that looks borrowed from a jewellery box. The accent nail draws the eye without overwhelming the hand, and the rest of the set stays quiet enough for any party.
A drop of nail glue holds each crystal better than top coat, and a tiny amount of glue goes a long way. Place the largest crystal near the cuticle and smaller ones toward the tip, so the cluster looks deliberate rather than scattered.
How to Apply
- Paint all nails with two coats of nude polish.
- Choose one accent nail on each hand.
- Dot nail glue where each crystal will sit.
- Place crystals with tweezers, largest first.
- Seal the edges with top coat, avoiding the crystal tops.
Gemstone nails shine brightest at a table full of treats, and these Christmas appetizers make the party complete.
Red Chrome Mirror
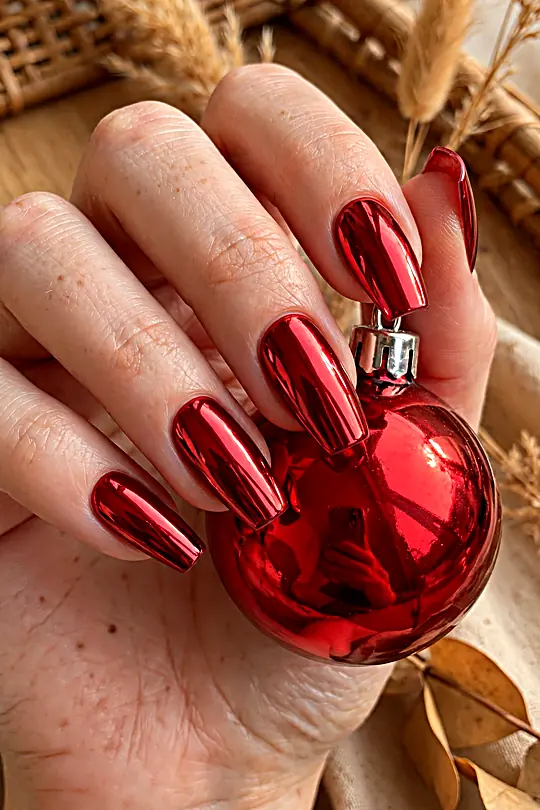
Mirror chrome in true red reflects light like polished metal, and the finish looks expensive from across the room. A black gel base underneath deepens the red, while a no-wipe top coat keeps the mirror clear for days without clouding.
The powder goes on with a silicone applicator in small circles, and the shine appears only after the powder is fully buffed in. Rushing this step leaves a dull grey cast, so take an extra minute on each nail before sealing.
Buffing tip: buff the chrome powder in small circles until the grey cast disappears, then brush away loose powder before the top coat.
These holiday nails suit every skin tone, because true red chrome has no warm or cool bias once the mirror shine takes over. Keep the shape short and square with softened corners, and the mirror reads modern and sharp rather than retro.
A red chrome manicure and a warm mug go together perfectly, especially with these Christmas coffee drinks.
Sugar-Coated Matte

A dusting of fine glitter over matte polish gives the nail a sugared finish that sparkles without shine. The texture feels like frost on a windowpane, and dusty rose keeps the effect soft enough for a daytime party as well as an evening one.
The Essentials
Shape: Short oval | Finish: Matte sugar | Time: 35 minutes
- Dusty rose polish
- Fine iridescent glitter
- Matte top coat
- Small makeup brush
- Cuticle oil
The Technique
- Paint two coats of dusty rose and let them dry.
- Brush a thin layer of matte top coat on one nail.
- Sprinkle fine glitter over the tacky surface.
- Shake off the excess and let the nail dry.
- Repeat on each nail, then add cuticle oil.
Sugar tip: sprinkle the glitter from a height of a few inches so it lands evenly, and never press it down or the sugar texture flattens.
Sugar sparkle fits a relaxed gathering with friends, and these Friendsmas party ideas set the scene.
Frozen Bubble Texture
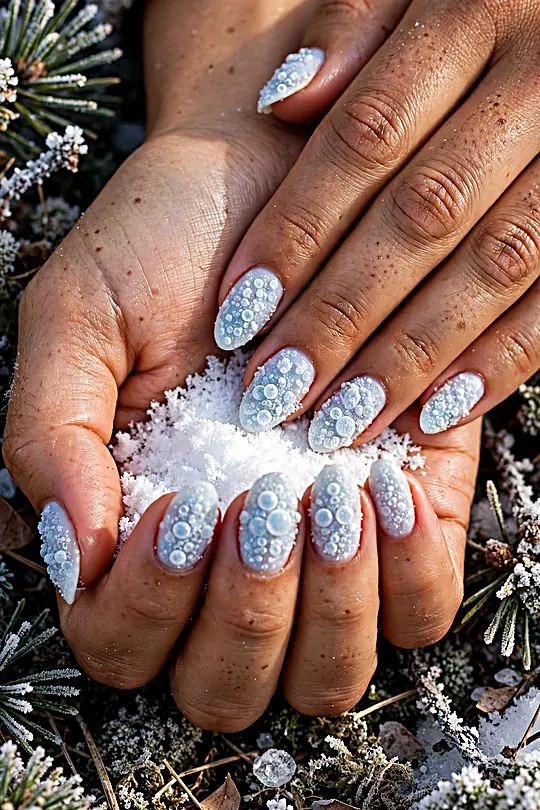
Tiny raised bubbles frozen across a pale blue base make the nail look like a window in deep winter. The texture comes from a dotting tool pressed into builder gel, and each bubble catches light differently as the hand moves.
At a Glance
Mixing bubble sizes keeps the texture looking natural, since real frost never forms in a tidy grid. A matte top coat over the whole nail makes the bubbles look frozen, while a glossy coat turns them into morning dew drops.
This is the quietest design in the list, and it works beautifully for a long holiday week when louder nails might tire. The pale blue reads icy without feeling cold, and the bubbles give the eye something new to notice every day.
Frozen textures echo a winter wonderland at home, and this luxury Christmas decor brings the same frost indoors.
Frequently Asked Questions
✦How long will a cat-eye or chrome manicure last?
A regular polish version lasts about five to seven days with a good base and top coat, while gel versions last two to three weeks. Cat-eye and chrome finishes chip at the tips first, so capping the free edge with every coat makes the biggest difference to wear time.
✦Can these designs work on short nails?
Yes, most of these designs look even better on short nails, because the finish does the talking rather than the length. Cat-eye velvet, sugar texture and chrome mirror all shine on a short oval, while 3D drips and long tinsel strands suit a little extra length.
✦Is a UV lamp needed for these looks?
Most of these looks work with regular polish, though gel gives chrome and cat-eye finishes their deepest shine. A UV lamp only matters if you choose gel polish or gel top coat; most designs in this list work with standard polish and a steady hand.
✦What is the safest way to remove glitter and chrome polish?
Wrap each nail in a small acetone-soaked cotton pad and a square of foil, wait ten minutes, then slide the colour off toward the tip. Foil wraps lift glitter and chrome cleanly without the scrubbing that roughs up the nail surface, and cuticle oil after removal restores moisture.
✦Which design suits a first-time nail art try?
Sugar-coated matte and frosted glass are the kindest first tries, since texture hides small wobbles and neither needs a perfect line. Start with one accent nail if a full set feels ambitious, and save molten gold drips for a second attempt.
Time to Pick Your Showstopper
Fourteen ideas make a generous shortlist, and the smartest pick is the set that suits the days ahead rather than the loudest picture on the page. A soft frosted finish carries a busy week gracefully, while molten gold owns the dance floor, and both choices are good in their own moment.
These christmas nails cover every mood of the season, soft sugar textures and molten gold among them, so there is a finish for every party on the calendar. Paint it slowly, cap the free edge, and the set will still look fresh when the new year begins.
A beautiful set of holiday nails keeps working after the party ends, catching the light every time you reach for a cup or a door handle. Choose the set that makes you smile when you glance down, give it a careful hour, and wear it with confidence all season.