
13 DIY Sunburst Mirror Ideas That Make a Wall Look Expensive
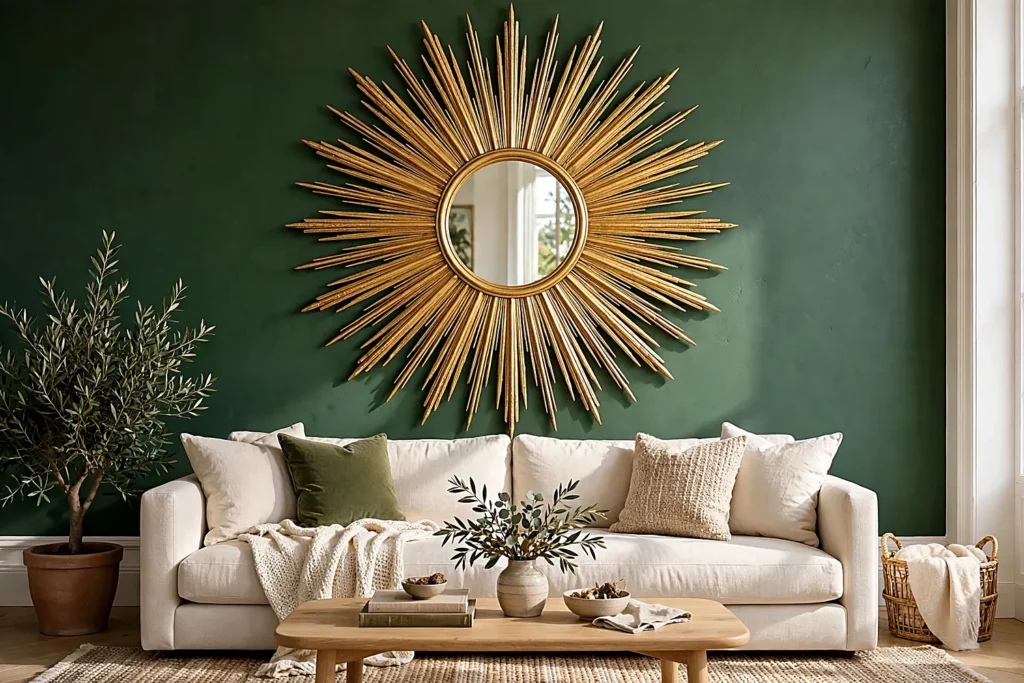
A sunburst mirror is the hardest-working decoration a wall can wear: it bounces light, fakes a window, and turns a blank patch into the room’s jewelry. Shop versions run into the hundreds — a diy sunburst mirror costs the price of a small mirror and a bag of rays, plus an afternoon of your time.
Thirteen builds follow, from the classic wooden dowel original to spoon, shell and cardboard versions that cost nearly nothing. Each comes with a full materials list and honest steps, and most share the same skeleton: a round mirror, a backing disc, and rays glued in rings. Pick the diy sunburst mirror that suits your room’s metal, wood or mood — and expect guests to ask where you bought it. That question is the whole point of a diy sunburst mirror.
Table of Contents
- Classic Wooden Dowel Sunburst Mirror
- Gold Mid-Century Sunburst Mirror
- Rattan Sunburst Mirror
- Driftwood Sunburst Mirror
- Bamboo Skewer Sunburst Mirror
- Rope Sunburst Mirror
- Clothespin Sunburst Mirror
- Vintage Spoon Sunburst Mirror
- Rustic Twig Sunburst Mirror
- Beaded Glam Sunburst Mirror
- Cardboard Sunburst Mirror
- Shell Sunburst Mirror
- Orb Starburst Mirror
- Frequently Asked Questions
- Final Thoughts: Let It Catch the Light
Classic Wooden Dowel Sunburst Mirror
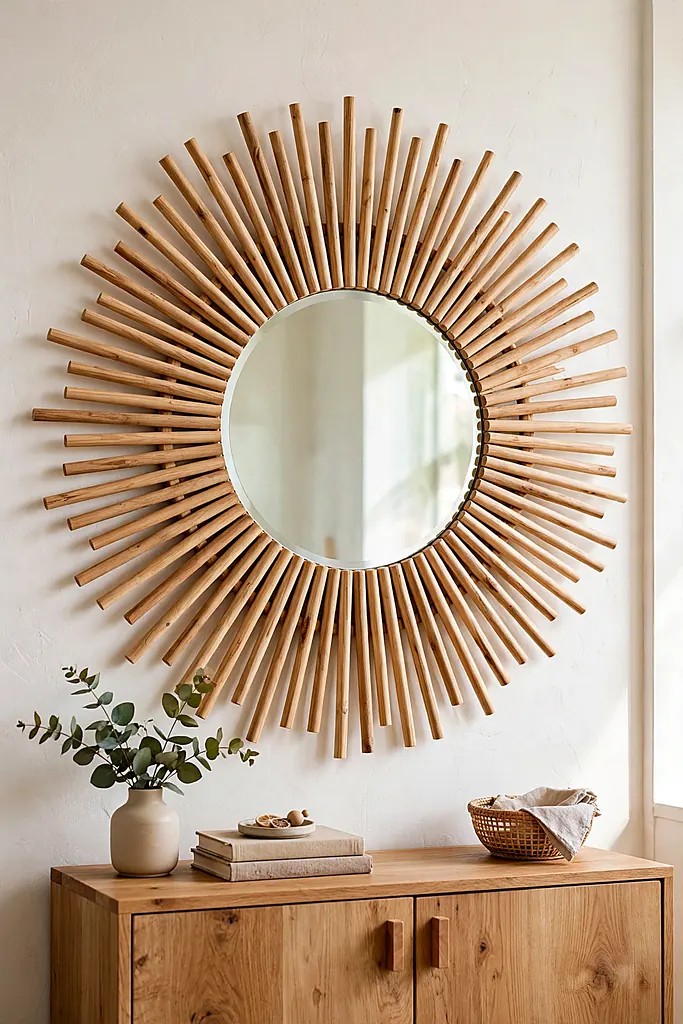
The original and still the benchmark: dozens of wooden dowels radiating around a round mirror, stained or left natural. It reads mid-century and farmhouse at once, which is why it survives every trend cycle — and why it is the diy sunburst mirror most worth making first.
Dowels are forgiving: slight length differences disappear once the ring is full, and a broken ray swaps out in seconds. Stain them before gluing if you want a two-tone effect — dark rays behind, natural in front. It adds a depth no single coat of paint can fake.
What You Need
- Round mirror, 25–30 cm
- Wooden backing disc or thick cardboard circle, 30 cm
- Wooden dowels, 6 mm, about 60
- Wood glue or hot glue
- Saw or strong garden shears
- Sandpaper
- Picture hanger
- Stain or paint (optional)
How to Make It
- Cut the dowels to equal lengths, 30–35 cm, and sand the cut ends smooth.
- Glue the mirror to the center of the backing disc and let it set.
- Glue dowels behind the backing at the clock positions first — 12, 3, 6 and 9 — to anchor the spacing.
- Fill between the anchors, keeping every ray snug against its neighbors, alternating long and short if you cut two lengths.
- Fit the picture hanger to the backing, wipe off any glue strings, and hang — the first diy sunburst mirror on a wall rarely stays the only one.
A handmade mirror is wall art with a job — see more in these diy wall art projects.
Gold Mid-Century Sunburst Mirror
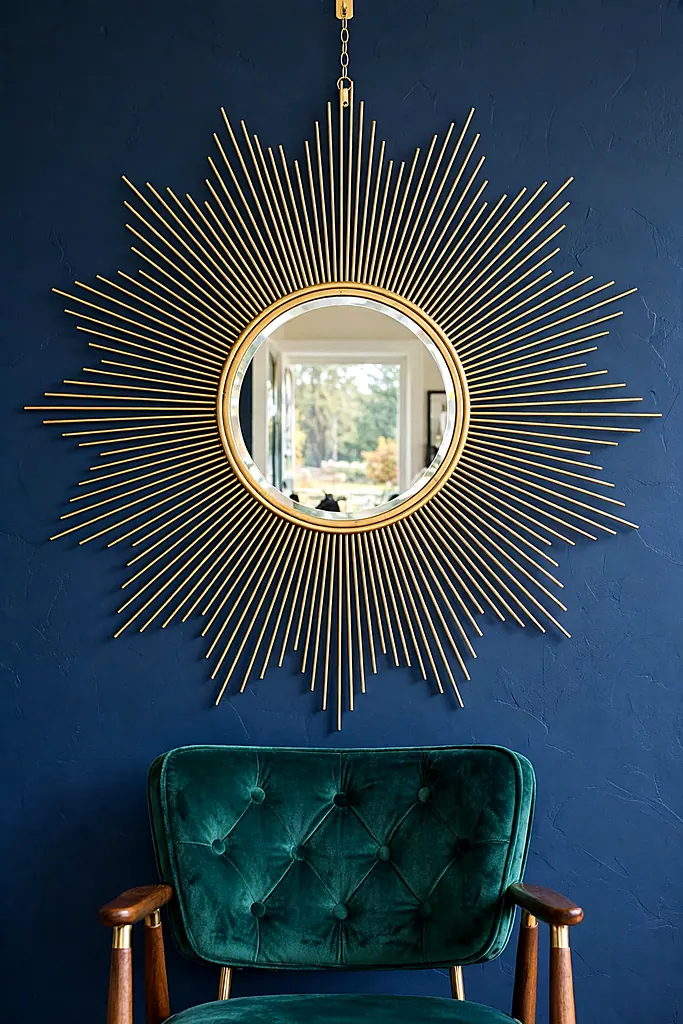
Thin, straight, unapologetically shiny: the gold metal sunburst is pure mid-century glamour, the one that hangs over mantels in magazine rooms. Metal rays keep their line perfectly, which is exactly the point of the style — this mirror is architecture, not crafts.
What You Need
- Round mirror, 25 cm
- Backing disc
- Brass rods or thick wire, about 48
- Metallic gold spray paint
- Strong glue — E6000 or hot glue
- Picture hanger
- Painter’s tape
Lay the mirror on the backing and mark the ray positions with tape every 7–8 degrees. Glue the rods one by one, checking each against the tape marks — with metal, a two-degree drift shows, so this diy sunburst mirror rewards patience over speed.
If your rods are not brass, spray them gold before gluing, in two light coats, and let them cure a full day so the finish does not take fingerprints. Hang it where lamplight hits it in the evening; gold rays earn their keep after dark.
Finish secret: Real brass and gold spray paint look identical in photos but not in person. If the mirror hangs where guests stand close, real metal rods are worth their small extra cost.
Gold and vintage are natural partners — browse these vintage home decor ideas.
Rattan Sunburst Mirror
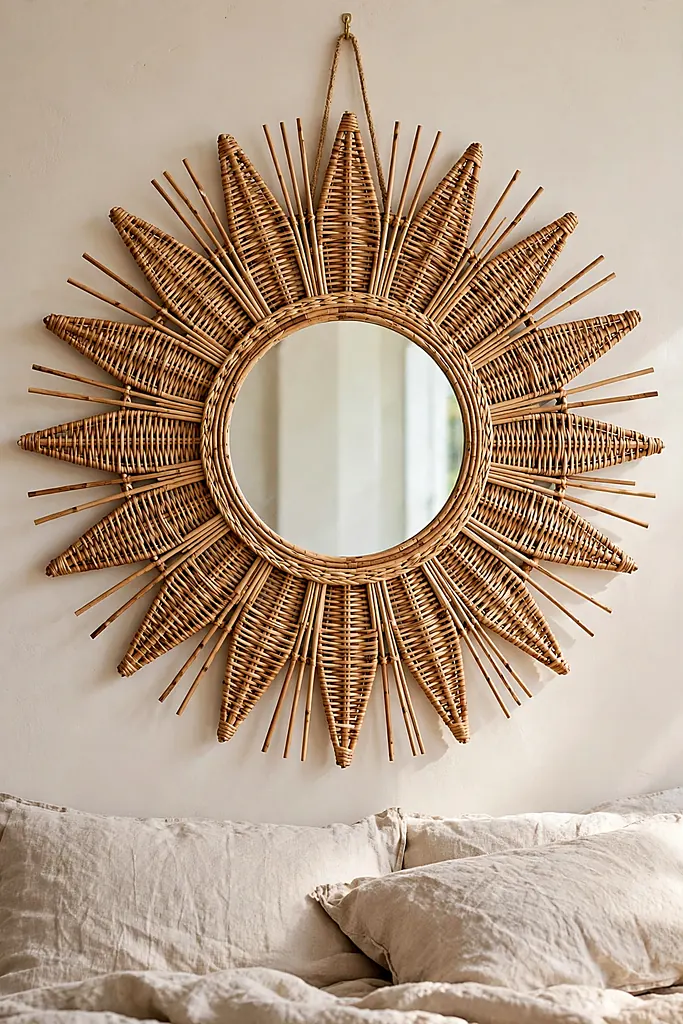
Rattan brings the sunburst down to earth: woven, honey-toned and soft — the mirror boho rooms are built around. Genuine rattan bends into gentle rays with natural variation, so no two mirrors are alike. The slight irregularity is the charm, not a flaw to sand away.
Soak rattan in warm water for twenty minutes before working; flexible fibers bend without snapping and hold their curve as they dry. This diy sunburst mirror is light enough to hang on a single small hook, even in its largest sizes.
What You Need
- Round mirror, 25 cm
- Rattan poles or reed, about 40 lengths
- Backing disc
- Hot glue gun
- Twine
- A tub for soaking
- Picture hanger
How to Make It
- Soak the rattan lengths in warm water for 20 minutes until flexible.
- Glue the mirror to the center of the backing disc.
- Glue the rays in two layers — the long lengths behind, shorter ones in front — working around the clock positions first.
- Wrap the center join with twine to hide the glue line, fit the hanger, and hang. Twine-wrapped, this diy sunburst mirror suits linen and pale wood best.
At a Glance
Rattan belongs in calm rooms like these cozy winter living room decor ideas.
Driftwood Sunburst Mirror
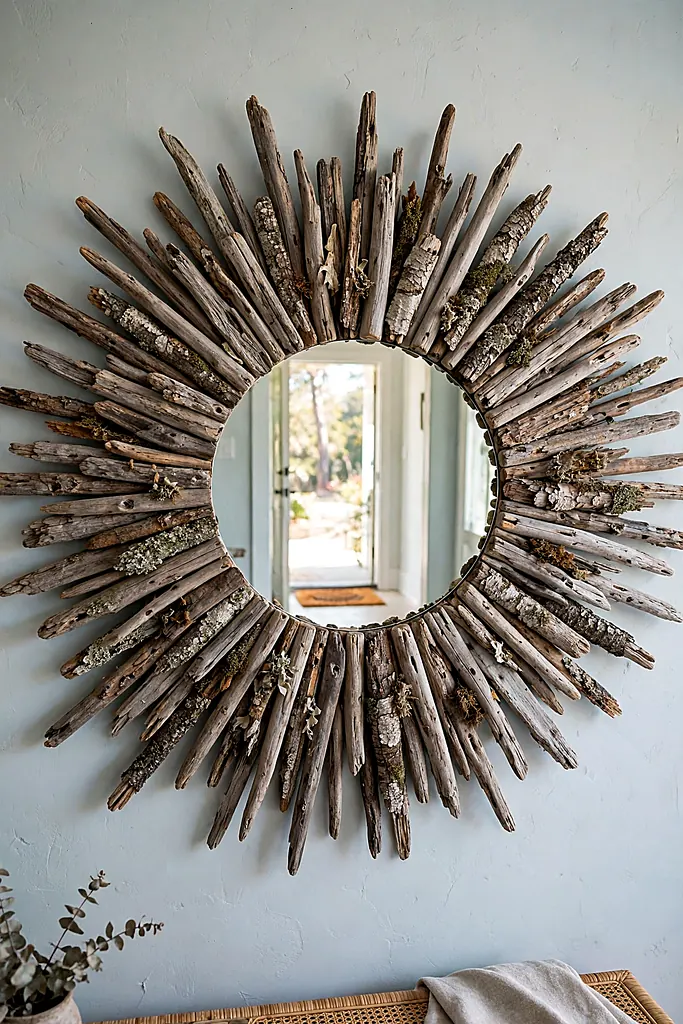
Driftwood is the coastal sunburst: grey, weathered pieces radiating like something the tide arranged. Every piece is a different length and curve, so the silhouette is organic — less clock, more shoreline. Collected pieces cost nothing but a beach walk with a bag and an eye for straight-ish sticks. It is the diy sunburst mirror a beach house asks for by name.
What You Need
- Round mirror, 20–25 cm
- Driftwood pieces, about 35–45
- Backing disc
- Hot glue or wood glue
- Picture hanger
- A stiff brush for cleaning
How to Make It
- Wash the driftwood, brush off sand and let it dry completely — damp wood will not hold glue.
- Sort the pieces by length into long and short piles.
- Glue the mirror to the center of the backing disc.
- Glue the longest pieces at the clock positions, then fill between them with shorter pieces, following each piece’s natural curve.
- Fit the hanger and hang it somewhere bright; driftwood looks best in honest daylight — a driftwood diy sunburst mirror sulks in dim corners.
Driftwood suits an entryway beautifully — more ideas in these hallway table decor looks.
Bamboo Skewer Sunburst Mirror
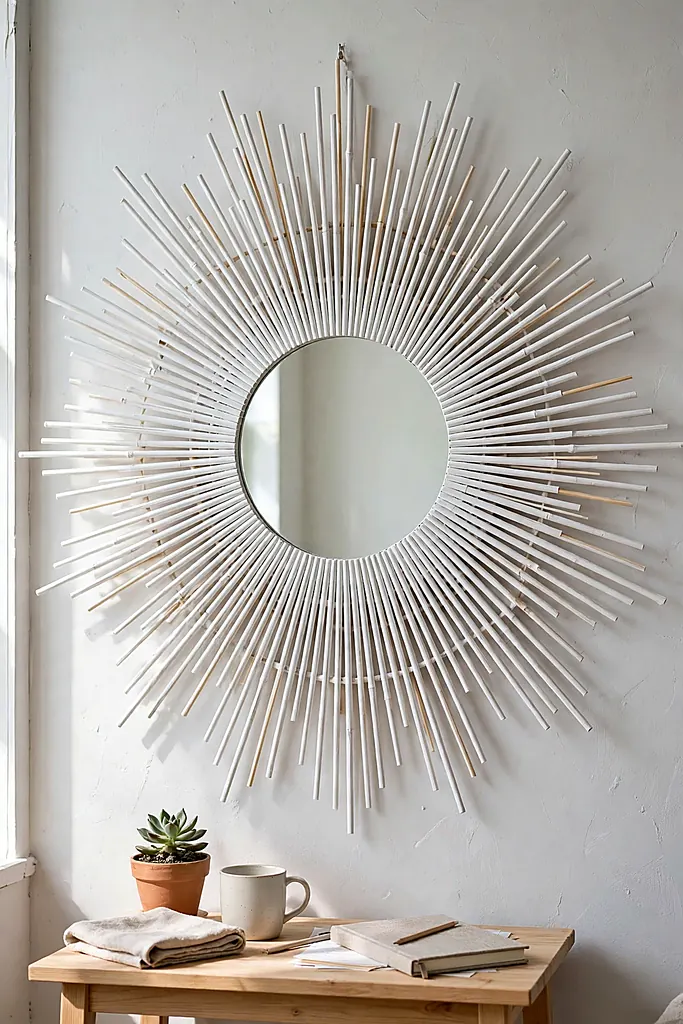
The budget miracle: a packet of bamboo skewers — the kind sold for kebabs — becomes a fine-rayed sunburst that looks like it came from a design shop. The rays are thin, so you use many of them; the effect is delicate, almost like sunbeams drawn with a ruler.
What You Need
- Round mirror, 20 cm
- Bamboo skewers, 2 packs (about 100)
- Backing disc
- Hot glue gun
- Paint in your chosen color
- Picture hanger
Trim the skewers to two lengths, long and short. Glue the long ones first at the clock positions behind the backing, then fill between them, and add the short layer in front for density — two layers are what stop a skewer diy sunburst mirror looking sparse.
Paint after gluing, not before: one coat over the whole back seals every join and unifies the color. White reads Scandinavian, black reads modern, gold reads glam — the same ten-dollar build wears all three convincingly.
Hang it with the lightest of hooks; the finished mirror weighs almost nothing. Group two smaller ones around a larger center mirror for a gallery effect that costs less than one shop-bought piece.
Patient, inexpensive crafts reward the maker — these diy christmas snow globes prove the same point.
Rope Sunburst Mirror
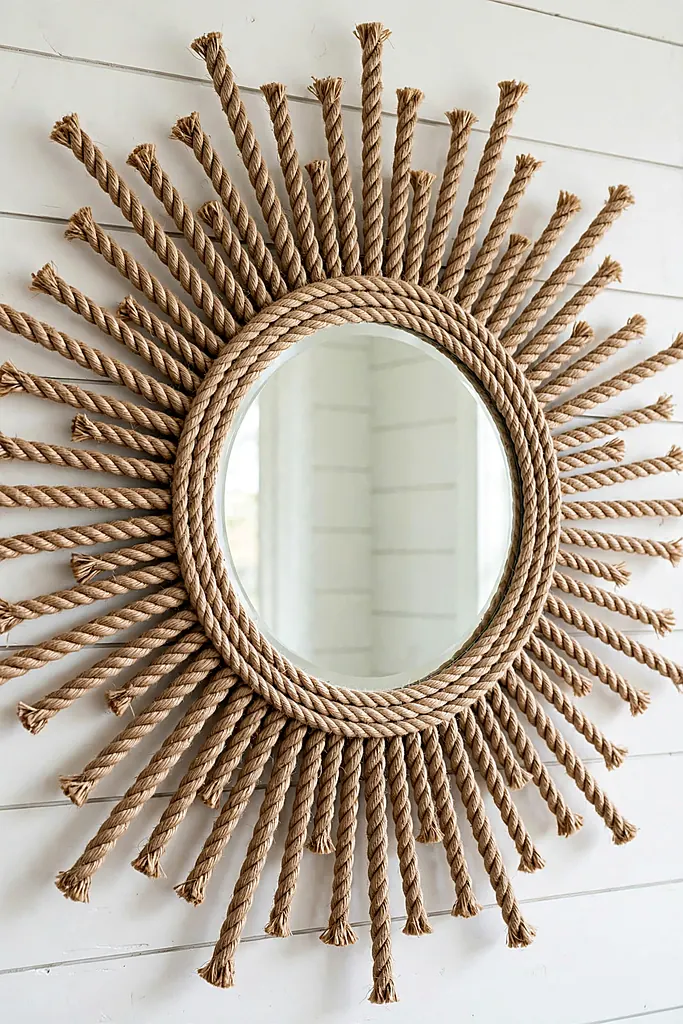
Rope rays give the sunburst a nautical, textural weight: thick cotton or manila rope, cut and neatly capped, around a rope-wrapped mirror edge. It suits bathrooms, hallways and any room that leans coastal without wanting shells glued to absolutely everything.
Work with rope that has been uncoiled and rested overnight — rope fresh off the spool fights every curve you ask of it. A diy sunburst mirror in rope is heavier than it looks, so fit a proper hanger and find a stud or use a solid wall plug.
What You Need
- Round mirror, 25 cm
- Natural rope, 10 mm, about 8 meters
- Backing disc
- Hot glue gun
- Sharp knife
- Tape for wrapping cut ends
- Sturdy picture hanger
Cut the rope into equal rays and tape each end before cutting the next — taped ends do not unravel while you work. Glue the rays behind the backing, then wrap the mirror’s own edge with a coil of rope to hide every join.
Decide the ends’ finish: frayed reads beachy, whipped (wrapped in twine) reads tailored. Either way, a final slow pass of glue along the back ring locks the whole structure into one solid piece. No other diy sunburst mirror feels this good to hold.
Rope and calm textures soften bedrooms too, in these winter bedroom decor ideas.
Clothespin Sunburst Mirror
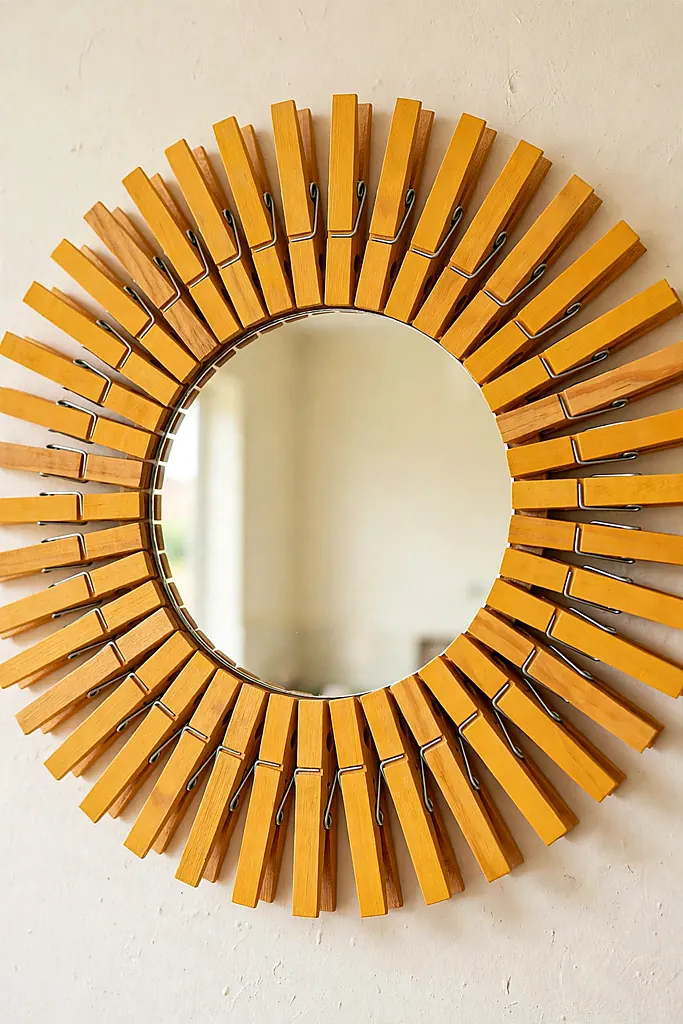
Clothespins are the sunburst hiding in your laundry room: wooden pins, used whole or split into halves, arranged in radiating rings with a rhythm no dowel can match. Painted honey, white or left raw, it is the friendliest first build here — cheap, light and nearly impossible to ruin. As a first diy sunburst mirror, it is practically un-failable.
What You Need
- Round mirror, 20 cm
- Wooden clothespins, about 48
- Backing disc
- Hot glue gun
- Paint or stain
- Picture hanger
How to Make It
- Decide on whole pins or halves — splitting the pins doubles your rays and gives a finer sun.
- Glue the mirror to the center of the backing disc.
- Glue the pins in rings around the backing, points outward, keeping the rhythm even.
- Paint or stain the finished piece, fit the hanger, and hang — a clothespin diy sunburst mirror in a sunny kitchen will make you smile daily.
At a Glance
If simple handcrafts please you, these crochet patterns for beginners are the natural next project.
Vintage Spoon Sunburst Mirror
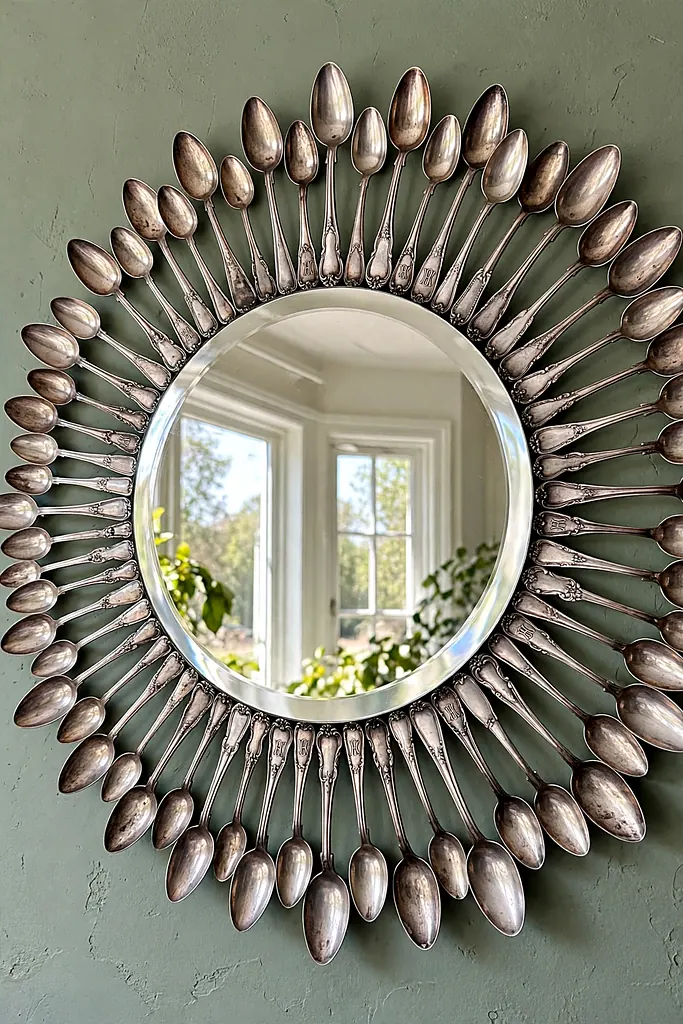
Silver spoons make the most talked-about sunburst of all: vintage spoon bowls catching light like petals around the mirror. Thrift stores sell odd silverware by the handful, and their mismatched patterns turn the mirror into a small family museum.
Flatten nothing — the spoons keep their curve, bowls facing out. This diy sunburst mirror is heavy in the hand and in presence, and it hangs best where people approach it slowly: a dining room, where it can be admired between courses.
What You Need
- Round mirror, 20 cm
- Vintage spoons, about 36–40
- Metal backing disc
- Strong metal glue (E6000)
- Wire cutters for handle trimming (optional)
- Heavy-duty picture hanger
How to Make It
- Wash and polish the spoons; silver that will catch light deserves a shine.
- Arrange a practice ring on the table, bowls out, handles in, until the spacing pleases you.
- Glue the handles to the disc in clock order, following your practice ring.
- Fill the ring completely, adjusting bowls to catch light from the room’s main window.
- Let the glue cure a full 24 hours before hanging — metal on metal needs its time.
Glue patience: Metal-to-metal glue needs a full day to cure before the mirror hangs. Rush it and the heaviest spoons slide first — usually at 2 a.m., loudly.
A mirror this personal makes a remarkable gift — more in these handmade christmas gift ideas.
Rustic Twig Sunburst Mirror
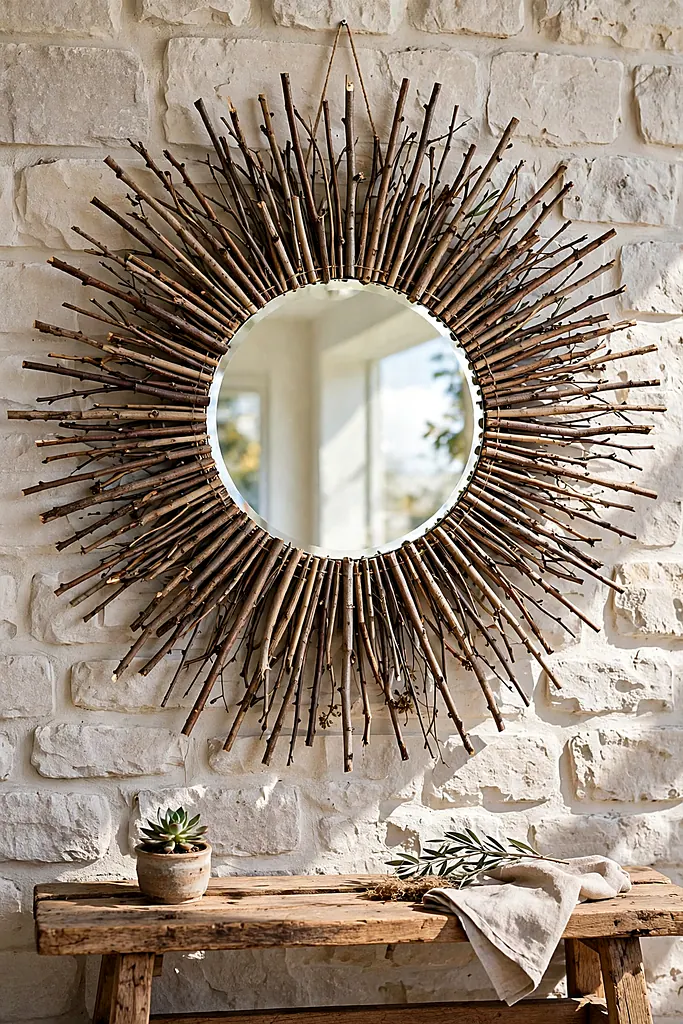
Twigs from the garden — straight, dry, roughly finger-thick — make the woodland sunburst: irregular, shadowy and completely free. It is the least polished mirror here and, in a rustic room, the most convincing one, because nothing about it pretends to be manufactured.
What You Need
- Round mirror, 20–25 cm
- Dry straight twigs, about 50
- Backing disc
- Hot glue gun
- Pruners
- Picture hanger
Cut the twigs to two lengths and strip any loose bark. Glue the long layer first at the clock points, then fill between them — twig rays look best when a few lean a degree or two off true, like a sun drawn by a child. A twig diy sunburst mirror costs nothing but an hour’s walk and an hour’s gluing.
Seal the back ring with a generous second pass of glue; twigs are light but brittle, and this diy sunburst mirror earns its keep in a busy rustic room only if its joins are overbuilt. Hang it where its shadows can fall across plaster or stone.
Twigs and firelight belong together — see these christmas living room decorations.
Beaded Glam Sunburst Mirror
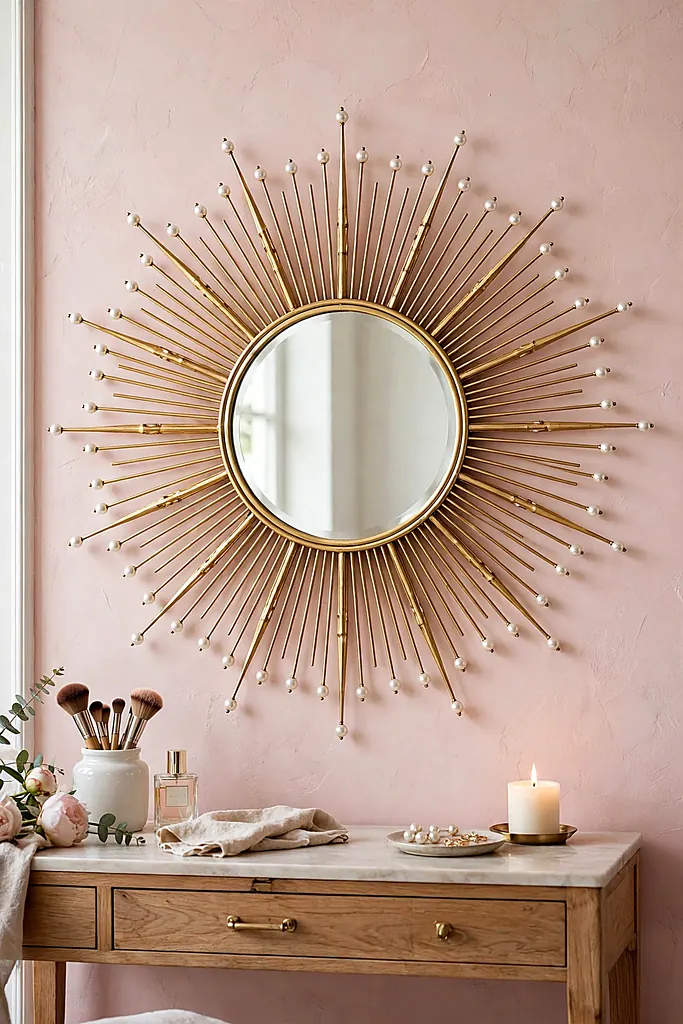
For the glamorous end of the craft: gold rays tipped with pearl beads, so the sun itself seems to be wearing jewelry. It is the vanity-table sunburst, catching morning light and doubling it — part mirror, part tiara, entirely unapologetic.
Thread or glue one bead to every ray’s end; the rhythm of identical tips is what makes it read expensive. This diy sunburst mirror takes the longest of the list and repays every minute in the room’s evening glow.
What You Need
- Round mirror, 20 cm
- Gold rods or painted skewers, about 40
- Pearl beads, 8 mm — one per ray
- Backing disc
- Hot glue gun
- Picture hanger
Glue the rays first and let the structure cure fully before beading — beads add leverage to every ray end, and a soft join will creep crooked under the weight.
Add the beads one at a time with a dot of glue inside each bead’s hole, turning the mirror as you go so gravity works for you. Check the ring from across the room before the last ten beads; spacing errors hide at arm’s length and shout from the doorway. Of all thirteen, this is the diy sunburst mirror most often mistaken for a boutique piece.
At a Glance
Glamour done properly is a whole style — browse these luxury christmas decor ideas.
Cardboard Sunburst Mirror
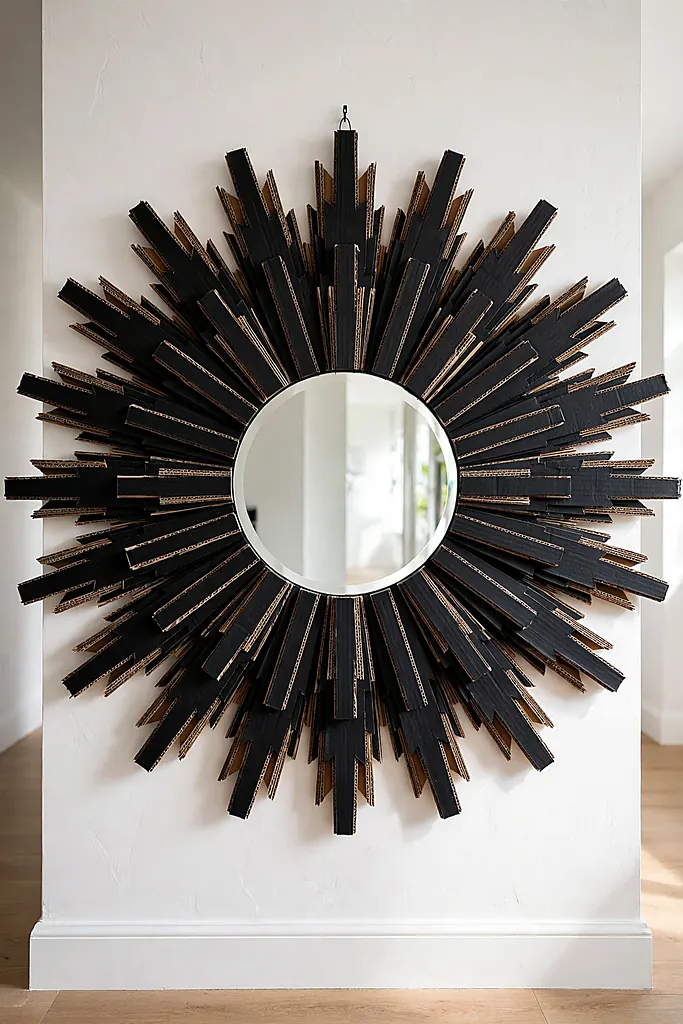
Cardboard is the zero-budget ray: layered strips of corrugated card, cut into long triangles and painted, become a crisp modern sunburst that weighs nothing and costs literally nothing beyond the mirror. Painted matte black, nobody guesses its past life as a delivery box. It is also the lightest diy sunburst mirror you will ever hang.
What You Need
- Small round mirror, 15–20 cm
- Corrugated cardboard — several boxes
- Craft knife and ruler
- Hot glue gun
- Matte paint
- Picture hanger or strong tape loop
How to Make It
- Cut long triangular rays in two sizes from the cardboard, cutting along the corrugation for strength.
- Score a light ridge down each ray’s center and fold it slightly — the ridge stops the rays drooping.
- Glue the mirror to a cardboard backing circle.
- Glue the long rays at the clock positions, then fill with the short layer.
- Paint the whole piece, edges included, in two coats of matte paint.
- Hang it on the lightest hook you own — it weighs almost nothing.
Cardboard is not the only kitchen-cupboard craft material — see how to make soap for another satisfying make.
Shell Sunburst Mirror
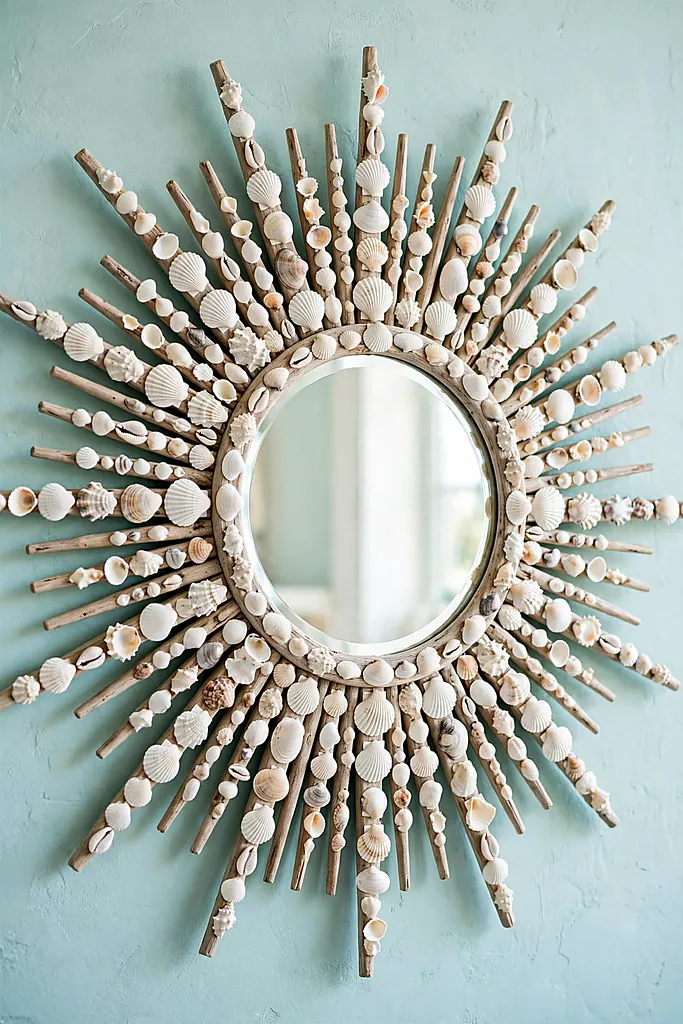
Shells along the rays turn the sunburst into a beach souvenir with posture: white and cream shells graduated along each ray, prettiest in bathrooms and sunrooms. Collected shells work; bought mixed bags work faster, and the sorting is honestly half the pleasure.
Glue the shells only after the rays are fixed and painted — shell weight tests every join. A diy sunburst mirror in shells belongs where daylight rakes across it; the shells’ ridges throw tiny shadows that change all day long.
What You Need
- Round mirror, 20 cm
- A finished ray base (dowel or skewer build)
- Mixed white and cream shells, about 60
- Hot glue gun
- White or aqua paint
- Picture hanger
How to Make It
- Build and paint the ray base first (idea 1 or idea 5 works perfectly) and let it cure.
- Sort the shells by size into three piles.
- Glue the largest shells at the rays’ bases, working around the clock positions.
- Continue with smaller shells toward the tips, then hang it where the light moves — a shell diy sunburst mirror changes with the light all day.
Shells and seaside tones run through these christmas decorations too, in winter dress.
Orb Starburst Mirror
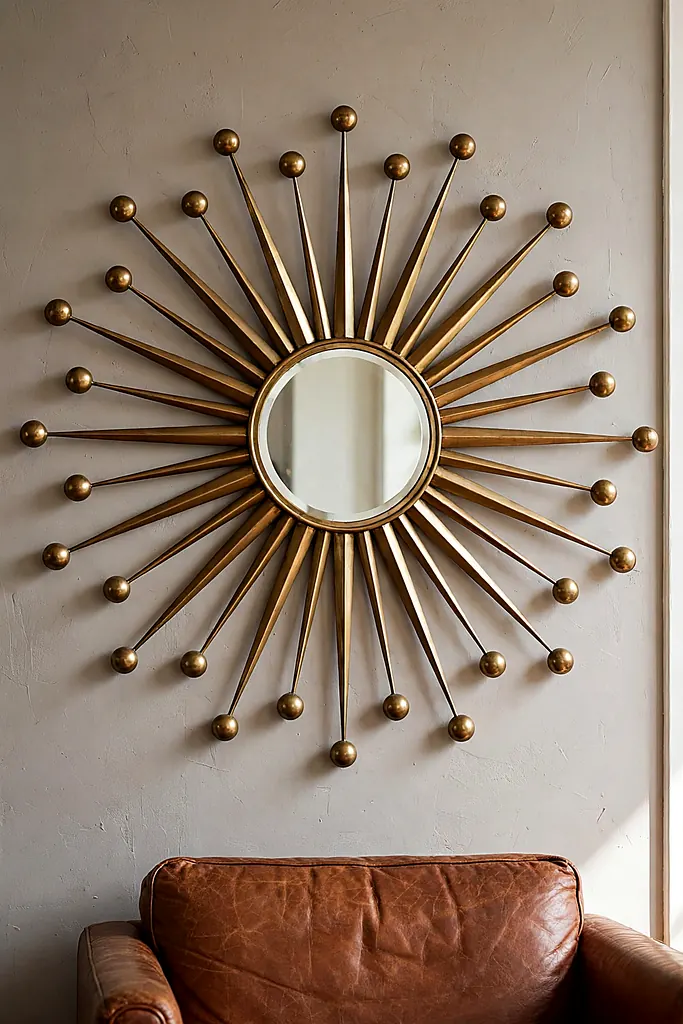
The orb starburst is the sunburst’s atomic-age cousin: brass rays ending in small balls, like a diagram of something splendid exploding politely. Wooden beads or clay balls on rod ends recreate it faithfully, and it is the most sculptural mirror on this list by a distance.
What You Need
- Round mirror, 20 cm
- Brass or gold rods, about 24
- Wooden beads or balls, 2 cm — one per ray
- Backing disc
- Gold paint
- Strong glue
- Picture hanger
This design uses fewer, longer rays than the others — spacing is the design. Mark every 15 degrees and keep to it strictly; the orb starburst forgives nothing, which is exactly why it looks like it cost a fortune when it is right.
Glue a ball to each rod before mounting the rods, and let each cure fully. Mounted last, the mirror itself almost disappears into the sculpture — visitors see the starburst first and their own reflection second, which for a diy sunburst mirror is the ultimate compliment.
Spacing trick: Cut a paper template of the full circle marked in 15-degree slices. Build the whole ray ring flat on the template, then transfer it to the backing in one piece.
A sculptural mirror anchors a decorated room — more anchors in these christmas decor ideas.
Frequently Asked Questions
How big should a diy sunburst mirror be?
Count the whole sunburst, not just the glass: 60–90 cm across suits most walls over furniture, with the mirror itself usually 20–30 cm. A diy sunburst mirror that is mostly rays reads as art; one that is mostly glass reads as a mirror with a frame.
What is the cheapest way to make one?
The cardboard and bamboo-skewer builds cost under ten dollars in total if you already own glue and paint. Dowels are the next step up in cost. Every build here costs a small fraction of its shop-bought twin, which is the entire appeal. Whichever route you choose, your first diy sunburst mirror will not be your last.
How do I hang it safely?
Fit the hanger to the backing disc, never to a ray, and use a wall plug rated well above the mirror’s weight. The spoon and rope versions are the heavy ones; skewer, clothespin and cardboard builds hang safely on a single small hook.
Can I make one without a backing disc?
You can glue rays directly to a mirror with a wide rim, but a backing disc makes every build stronger and far easier to hang. It is the one component worth buying properly — a diy sunburst mirror lives or dies by its center.
Which style suits a small room?
Fine-rayed versions — skewer, clothespin, thin gold — add sparkle without visual weight. Chunky driftwood and rope mirrors are wonderful but bossy; in a small room, one diy sunburst mirror should be the only loud thing on its wall.
How do I keep the rays even?
Mark the clock positions first — 12, 3, 6, 9 — glue those anchor rays, then fill each quarter in turn. Working quarter by quarter keeps the spacing honest, and it is the single habit that separates a tidy diy sunburst mirror from a wonky one.
Final Thoughts: Let It Catch the Light
Thirteen ways to make the sun stay indoors. Every one of them started as a plain round mirror and a handful of humble material — dowels, spoons, shells, string — and ended as the thing guests photograph. That transformation, more than the savings, is why people build these at all.
Start with the build that matches what your junk drawer already holds, hang it, and live with it for a week. You will either love it or know exactly which one to build next — and either way, your wall will never be blank again. That is the quiet promise of every diy sunburst mirror: a little daily sunshine, made by hand. Build one diy sunburst mirror this weekend, and the room will feel finished by Monday.
More from The Glossy Guide
 DIY & Craft
22 Stunning DIY Shadow Box Ideas That Turn Keepsakes Into Beautiful Wall Art
Every home has a drawer of things too precious to throw away and too awkward to display: the baby shoes,…
 DIY & Craft
16 DIY Christmas Wreath Ideas to Make Your Front Door the Best on the Street
A wreath is the handshake of a house in December — the first thing guests see and the thing the…
 DIY & Craft
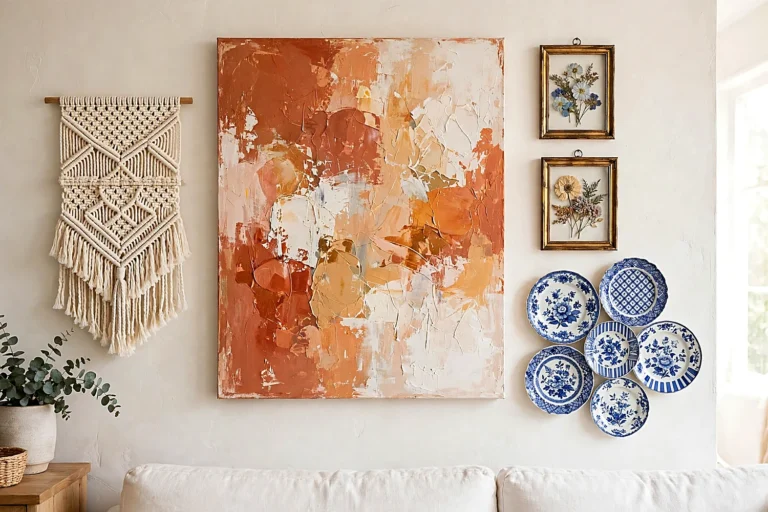
14 DIY Wall Art Projects That Turn Blank Walls Into the Best Part of the Room
Blank walls make even a furnished room feel unfinished, and the fix does not need a gallery budget. These diy…