Shake Up Christmas: 15 DIY Christmas Snow Globes to Craft, Gift, and Display
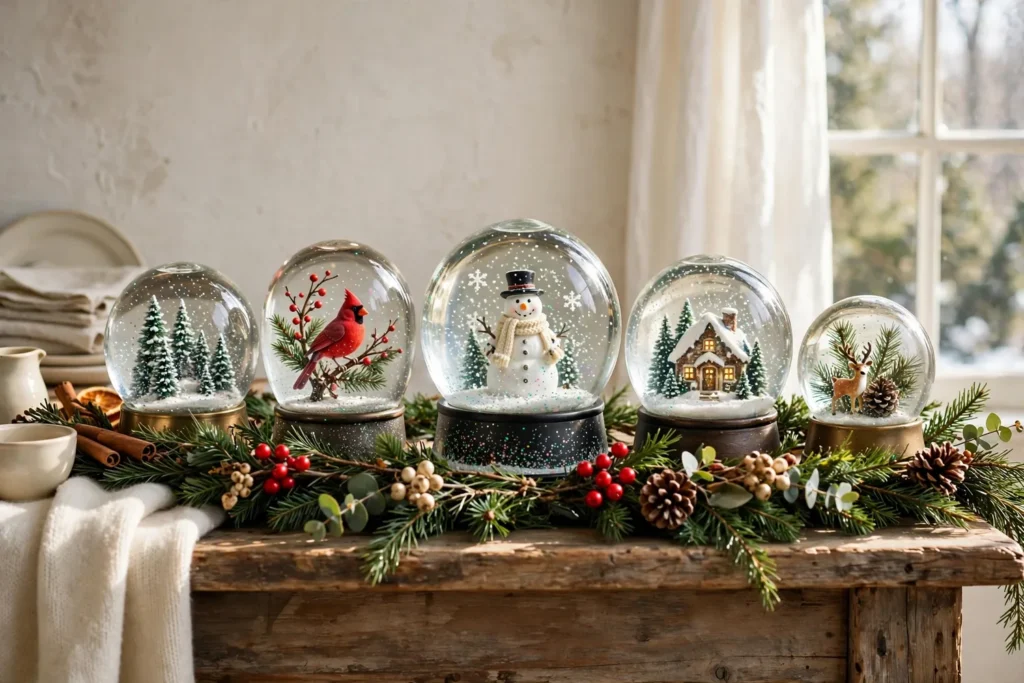
There is a particular kind of quiet magic in a snow globe. Give it a shake, and for a few seconds an entire winter scene comes alive behind glass — trees dusted white, tiny windows glowing, glitter drifting down like real snowfall. It is no wonder they have sat on mantels and bookshelves for generations.
The best part is that you do not need special equipment or a big budget to make one yourself. With a clean jar, a waterproof figure or two, a little glitter, and a careful seal, you can build a globe that looks shop-bought and lasts for years. This guide walks you through fifteen different scenes, each with a full materials list and step-by-step instructions, so you can pick the one that suits your home — or make a whole shelf of them as gifts.
A few ground rules run through every project below: use distilled water so the liquid stays clear, choose glue that is genuinely waterproof for anything that sits underwater, and always let glued figures cure fully before you add water. Get those three things right, and the rest is pure fun.
Table of Contents
- 1. Winter Village in a Mason Jar
- 2. A Nativity Scene Under Glass
- 3. Woodland Deer in a Pine Forest
- 4. Ice Skating Rink in a Jar
- 5. Santa’s Workshop in Miniature
- 6. A Snowy Chapel on a Winter Night
- 7. Penguin Colony on Ice
- 8. Polar Bear and Igloo Arctic Scene
- 9. Gingerbread House in a Snowstorm
- 10. Nutcracker Ballet on Stage
- 11. Cozy Cabin Deep in the Woods
- 12. Christmas Train Around the Tree
- 13. Angel Choir in the Clouds
- 14. Snowman Family in the Front Yard
- 15. New Year’s Eve Countdown Globe
- Frequently Asked Questions
1. Winter Village in a Mason Jar
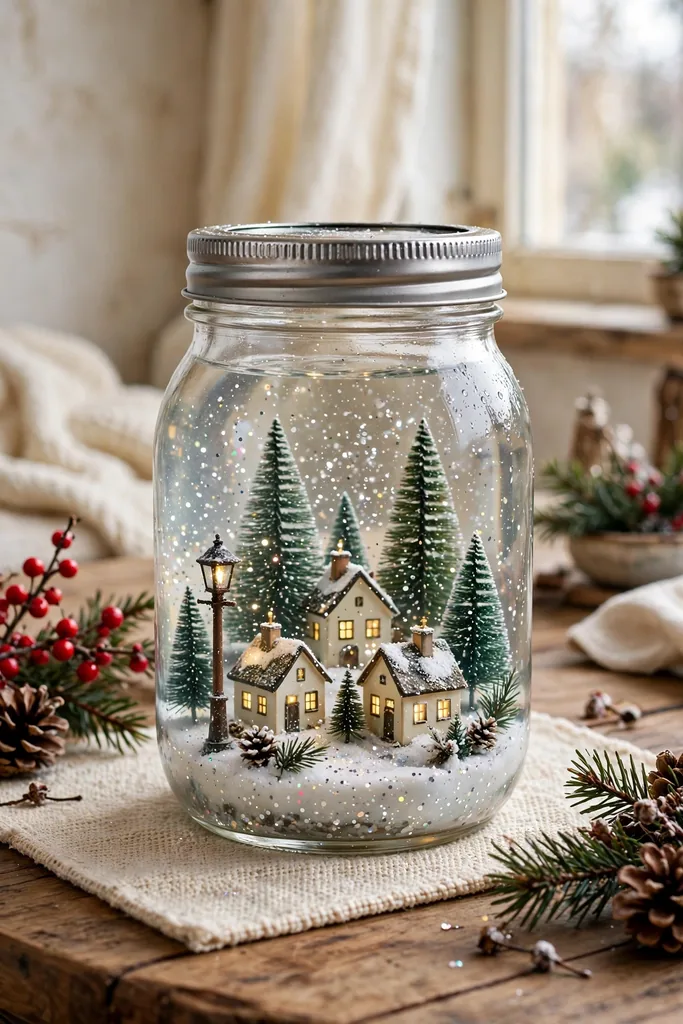
A tiny winter village tucked inside a mason jar feels like a whole December evening captured in glass. Little houses with lit windows, a dusting of snow on the rooftops, and a few bottle-brush trees turn an ordinary jar into the first thing guests notice on a mantel or windowsill.
This is a wonderful first globe project because the scene is forgiving. If a house leans a fraction, it still looks charming, and you can build the whole village from a handful of small pieces rather than one fussy centerpiece. Once it is sealed, it becomes one of those vintage home decor touches that makes a handmade display feel collected over years rather than made in an afternoon.
What you need:
- 1 wide-mouth mason jar, 16 oz / 500 ml, with a two-piece lid
- 3 to 4 miniature ceramic or resin houses, 2 to 3 inches tall
- 4 small bottle-brush trees, 2 to 4 inches tall
- 1 tube waterproof epoxy adhesive
- 1 cup distilled water
- 1 to 2 teaspoons glycerin
- 2 tablespoons fine white glitter
- 1 small bag of fake snow or white sand for the base
- Clear silicone sealant for the lid rim
How to make it:
- Arrange the houses and trees on the inside of the lid first, without glue, until the layout looks balanced from every side.
- Glue each piece to the lid with waterproof epoxy, then let it cure for a full 24 hours. Do not use hot glue here, as it softens underwater over time.
- Fill the jar with 1 cup of distilled water, stir in 1 to 2 teaspoons of glycerin, and add 2 tablespoons of fine glitter.
- Lower the lid scene into the jar slowly so air escapes, then screw the lid on tightly.
- Run a thin bead of clear silicone sealant around the outside of the lid rim and let it dry for 12 hours before turning the jar upright.
Display Tip: Light It From Below
Set the finished jar on a small battery candle or a puck light. The glow through the glass makes the windows look lit and the glitter sparkle far more than overhead room light ever will.
2. A Nativity Scene Under Glass
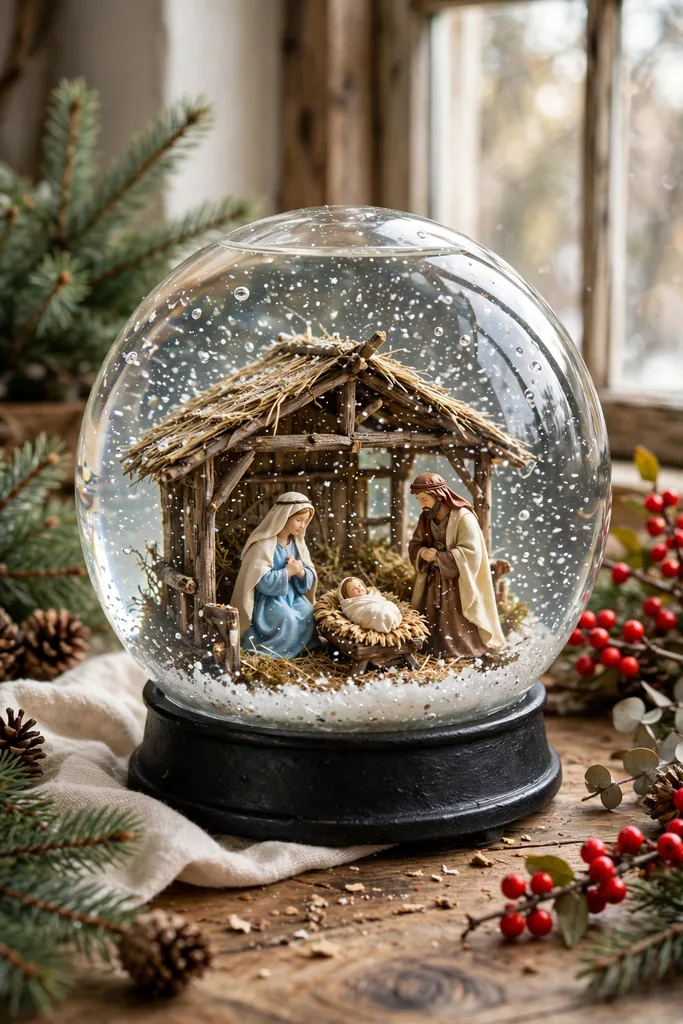
A nativity scene inside a globe turns a familiar Christmas story into something quiet and reverent. Small figures gathered around a simple stable, with a star above, carry a stillness that suits a bedside table or a reading corner better than a busy mantel.
Keep the figures small and the palette calm. Gold glitter can look festive, but a mix of white and pale gold keeps the focus on the figures rather than the sparkle. A plain wooden base, rather than a painted one, suits the humble feel of the scene.
What you need:
- 1 large glass jar or globe jar, 24 oz / 700 ml
- 1 miniature nativity set, figures 1 to 2 inches tall
- 1 small wooden stable or arch piece
- 1 tube waterproof epoxy adhesive
- 1 and 1/2 cups distilled water
- 2 teaspoons glycerin
- 1 tablespoon fine white glitter and 1 teaspoon pale gold glitter
- 1 star pick or small gold star for the top of the stable
- Clear silicone sealant
How to make it:
- Glue the stable to the lid first with waterproof epoxy, then position the figures around it, leaving a little breathing room between each one.
- Glue each figure in place and allow the epoxy to cure for 24 hours before the jar is filled.
- Mix 1 and 1/2 cups of distilled water with 2 teaspoons of glycerin and both glitters.
- Insert the scene, screw the lid on firmly, and wipe away any water that escapes.
- Seal the rim with silicone sealant and leave it undisturbed for 12 hours.
Watch Out: Crowded Scenes Cloud the View
It is tempting to add shepherds, animals, and angels all at once, but too many figures block one another through curved glass. Choose five or six pieces at most, and check the arrangement by looking through the side of the jar before anything is glued.
3. Woodland Deer in a Pine Forest
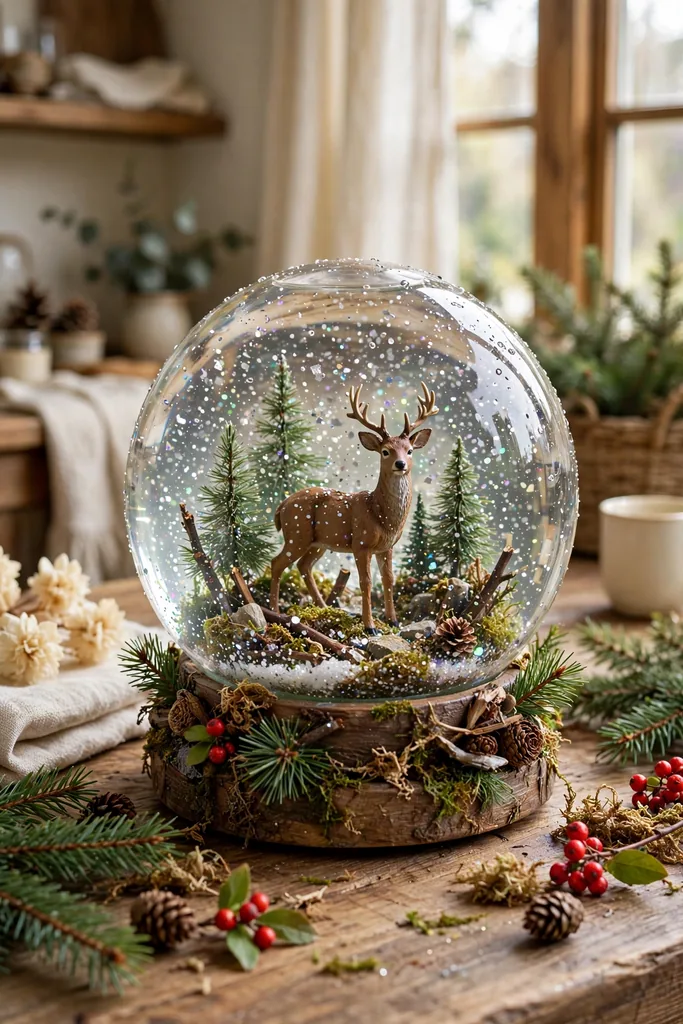
A deer standing among tiny pines feels like a walk through a snowy woodland, frozen at its quietest moment. The deep green of the trees against white glitter gives this globe a natural, almost forest-floor calm that works beautifully in a living room all winter long.
Scale matters more here than in a village scene. One deer slightly larger than the trees reads as the star of the piece, while two tiny deer tucked behind a tree can add depth. Keep the ground layer thin so the deer’s legs stay visible above the snow line.
What you need:
- 1 wide-mouth jar, 16 oz / 500 ml
- 1 deer figurine, about 3 inches tall, plus 1 smaller deer if desired
- 5 to 7 miniature pine trees, 2 to 4 inches tall
- 1 tube waterproof epoxy adhesive
- 1 cup distilled water
- 1 teaspoon glycerin
- 2 tablespoons fine white glitter and 1 teaspoon iridescent glitter
- 1 tablespoon fake snow for the ground
- Clear silicone sealant
How to make it:
- Glue the tallest trees at the back of the lid and shorter ones toward the front to create depth.
- Add the deer in the center, slightly forward, and glue it down with waterproof epoxy.
- Let the whole scene cure for 24 hours, then sprinkle a thin layer of fake snow around the bases.
- Fill the jar with 1 cup of distilled water mixed with 1 teaspoon of glycerin and the glitter.
- Seal the lid, apply silicone sealant around the rim, and rest the jar for 12 hours before display.
Variation: Add a Frozen Pond
Place a small circle of pale blue craft foam or a flat glass pebble in front of the deer before gluing. Under water it reads as a frozen pond and gives the scene a focal point beyond the trees.
4. Ice Skating Rink in a Jar
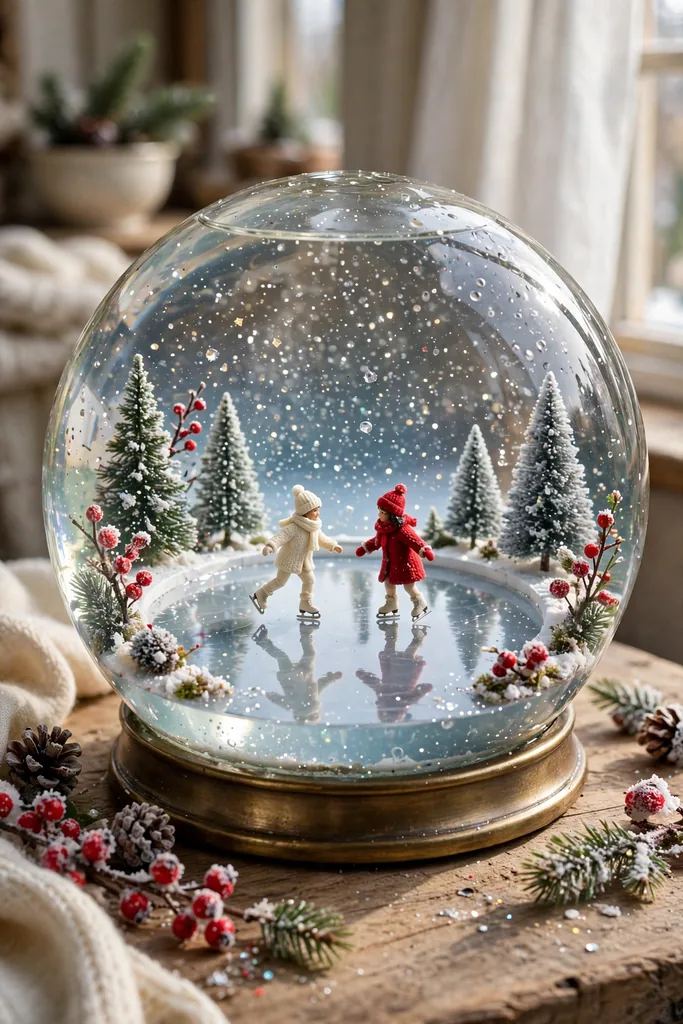
An ice rink globe is pure motion in miniature. Two skaters mid-glide, a ring of tiny trees, and a scatter of snowflakes make it feel joyful even when it sits still on a shelf. It is a lovely choice for a child’s room or a kitchen windowsill where it gets shaken often.
The trick is the rink surface itself. A smooth, pale disc gives the skaters a believable stage, and keeping their bases small prevents the classic beginner mistake of figures that look glued to a lump. A little less glitter than usual also helps, since a rink should look crisp rather than blizzardy.
What you need:
- 1 wide-mouth jar, 20 oz / 600 ml
- 2 miniature skater figurines, about 2 inches tall
- 1 round white or pale blue disc, 3 inches across, for the rink
- 6 tiny bottle-brush trees for the rink edge
- 1 tube waterproof epoxy adhesive
- 1 and 1/4 cups distilled water
- 1 teaspoon glycerin
- 1 tablespoon fine white glitter
- Clear silicone sealant
How to make it:
- Glue the rink disc to the center of the lid with waterproof epoxy and let it set for 6 hours.
- Glue the skaters onto the disc, angled as if mid-turn, and the trees around the rim.
- Allow the full assembly to cure for 24 hours.
- Fill the jar with 1 and 1/4 cups of distilled water, 1 teaspoon of glycerin, and 1 tablespoon of glitter.
- Seal the lid, add silicone sealant around the rim, and wait 12 hours before the first shake.
Make It With Kids: Let Them Place the Trees
Children love arranging the rink edge, and trees are forgiving pieces to place. Let kids set the trees while an adult handles the epoxy and sealing. Safety note: keep hot glue guns and epoxy out of children’s reach, and let an adult do all gluing and sealing.
5. Santa’s Workshop in Miniature
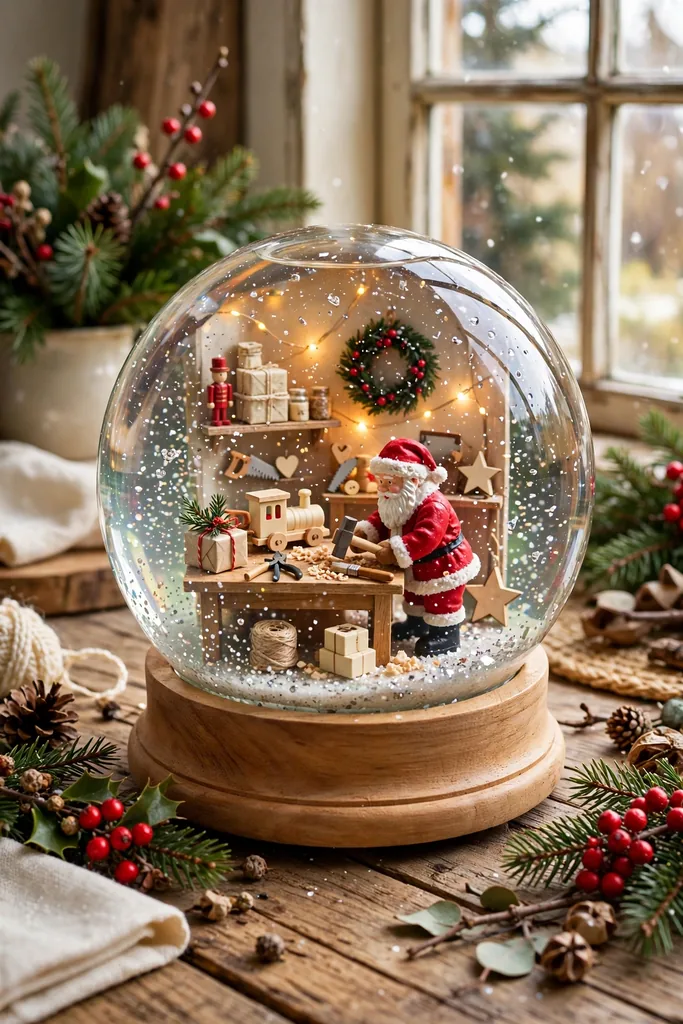
Santa’s workshop is the busiest little globe on this list, and that is exactly its charm. Tiny workbenches, wrapped gifts, a toy train, and a jolly figure in red turn the jar into a storybook scene that children will study for ages, hunting for each new detail.
Because this scene has so many small pieces, glue choice matters more than anywhere else. A figure glued with the wrong adhesive can drift off during the first enthusiastic shake, so take the time to match each joint to the right glue before the jar is ever filled.
What you need:
- 1 large jar, 32 oz / 950 ml
- 1 Santa figurine, about 3 inches tall
- 3 to 5 tiny gift boxes, workbench pieces, or toy props
- 1 tube waterproof epoxy adhesive and 1 hot glue gun for non-submerged parts only
- 1 and 3/4 cups distilled water
- 2 teaspoons glycerin
- 2 tablespoons fine white glitter
- Clear silicone sealant
How to make it:
- Build the workshop on the lid from back to front, tallest pieces first, and test the layout through the jar wall before gluing.
- Glue every submerged piece with waterproof epoxy and cure for 24 hours. Use hot glue only for decorations on the outside of the lid or base, never underwater. Safety note: hot glue guns cause burns, so keep the nozzle away from skin and let glued pieces cool fully before handling.
- Fill the jar with 1 and 3/4 cups of distilled water mixed with 2 teaspoons of glycerin and the glitter.
- Lower the scene in slowly, screw the lid on, and seal the rim with silicone sealant for 12 hours.
| Glue type | Set time | Fully waterproof? |
|---|---|---|
| Waterproof epoxy | 24 hours to full cure | Yes, best for submerged figures |
| Silicone sealant | 12 to 24 hours | Yes, best for lid rims |
| Hot glue | Minutes | No, outside decorations only |
| Craft glue | 1 to 2 hours | No, dissolves underwater |
6. A Snowy Chapel on a Winter Night
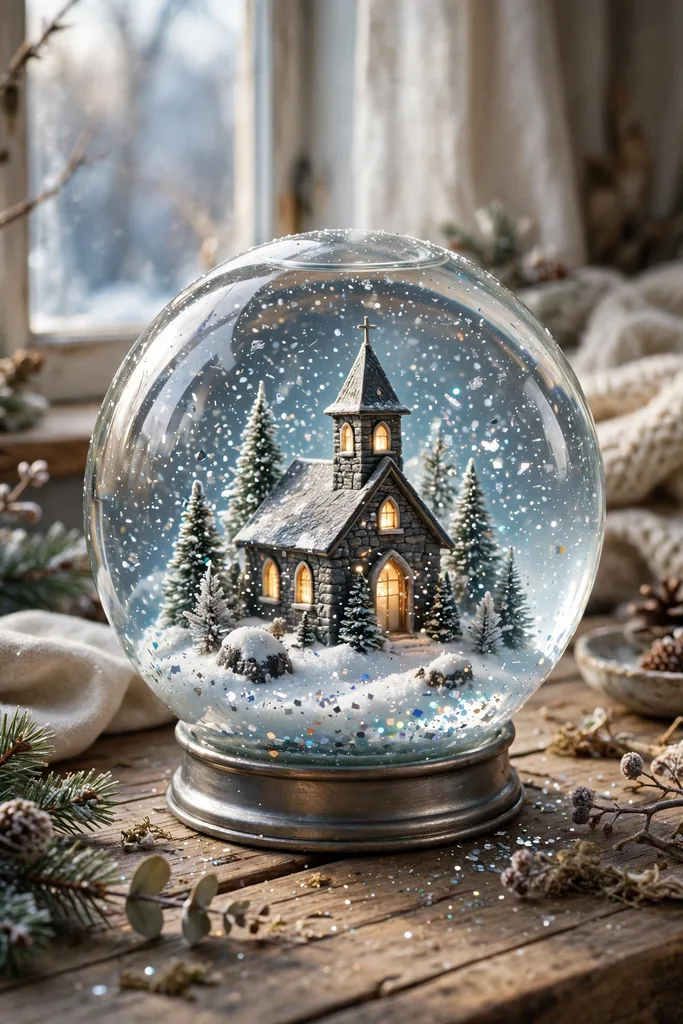
A little chapel with a steeple, snow piled on its roof, and a warm glow in its windows is the most peaceful globe you can make. It suits a quiet corner, a hallway console, or a gift for someone who loves simple, classic Christmas decor.
The night-sky effect comes from restraint. Deep blue or charcoal paint on the base, a dark backdrop, and just a touch of gold glitter among the white will make the chapel look lit from within. Avoid bright multi-colored glitter here, which would break the evening mood.
What you need:
- 1 jar, 20 oz / 600 ml
- 1 miniature chapel or church figurine, about 4 inches tall
- 3 small pine trees
- 1 tube waterproof epoxy adhesive
- 1 and 1/4 cups distilled water
- 1 teaspoon glycerin
- 1 tablespoon white glitter and 1 teaspoon gold glitter
- 1 small battery tea light for display beneath the jar
- Clear silicone sealant
How to make it:
- Glue the chapel to the center of the lid and the trees on either side with waterproof epoxy.
- Cure for 24 hours, then check that the steeple clears the jar opening before filling.
- Mix 1 and 1/4 cups of distilled water with 1 teaspoon of glycerin and the glitter.
- Seal the lid and add silicone sealant around the rim, drying for 12 hours.
- Display the globe over a battery tea light in the evening for a glowing-window effect.
Gifting Note: Pair It With a Handwritten Card
A chapel globe feels personal already, and a short handwritten note about a shared Christmas memory makes it a keepsake rather than just a decoration. Wrap it in tissue, nest it in a small box with padding, and mark the box this side up.
7. Penguin Colony on Ice
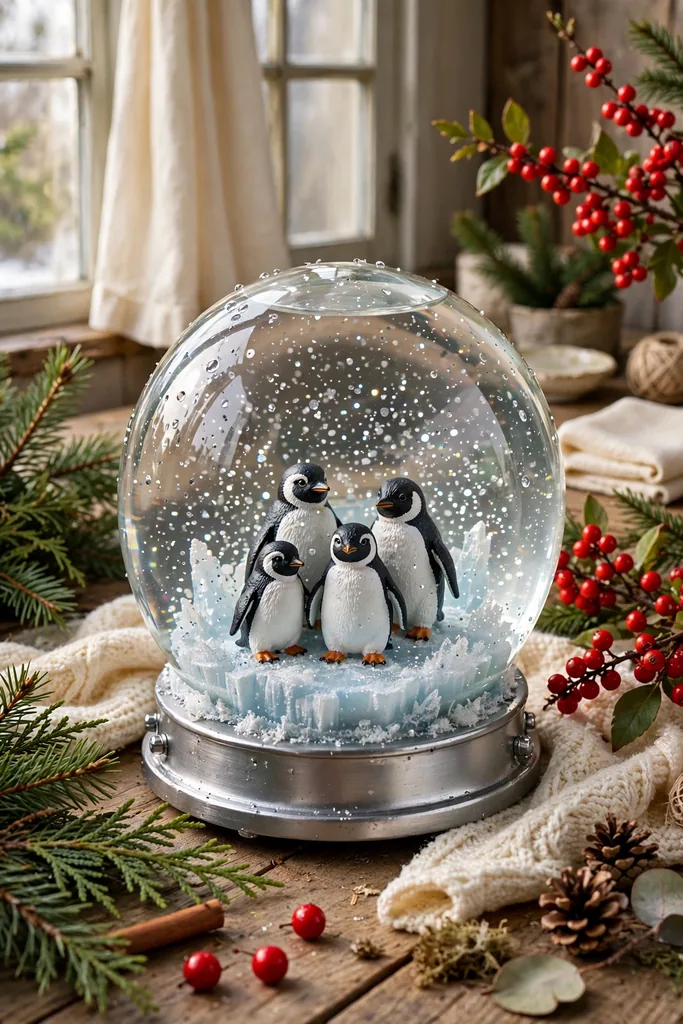
Penguins bring instant delight to a snow globe. A little colony waddling across an icy base, with a few ice chunks and a sprinkle of snow, is playful without being childish, and it looks wonderful grouped with other winter animals on a shelf.
Odd numbers work best here. Three or five penguins, varied in height, look like a real colony, while an even pair can look staged. Angle them slightly differently so no two face exactly the same direction.
What you need:
- 1 wide-mouth jar, 16 oz / 500 ml
- 3 to 5 penguin figurines, 1 to 2 inches tall
- 3 clear or white decorative stones for ice chunks
- 1 tube waterproof epoxy adhesive
- 1 cup distilled water
- 1 teaspoon glycerin
- 2 tablespoons fine white glitter
- Clear silicone sealant
How to make it:
- Glue the ice stones to the lid first to form an uneven icy base.
- Add the penguins one at a time with waterproof epoxy, varying their angles, and cure for 24 hours.
- Mix 1 cup of distilled water with 1 teaspoon of glycerin and 2 tablespoons of glitter.
- Insert the scene, seal the lid, and run silicone sealant around the rim for 12 hours of drying.
Troubleshooting: Penguins That Lean
If a penguin leans after curing, the base was probably too small for its weight. Remove it gently, glue a tiny flat disc under its feet to widen the footprint, re-glue with epoxy, and cure another 24 hours before refilling.
8. Polar Bear and Igloo Arctic Scene
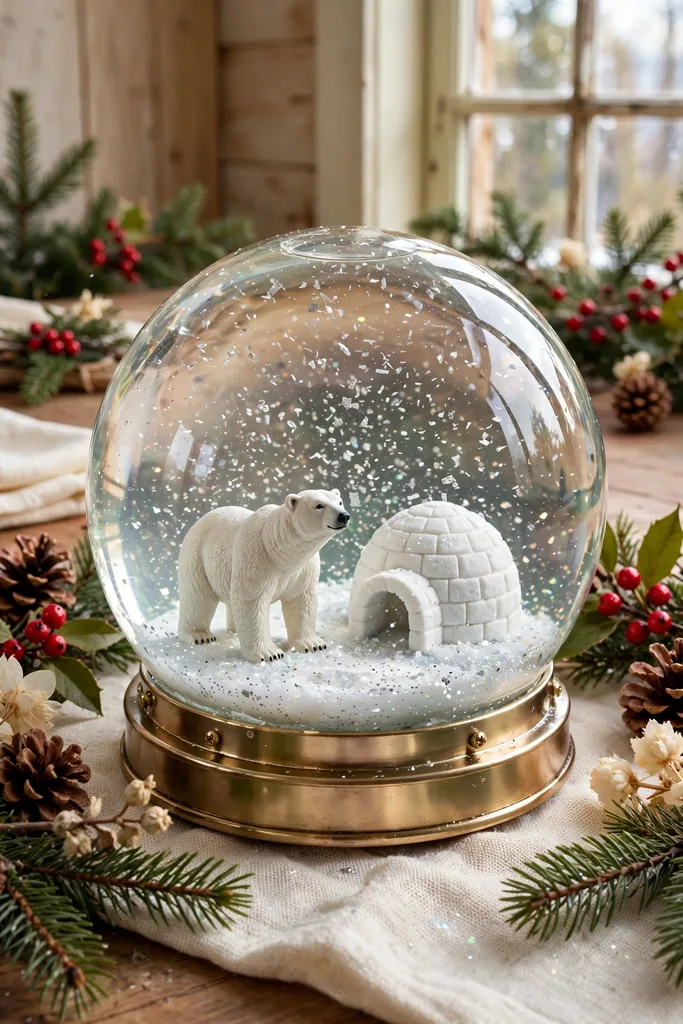
A polar bear beside a small igloo turns a globe into a miniature Arctic expedition. The white-on-white palette sounds plain, but with pale blue glitter and a few ice-blue accents, it becomes one of the most elegant globes in this collection.
Contrast is the secret. A pure white bear on a pure white base disappears, so give the ground a hint of blue or a dusting of iridescent glitter, and choose an igloo with a visible doorway arch. The bear then stands out crisply against its icy home.
What you need:
- 1 jar, 24 oz / 700 ml
- 1 polar bear figurine, about 3 inches tall
- 1 miniature igloo, about 3 inches wide
- 1 tube waterproof epoxy adhesive
- 1 and 1/2 cups distilled water
- 1 to 2 teaspoons glycerin
- 1 tablespoon white glitter and 1 tablespoon pale blue glitter
- Clear silicone sealant
How to make it:
- Glue the igloo to one side of the lid and the bear facing it, slightly forward, with waterproof epoxy.
- Cure for 24 hours, then check the scene fits through the jar neck before filling.
- Mix 1 and 1/2 cups of distilled water with 1 to 2 teaspoons of glycerin and both glitters.
- Seal the lid, apply silicone sealant, and dry for 12 hours.
9. Gingerbread House in a Snowstorm
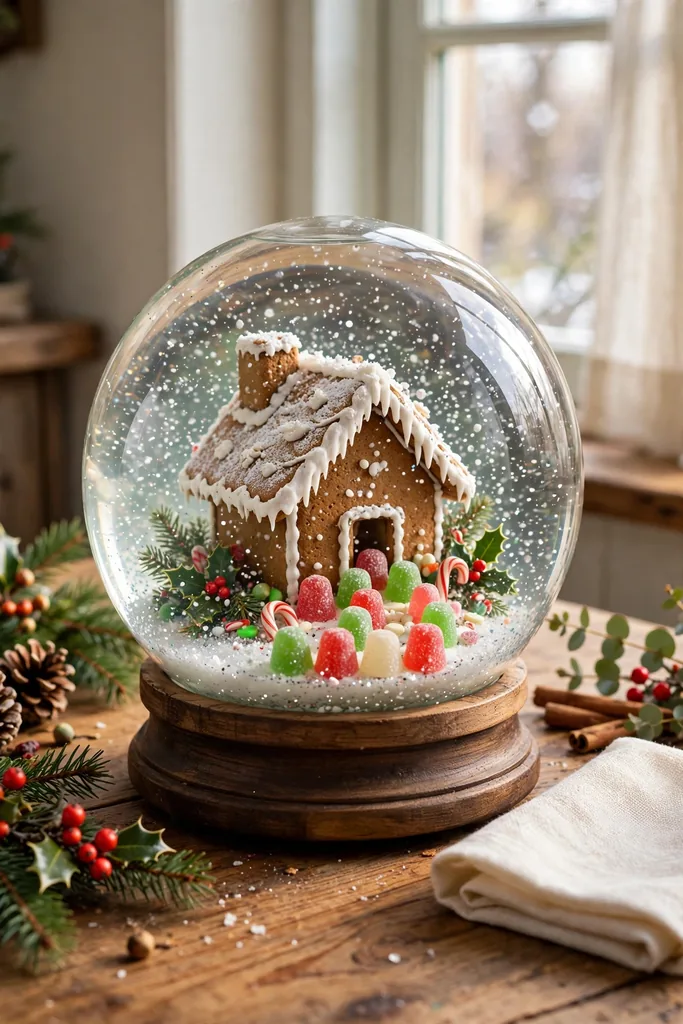
A gingerbread house in a snowstorm is the coziest globe imaginable. Candy-cane pillars, a frosted roof, and a flurry of glitter falling around it smell, in the imagination at least, of cinnamon and sugar. It belongs on a kitchen shelf or beside a cookie jar.
This is the globe where glitter choice changes everything. Fine glitter drifts gently, chunky glitter falls like a blizzard, and mixing the two gives a storm that looks lively without turning the water murky. The table below helps you pick the fall speed you actually want.
What you need:
- 1 wide-mouth jar, 20 oz / 600 ml
- 1 miniature gingerbread house, about 3 inches tall
- 2 miniature candy canes or peppermint sticks
- 1 tube waterproof epoxy adhesive
- 1 and 1/4 cups distilled water
- 1 teaspoon glycerin
- 1 tablespoon fine white glitter and 1 tablespoon chunky snowflake glitter
- Clear silicone sealant
How to make it:
- Glue the gingerbread house to the lid center and a candy cane on each side with waterproof epoxy.
- Cure for 24 hours, then gently test that nothing wobbles when the lid is tapped.
- Mix 1 and 1/4 cups of distilled water with 1 teaspoon of glycerin and both glitters.
- Seal the lid, add silicone sealant around the rim, and dry for 12 hours before shaking hard.
| Glitter type | How fast it falls | Best for |
|---|---|---|
| Extra-fine glitter | Slow, drifting, 30 to 60 seconds | Gentle snowfall scenes |
| Fine glitter | Medium, 15 to 30 seconds | Everyday snow globes |
| Chunky glitter | Fast, under 10 seconds | Blizzard or snowstorm effects |
| Snowflake confetti | Fast, with fluttering | Dramatic storm moments |
10. Nutcracker Ballet on Stage
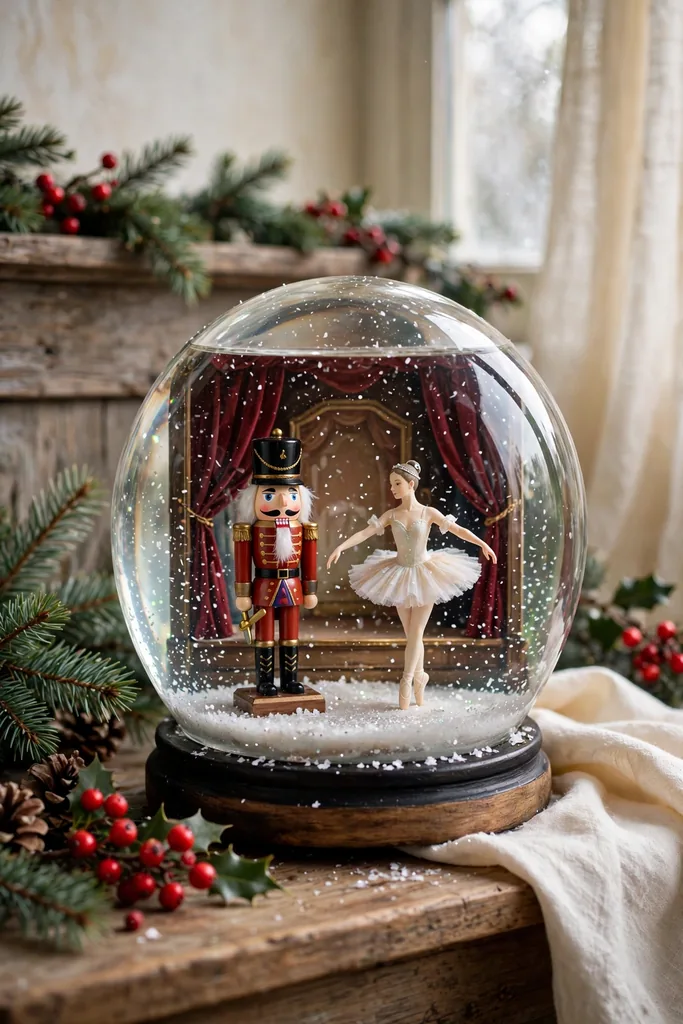
A nutcracker ballet globe brings theatre into miniature. A dancer poised mid-spin, a nutcracker soldier standing guard, and a tiny stage curtain or backdrop turn a jar into a performance that feels festive and a little bit grand.
Keep the stage simple so the figures read clearly. A flat red or deep green base disc, a small backdrop card behind the dancer, and gold glitter rather than white will give the scene its theatrical warmth without cluttering it.
What you need:
- 1 jar, 20 oz / 600 ml
- 1 ballerina figurine, about 3 inches tall, and 1 nutcracker figurine, about 3 inches tall
- 1 round stage disc, 3 inches across, in red or deep green
- 1 tube waterproof epoxy adhesive
- 1 and 1/4 cups distilled water
- 1 teaspoon glycerin
- 1 tablespoon gold glitter and 1 teaspoon white glitter
- Clear silicone sealant
How to make it:
- Glue the stage disc to the lid with waterproof epoxy and let it set for 6 hours.
- Glue the ballerina center stage and the nutcracker slightly to one side, then cure for 24 hours.
- Mix 1 and 1/4 cups of distilled water with 1 teaspoon of glycerin and both glitters.
- Seal the lid, apply silicone sealant, and dry for 12 hours.
Storage Tip: Keep the Stage Upright
After the holidays, store this globe upright in its original box with tissue around the jar, never on its side. A sideways globe can shift glitter into clumps and, over months, stress the lid seal.
11. Cozy Cabin Deep in the Woods
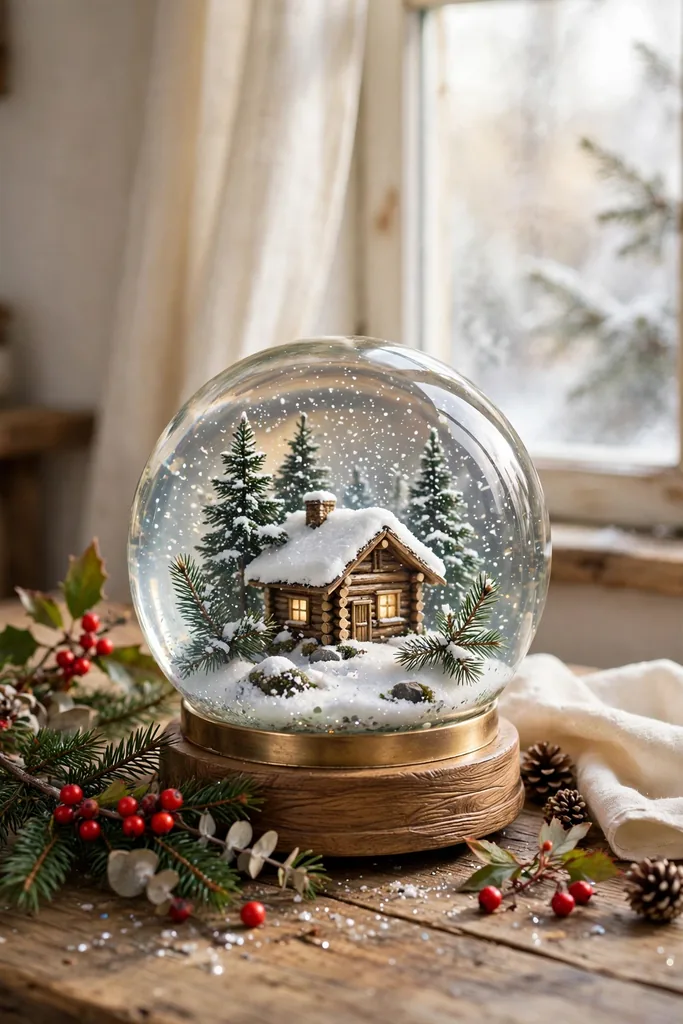
A cabin deep in the woods, smoke curling from its chimney and pines crowding close, is the globe for anyone who dreams of a quiet Christmas away from it all. It feels warm even in glass, and it pairs beautifully with plaid throws and wooden decor.
The cabin should look nestled, not stranded. Surround it with trees on three sides, leave a small clearing at the front for a path, and keep the snow layer light so the cabin’s wooden texture stays visible through the water.
What you need:
- 1 wide-mouth jar, 24 oz / 700 ml
- 1 miniature log cabin, about 3 to 4 inches wide
- 6 to 8 miniature pine trees, 2 to 4 inches tall
- 1 tube waterproof epoxy adhesive
- 1 and 1/2 cups distilled water
- 2 teaspoons glycerin
- 2 tablespoons fine white glitter
- Clear silicone sealant
How to make it:
- Glue the cabin slightly off-center on the lid with waterproof epoxy.
- Cluster the trees around the back and sides, tallest at the rear, and cure for 24 hours.
- Mix 1 and 1/2 cups of distilled water with 2 teaspoons of glycerin and the glitter.
- Seal the lid, add silicone sealant around the rim, and dry for 12 hours.
Budget Box: Use What You Already Have
This cabin scene comes together from simple, low-cost pieces. A clean pasta-sauce jar, trees saved from old decor, and a cabin figurine from a craft-store clearance bin can bring the whole project under the cost of one store-bought globe, with a far more personal result.
12. Christmas Train Around the Tree
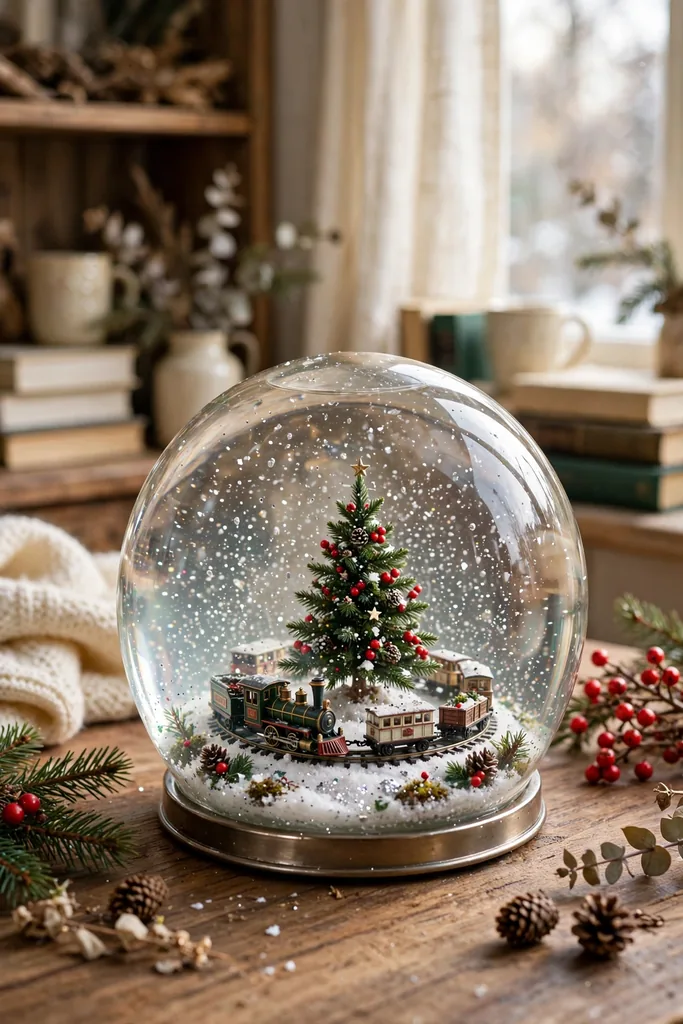
A Christmas train circling a tree inside a globe captures the magic of the living-room floor on Christmas morning. A tiny tree in the center, a little engine and two or three cars curving around it, and a dusting of snow make this a favorite with children and nostalgic adults alike.
Jar size decides whether this project works at all. A train scene needs width for the track curve, so choose a wide jar rather than a tall narrow one, and measure the assembled train against the jar opening before any glue touches a lid.
What you need:
- 1 extra-wide jar, 32 oz / 950 ml
- 1 miniature Christmas tree, about 4 inches tall
- 1 miniature train set, engine plus 2 to 3 cars, fitting a 4-inch curve
- 1 tube waterproof epoxy adhesive
- 1 and 3/4 cups distilled water
- 2 teaspoons glycerin
- 2 tablespoons fine white glitter
- Clear silicone sealant
How to make it:
- Glue the tree to the center of the lid with waterproof epoxy and let it set for 6 hours.
- Arrange the train cars in a curve around the tree, glue each one down, and cure for 24 hours.
- Mix 1 and 3/4 cups of distilled water with 2 teaspoons of glycerin and the glitter.
- Seal the lid, apply silicone sealant, and dry for 12 hours.
| Jar size | What scene fits | Water volume |
|---|---|---|
| 8 oz / 250 ml | Single small figure or one tree | About 1/2 cup |
| 16 oz / 500 ml | Village, deer, or penguin scene | About 1 cup |
| 24 oz / 700 ml | Chapel, cabin, or nativity scene | About 1 and 1/2 cups |
| 32 oz / 950 ml | Train, workshop, or wide village | About 1 and 3/4 cups |
13. Angel Choir in the Clouds

An angel choir floating among clouds is the most heavenly globe on this list. White-robed figures, soft gold accents, and gentle glitter drifting like falling light make it a beautiful gift for a christening, a church friend, or a quiet Christmas mantel.
Clouds are the secret ingredient. Small puffs of white craft foam or cotton sealed with clear sealant, placed at different heights, give the angels something to float among. Without them, the figures can look like they are standing on nothing.
What you need:
- 1 jar, 24 oz / 700 ml
- 3 to 5 small angel figurines, 1 to 2 inches tall
- 4 to 6 small white craft-foam cloud pieces
- 1 tube waterproof epoxy adhesive and clear sealant for the clouds
- 1 and 1/2 cups distilled water
- 1 teaspoon glycerin
- 1 tablespoon fine white glitter and 1 teaspoon gold glitter
- Clear silicone sealant for the lid rim
How to make it:
- Seal each foam cloud piece with clear sealant and let it dry for 6 hours so it will not soak up water.
- Glue the clouds and angels to the lid at staggered heights with waterproof epoxy, then cure for 24 hours.
- Mix 1 and 1/2 cups of distilled water with 1 teaspoon of glycerin and both glitters.
- Seal the lid, add silicone sealant around the rim, and dry for 12 hours.
Shortcut: Buy the Choir Ready-Made
If gluing five separate angels feels fussy, look for a single-piece angel-choir ornament and mount that instead. One sturdy piece is easier to seal, cures more reliably, and still looks like a full choir through the glass.
14. Snowman Family in the Front Yard
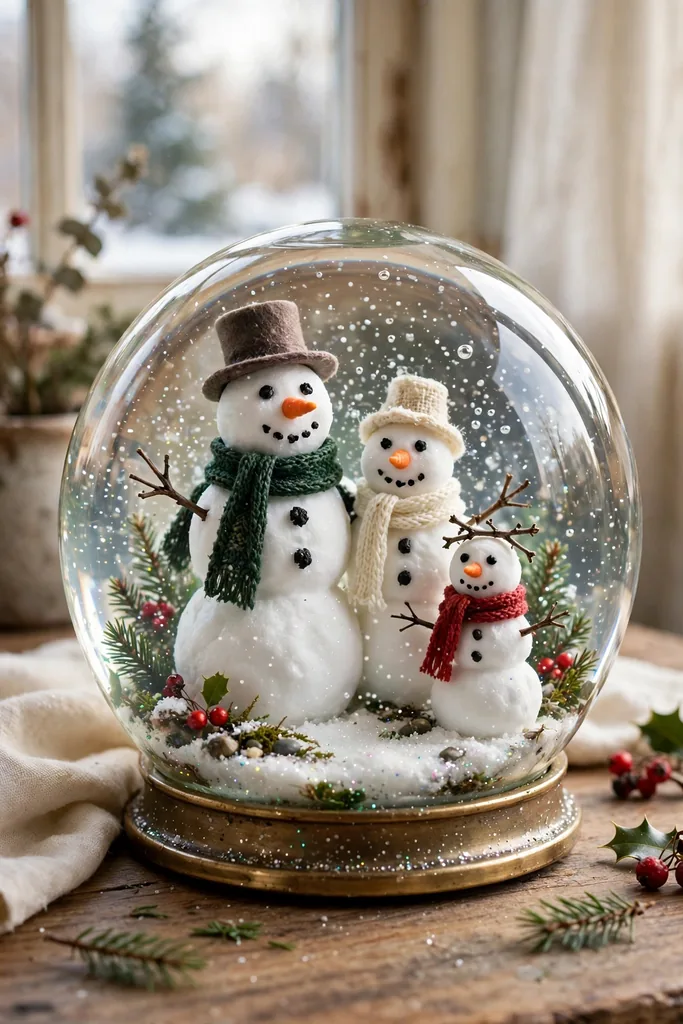
A snowman family in the front yard is the friendliest globe you can make. A tall snowman, a smaller one beside him, and a tiny one in front, with a fence and a lamp post, feel like a holiday card come to life.
Vary the heights clearly. If all three snowmen are the same size, the family effect disappears and the scene looks like a row of ornaments. A tall, a medium, and a small figure, with different scarves, instantly reads as a family.
What you need:
- 1 wide-mouth jar, 24 oz / 700 ml
- 3 snowman figurines, about 1, 2, and 3 inches tall
- 1 miniature fence piece and 1 miniature lamp post
- 1 tube waterproof epoxy adhesive
- 1 and 1/2 cups distilled water
- 1 to 2 teaspoons glycerin
- 2 tablespoons fine white glitter
- Clear silicone sealant
How to make it:
- Glue the fence along the back of the lid and the lamp post to one side with waterproof epoxy.
- Add the three snowmen in descending height order and cure for 24 hours.
- Mix 1 and 1/2 cups of distilled water with 1 to 2 teaspoons of glycerin and the glitter.
- Seal the lid, apply silicone sealant, and dry for 12 hours.
Cleanup Box: Glitter Gets Everywhere
Work over a baking tray to catch stray glitter, and keep a damp cloth nearby for the jar rim before sealing. Any glitter trapped on the rim can break the seal, so wipe the rim completely clean before the silicone goes on.
15. New Year’s Eve Countdown Globe

A New Year’s Eve countdown globe lets Christmas decor glide gracefully into January. A tiny clock striking midnight, gold and silver confetti, and a scattering of stars make it the perfect globe to keep out after the tree comes down.
This globe also makes a thoughtful paired gift. Slip it into a gift bag alongside other handmade presents, such as handmade soap gifts, and the recipient gets a whole handmade celebration rather than a single decoration. A small tag reading Happy New Year finishes the set.
What you need:
- 1 jar, 20 oz / 600 ml
- 1 miniature clock or clock-face piece, about 3 inches tall
- 2 miniature party figures or champagne-flute pieces
- 1 tube waterproof epoxy adhesive
- 1 and 1/4 cups distilled water
- 1 teaspoon glycerin
- 1 tablespoon gold glitter and 1 tablespoon silver glitter
- Clear silicone sealant
How to make it:
- Glue the clock to the center of the lid with waterproof epoxy and the party figures on either side.
- Cure for 24 hours, then check the clock hands are firmly attached before filling.
- Mix 1 and 1/4 cups of distilled water with 1 teaspoon of glycerin and both glitters.
- Seal the lid, apply silicone sealant around the rim, and dry for 12 hours.
Frequently Asked Questions
More from The Glossy Guide
 DIY & Craft
First-Time Crochet Made Easy: 22 Simple Patterns for Absolute Beginners
You do not need a shelf of skills to make something lovely with a hook and a ball of yarn.…
 Home Decor
An Old Soul at Home: Vintage Home Decor Touches That Never Feel Dated — 15 Collected Looks
Getting the balance between eras right indoors takes some trial and error. A room full of period pieces can start…
 Fashion and Beauty
Effortless Hair After 50: 15 Low-Upkeep Cuts That Dry Beautifully on Their Own
15 Easy, Low-Maintenance Haircuts for Women Over 50That Air-Dry Beautifully Mornings are easier when a haircut behaves without a daily…