23 Amazing DIY Felt Christmas Ornaments That Look Absolutely Adorable
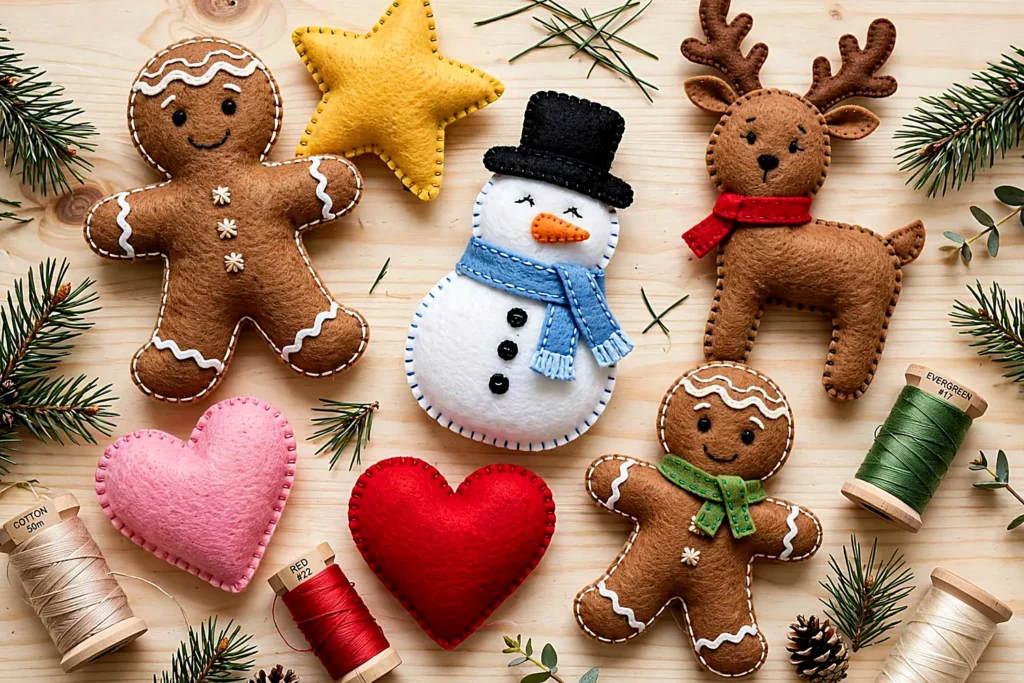
There is a reason felt ornaments never go out of style: they are soft, unbreakable, and forgiving of beginner stitches — three virtues no glass bauble can claim. These diy felt christmas ornaments cost a few dollars in felt sheets, survive toddlers and cats with equal grace, and look like they came from a craft shop’s very best shelf.
Every design here comes with its full materials list and steps, from a twenty-minute snowman to an embroidered bauble worth framing. If you can thread a needle and cut along a line, you can make every one of these diy felt christmas ornaments — most of them in a single cozy evening by the tree. By December, your branches will be full of diy felt christmas ornaments with actual personality.
Table of Contents
- Gingerbread Man Ornaments
- Snowman Ornaments
- Reindeer Ornaments
- Santa Face Ornaments
- Christmas Tree Ornaments
- Snowflake Ornaments
- Heart Ornaments
- Penguin Ornaments
- Owl Ornaments
- Gold Star Ornaments
- Mitten Ornaments
- Stocking Ornaments
- Candy Cane Ornaments
- Angel Ornaments
- Mini Wreath Ornaments
- Holly and Berry Ornaments
- Christmas Pudding Ornaments
- Gnome Ornaments
- Polar Bear Ornaments
- Robin Ornaments
- Embroidered Bauble Ornaments
- Mushroom Ornaments
- Personalized Name Tag Ornaments
- Frequently Asked Questions
- Final Thoughts: A Softer Kind of Christmas
Gingerbread Man Ornaments
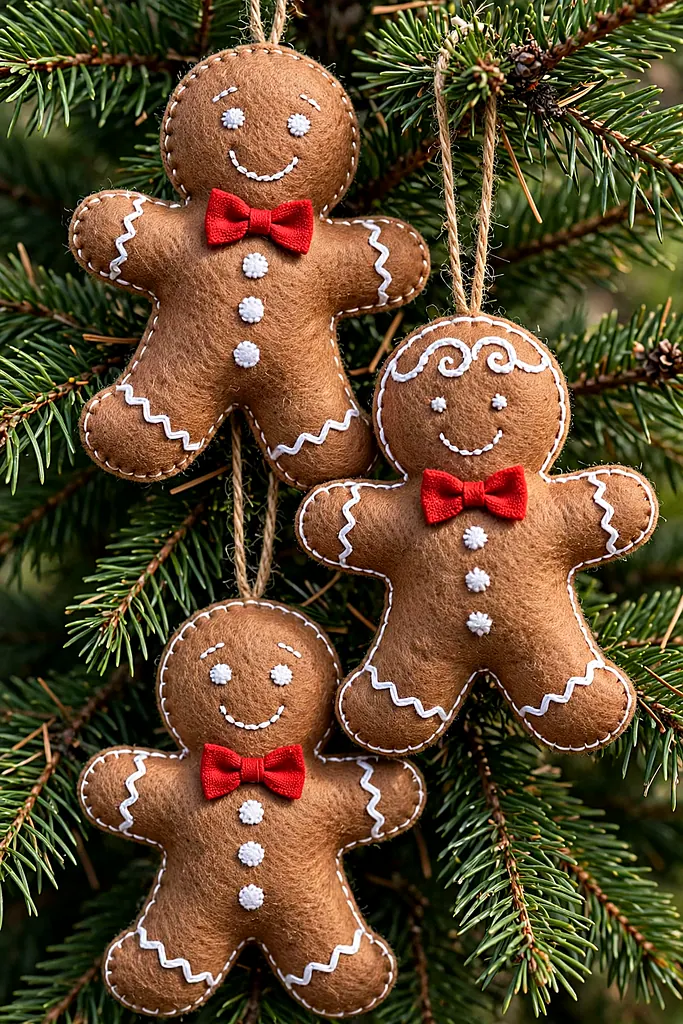
Start with the icon: a plump gingerbread man in warm brown felt, his icing piped in white embroidery floss instead of royal icing that cracks. He never goes stale, never loses a limb to a hungry guest, and his wonky smile — every stitcher’s is different — is precisely his charm.
Cut two identical men, stitch the white icing lines onto the front first, then blanket-stitch the pair together and stuff him fat. Of all diy felt christmas ornaments, this is the one to make first: every basic skill the rest of the list uses lives inside this one friendly shape.
What You Need
- Brown felt sheets
- White embroidery floss (for the icing) and brown thread
- Embroidery needle and scissors
- Polyester fiberfill stuffing
- Two tiny black beads or French knots for eyes
- Red ribbon or felt bow tie, plus a hanging loop
How to Make It
- Print or draw a gingerbread man template about 10 cm tall and cut two pieces from brown felt.
- On the front piece, stitch the icing: wavy lines at the wrists and ankles, a smile, and the eyes.
- Add the bow tie or two buttons down the belly.
- Blanket-stitch the two pieces together, leaving the head open; stuff firmly and finish stitching.
- Sew a ribbon loop through the top of the head and hang. The gingerbread man is the first of all diy felt christmas ornaments for a reason.
His baked cousins live here — these salt dough christmas ornaments complete the set.
Snowman Ornaments
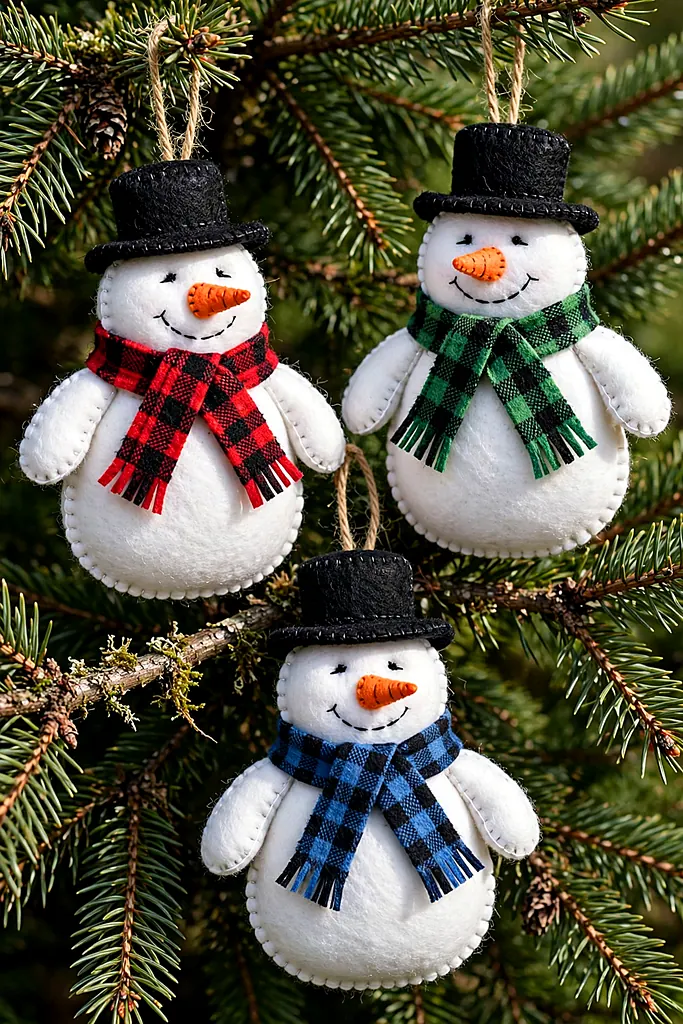
Two white felt circles, a carrot nose in orange felt, and a scarf in whatever color your scrap bag offers: the felt snowman is twenty minutes of stitching for decades of hanging. He cannot melt, which already puts him ahead of his outdoor relatives, and children can genuinely make this one themselves.
What You Need
- White felt sheets
- Orange felt scrap (carrot nose)
- Black beads or floss for eyes and buttons
- Plaid or striped felt for the scarf
- Fiberfill stuffing
- Ribbon loop and fabric glue (optional)
Cut a snowman silhouette — two stacked circles in one piece reads best — twice. Stitch or glue the carrot nose and bead eyes onto the front, then embroider a coal smile.
Wrap the scarf piece around the neck join before you close him up, so it can never be lost. Snowmen are the friendliest diy felt christmas ornaments to give in sets of three, each scarf a different color, each smile slightly more surprised than the last. Every set of diy felt christmas ornaments needs its snowman.
Scarf trick: Cut the scarf from a strip of felt with fringed ends and stitch it on before stuffing. A scarf added afterwards always migrates; a scarf built in stays put for life.
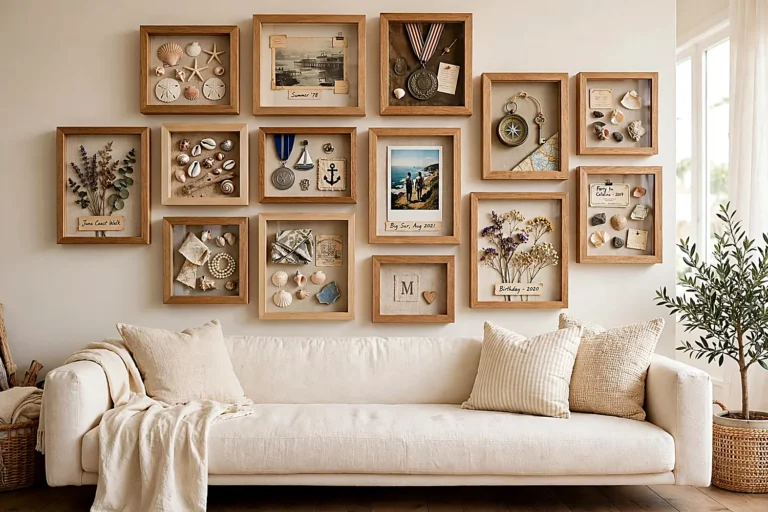
A snowman family deserves a frame — display them in these diy shadow box ideas.
Reindeer Ornaments
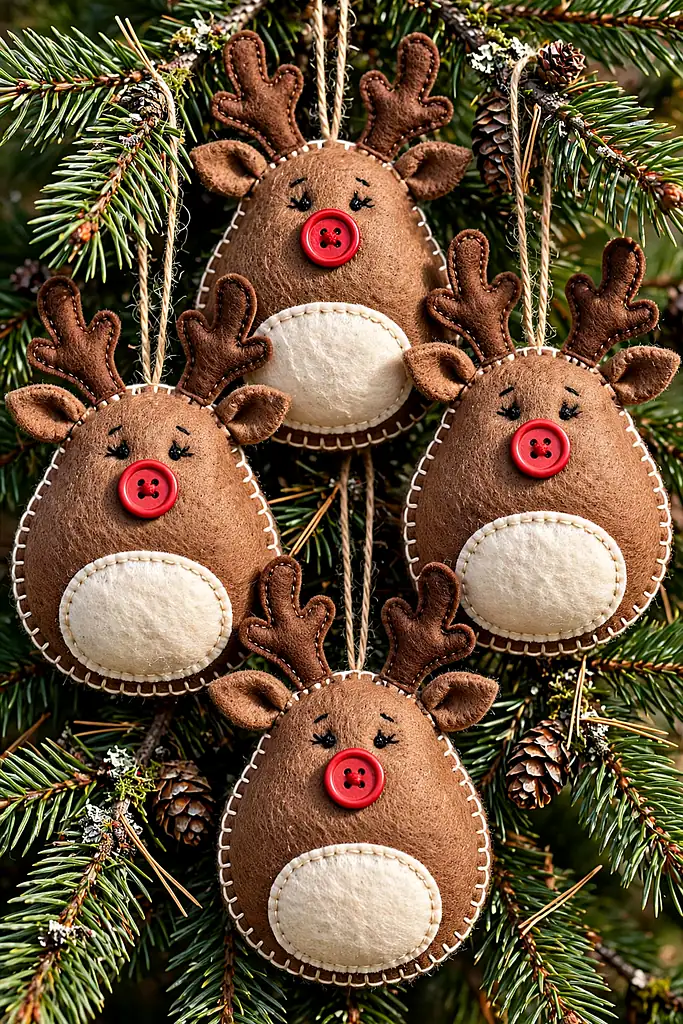
The reindeer is a brown felt head with cream belly patch, stitched antlers, and — non-negotiably — one red nose. Make nine and you have the whole team; make one with a gold nose and you have the leader. Felt antlers are the fiddliest cut here, so cut them from doubled felt for strength.
Simplify freely for young stitchers: a round brown face, two antler shapes glued behind, and features embroidered straight on. Reindeer are the diy felt christmas ornaments classrooms choose when December is short and the gift list is long.
What You Need
- Brown and cream felt sheets
- Red felt or a red button for the nose
- Dark brown felt for antlers
- Black beads for eyes
- Fiberfill stuffing
- Matching thread and a ribbon loop
How to Make It
- Cut the head shape twice in brown, plus a cream muzzle patch and two antlers in dark brown.
- Stitch the muzzle, nose and eyes onto the front piece.
- Position the antlers between the layers at the top and blanket-stitch around, catching them firmly.
- Stuff the head plump, close, and add the hanging loop. Reindeer diy felt christmas ornaments multiply happily across a mantel.
At a Glance
Reindeer report to the door next — meet them in these diy christmas wreath ideas.
Santa Face Ornaments
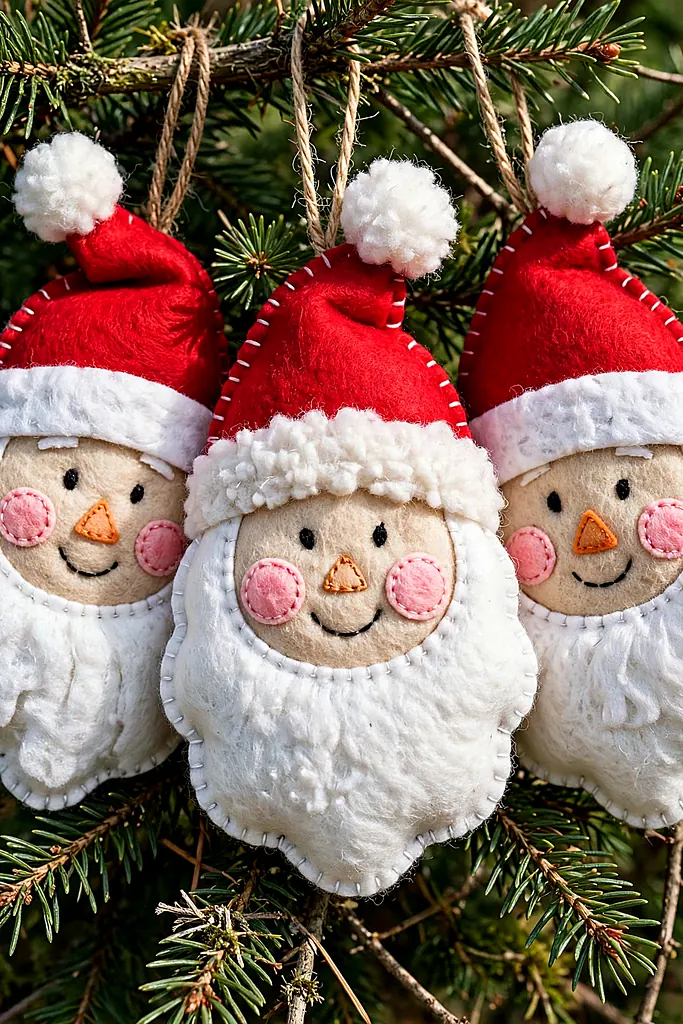
Santa’s whole personality is a beard with a hat, which makes him the perfect felt subject: a peach face circle, a cloud of white felt beard layered in scallops, and a red hat with a white brim. Layer the beard in three scalloped rows and he gains the depth that flat felt usually lacks.
What You Need
- Peach, white and red felt sheets
- Pink felt scrap (cheeks and nose)
- Black beads for eyes
- White pom-pom for the hat tip
- Fiberfill stuffing
- Gold thread loop
How to Make It
- Cut the face circle in peach, the beard in white with a scalloped top edge, and the hat in red.
- Layer and stitch the beard onto the face, then the hat and its white brim above.
- Add bead eyes, a pink nose and cheeks.
- Stitch the face to a plain peach backing, stuff lightly — Santa stays fairly flat — and close.
- Glue the pom-pom to the hat tip and sew the loop behind it. Santa faces are the diy felt christmas ornaments grandfathers request by name.
Santa appreciates refreshments — leave these christmas cookies nearby.
Christmas Tree Ornaments
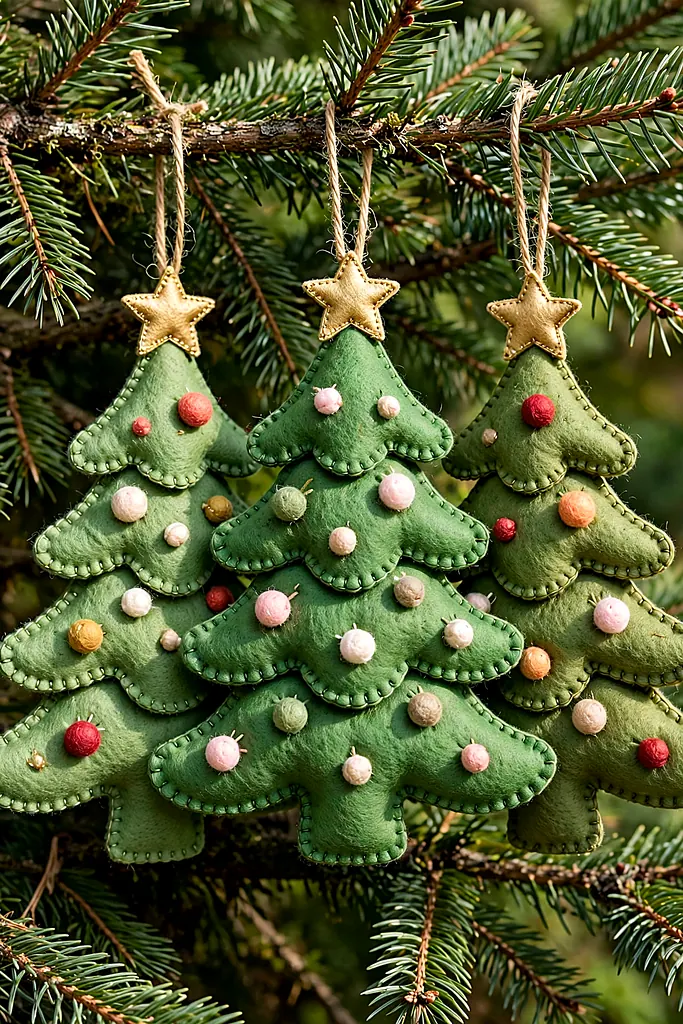
A tree for the tree: three tiers of green felt in descending triangles, or one plump tree silhouette, decorated with French-knot baubles and a star you can actually sew. Vary the greens across a batch — forest, sage, emerald — and the set looks curated rather than matched. As diy felt christmas ornaments go, the little tree is the friendliest start of all.
This is the design to hand a total beginner: straight edges, forgiving shape, and decoration that hides every uneven stitch under a bauble. The first diy felt christmas ornaments most people ever make is a little green tree, and plenty stop collecting right there, happily.
What You Need
- Green felt in two or three shades
- Gold felt for the star
- Embroidery floss in bauble colors
- Brown felt scrap for the trunk
- Fiberfill stuffing
- Thread and a hanging loop
Cut the tree shape twice. On the front, stitch the garland as a loose zigzag of gold floss, then add French knots or tiny felt circles as baubles — odd numbers, scattered high and low.
Sew the star at the top between the layers so it can never spin. Blanket-stitch, stuff the tiers plump, and close at the trunk. A tree ornament with a slightly lopsided star is not a mistake; it is a signature.
A felt tree suits a snowy theme — pair it with these flocked tree decorating ideas.
Snowflake Ornaments
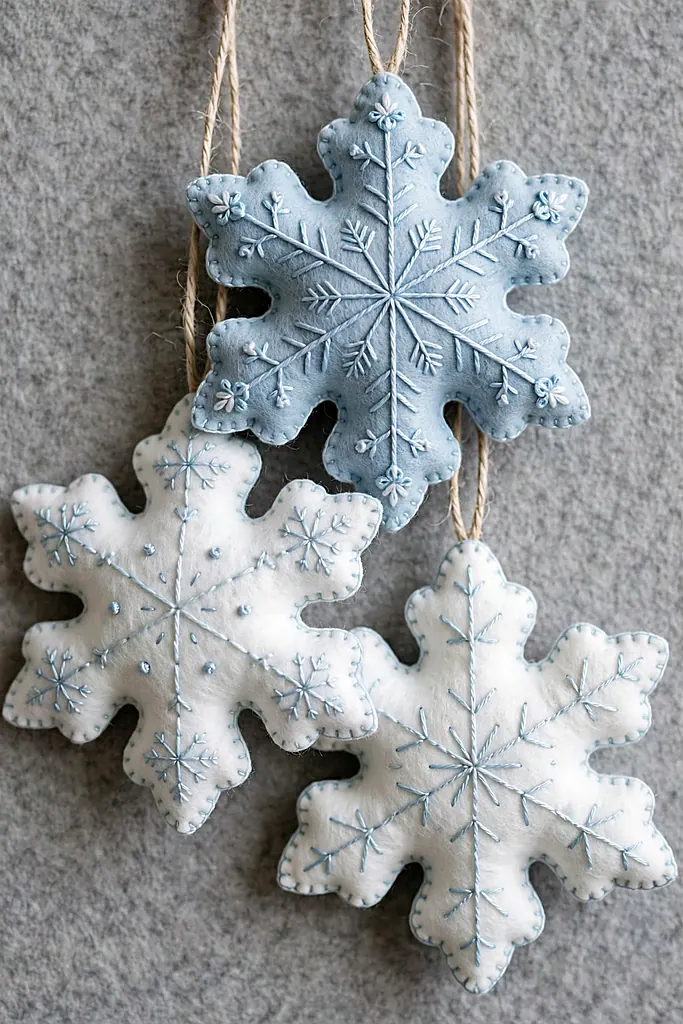
Felt snowflakes cheat beautifully: instead of cutting lacy holes (felt frays at fine work), you layer a smaller white flake on a pale blue one and let embroidery do the detail. The result reads crisp from across the room and survives being sat on by the cat, which real snowflakes notoriously do not.
What You Need
- White and pale blue felt sheets
- White embroidery floss
- A snowflake template or die
- Silver thread for hanging
- A little stuffing (optional — they hang well flat)
- Seed beads (optional sparkle)
How to Make It
- Cut a large flake in pale blue and a smaller one in white.
- Embroider simple stitch lines and French knots on the white flake.
- Layer and stitch the white flake onto the blue one at the center and arm tips.
- Add the silver loop at one arm and hang where it can turn gently. Snowflakes are the diy felt christmas ornaments that need no stuffing at all.
Cutting shortcut: Fold the felt and cut the snowflake like paper, then press it flat under a book overnight. Folded cuts give perfectly symmetrical flakes every time.
Felt flakes pair with frozen glass — these diy christmas snow globes are their cousins.
Heart Ornaments
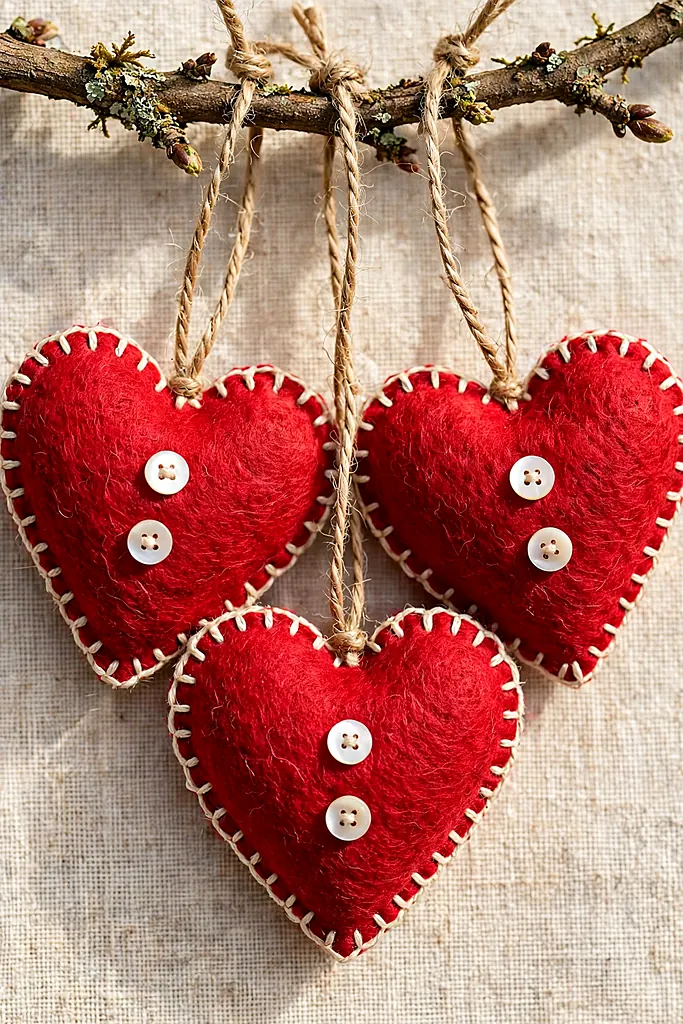
The heart is felt’s home turf: one shape, one contrast blanket stitch, endless colorways. Red with cream stitching is the classic; blush with gold is the modern one; a whole garland strung through their loops is the ambitious one, and worth it.
Stuff hearts firmly — a limp heart helps nobody — and consider a drop of dried lavender inside for the ones destined for drawers after December. Heart diy felt christmas ornaments are the design that escapes the tree and lives on doorknobs all year.
What You Need
- Red felt sheets (plus blush and cream for variations)
- Contrasting embroidery floss
- Heart template
- Fiberfill stuffing
- A small white button or felt flower for the center
- Twine or ribbon loop
How to Make It
- Cut two hearts per ornament.
- Stitch the button or flower onto the front heart’s center.
- Blanket-stitch the pair together in the contrast floss, leaving the top open.
- Stuff firmly, pushing filling into the lobes with a chopstick.
- Close, knot off, and thread the loop through the top stitch. Of all diy felt christmas ornaments, hearts travel furthest beyond December.
Stitch showcase: On hearts, the blanket stitch IS the decoration — use the thickest floss you have (all six strands) in a bold contrast. Neatness matters less than confidence.
Hearts are the handmade gift that never misses — more in these handmade christmas gift ideas.
Penguin Ornaments
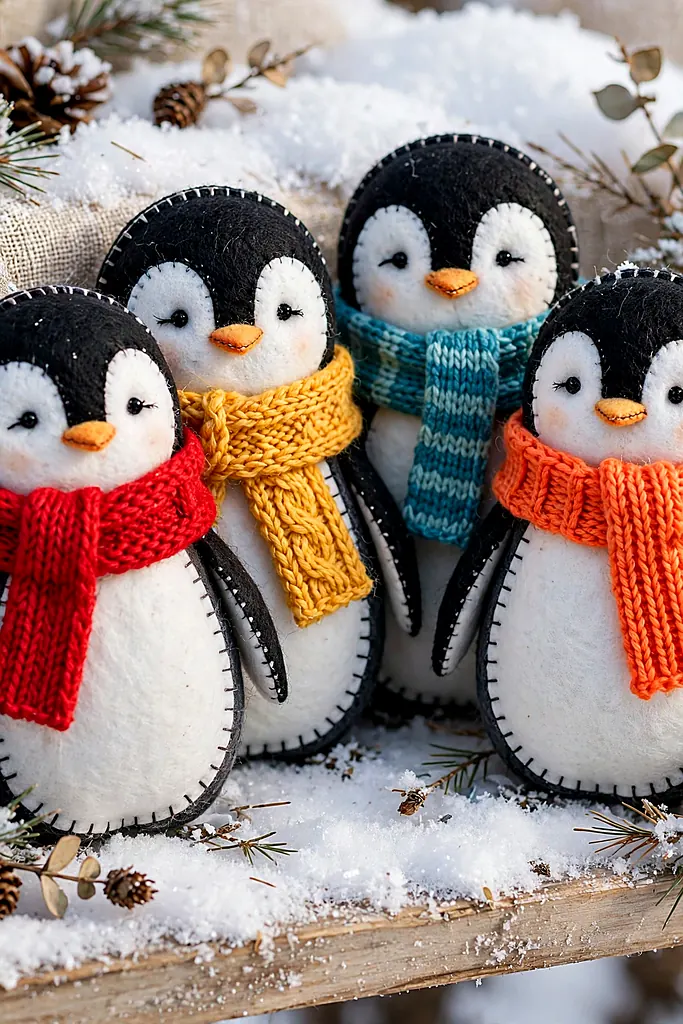
A black felt oval, a white belly, two dot eyes and a scarf: the penguin assembles like a joke with a perfect punchline. Children arrange them in colonies on low branches, and adults pretend the arrangement was theirs. Make the scarves in everyone’s favorite colors and the colony becomes a family portrait.
What You Need
- Black and white felt sheets
- Orange felt scrap (beak and feet)
- Scarf felt in assorted colors
- Black beads for eyes
- Fiberfill stuffing
- Thread and a hanging loop
Cut the penguin body twice in black, and a white belly oval. Stitch the belly onto the front, then the bead eyes and tiny orange triangle beak above it.
Stitch the scarf band across the neck line and add two orange feet at the base between the layers. Blanket-stitch in black, stuff, and close.
A single penguin is cute; five are a colony, and colonies are how diy felt christmas ornaments take over a tree in the best way. Give each a different scarf and let the family claim theirs. Penguins are the diy felt christmas ornaments children arrange and rearrange all December.
Penguins approve of cozy rooms — settle yours with these cozy winter living room decor ideas.
Owl Ornaments
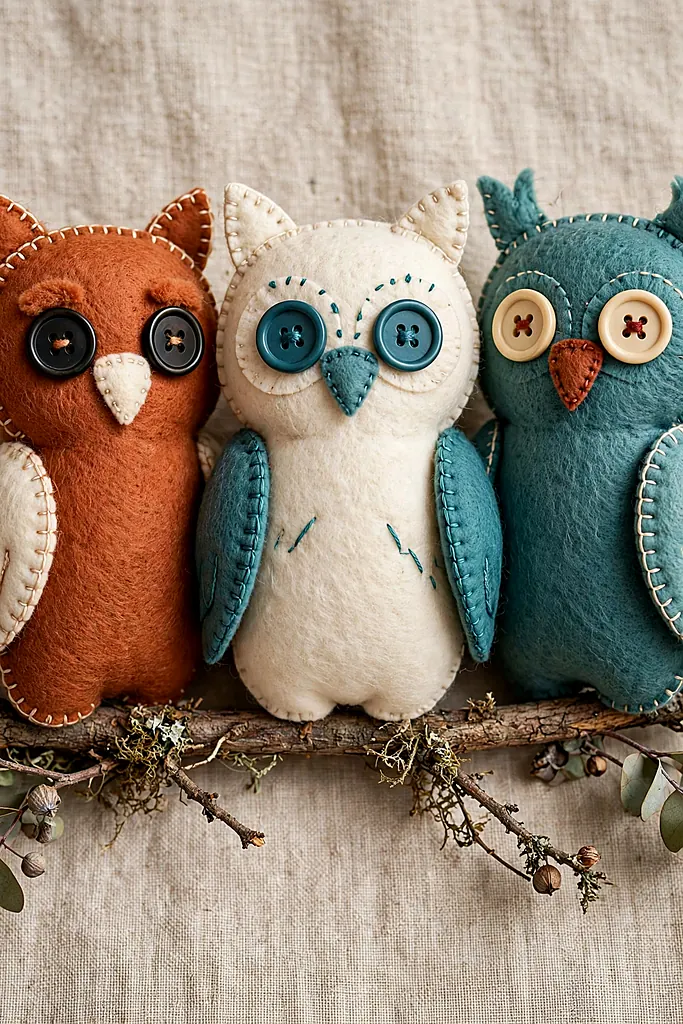
Owls let you use the whole scrap bag: rust body, cream belly, teal wings, mustard feet — the more improbable the combination, the better he looks. Big button eyes give him his wisdom; a few straight stitches give him his feathers. He is the ornament the family’s readers adopt.
Cut the eyes as layered felt circles if buttons feel too heavy; the stitched version lies flatter and ships better. Owls are the diy felt christmas ornaments most often requested by name the following year, so keep the template.
What You Need
- Felt in rust, cream, teal and mustard (or your scraps)
- Two buttons or layered felt circles for eyes
- Orange felt triangle (beak)
- Embroidery floss
- Fiberfill stuffing
- Twine loop
How to Make It
- Cut the owl body twice, plus a belly oval, two wings and two eye circles.
- Stitch the belly, eyes and beak onto the front; add feather stitches on the belly.
- Position the wings between the layers at the sides and blanket-stitch around.
- Stuff, close, and hang him somewhere he can supervise. Owl diy felt christmas ornaments keep their template in demand year after year.
A woodland owl suits collected rooms — see these vintage home decor ideas.
Gold Star Ornaments
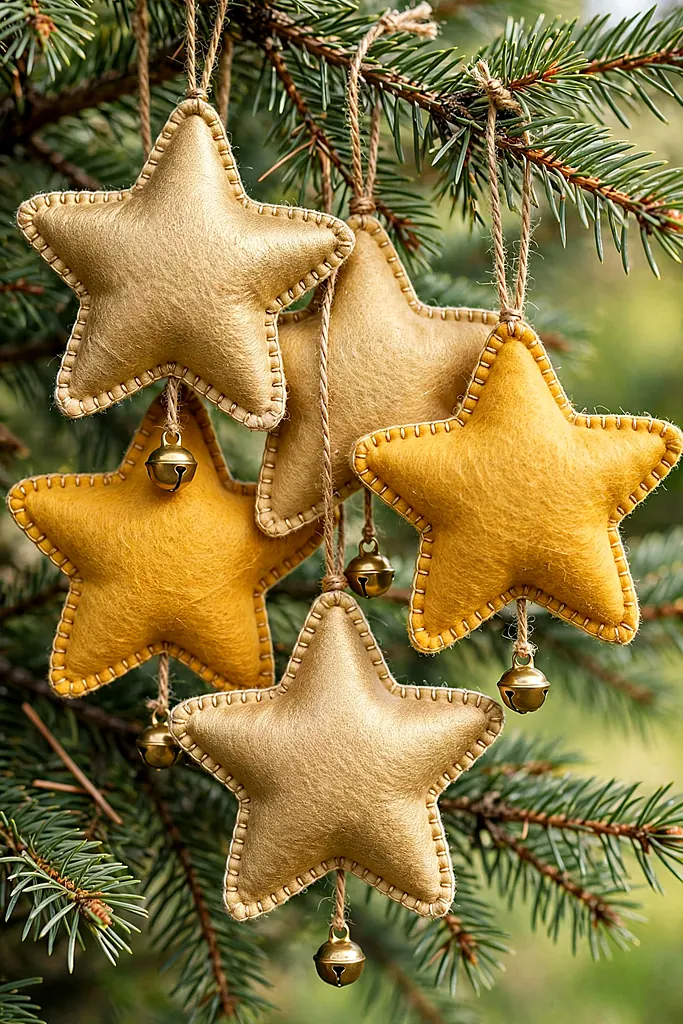
Every tree needs stars that are not plastic, and felt delivers them plump and matte-gold, with stitching that catches the light like embroidery on a cushion. Add a tiny bell at the bottom point and the star announces itself whenever the tree is touched — the cat will provide demonstrations.
What You Need
- Gold or mustard felt sheets
- Gold embroidery floss
- Star template (5-point, about 9 cm)
- One tiny jingle bell per star
- Fiberfill stuffing
- Gold thread loop
How to Make It
- Cut two stars per ornament.
- Running-stitch a smaller star outline onto the front for detail.
- Blanket-stitch the pair in gold floss, leaving one point open.
- Stuff each point with the end of a chopstick, then close.
- Sew the bell to the bottom point and the loop to the top. Stars are the diy felt christmas ornaments to hang where the lights hit.
At a Glance
Stars and bows share the top branches — coordinate with these bows on christmas trees.
Mitten Ornaments
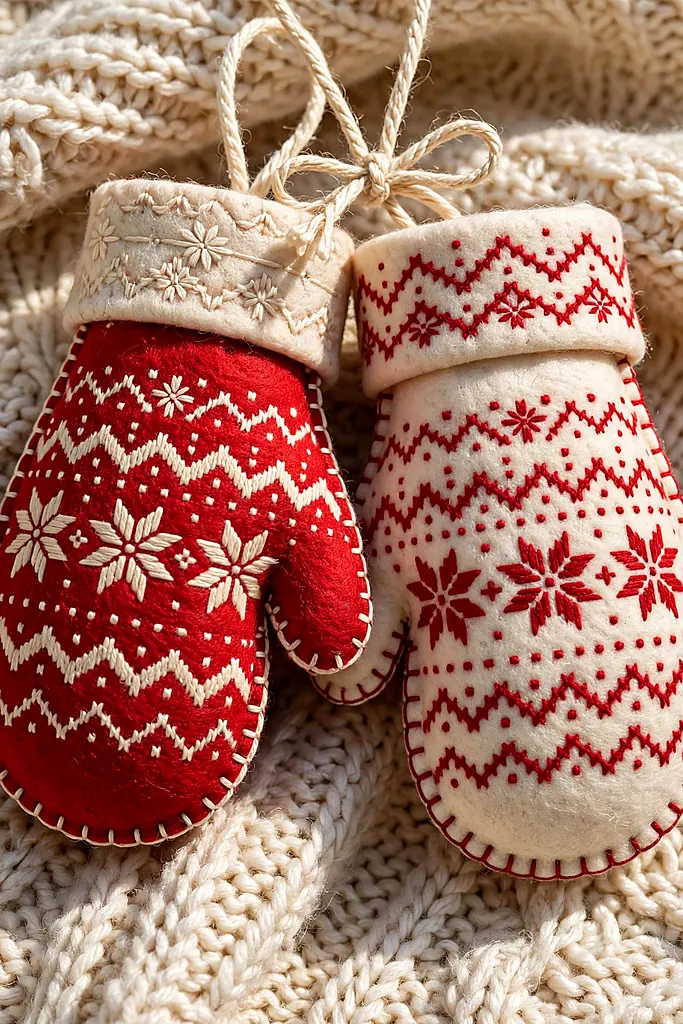
Mittens are made to be a pair, and felt mittens — red with cream cuffs and a row of stitched snowflakes — tie together with yarn and hang like they were just taken off by someone small. They are the coziest silhouette on this list and the fastest to cut, being mostly one friendly curve.
What You Need
- Red and cream felt sheets
- White embroidery floss for snowflakes
- Mitten template
- Yarn to tie the pair
- Fiberfill stuffing
- Thread
Flip the template for the second mitten — a pair of lefts is the classic heartbreak, and felt shows no mercy about it. Stitch a simple six-point snowflake onto each front with white floss.
Stitch the cream cuff across the top of each mitten front, then blanket-stitch, stuff lightly, and close. Tie the pair together with yarn through their cuffs. Mitten diy felt christmas ornaments always hang in pairs — that is their whole point. Mitten diy felt christmas ornaments in a cold house get a knowing laugh every single year.
Pair check: Before stitching anything, lay both mittens out and confirm the thumbs mirror each other. It takes five seconds and saves a whole evening’s sigh.
At a Glance
Mittens are winter wear in miniature — match them with these scarf outfits.
Stocking Ornaments
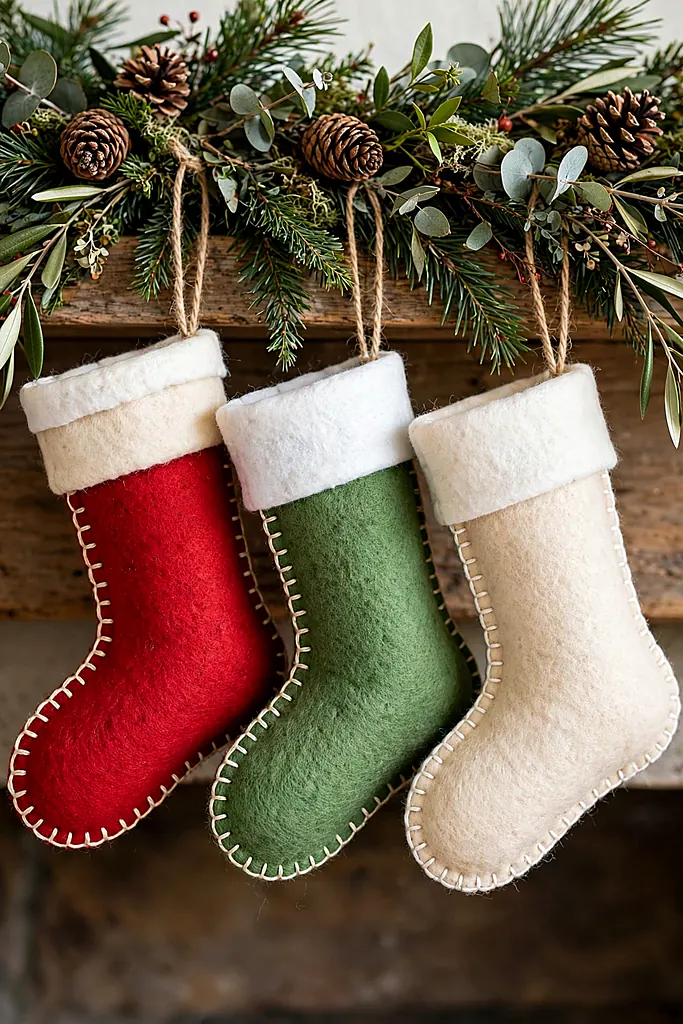
Mini stockings personalize better than any other shape: one per family member, initial stitched on the cuff, colors matched to their real stockings if your household runs that way. Hung along the mantel garland, they are the family’s Christmas lineup in miniature — and they hold a chocolate coin each, which never hurts.
What You Need
- Felt in red, green and cream
- White felt for cuffs
- Embroidery floss for initials
- Stocking template (about 10 cm)
- Fiberfill stuffing (light)
- Ribbon loops
How to Make It
- Cut two stocking shapes per ornament, plus a white cuff strip.
- Stitch the initial onto the cuff, then stitch the cuff across the front stocking’s top.
- Blanket-stitch the pair together around the foot and leg.
- Stuff very lightly — stockings should stay almost flat.
- Close at the top and sew the ribbon loop at the heel-side corner.
- Slip in a chocolate coin before hanging, if tradition demands. Stocking diy felt christmas ornaments grow by one whenever the family does.
A stocking for the hardest person to buy for — more ideas in these christmas gift ideas for mom.
Candy Cane Ornaments
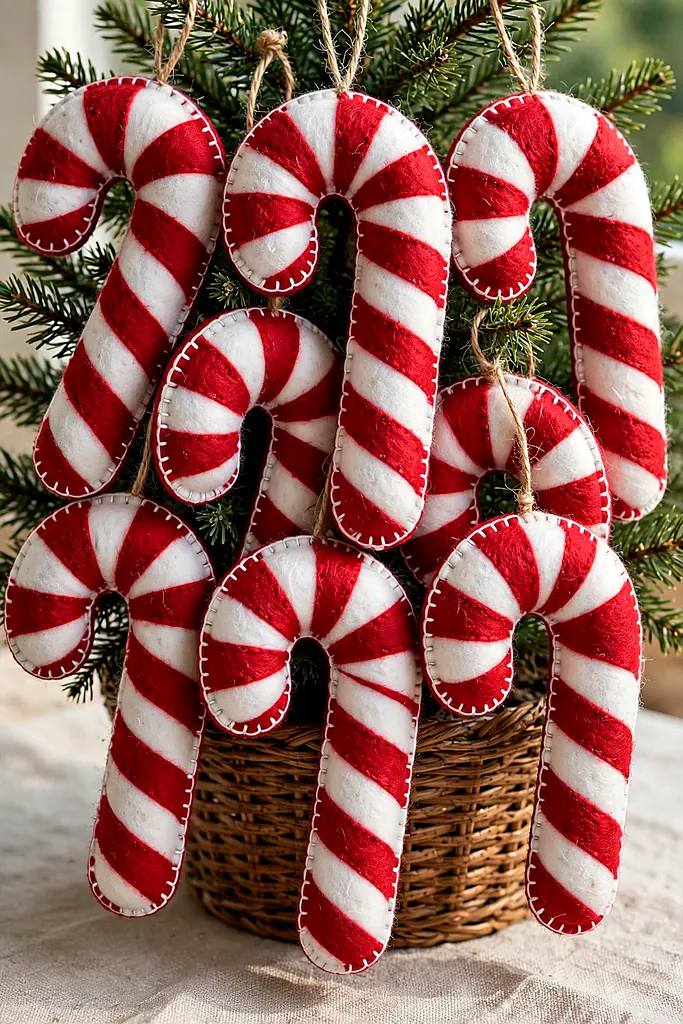
The candy cane’s stripes solve themselves in felt: cut the cane in white, then stitch diagonal red felt bands across it — or cut the bands and the cane separately and appliqué. Either way the result is plump, graphic, and readable from the doorway, which is all a candy cane has ever needed to be.
Make them in peppermint classic or in pink-and-cream for the pastel tree; a set marches beautifully along a garland. Striped diy felt christmas ornaments also photograph well, which matters when the ornament doubles as a card enclosure.
What You Need
- White and red felt sheets
- Candy cane template
- Matching red and white thread
- Fiberfill stuffing
- Red ribbon
- Optional: a tiny felt bow for the crook
How to Make It
- Cut two cane shapes in white.
- Cut thin diagonal red strips and stitch them across the front cane in even bands.
- Add the tiny bow at the crook if you are using one.
- Blanket-stitch the pair together, stuffing the curve gently so it holds its shape.
- Close, and hang by a ribbon at the crook. Candy cane diy felt christmas ornaments march best in rows of five or more.
At a Glance
Stripes dress a table too — borrow the palette from these christmas table decorations.
Angel Ornaments
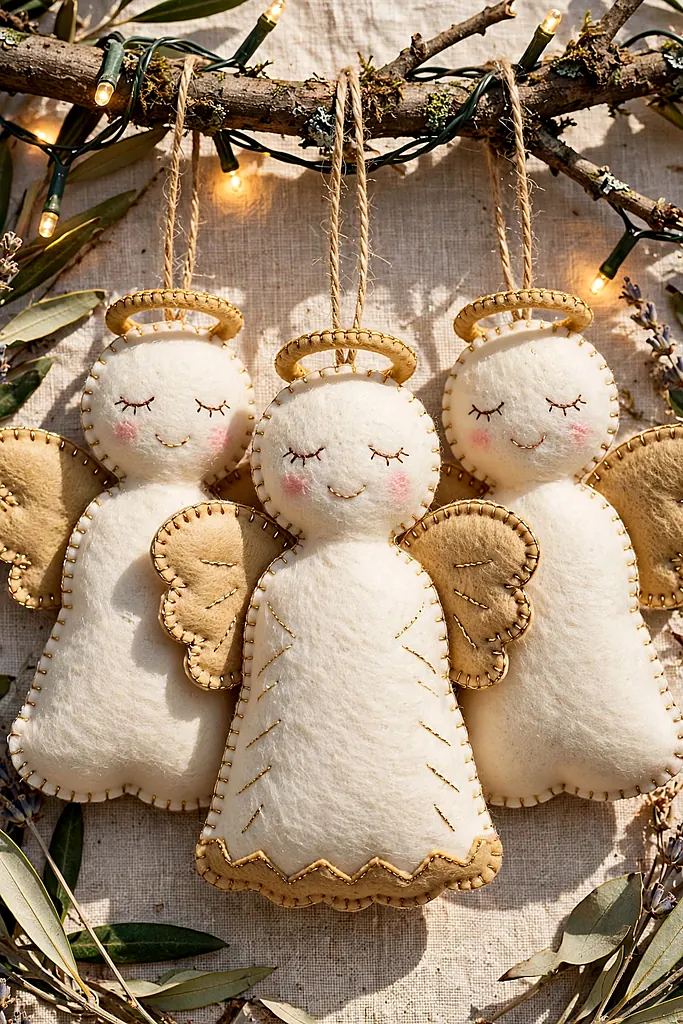
Felt angels carry the folk-art purity that porcelain ones price themselves out of: a cream dress in a simple bell shape, white wings behind, and a gold floss halo floating above a face of two dot stitches. Leave the face nearly blank — the classic angels always did — and she suits memorial ornaments as gracefully as festive ones.
What You Need
- Cream, white and peach felt
- Gold embroidery floss (halo and trim)
- A small gold star (optional)
- Fiberfill stuffing
- Gold thread loop
- Fabric glue for tiny parts
Cut the dress as a bell shape twice in cream, wings in white, and a small peach face circle. Stitch the face onto the dress top with two dot eyes and nothing more.
Stitch the wings between the layers at the back. Embroider the halo as a gold oval above the head and a line of gold trim at the hem. Blanket-stitch, stuff softly, close. An angel made from diy felt christmas ornaments stock tends to become the ornament the family argues over keeping. Angel diy felt christmas ornaments are given at christenings and Christmases alike.
Angels preside over decorated rooms — set theirs with these christmas decor ideas.
Mini Wreath Ornaments
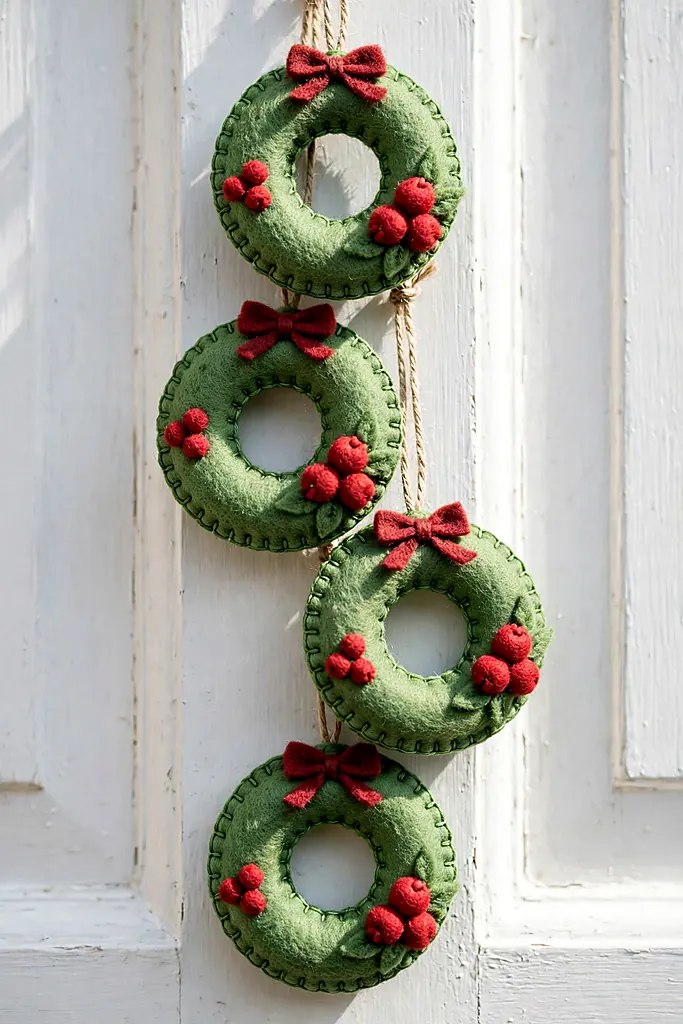
A wreath the size of your palm: a green felt ring, leaves stitched around it in two greens, berries as French knots or tiny red circles, and a bow that ties the whole performance together. One per colleague is a December’s worth of goodwill, stitched at the speed of one wreath per evening.
Cut the ring from doubled felt for stiffness, or stitch two rings together with a whisper of stuffing. Wreath diy felt christmas ornaments also work as napkin rings and bottle gifts — the shape multitasks all season.
What You Need
- Green felt in two shades
- Red felt for berries
- Wreath ring template (two circles)
- Embroidery floss
- A tiny ribbon bow
- Twine loop
How to Make It
- Cut two rings — a large circle with the center cut out — or one ring from doubled felt.
- Cut small leaf shapes and stitch them around the ring, alternating the greens.
- Add berry clusters: three tiny red circles or French knots per cluster.
- Stitch or glue the bow at the top, add the twine loop behind it. Wreath diy felt christmas ornaments double as napkin rings in a pinch.
Ring stiffness: A wreath lives or dies by its ring. Slip a circle of cardboard or a plastic lid ring between the felt layers and it will hold its circle for decades.
The full-size inspiration hangs in these christmas decorations.
Holly and Berry Ornaments
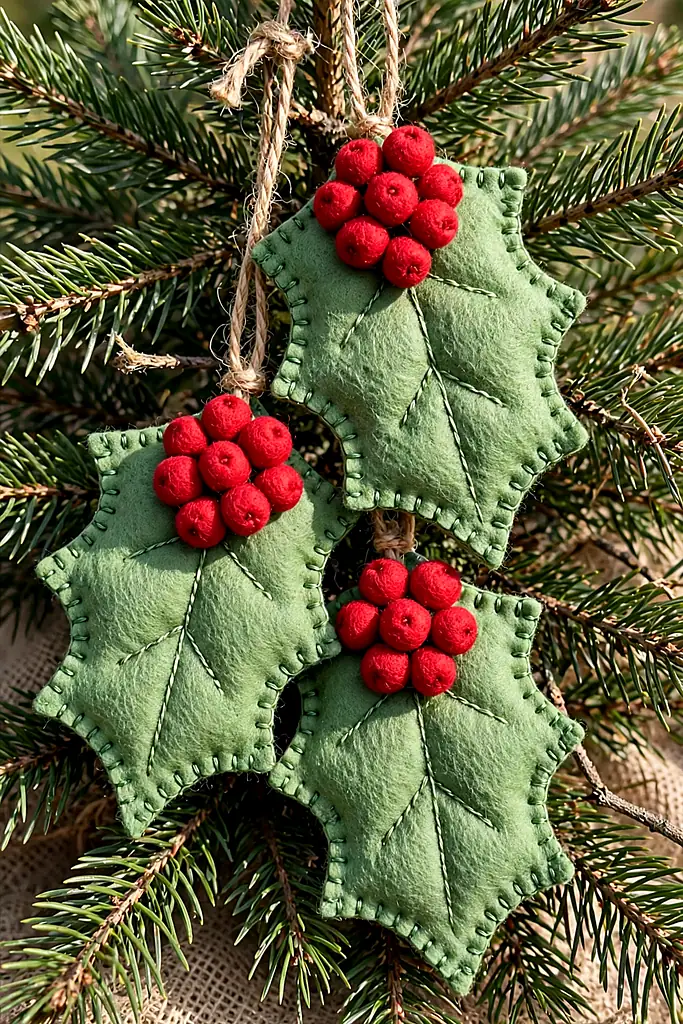
Holly is the botanical signature of Christmas, and felt does it justice: two or three deep-green leaves with stitched veins and pointed lobes, gathered around a cluster of plump red berries. It is the most grown-up design here — no face, no smile — and it flatters traditional trees enormously.
What You Need
- Deep green felt
- Red felt for berries
- Green embroidery floss (veins)
- A holly leaf template
- A touch of stuffing for the berries
- Gold thread loop
How to Make It
- Cut four to six holly leaves with pointed lobes.
- Stitch a center vein and side veins on each leaf in lighter green floss.
- Cut three small red circles, gather-stitch each into a plump berry with a pinch of stuffing.
- Arrange the leaves in a fan, stitch them together at the base, and fix the berry cluster on top.
- Add the gold loop at the back of the base. Holly diy felt christmas ornaments flatter the most traditional tree in the house.
Leaf shape: Holly leaves must point. Round the lobes and you have made ivy — still pretty, but the berries will be telling a different story than the leaves.
Holly belongs in the big room scheme — build it from these christmas living room decorations.
Christmas Pudding Ornaments
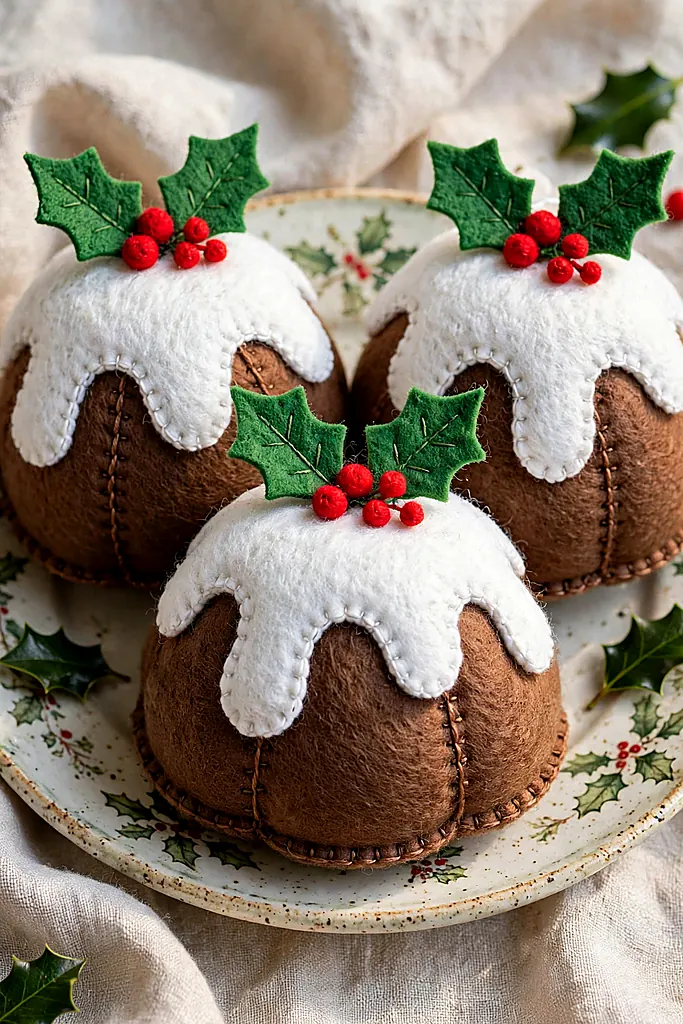
For the household that takes Christmas dinner seriously: a round brown pudding, white felt icing dripping over the top in perfect scallops, and a sprig of felt holly as the garnish. It is the funniest ornament on the tree and the one British grandmothers claim on sight. Pudding diy felt christmas ornaments are Britain’s gift to the tree.
What You Need
- Dark brown felt
- White felt for the icing cap
- Green and red felt scraps (holly garnish)
- Brown thread
- Fiberfill stuffing
- Ribbon loop
Cut two circles in dark brown. Cut the icing as a white circle with a deeply scalloped, drippy edge — irregular drips look real; tidy ones look printed.
Stitch the icing onto the front circle, then the tiny holly sprig at its top. Blanket-stitch the pudding in brown, stuff it round and firm, and close.
Hang him near the dining end of the tree as a promise of things to come. Pudding diy felt christmas ornaments make the hostess gift that gets hung before the coat comes off.
Icing drips: Cut the icing’s drips uneven — long, short, long. Real icing never drips in a pattern, and felt icing should not either. One scallop slightly off makes the whole pudding believable.
For the edible course, these pecan pie cake recipes hold the table.
Gnome Ornaments
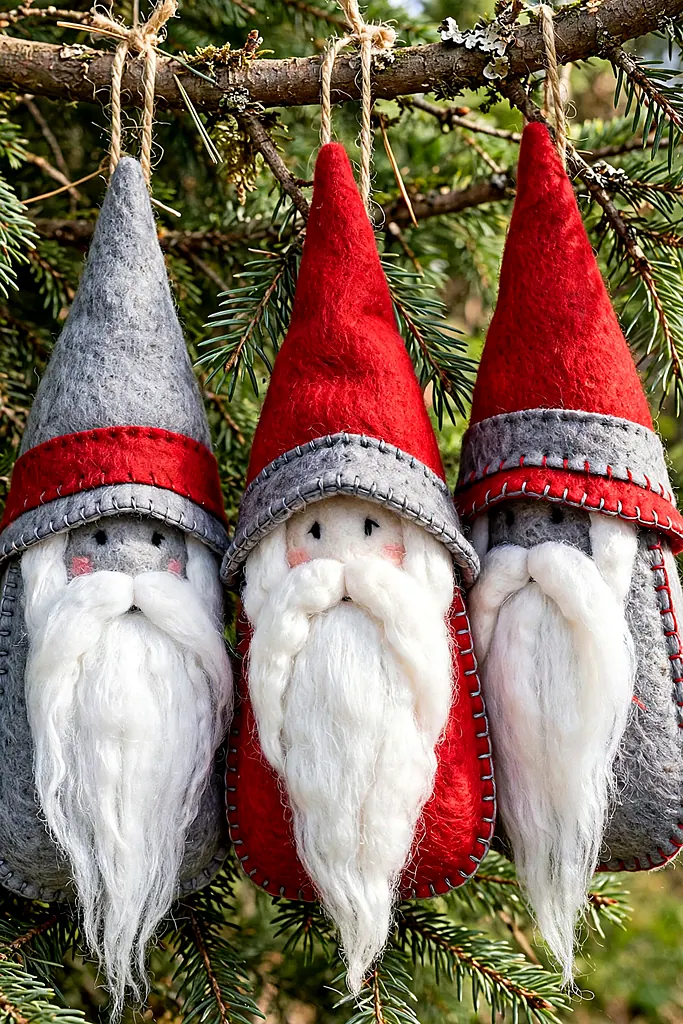
The Scandinavian gnome is ninety percent beard: a tall pointed hat, a triangle of white or grey beard beneath it, and one round nose peeking out — no eyes, by law of gnome. Felt was invented for this creature. Make them in red, grey and forest green and stand them in a row along the mantel between appearances on the tree.
What You Need
- Felt in red, grey and green (hats and bodies)
- White or grey felt for beards
- Peach felt ball or circle (nose)
- Gnome template
- Fiberfill stuffing
- Thread and a hanging loop
How to Make It
- Cut the body cone and hat as one tall triangle in your main color, twice.
- Cut the beard as a long white triangle and stitch it down the front.
- Glue or stitch the round nose at the beard’s top, just under the hat line.
- Blanket-stitch, stuff the base firmly so he can stand, and close. Gnome diy felt christmas ornaments observe a strict no-eyes discipline.
At a Glance
Gnome stitchers usually knit too — try these crochet patterns for beginners next.
Polar Bear Ornaments
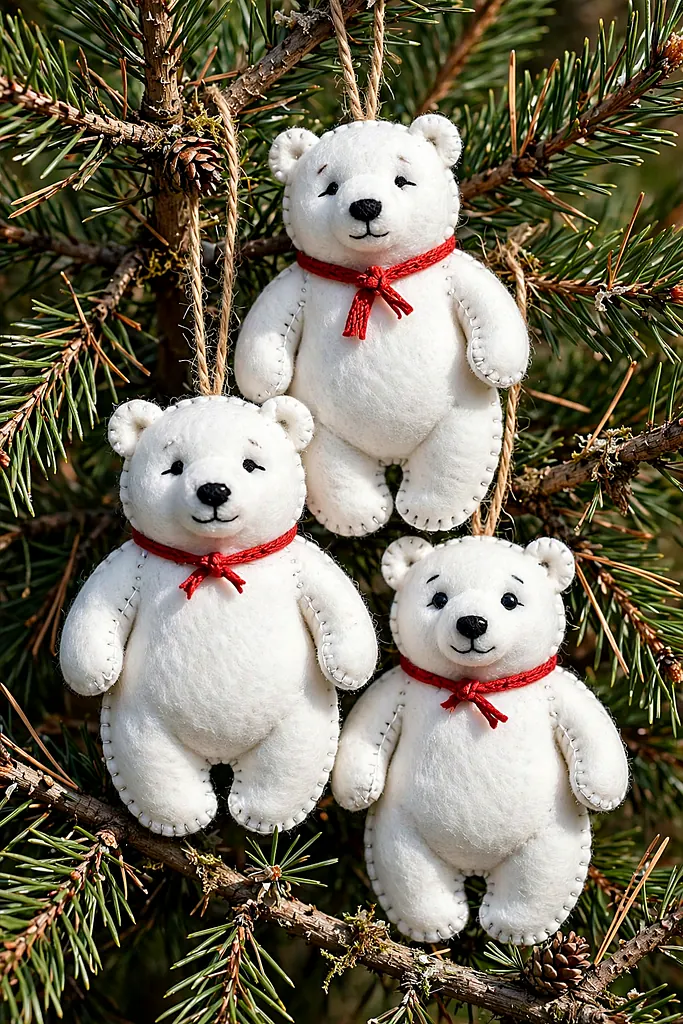
A white bear in a red scarf is winter itself, and felt gives him the softness his real counterpart only appears to have. Cut him standing or as a simple bear face — the face version is faster and reads at a distance; the standing version earns the mantel.
Keep his features minimal: two bead eyes and a stitched nose on a cream muzzle patch. Polar bears are the diy felt christmas ornaments that bridge Christmas into January — leave them up while the snow does.
What You Need
- White and cream felt
- Red felt for the scarf
- Black beads and floss
- Fiberfill stuffing
- Thread
- Ribbon loop
How to Make It
- Cut the bear shape twice in white, plus a cream muzzle oval.
- Stitch the muzzle, nose and bead eyes onto the front.
- Wrap and stitch the red scarf at the neck before closing.
- Blanket-stitch in white, stuff plump, and close.
- Add the loop and hang him on a low, visible branch. Polar bear diy felt christmas ornaments stay up until the snow melts.
White-on-white: Stitch white felt with slightly cream thread — invisible in person, but the seams photograph with definition, and these ornaments always get photographed.
Bears hibernate in cozy rooms — build his with these winter bedroom decor ideas.
Robin Ornaments
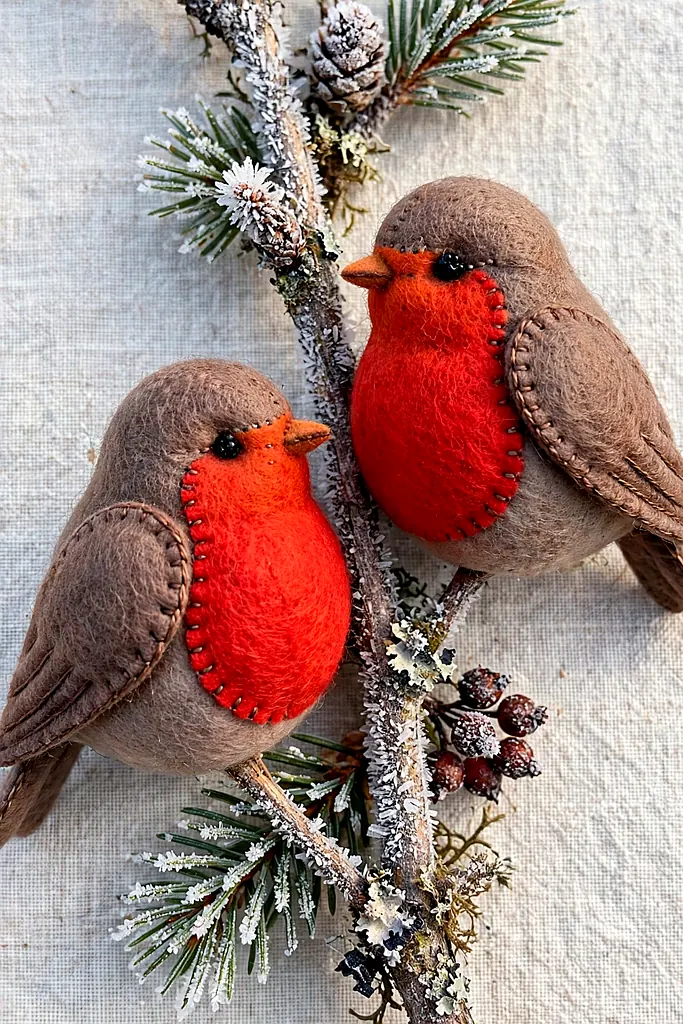
The Christmas robin earns his place by color alone: brown back, cream belly, and that famous red breast worked as an appliquéd felt panel. Perched shapes are ambitious; a round, plump robin silhouette is achievable by anyone and reads instantly. Stitch a tiny wing line and a bead eye, and he is ready for the garden-themed tree.
What You Need
- Brown, cream and red felt
- A robin template (plump bird silhouette)
- Black bead for the eye
- Orange floss (beak and legs)
- Fiberfill stuffing
- Twine loop
Cut the bird twice in brown. Appliqué the cream belly and the red breast onto the front as overlapping panels — the breast sits high, right under the beak, or he is just a sparrow.
Add the bead eye and a stitched wing curve. Blanket-stitch the pair in brown, stuff him round, and close at the tail. Robins made as diy felt christmas ornaments suit the gardener on your list better than any shop card. Robin diy felt christmas ornaments belong on the gardener’s tree.
Breast position: The red panel must touch the beak and cover the chest like a bib. Place it low and wide and the robin turns into a generic bird with a red skirt.
A robin is wall art with feathers — pair him with these diy wall art projects.
Embroidered Bauble Ornaments
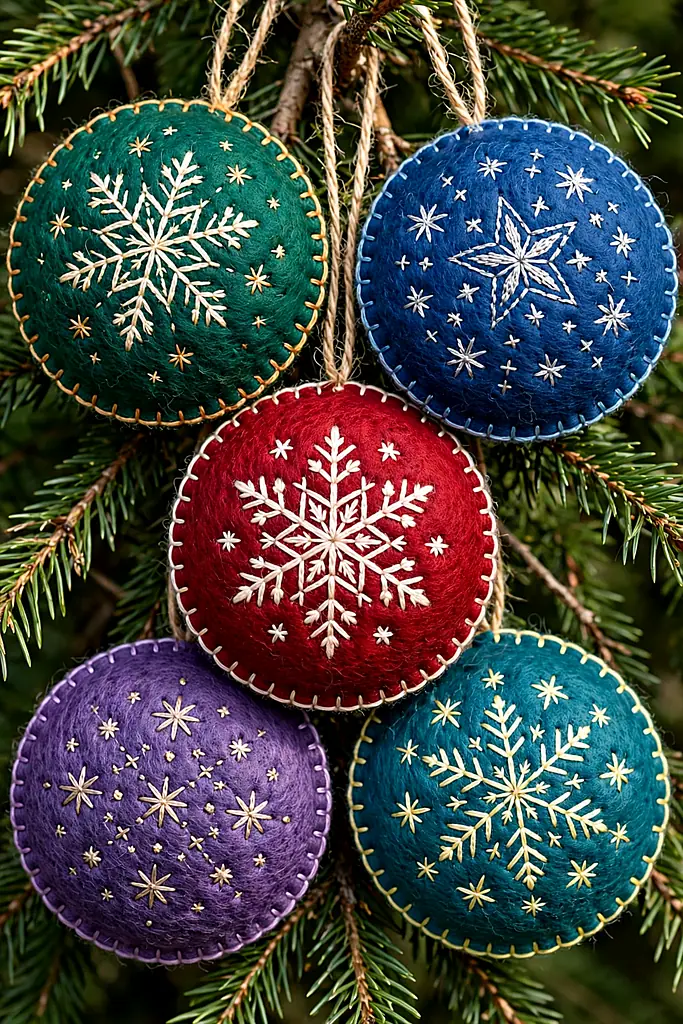
The grown-up finale for needleworkers: plain felt rounds in jewel colors — burgundy, teal, mustard, plum — carrying real embroidery: snowflakes in chain stitch, stars, sprigs, initials. Each is a small framed piece of needlework that happens to hang on a tree, and a set of them looks like a boutique’s window.
Work the embroidery before assembly, on the flat front circle, with a hoop if you have one. These are the diy felt christmas ornaments that get mistaken for purchases, and the ones to sign — a tiny initial in the corner — because they will outlast every other decoration you own.
What You Need
- Felt rounds in jewel colors
- Embroidery floss in metallics and contrasts
- An embroidery hoop and needle
- Felt or fabric caps (or real bauble caps)
- Fiberfill stuffing (light)
- Ribbon loops
How to Make It
- Cut two circles per bauble, about 8 cm across.
- Hoop the front circle and embroider your design — snowflake, star, sprig or initial.
- Stitch a small felt cap rectangle at the top of the front circle.
- Blanket-stitch the pair, stuff lightly so the embroidery stays smooth, and close.
- Thread the ribbon through the cap and hang in good light. Embroidered baubles are the diy felt christmas ornaments that get mistaken for purchases.
Hoop first: Embroider on the flat circle before any assembly. Stitching a stuffed bauble warps every design — flat work is the whole secret to the boutique finish.
At a Glance
Embroidery is slow craft at its best — its supply-shelf cousin is how to make soap.
Mushroom Ornaments
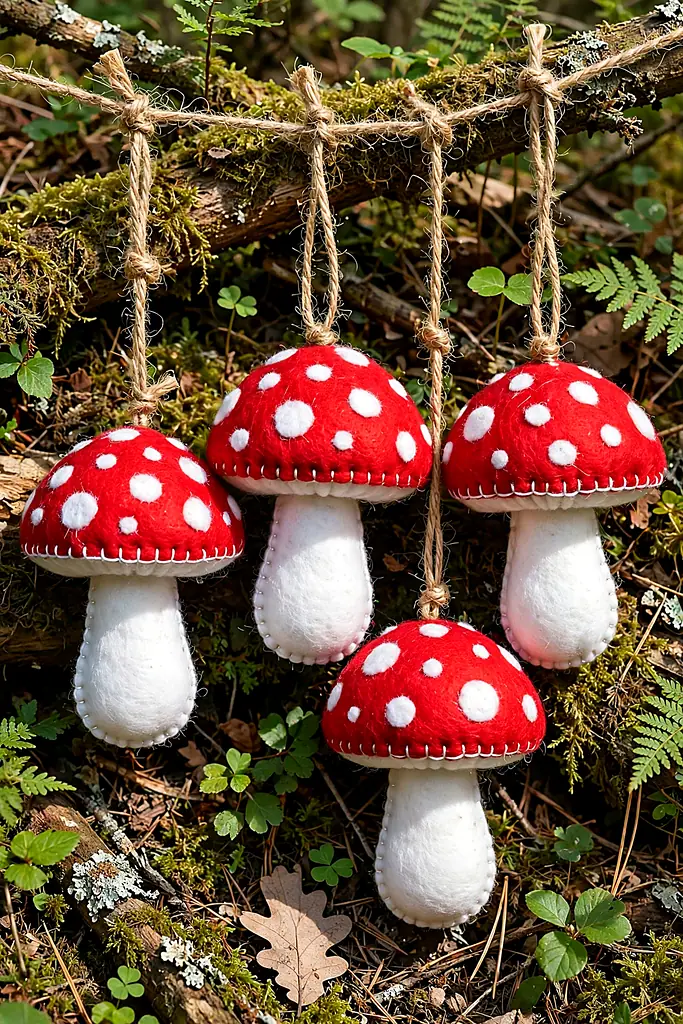
The woodland toadstool — red cap, white spots, cream stem — has become the ornament of the moment, and felt makes it in fifteen minutes flat. A row of them turns a tree woodland; a single one on a gift marks the giver as someone who pays attention. They suit autumn people who tolerate Christmas.
What You Need
- Red, white and cream felt
- A mushroom template
- Matching thread
- Fiberfill stuffing
- Twine loop
- Optional: a mini felt leaf for the base
How to Make It
- Cut the cap twice in red and the stem twice in cream.
- Stitch white spot circles onto the front cap.
- Stitch the stem pieces together, then join cap to stem, catching all layers.
- Stuff the cap plump and the stem lightly; close and add the twine loop. Mushroom diy felt christmas ornaments turn any tree woodland in minutes.
Toadstools greet guests best at the door — stage them with these hallway table decor looks.
Personalized Name Tag Ornaments
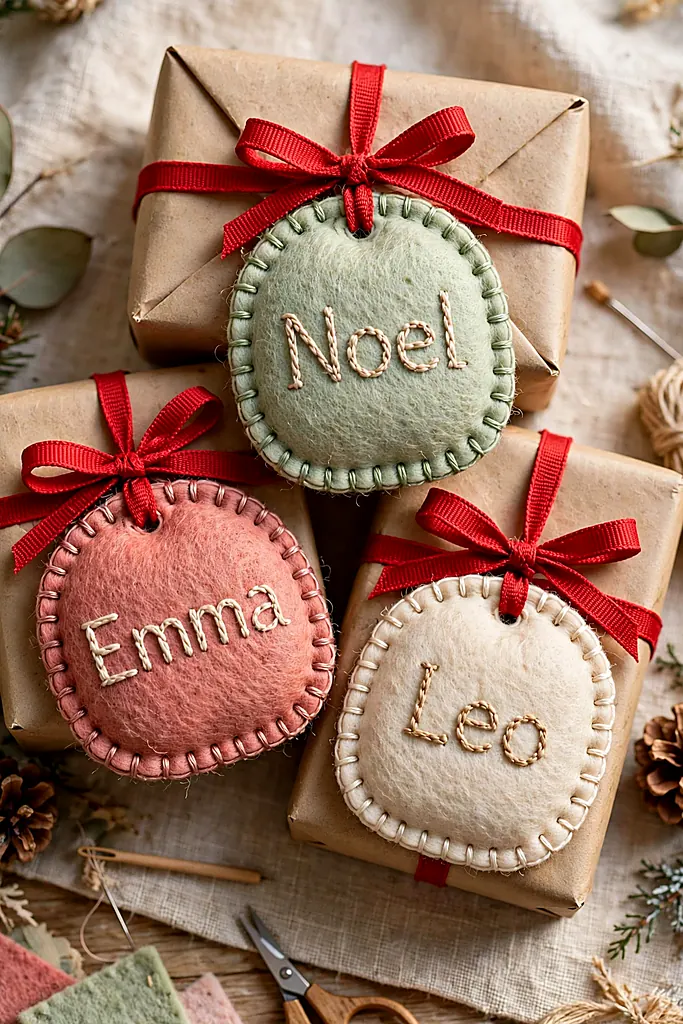
Close with the hardest-working ornament of all: a felt tag, name chain-stitched or appliquéd on the front, tied first onto a present and then, forever after, onto the tree. Every other gift tag in the world gets thrown away in the unwrapping. This one gets kept, hung, and asked about — the most efficient making on this entire list.
Cut tags generously, back them with a contrast color so the edge frames the name, and write the name in pencil before you stitch. Name-tag diy felt christmas ornaments end the list the way they end every gift: personally.
What You Need
- Felt in two contrast colors
- Embroidery floss for the names
- A tag template
- A pencil for marking names
- Ribbon for tying
- A hole punch suitable for felt, or careful scissors
Cut the tag in the main color and a slightly smaller tag in the contrast color; stitch the smaller onto the front as a framed panel.
Pencil each name onto the panel, then chain-stitch or backstitch over it in the boldest floss you have. Punch the hole, thread the ribbon, and tie it onto the gift — with instructions, delivered verbally and with confidence, that the tag comes back to the tree, not the bin. Name-tag diy felt christmas ornaments are the tags nobody throws away.
At a Glance
Tags travel well to a swap — bring yours to a cookie exchange.
Frequently Asked Questions
Are diy felt christmas ornaments good for beginners?
They are the best beginner ornaments there are. Felt does not fray, so edges need no hemming; the whole craft is cutting, simple stitching and stuffing. Start with the tree, heart or star from this list — all straight cuts and one stitch — and by the third ornament your blanket stitch will look like you have done it for years.
What felt should I buy — craft felt or wool felt?
Wool and wool-blend felt is thicker, cuts cleaner, and lasts decades; cheap acrylic craft felt works for children’s projects but pills and thins with age. For ornaments you intend to keep — and diy felt christmas ornaments are almost always keepers — buy the wool blend. One mixed pack of sheets covers most of this list.
What stitches do I actually need to know?
Two: blanket stitch, which joins and decorates every edge here, and running stitch for details. French knots make eyes, berries and baubles. That is the entire vocabulary of this article — twenty-three designs, three stitches. A ten-minute video teaches each one; the ornaments teach the rest. Once you know them, every one of these diy felt christmas ornaments is open to you.
How do I make the ornaments look neat rather than homemade-wonky?
Use a template for every cut, cut with sharp scissors in long strokes, and stuff firmly with small pieces of filling pushed in with a chopstick. Neatness in felt work is mostly template discipline. That said, a little wonk is the charm of diy felt christmas ornaments — machine-perfect is what the shops are for.
Can children make these?
Yes — felt is the classic first sewing material. Give children pre-cut shapes, a large blunt needle, and the designs with the fewest small parts (snowman, tree, heart). Adults should do the fine cutting and any bead work. A child’s first ornament, dated on the back, becomes a family artifact immediately.
How do I store felt ornaments between Christmases?
Wrap them in tissue in a rigid box, away from damp. Felt’s one enemy is the clothes moth, so add a cedar block or lavender sachet to the box. Stored dry and dark, diy felt christmas ornaments keep their color and shape for decades — many families hang felt ornaments older than the tree’s owner.
Final Thoughts: A Softer Kind of Christmas
Twenty-three designs, a rainbow of felt sheets, and a tree that now holds things your own hands made — soft, unbreakable, and impossible to buy. That is the whole argument for felt: the tree stops looking decorated and starts looking loved, one blanket stitch at a time.
Start with the gingerbread man if it is your first year, and add a design or two each November. In a decade, your box of diy felt christmas ornaments will hold the family’s whole history in miniature — and every December, hanging them, you will reach the same conclusion: the best diy felt christmas ornaments are never the perfect ones. They are the ones with a story and a slightly crooked smile.
More from The Glossy Guide
 DIY & Craft
24 Stunning Salt Dough Christmas Ornaments That Look Store-Bought
Every December, the best ornaments on the tree are the ones nobody bought. Salt dough — flour, salt and water…
 DIY & Craft
22 Stunning DIY Shadow Box Ideas That Turn Keepsakes Into Beautiful Wall Art
Every home has a drawer of things too precious to throw away and too awkward to display: the baby shoes,…
 DIY & Craft
13 DIY Sunburst Mirror Ideas That Make a Wall Look Expensive
A sunburst mirror is the hardest-working decoration a wall can wear: it bounces light, fakes a window, and turns a…