Top 19 Stunning Hand Embroidery Art Ideas That Turn Plain Fabric Into Pure Magic
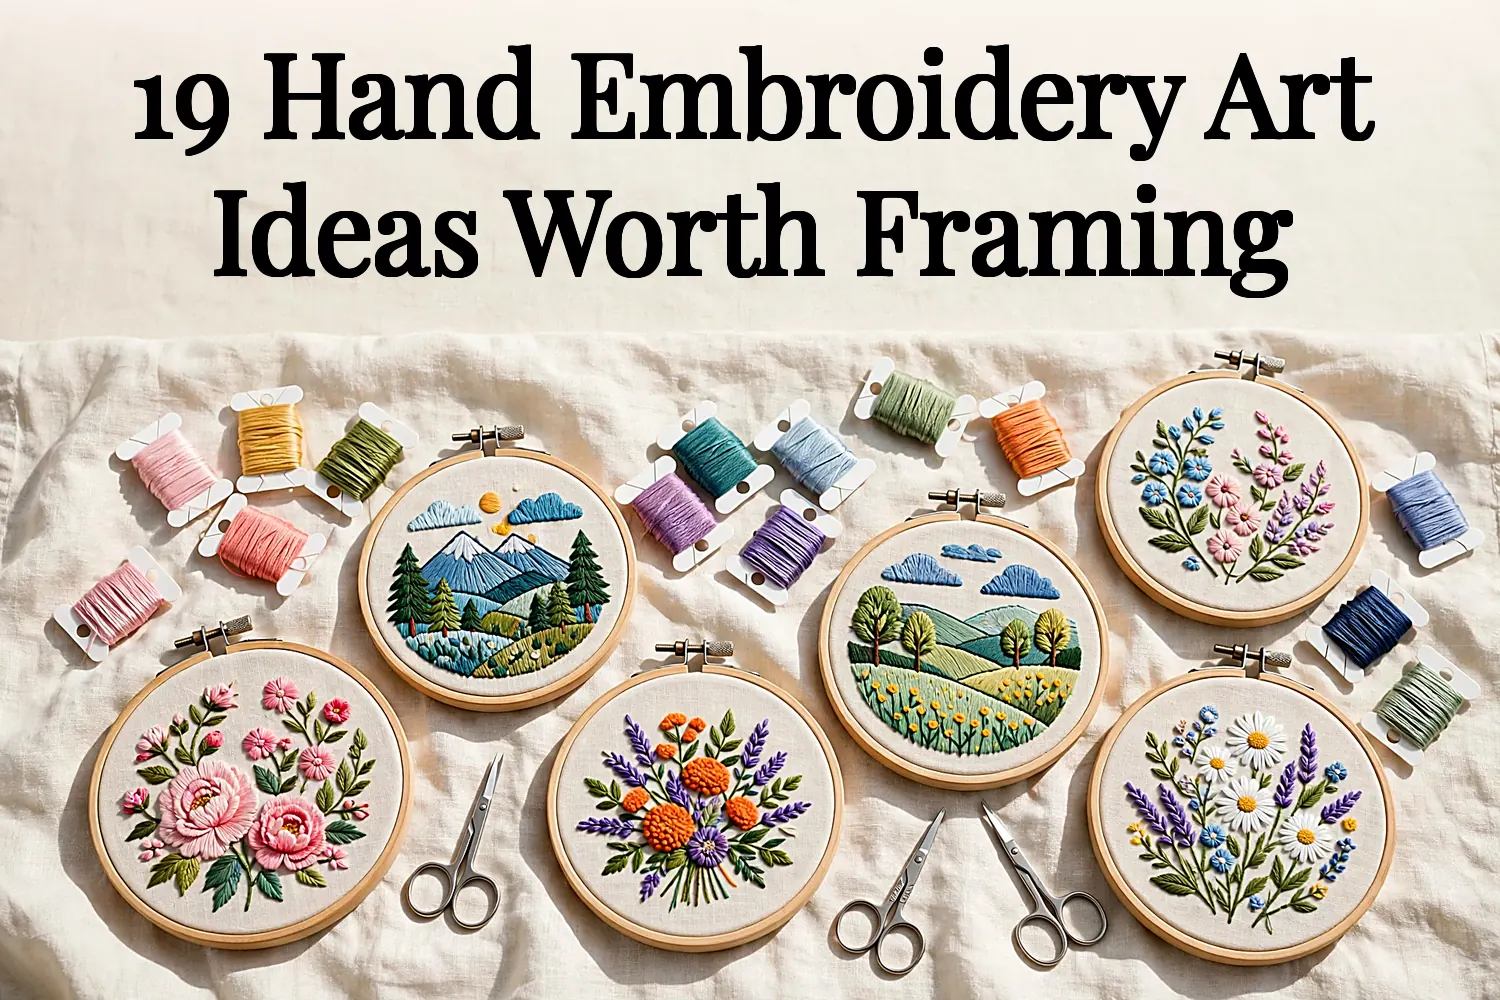
The pin promised hand embroidery art that looks like it came from a boutique, and this list keeps that promise. A hoop, a needle, and a few skeins of floss are all it takes to turn plain fabric into something worth framing.
Inside you will find beginner-friendly florals, moody landscapes, wearable pieces for jackets and totes, and keepsakes made for gifting. Every idea lists its materials and stitches, plus the steps to make it.
Do not miss number ten, where a row of moon phases glows against deep navy linen, or number nineteen, the grandest garden scene on the list, stitched petal by petal. Thread your needle and pick a favorite.
Table of Contents
- 1. Wildflower Meadow Hoop
- 2. Embroidered Denim Jacket
- 3. Mountain Landscape Hoop
- 4. Botanical Herb Sampler
- 5. Pet Portrait Hoop
- 6. Linen Napkin Monograms
- 7. Sunset Seascape Hoop
- 8. Stitched Tote Bag
- 9. Rose Garden Pillow
- 10. Moon Phase Wall Hanging
- 11. Embroidered Baseball Cap
- 12. Forest Mushroom Hoop
- 13. Family Initial Wreath Hoop
- 14. Embroidered Table Runner
- 15. Butterfly Specimen Hoop
- 16. Floral Collar Shirt
- 17. Desert Cactus Scene Hoop
- 18. Heirloom Wedding Handkerchief
- 19. Full Garden Tapestry Hoop
- Frequently Asked Questions
- Pick Up Your Needle
1. Wildflower Meadow Hoop
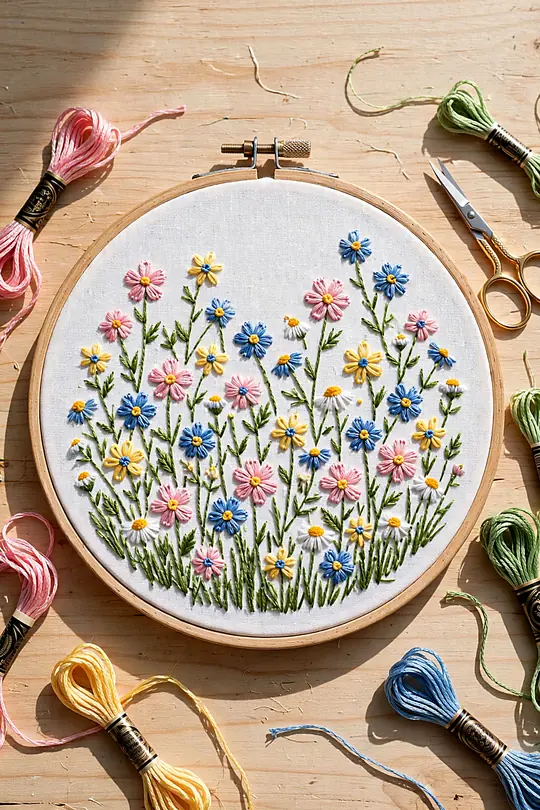
A meadow of tiny wildflowers is a welcoming first project for a new stitcher. Lazy daisy petals, French knot centers, and a few stem stitch grasses fill a 6-inch hoop in a single relaxed evening, and every flower forgives a wobbly stitch. Among all the hand embroidery art here, this is the one to stitch first.
Your Kit
- 6-inch wooden hoop
- White cotton fabric, 10-inch square
- Embroidery floss in 5 colors
- Size 7 embroidery needle
- Water-soluble pen
- Small scissors
- Trace a loose scatter of flower shapes onto the fabric with the pen.
- Stitch each petal with a lazy daisy stitch, working from the center outward.
- Add a French knot to the middle of every flower.
- Fill the gaps with stem stitch grasses in two greens.
- Trim the fabric, gather the back, and hang the hoop as finished wall art.
Stitch tip: Keep your floss to two strands for fine petals and three for bold centers. Shorter lengths, about 18 inches, tangle far less than long ones while you work.
When the hoop is done, hang it beside these DIY wall art projects for a gallery wall that mixes stitches with paint and paper.
2. Embroidered Denim Jacket
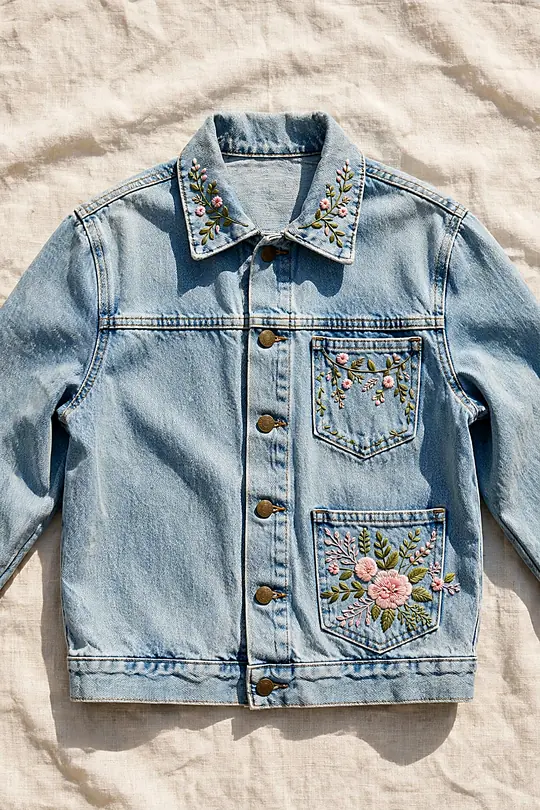
A plain denim jacket turns into a one-of-a-kind piece with a pocket of stitched blooms. Small floral sprigs along the collar and cuffs read playful, while a larger spray across the back pocket makes a real statement. Denim holds stitches well, so the design survives years of wear.
Stabilizer is the secret here. Iron a fusible stabilizer behind the denim before you start, and the fabric stays flat while you stitch. Without it, heavy thread pulls the denim into puckers that no amount of pressing can smooth out.
Your Kit
- Denim jacket
- Fusible stabilizer
- Embroidery floss in 4 colors
- Size 5 needle
- Chalk pencil
- Embroidery hoop, for flat panels
- Iron stabilizer onto the inside of the panel you plan to stitch.
- Sketch the floral spray with a chalk pencil.
- Stitch the stems first, then the petals, then the French knot centers.
- Work in small sections so the jacket stays easy to hold.
- Press the finished panel from the back with a warm iron before wearing.
Pair the finished jacket with these jeans for women over 50 for a denim-on-denim look that feels intentional.
3. Mountain Landscape Hoop
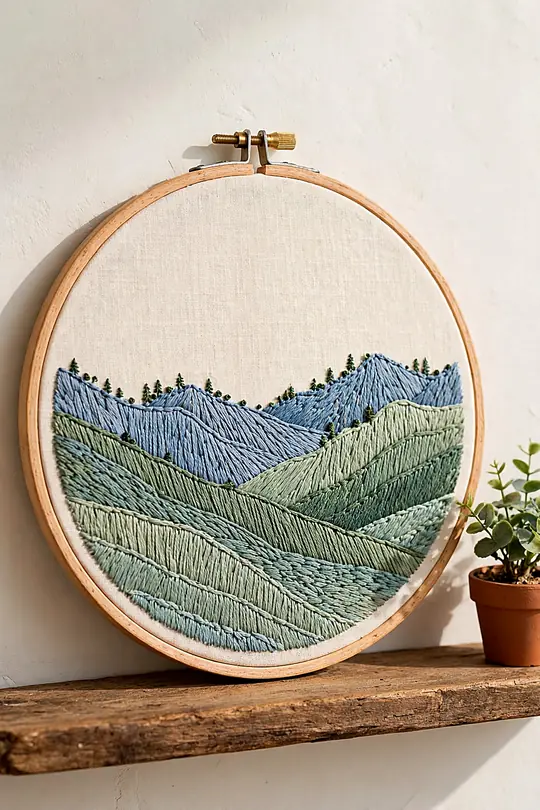
Layered ridges in dusty blue and sage turn a simple hoop into a window on the mountains. Long and short stitch fills the slopes with soft color shifts, while a few French knots become pine trees on the far ridge. The scene reads calm from across the room and rewards a closer look.
- Sketch three overlapping ridge lines across the fabric.
- Fill the back ridge with the palest blue, using long and short stitch.
- Stitch the middle ridge a shade deeper, then the front ridge darkest.
- Add pine trees as small French knots along the ridges.
- Blend where two ridges meet by carrying one thread color into the next.
The trick is keeping the sky empty. A plain cream sky lets the ridges carry the whole scene, and a tiny stitched sun or a single bird gives the eye a resting point. Too much detail up top crowds the mountains.
At a Glance
A landscape hoop suits a collected room, so pair it with these vintage home decor ideas for a cabin-like corner.
4. Botanical Herb Sampler
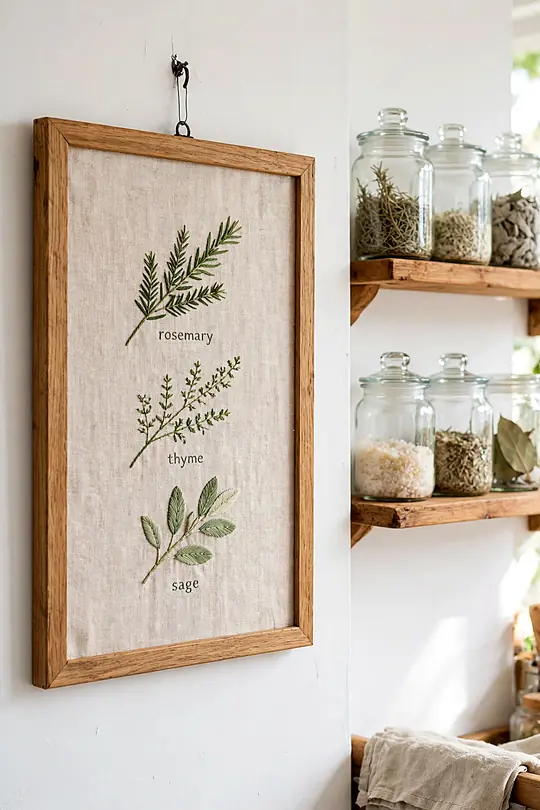
Rosemary, thyme, and sage stitched in neat rows make a sampler that belongs in the kitchen. Each herb gets its own small frame of stem stitch leaves, with the name lettered beneath in backstitch. The finished piece smells of nothing but looks like a page from an old garden book.
Your Kit
- Linen fabric, 12 by 14 inches
- Green floss in 3 shades
- Brown floss for stems
- Size 7 needle
- 8-inch hoop
- Printed herb templates
Lettering is the part that worries new stitchers, but backstitch letters stay neat if you keep them tall and simple. Sketch each letter at least a quarter inch high, and stitch slowly around curves. The herb names are the charm of the piece, so give them room.
Hang it near the stove, then cook something herby from these winter soup recipes to match the mood.
5. Pet Portrait Hoop
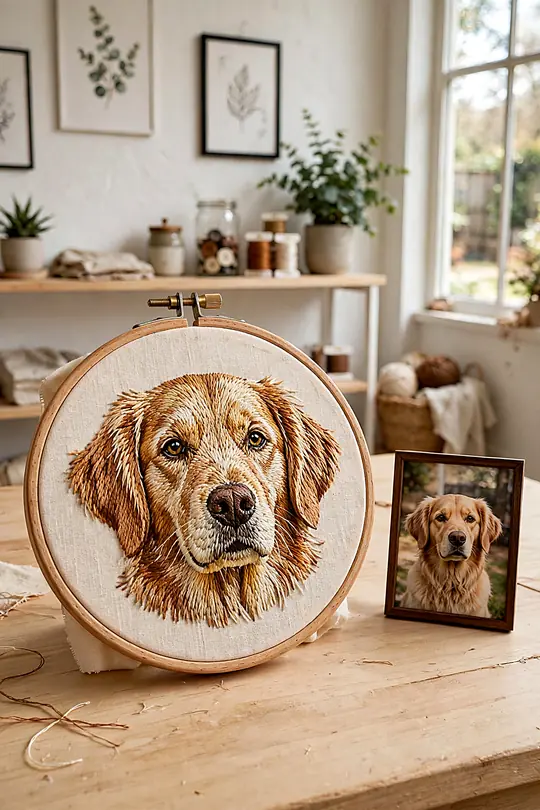
A stitched portrait of a beloved dog or cat makes a gift nobody forgets. The trick is picking a photo with clear light and shadow, then tracing just the outline and the main color blocks onto the fabric. Long and short stitch builds the fur in soft layers, and a French knot nose finishes the face.
Eyes carry the whole portrait, so stitch them last and take your time. A single dark bead of satin stitch with one tiny white highlight stitch reads as a living eye. If the eyes look right, the whole face falls into place.
Work from the back of the head toward the nose, following the direction the fur grows. Short stitches in three close shades of the same color give the coat depth without looking striped. Keep a photo beside the hoop and check it often.
Your Kit
- Clear pet photo, printed
- Linen or cotton fabric
- Floss matched to the coat colors
- Size 7 needle
- 6-inch hoop
- Water-soluble pen
Frame the finished portrait in one of these DIY shadow box ideas for a keepsake display that protects the stitches.
6. Linen Napkin Monograms
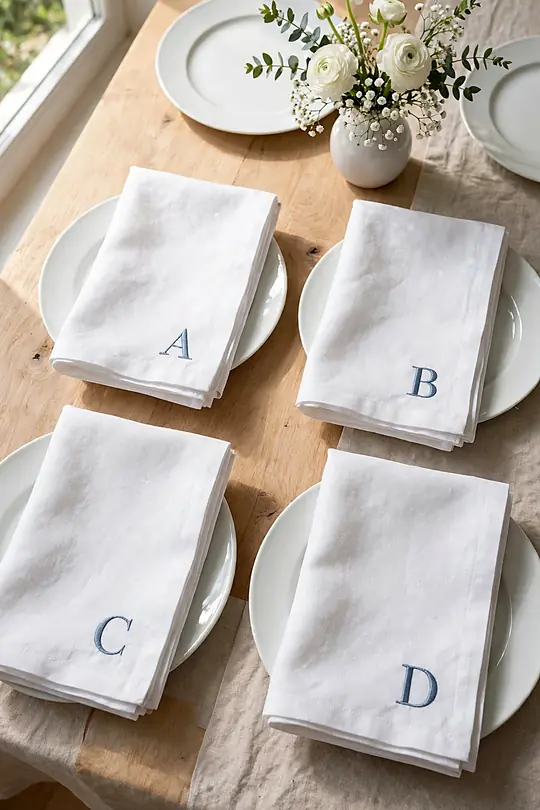
A single stitched initial turns a plain linen napkin into a table setting with manners. One elegant letter in the corner, worked in satin stitch or a fine chain stitch, is all it takes. Make a set of four in an evening, and the table looks dressed even on a Tuesday.
- Fold each napkin and mark the corner spot with a pin.
- Trace the initial with a water-soluble pen.
- Stitch the letter in satin stitch, keeping the edges even.
- Rinse away the pen marks and press the napkin flat.
Monogram tip: Choose a thread color one shade deeper than the napkin for a quiet look, or a bold contrast color for a modern table. Both read elegant when the letter stays small.
Linen frays, so finish the edges before you stitch. A narrow hem or a quick line of blanket stitch around the napkin keeps the weave from unraveling while you work. The extra ten minutes save the whole set from fraying apart.
Set them out for your next spread with these bring a board night ideas and let the table do the talking.
7. Sunset Seascape Hoop
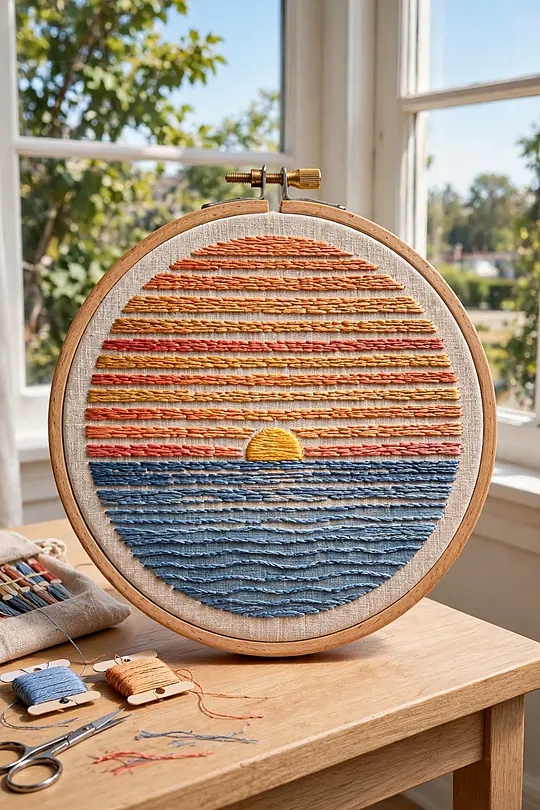
Bands of coral, gold, and dusty blue stitched across a hoop catch the last light over the water. Straight stitches laid side by side make the sea shimmer, and a low sun in satin stitch anchors the whole scene. The colors do the work here, so pick floss you love.
Keep the horizon line low so the sky gets the bigger share of the hoop. A wide sky in soft ombre bands feels like evening, while a thin strip of sea below it keeps the scene grounded. A few gulls in tiny backstitch finish the picture without crowding it.
At a Glance
The calm colors suit a restful room, so pair it with these winter bedroom decor ideas for a soft evening corner.
8. Stitched Tote Bag
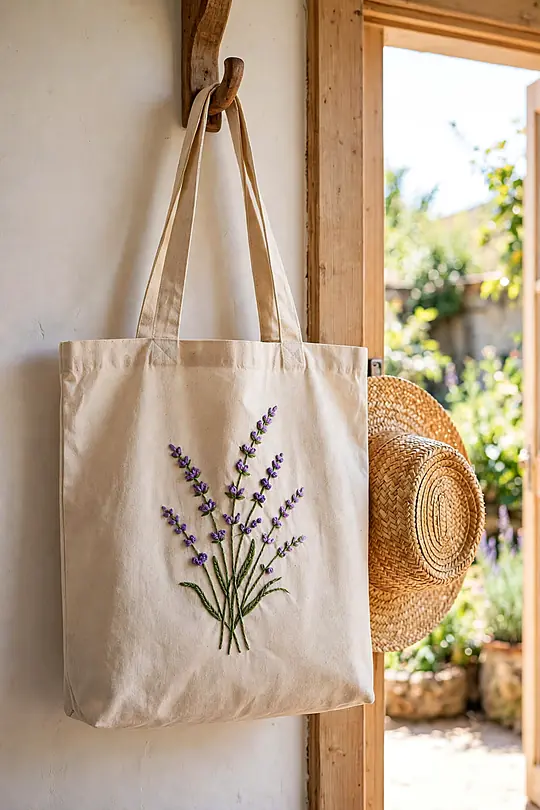
A canvas tote with a stitched sprig of lavender goes everywhere a plain bag does, only prettier. The flat front panel is an easy surface to hoop, and the design sits where everyone sees it. One afternoon of stitching turns a five-dollar tote into a market-day favorite.
Your Kit
- Plain canvas tote
- Lavender floss in 2 purples plus green
- Size 5 needle
- Fusible stabilizer
- 5-inch hoop
- Chalk pencil
Stitch before you load the bag with groceries. A hoop fits the empty front panel easily, and the stabilizer keeps the canvas from puckering under the thread. Once the stitching is done, the bag handles daily use without a fuss.
- Iron stabilizer onto the inside of the front panel.
- Draw the lavender sprig with a chalk pencil.
- Stitch the stems in stem stitch, the buds in French knots.
- Press from the back and the tote is ready to carry.
Carry it on a cold-weather outing with these cozy winter outfits for women over 50 for a put-together look.
9. Rose Garden Pillow
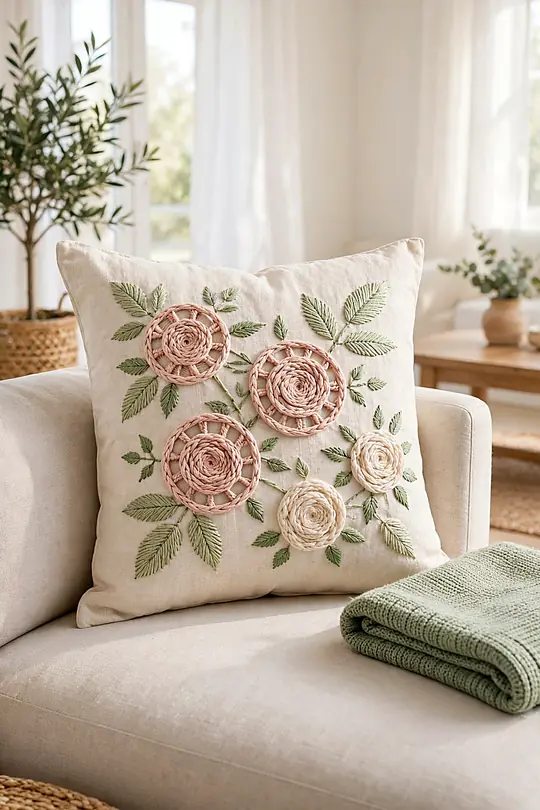
A scatter of stitched roses across a linen pillow cover brings the garden indoors for the whole year. Woven wheel roses in blush and cream sit beside lazy daisy leaves, and the whole cover takes shape over a few quiet evenings. It is the kind of project that makes a sofa feel finished.
Pillow tip: Stitch the cover before you sew it into a pillow. A flat panel hoops cleanly, and you can hide every knot on the inside where nobody sees it.
Woven wheel roses look fancy but stitch up fast. Five straight spokes, then a thread woven over and under until the rose fills out, and the flower is done. Make the roses different sizes so the garden feels natural instead of stamped.
Your Kit
- Linen pillow cover, 18-inch
- Blush, cream, and green floss
- Size 7 needle
- 7-inch hoop
- Water-soluble pen
Style it on the sofa with these cozy winter living room decor ideas for a room that invites long evenings.
10. Moon Phase Wall Hanging
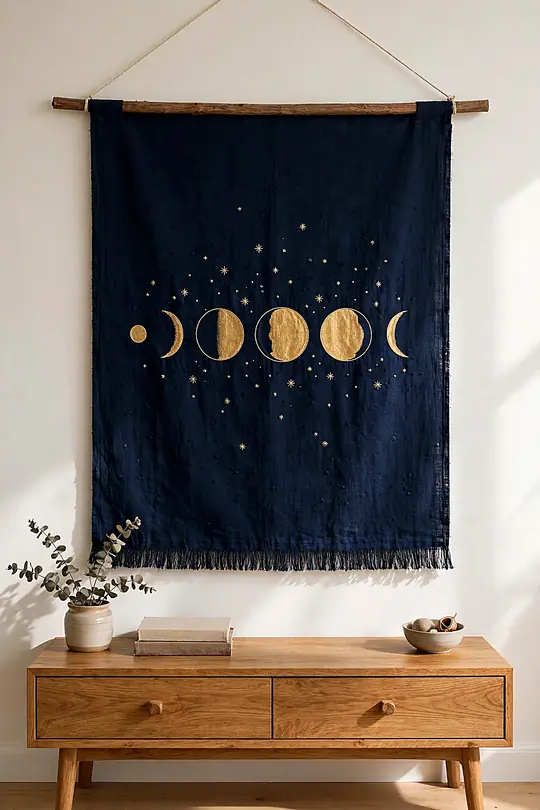
A row of moon phases stitched in gold thread on deep navy linen looks like the night sky hung on the wall. Each phase is a small satin stitch circle, clipped and shaped a little differently, with tiny French knot stars scattered between them. The piece takes one weekend and draws every eye in the room.
The navy background is what sells it. Dark fabric makes the gold thread glow, and the contrast is strong enough to read from the hallway. A wooden dowel across the top and two lengths of cord turn the panel into a hanging in minutes.
- Cut the navy linen to 12 by 16 inches and hem the edges.
- Mark a row of moon circles with a chalk pencil.
- Fill each moon with satin stitch, shaping the phases as you go.
- Scatter French knot stars around the moons.
- Slide a dowel through the top hem and tie on the cord.
Keep the moons small and even. A coin makes a handy template for the circles, and a ruler keeps the row straight. The neat row is what makes the hanging feel designed rather than random, and it is the detail guests notice first.
Hang it near a mirror for extra glow with these DIY sunburst mirror ideas on the same wall.
11. Embroidered Baseball Cap
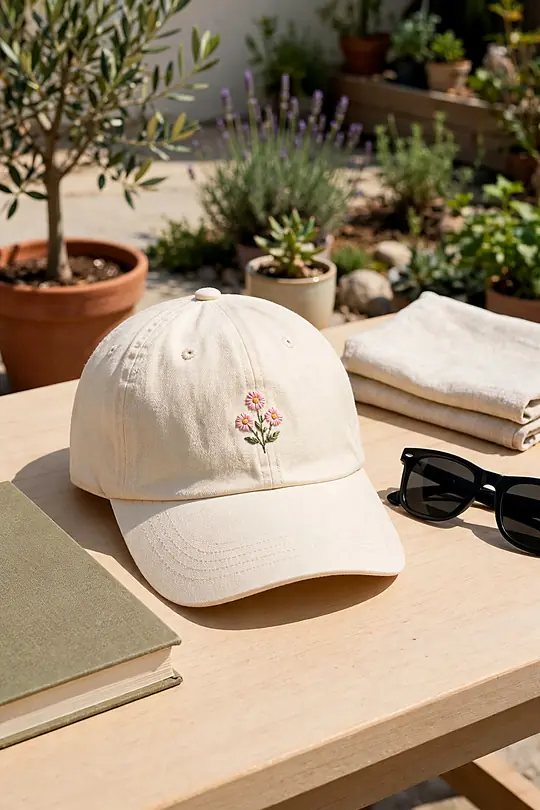
A tiny stitched sprig on a plain baseball cap turns a basic accessory into a signature. The curved front panel suits small designs, a sprig, a star, or a single initial, worked in three strands so the stitches sit proud of the fabric. It is a quick project with a big payoff.
Your Kit
- Plain cotton cap
- Tear-away stabilizer
- Floss in 2 colors
- Size 5 sharp needle
- Small hoop, or none
- Chalk pencil
At a Glance
Wear it with a wrapped layer from these scarf outfits for an easy weekend look.
12. Forest Mushroom Hoop

A cluster of red-capped mushrooms with white dot stitching brings a woodland walk into a 5-inch hoop. The caps fill fast with satin stitch, the stems need only a few straight stitches, and a ring of French knot moss grounds the scene. Children love this one, and so do adults who like a little whimsy.
The white dots are what make the mushrooms read as mushrooms. Keep them small and scatter them unevenly, a few big dots and several tiny ones, so the caps look natural. A single stitch in white floss is all each dot needs.
A mossy green ground line ties the cluster together. Work it as a loose row of seed stitches in two greens, then tuck the mushroom stems into it. The whole piece stitches up in one sitting, which makes it a sweet first gift project.
Mushroom tip: Stitch the stems first, then the caps over the top of them. The overlap hides the stem ends and makes each mushroom look like it grew from the moss.
It makes a charming handmade gift, like these soap making ideas that pair craft with something useful.
13. Family Initial Wreath Hoop
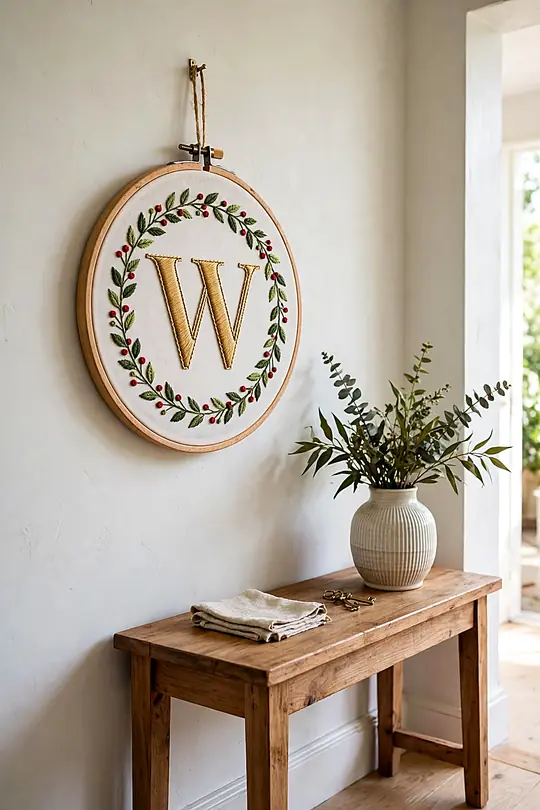
A single family initial ringed by a wreath of leaves and berries makes a hoop that belongs by the front door. The letter sits in the center in bold satin stitch, while the wreath grows around it in stem stitch and lazy daisy leaves. It is a warm welcome in thread.
- Draw a circle on the fabric with a compass or a plate.
- Stitch the initial in the center with satin stitch.
- Work the wreath ring in stem stitch, adding leaves as you go.
- Fill gaps with French knot berries in two colors.
- Leave a small gap at the top of the wreath for a tied bow.
The wreath does not need to be symmetrical. A fuller cluster of leaves on one side and a sparser stretch on the other looks like a real garland, not a stamp. Let the berries cluster where the leaves grow dense.
Your Kit
- Linen fabric, 10-inch square
- Green floss in 2 shades
- Berry-red floss
- Gold floss for the letter
- Size 7 needle
- 7-inch hoop
Hang it in the entry beside these hallway table decor ideas for a welcome that starts at the door.
14. Embroidered Table Runner
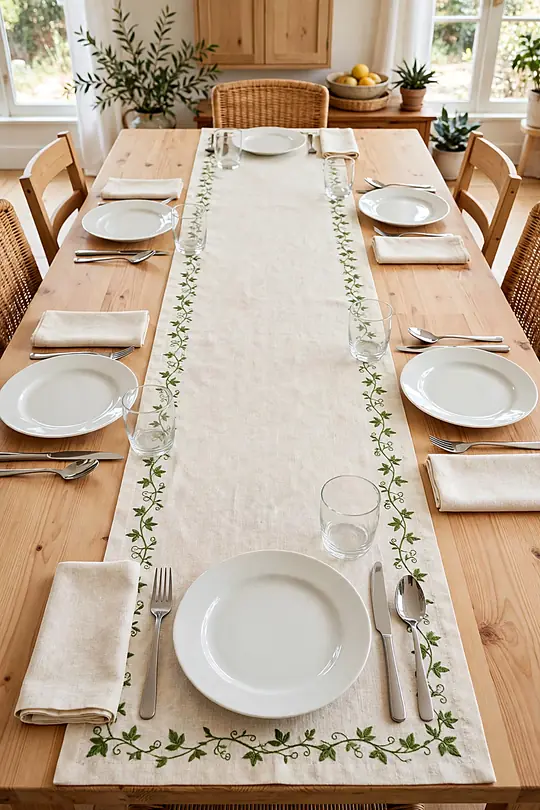
A linen runner with a stitched border of vines down each long edge dresses the table for every meal, not just holidays. The repeat pattern is simple, one vine motif stitched again and again, so the work settles into a relaxing rhythm. It is a longer project, but the table shows it off daily.
At a Glance
Mark the border lines before you start stitching. Two chalk lines down the runner keep the vines straight and evenly spaced, and the repeat stays tidy from one end to the other. Rushing this step shows in the finished runner.
- Hem the runner edges and press the linen flat.
- Draw the border lines with a chalk pencil and ruler.
- Stitch the vine in stem stitch, adding leaves as you go.
- Work from the center outward so the pattern stays balanced.
Set the table for a simple supper and serve this tuna pasta with cheese on the finished runner.
15. Butterfly Specimen Hoop
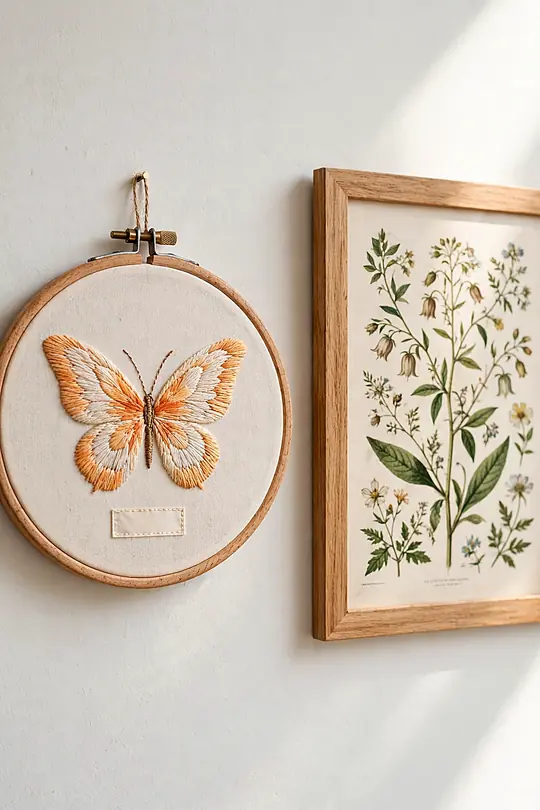
A single butterfly stitched like a vintage naturalist plate brings quiet color to a wall. The wings fill with long and short stitch in two close shades, the body is a neat line of backstitch, and a small stitched label beneath it completes the specimen look. It feels collected, not crafted.
Keep the wings symmetrical by stitching one side, then mirroring it stitch for stitch. Count the rows as you go so both wings match in size and color. The symmetry is what makes the butterfly look like a real specimen.
Your Kit
- Cream linen, 10-inch square
- Floss in 2 wing colors plus black
- Size 7 needle
- 6-inch hoop
- Printed butterfly outline
Butterfly tip: Stitch the wing outline first in backstitch, then fill inside the line. The crisp edge keeps the colors from bleeding past the wing shape and gives the butterfly its specimen look.
The soft wing colors echo a gentle makeup palette, like these dusty rose blush looks for a fresh spring face.
16. Floral Collar Shirt
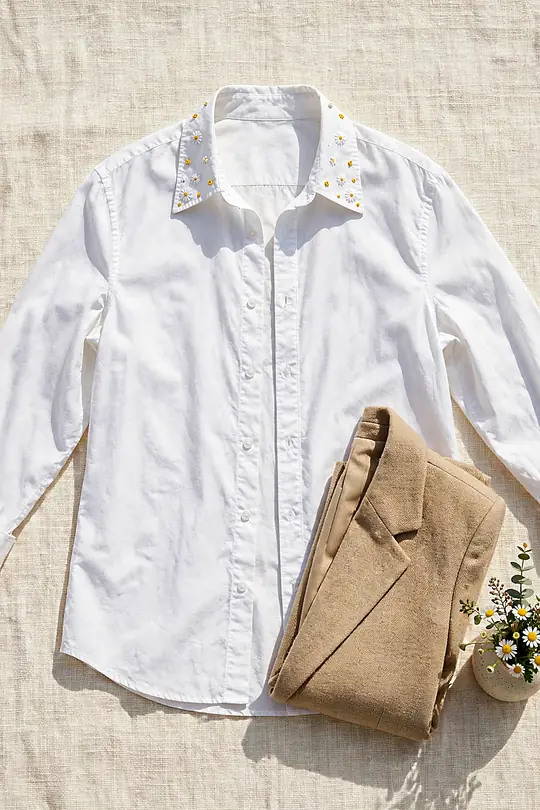
Small stitched flowers scattered across a shirt collar turn a plain button-down into a piece people ask about. Tiny daisies and French knot buds along the collar points read delicate, and the design peeks out under a sweater or a blazer. It is a subtle kind of statement.
Collar tip: Stitch through the collar only, not through the shirt body beneath it. Slip a small piece of card inside the collar while you work to keep the layers apart.
- Slip card inside the collar to separate the layers.
- Mark the flower spots with a water-soluble pen.
- Stitch each daisy with five lazy daisy petals and a French knot center.
- Rinse the pen marks and press the collar flat.
Layer it under a rich texture from these velvet outfits for women over 50 for a polished evening look.
17. Desert Cactus Scene Hoop
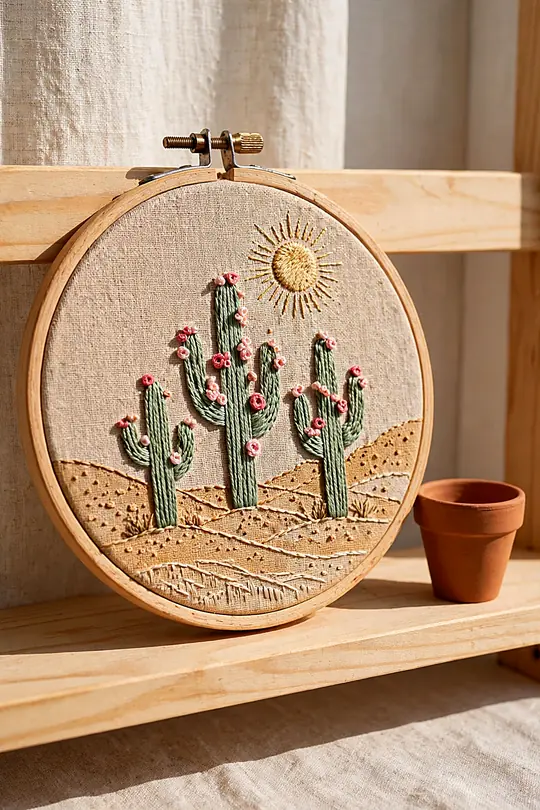
A row of saguaro cacti stitched in sage green against a warm sand background brings the desert home. Straight stitches build the cactus ribs, tiny French knots become the blooms on top, and a low sun in gold thread warms the whole scene. The palette suits a modern room.
The sand background does half the work. A warm tan linen makes the green cacti stand out without any extra stitching, and the empty sky keeps the scene calm. If the linen is too pale, the cacti lose their contrast and the scene goes flat.
- Sketch three cacti of different heights on the fabric.
- Stitch the ribs in straight stitch, following the curve of each cactus.
- Add French knot blooms on the arms and tops.
- Fill the sun with satin stitch in two golds.
At a Glance
Your Kit
- Sand linen, 10-inch square
- Sage and gold floss
- Size 7 needle
- 7-inch hoop
- Water-soluble pen
The warm desert tones pair nicely with these mocha balayage looks for a sun-warmed look to match.
18. Heirloom Wedding Handkerchief
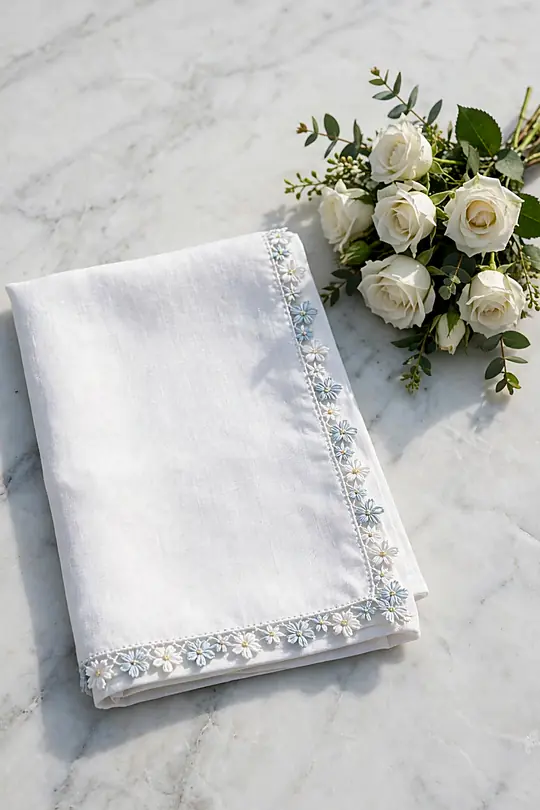
A fine white handkerchief edged with tiny stitched flowers and a wedding date becomes a keepsake a bride carries down the aisle. The work is small and slow, a single strand of floss and tiny French knots, but the finished piece outlives the wedding day by decades.
Your Kit
- Fine white linen handkerchief
- White and pale blue floss
- Size 10 sharp needle
- Small hoop
- Water-soluble pen
- Magnifier, optional
Work one strand only. A single strand of floss keeps the stitches fine enough for the thin fabric, and the date letters stay legible instead of turning into blobs. Slow, even stitches beat fast, uneven ones on a piece this small.
Handkerchief tip: Wash your hands before every stitching session. Skin oils mark fine white linen, and a faint smudge on a keepsake is a shame after hours of careful work.
Tuck it into the bouquet, then finish the day with a signature scent from these scent stacking ideas.
19. Full Garden Tapestry Hoop
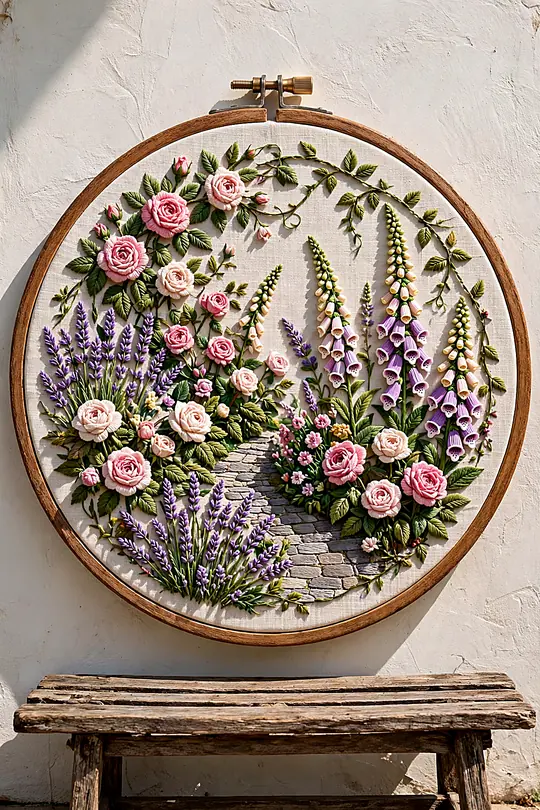
This is the grandest piece on the list, a full garden stitched into a 10-inch hoop, petal by petal. Roses, lavender, foxgloves, and trailing vines fill every inch of the fabric, with a tiny stone path winding through the middle. It takes weeks, and it is worth every evening.
Plan the garden before the first stitch. Sketch the path first, then place the tallest flowers at the back and the low ground cover at the front, just like a real garden bed. A planned layout keeps the hoop from turning into a jumble of flowers.
Work the background first and the flowers last. Vines and leaves fill the space behind the blooms, and the roses sit on top of the greenery where the eye lands first. Among all the hand embroidery art in this list, this is the piece that stops guests mid-sentence.
Your Kit
- Linen fabric, 14-inch square
- Floss in 10 colors
- Size 7 needle
- 10-inch hoop
- Water-soluble pen
- Printed garden sketch
Tapestry tip: Stitch in short sessions and store the hoop flat between them. A big piece creases if it is folded, and a crease across a finished garden is hard to press out.
After the last stitch, celebrate with a batch of these cookie recipes and hang the garden where everyone sees it.
Frequently Asked Questions
How long does a first embroidery hoop take to finish?
A simple floral hoop takes one relaxed evening, about two to three hours of stitching. Larger pieces with more detail can take a weekend or several evenings. Start small, and the quick finish keeps the hobby fun instead of feeling like homework.
Which fabric should a beginner start with?
Plain cotton or linen with a tight, even weave is a friendly surface to learn on. The needle passes through cleanly, and the weave holds the stitches in place. Avoid stretchy or very loose fabrics until your stitches feel steady, since they shift under the needle.
How do I keep the back of my embroidery neat?
Short thread lengths and small knots keep the back tidy. Carry the thread across the back only for short jumps, and start a new length instead of dragging thread across open fabric. A felt circle glued over the back of a hoop hides the rest for display.
Can I wash an embroidered piece?
Yes, with care. Hand wash in cool water with a drop of mild soap, press the water out gently, and lay the piece flat to dry. Never wring it, and press from the back with a warm iron. Test a scrap of floss first if the colors are deep or bright.
Pick Up Your Needle
Nineteen projects, one needle, and a hoop full of color: that is what this list was built for. Pick the piece that fits your evening, stitch it at your own pace, and let the next one wait until you are ready.
These hand embroidery art ideas work because they start where you are, with simple stitches and a forgiving hoop. The first flower asks for patience, and after that, the thread does the talking. Pick a project tonight and see where the needle leads.
If the hoop bug has bitten, keep crafting with these crochet patterns for beginners for your next handmade project.