Top 17 Stunning Christmas Gift Wrapping Ideas That Turn Every Present Into a Showstopper
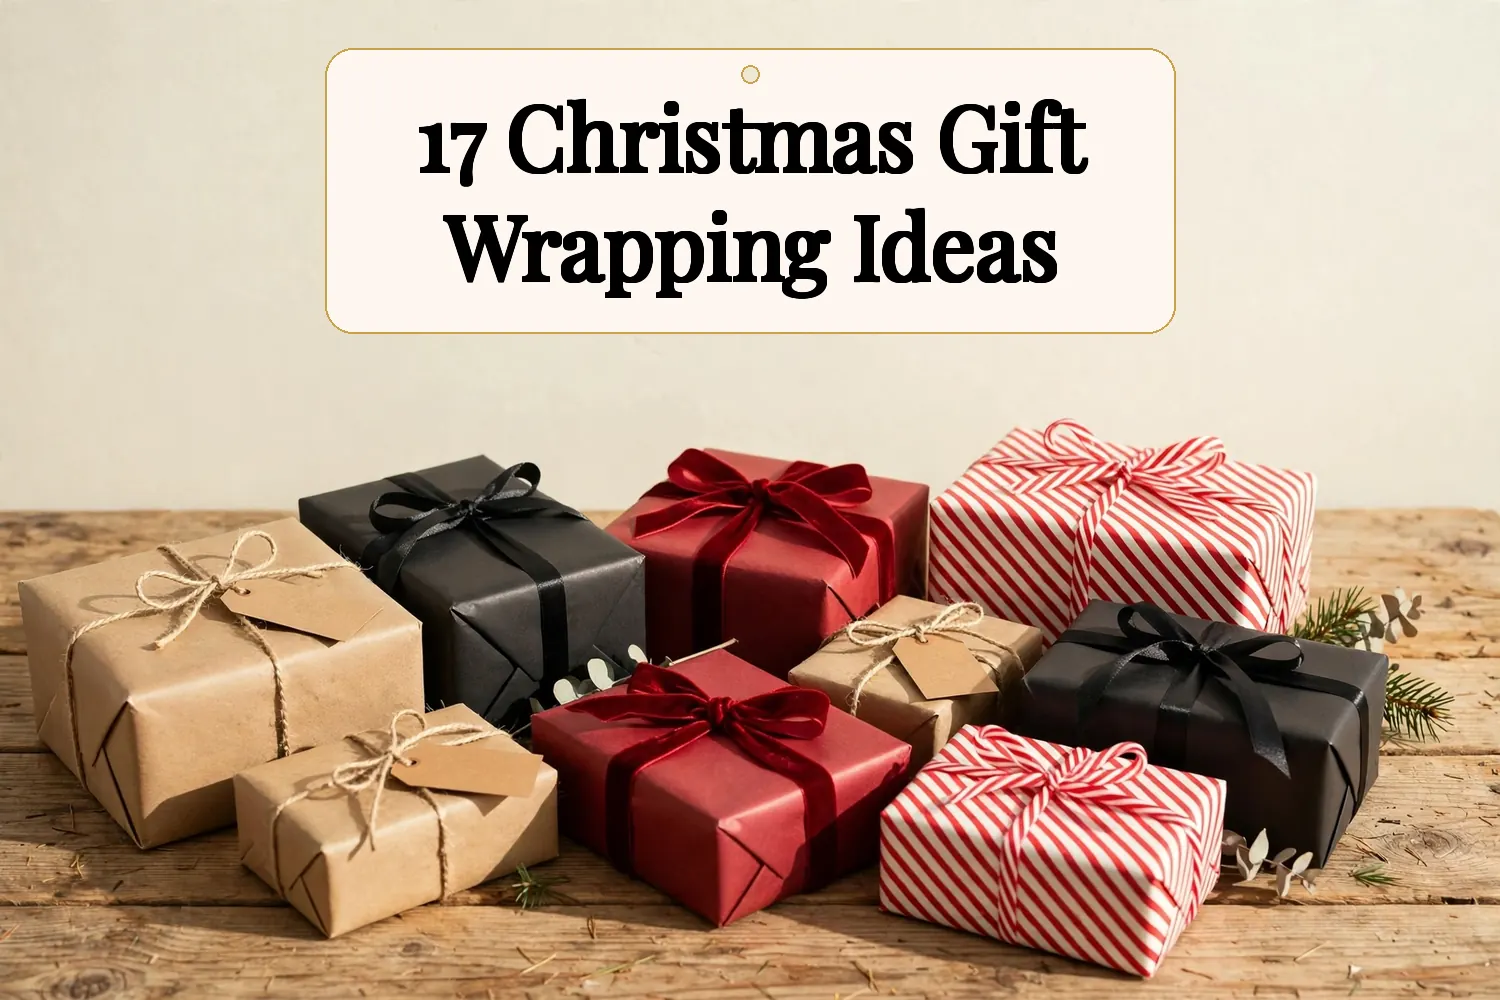
The pin promised gifts wrapped so beautifully they steal the show before anyone opens them, and this list delivers exactly that: seventeen wrapping projects, each one with a materials list and clear steps you can follow tonight.
Some wraps take ten minutes and cost almost nothing, while others turn an ordinary box into a keepsake worth photographing. These christmas gift wrapping ideas cover paper, fabric, greenery, and handmade tags, so every gift on your list gets a finish that fits the person receiving it.
Number nine hides the Tulle Cloud Wrap, a soft, airy finish that looks far harder than it is, and number seventeen closes the list with the grandest wrap of all, a velvet box sealed with wax and topped with a fresh rose.
Table of Contents
- 1. Matte Black Paper with a Velvet Ribbon
- 2. Kraft Paper with Hand-Stamped Snowflakes
- 3. Fresh Pine and Eucalyptus Sprig Topper
- 4. Candy-Cane Striped Paper with a Jumbo Bow
- 5. Furoshiki Fabric Wrap from a Vintage Scarf
- 6. Fingerprint Reindeer Wrap Kids Can Paint
- 7. Gold Foil Monogram Gift Tags
- 8. Burlap and Twine Rustic Wrap
- 9. The Tulle Cloud Wrap
- 10. Wine Bottle Wrap with a Knitted Sleeve
- 11. Dried Orange and Cinnamon Stick Topper
- 12. Chalkboard Paper with Hand-Drawn Doodles
- 13. The Perfect Double-Loop Satin Bow
- 14. Newspaper Wrap with Red Bakers Twine
- 15. Glitter-Dipped Gift Box Edges
- 16. The Drawstring Pouch for Awkward Shapes
- 17. Velvet Box with a Wax Seal and Fresh Rose
- Frequently Asked Questions
- Wrap It Up with Style
1. Matte Black Paper with a Velvet Ribbon

Matte black paper turns an ordinary box into something quietly dramatic, and a velvet ribbon is the only decoration it needs. The dark surface makes the ribbon’s color glow, and the whole package looks like it came from a high-end boutique. This is the wrap to reach for when the gift inside deserves a little ceremony.
What You Need
- 1 roll matte black wrapping paper
- 2 yards velvet ribbon, deep red
- Double-sided tape
- Sharp scissors
- Bone folder or ruler
- 1 gift tag
Black paper shows every fingerprint and crease, so work on a clean table and handle the sheet by the edges. A bone folder pressed along each fold gives crisp lines that cheap paper cannot match. If the paper tears, flip the sheet and start fresh rather than patching it. Tape shows on black, so a patch never hides.
- Cut the paper to wrap the box with 2 inches of overlap on every side.
- Fold the long edges first, then crease the ends into neat triangles.
- Tape the seams from the inside so no tape shows on the black surface.
- Wrap the velvet ribbon around the box twice and tie a simple bow on top.
Ribbon trick: Velvet ribbon frays when cut with dull scissors, so use sharp shears and seal the ends with clear craft glue. The glue dries invisible and keeps the tails tidy.
A matte black wrap belongs in a room dressed to match, so see these luxury Christmas decor ideas.
2. Kraft Paper with Hand-Stamped Snowflakes

Kraft paper is the humble hero of the wrapping table: cheap, sturdy, and endlessly forgiving. A few hand-stamped snowflakes in white ink turn the plain brown sheet into a winter scene, and no two gifts look alike. Kids love stamping, which makes this wrap a family project as much as a finishing touch.
Gather These
- 1 roll brown kraft paper
- Snowflake rubber stamps, 2 sizes
- White pigment ink pad
- Red bakers twine
- Scissors and tape
- A scrap sheet for practice
- Practice the stamp on scrap paper until the snowflakes print clean and even.
- Stamp the kraft sheet in a loose pattern, leaving space between flakes.
- Let the ink dry for ten minutes before you wrap, or it will smudge.
- Wrap the gift, then tie red bakers twine around it twice and knot it.
Pigment ink sits on top of the paper and dries opaque, which is why white shows up so well on brown. Dye ink sinks in and fades, so check the pad label before you buy. A second color, like deep red or forest green, adds depth if you stamp a few flakes in each shade.
Stamp Shopping
Pair the handmade wrap with a handmade present from these handmade Christmas gift ideas.
3. Fresh Pine and Eucalyptus Sprig Topper
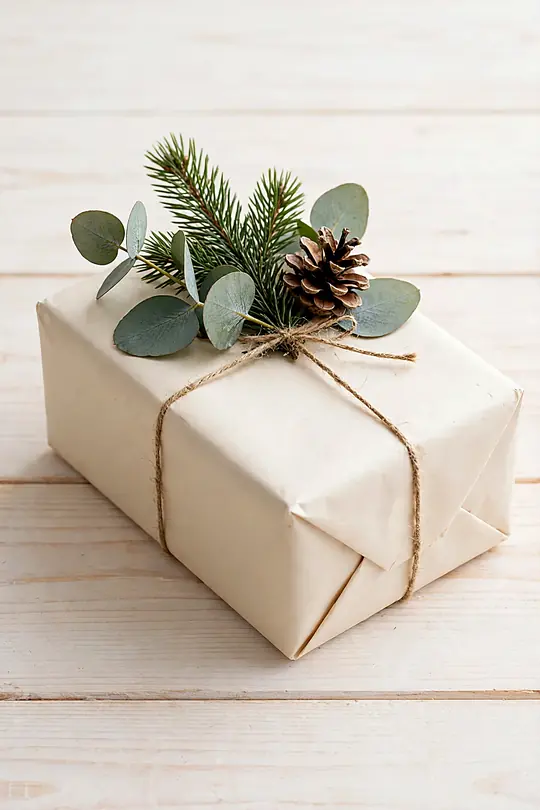
A sprig of fresh pine and a stem of eucalyptus can rescue a plain wrap in seconds. The greenery smells like a walk through a winter forest, and its soft gray-green tones sit beautifully against kraft, cream, or deep red paper. This topper costs almost nothing if you clip it from your own yard.
Cut the sprigs the morning you wrap, and keep them in a glass of water until the last minute. Pine needles drop when they dry out, so a gift wrapped days ahead will shed on the shelf. A small dot of hot glue under the stems holds the sprig in place without crushing the needles.
Materials
- Fresh pine sprigs
- Eucalyptus stems
- Plain wrapping paper
- Twine or ribbon
- Hot glue gun
- Pruning shears
- Wrap the gift in plain paper and tie twine around it in a cross.
- Trim the pine and eucalyptus stems to about 4 inches long.
- Tuck the sprigs under the twine at the center of the box.
- Add a dot of hot glue under the stems if the sprig slides.
Clip extra greenery for the door with this DIY Christmas wreath.
4. Candy-Cane Striped Paper with a Jumbo Bow

Red and white stripes say Christmas before a single ornament appears, and a jumbo bow turns the whole package into a present nobody can miss under the tree. This wrap suits gifts for kids and anyone who loves the holiday with full enthusiasm. The stripes do the decorating, so the bow is the only extra you need.
You Will Need
- 1 roll candy-cane striped paper
- Wide red ribbon, 2 inches
- Scissors and double-sided tape
- A real candy cane, for the tag
- Gift tag
- Wrap the box so the stripes run straight and line up at the seam.
- Cut four lengths of ribbon, each long enough to loop around your hand twice.
- Pinch the loops together at the center and tie them tight with a short piece of ribbon.
- Tape the bow to the top of the box and fan the loops out.
Striped paper shows a crooked seam more than any solid color, so take an extra minute to line the pattern up where the paper meets. If the stripes refuse to match, turn the seam to the bottom of the box and let the bow cover the join. A candy cane tied to the tag finishes the theme for pennies.
Bow tip: A jumbo bow needs wide ribbon to look full, so choose ribbon at least two inches across. Narrow ribbon makes small, limp loops no matter how many you stack.
A candy-cane wrap pairs well with a tin of these Christmas cookies.
5. Furoshiki Fabric Wrap from a Vintage Scarf
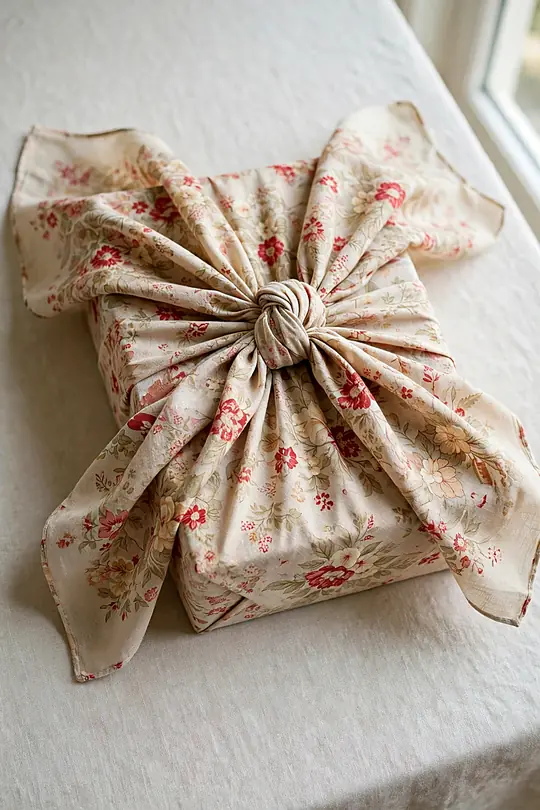
Furoshiki is the Japanese art of wrapping gifts in cloth, and a vintage scarf makes a wrap that becomes part of the present. The fabric drapes around odd shapes paper cannot handle, and the knot on top looks effortless. When the scarf is beautiful on its own, the wrapping needs nothing else at all.
Choose a scarf at least twice as wide as the gift, because the corners need enough fabric to meet and knot. Silk slides and knots come loose, so cotton or a cotton blend grips better for a first try. Thrift stores sell beautiful scarves for a few dollars, which keeps this wrap cheaper than a roll of fancy paper.
For This Wrap
- 1 vintage scarf, cotton or blend
- The gift, boxed if fragile
- A small sprig of greenery (optional)
- A gift tag tied with string
- A tape measure, for sizing the scarf
- Lay the scarf flat, diamond side up, and set the gift in the center.
- Fold the bottom corner up over the gift, then fold the side corners in.
- Pull the top corner down and tie it together with the bottom corner in a square knot.
- Tuck a sprig of greenery under the knot and tie on the tag.
Scarf Sizing
The scarf gets a second life after unwrapping, so wear it with these scarf outfits.
6. Fingerprint Reindeer Wrap Kids Can Paint

Little fingers and brown paint turn plain paper into a herd of reindeer, and the result is the kind of wrap grandparents keep long after the gift is gone. Each fingerprint becomes a reindeer face with antlers drawn on top. The charm is in the wobble: no two reindeer match, and that is exactly the point.
What to Set Out
- 1 roll plain white or kraft paper
- Brown washable paint
- Red paint, for noses
- Black fine-tip marker
- Paper plates, for paint
- Wet wipes, for little hands
Set up on a washable surface and roll out the paper before the paint comes out, because small hands move fast. Press each finger straight down and lift it straight up, or the print smears into a blob. Let the prints dry completely before drawing antlers, or the marker will drag through wet paint.
- Pour a thin layer of brown paint onto a paper plate.
- Press one fingertip into the paint, then onto the paper, to make a reindeer face.
- Add a red dot for the nose once the brown print is dry.
- Draw antlers and eyes with the black marker, then let the sheet dry flat.
Keep the kids crafting after the wrapping with these salt dough Christmas ornaments.
7. Gold Foil Monogram Gift Tags
For the Tags
- Blank kraft gift tags
- Gold foil transfer sheets
- A ballpoint pen
- Alphabet stickers or a stencil
- Hole punch and twine
- A hard, flat surface
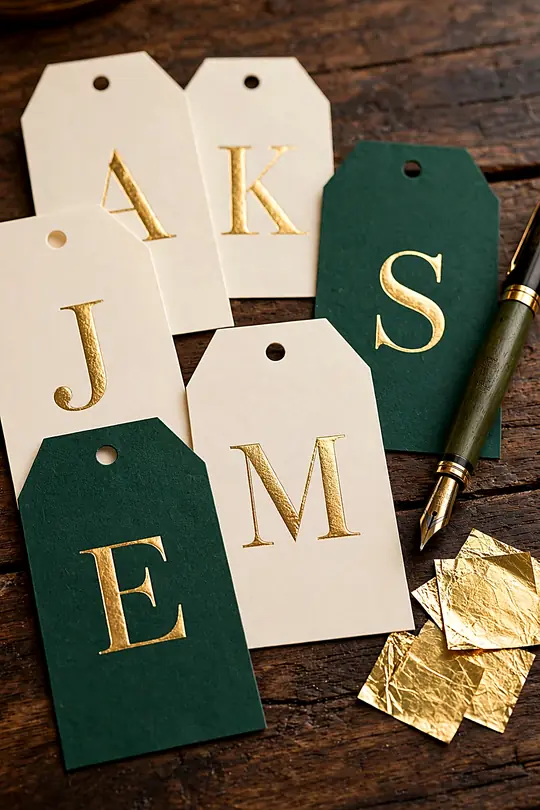
A gold monogram turns a plain tag into a tiny piece of jewelry for the package. The foil catches the light every time the gift moves, and the single letter feels personal without giving away what is inside. These tags take minutes to make, yet they look like they came from a stationery shop.
- Place the tag on a hard surface and lay a foil sheet over it, shiny side up.
- Press the letter stencil onto the foil and trace the letter firmly with the pen.
- Peel the foil away slowly to reveal the gold letter underneath.
- Punch a hole, thread twine through, and tie the tag to the gift.
The trick is firm, even pressure: too light and the foil skips, too hard and it tears the tag. A ballpoint pen works better than a pencil because the rounded tip glides without snagging. If a letter comes out patchy, lay a fresh piece of foil over it and trace the letter once more.
Foil tip: Gold foil sticks to clean, dry paper and slips on damp or glossy tags, so work with matte kraft tags and keep them dry before you start the project.
A gold monogram suits a gift chosen with care, like these Christmas gift ideas for mom.
8. Burlap and Twine Rustic Wrap
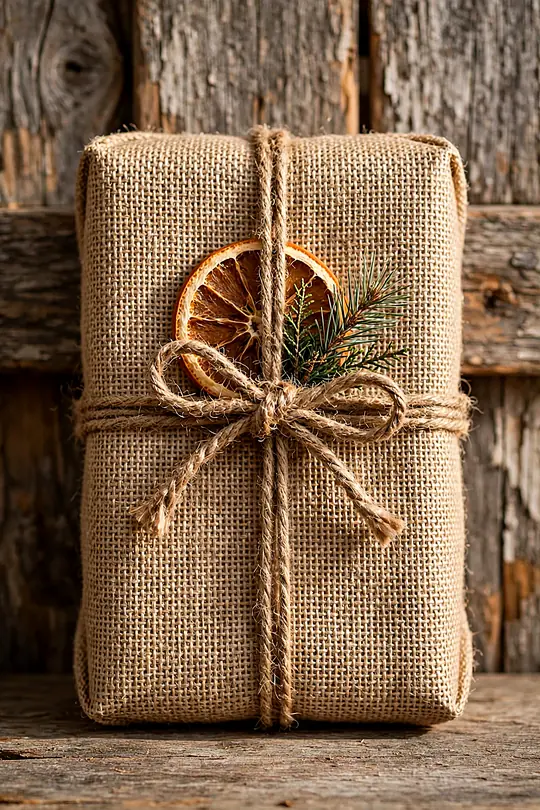
Burlap brings a farmhouse calm to the gift table, all soft texture and warm, earthy tones. A few wraps of twine and a sprig of dried lavender are the only dressing it needs. This wrap suits homemade gifts especially well, because the rough fabric matches the care that went into what is inside.
- Cut the burlap to wrap the box with 2 inches of overlap, then fold the edges under.
- Wrap the box as you would with paper, creasing the burlap gently.
- Tie twine around the box three times and knot it on top.
- Tuck a sprig of dried lavender under the twine and trim the ends.
The Supplies
- Burlap fabric, 1 yard
- Natural jute twine
- Dried lavender sprigs
- Scissors
- Double-sided tape
- Kraft gift tag
Burlap frays the moment you cut it, so fold every raw edge under before you wrap, or seal the edge with a thin line of fabric glue. The weave is loose, so double-sided tape grips better than regular tape on this fabric. A kraft tag tied with twine keeps the whole package in the same rustic mood.
A rustic wrap feels at home in a room styled with these cozy winter living room decor ideas.
9. The Tulle Cloud Wrap
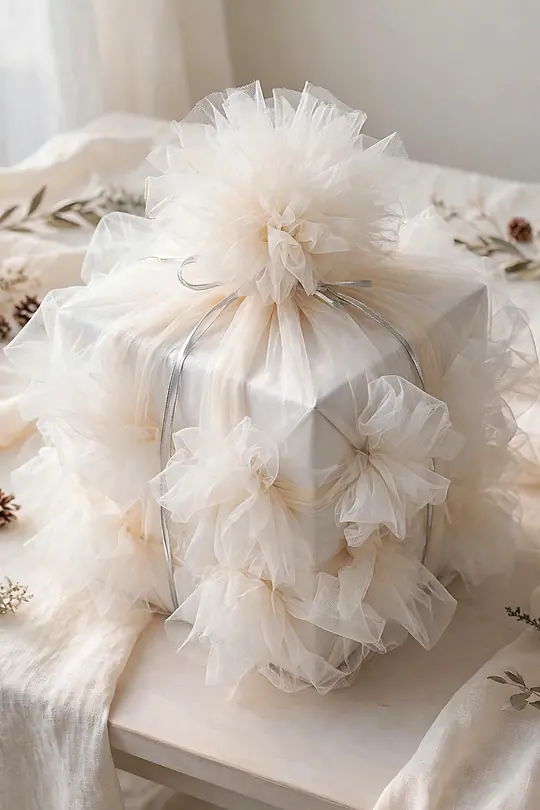
Halfway through the list comes the wrap everyone asks about: layers of soft white tulle gathered around a box until it looks like a gift resting inside a cloud. The tulle catches the light and moves when the box moves, which makes the whole package feel alive. It looks like a professional florist made it, yet the steps are simple.
Your Wrapping Kit
- 3 yards white tulle, 6 inches wide
- Plain white or silver paper
- White satin ribbon
- Scissors and tape
- Small pearl pins (optional)
- A gift tag
- Wrap the box in plain paper and tape the seams flat.
- Cut the tulle into six strips, each long enough to wrap around the box.
- Gather the tulle strips at the top and tie them with ribbon into a soft pouf.
- Fan the tulle layers apart until the cloud looks full and even.
This is the wrap friends photograph before they open it, and it is the one people save from any list of christmas gift wrapping ideas. Tulle costs little and forgives mistakes, because a crooked gather just looks like another soft fold. A silver tag tied into the pouf finishes the cloud without weighing it down.
Tulle tip: Tulle holds a crease if it sits folded in the package, so unroll it and let it hang for an hour before you wrap. A steamer smooths any stubborn wrinkles.
Tulle Cloud Facts
A cloud-like wrap fits a room full of these whimsical Christmas decor ideas.
10. Wine Bottle Wrap with a Knitted Sleeve

A bottle of wine is an awkward gift to wrap neatly, which is exactly why a knitted sleeve wins: it slides on in seconds and hides every tricky curve. The sleeve keeps the bottle safe on the way to the party and looks like a tiny sweater. Pick a sleeve in a holiday color and the bottle needs nothing else.
Measure the bottle before you buy or knit a sleeve, because wine bottles vary more than people expect. A standard 750-milliliter bottle is about 12 inches tall and 3 inches across, and the sleeve should hug it snugly without stretching. If the sleeve is loose, a ribbon tied at the neck holds it in place.
- Slide the knitted sleeve over the bottle from the bottom up.
- Smooth the sleeve down so the knit lies flat against the glass.
- Tie a ribbon around the neck to hold the sleeve in place.
- Tuck a sprig of pine or a small tag under the ribbon.
For the Bottle
- 1 knitted bottle sleeve
- Ribbon, 1 yard
- A sprig of pine
- A gift tag
- Scissors
Knit or crochet the sleeve yourself with these crochet patterns for beginners.
11. Dried Orange and Cinnamon Stick Topper

Dried orange slices and cinnamon sticks smell like Christmas the moment someone lifts the lid, and they cost pennies to make. The warm amber color of the oranges glows against green or kraft paper, and the cinnamon adds a rustic line across the top. This topper works on any wrap, and it dresses up a plain box in seconds.
For the Topper
- Oranges, sliced thin
- Cinnamon sticks
- Plain wrapping paper
- Twine or ribbon
- Hot glue gun
- Parchment paper
- Slice the oranges thin and dry them in a low oven until crisp, flipping once.
- Wrap the gift and tie twine around it in a cross.
- Glue one orange slice and two cinnamon sticks to the center of the box.
- Add a sprig of pine beside the orange if you like.
Drying Oranges
Cut the orange slices as thin as you can, because thick slices take hours longer and brown unevenly. A mandoline slicer gives even slices, but a sharp knife works if you take your time. Dry the slices a day ahead so they cool and harden fully before you glue them on.
Orange and cinnamon smell even better beside one of these Christmas coffee drinks.
12. Chalkboard Paper with Hand-Drawn Doodles
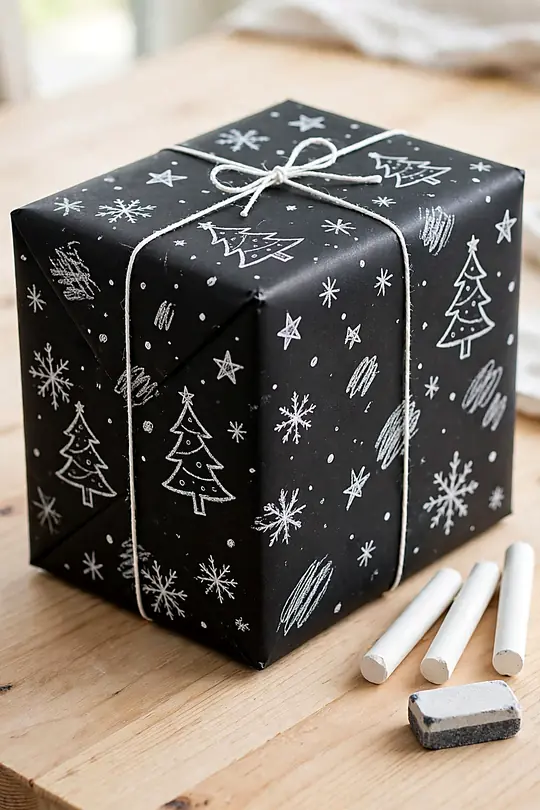
Chalkboard paper turns the gift itself into a greeting card, because the whole surface is yours to draw on. White chalk markers sketch snowflakes, trees, and names right onto the black paper, and every gift becomes one of a kind. This wrap is a gift for the artist in the family, or for anyone who loves a personal touch.
Chalk markers beat real chalk here, because real chalk smudges the moment the gift is handled. The markers dry bright and crisp, and they stay put until the paper is recycled. Test your marker on a scrap piece first. Some brands bleed on thin chalkboard paper, and a test saves the whole sheet.
Your Kit
- 1 roll black chalkboard paper
- White chalk markers, 2 sizes
- A pencil, for sketching
- Scissors and tape
- A ruler
- A soft eraser
Sketch the design lightly in pencil before you commit with the marker, and keep the doodles loose and simple. A snowflake needs only six lines and a few dots, and a pine tree is three triangles stacked. Leave one clear corner for the name, written large so the gift is easy to spot under the tree.
- Wrap the gift in chalkboard paper and tape the seams flat.
- Sketch your design in pencil on the top of the box.
- Trace the pencil lines with a white chalk marker and let it dry.
- Write the recipient’s name in large letters on one corner.
Take the doodling further with these DIY wall art projects.
13. The Perfect Double-Loop Satin Bow
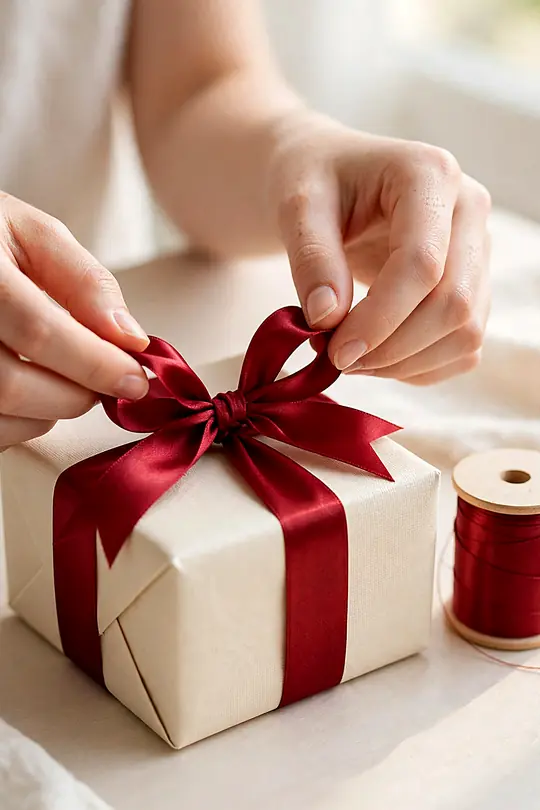
For the Bow
- Satin ribbon, 1.5 inches wide
- Sharp scissors
- A ruler
- Double-sided tape
- A wrapped gift
- Cut a length of ribbon four times the width of the box.
- Form two loops on each side, keeping every loop the same size.
- Pinch all four loops together at the center and bind them with a short strip of ribbon to lock them.
- Fan the loops apart, trim the tails at an angle, and tape the bow to the box.
A double-loop bow looks like it came from a department store, yet it needs only ribbon and a little patience. The secret is symmetry: loops of the same size on both sides, with tails cut to matching lengths. Once the shape clicks, you will tie this bow on every gift you wrap this year.
Satin ribbon slips more than wired ribbon, so hold the loops tight while you wrap the center. A small piece of double-sided tape under the bow stops it from sliding on glossy paper. If a loop droops, pull it gently from the base, not the tip, and the satin will hold its shape.
Loop tip: Measure each loop against your fingers to keep the sizes even, and count the loops as you form them. Two loops per side make a full bow every time.
Match the bow on the gift to the bows in these bows on Christmas trees.
14. Newspaper Wrap with Red Bakers Twine
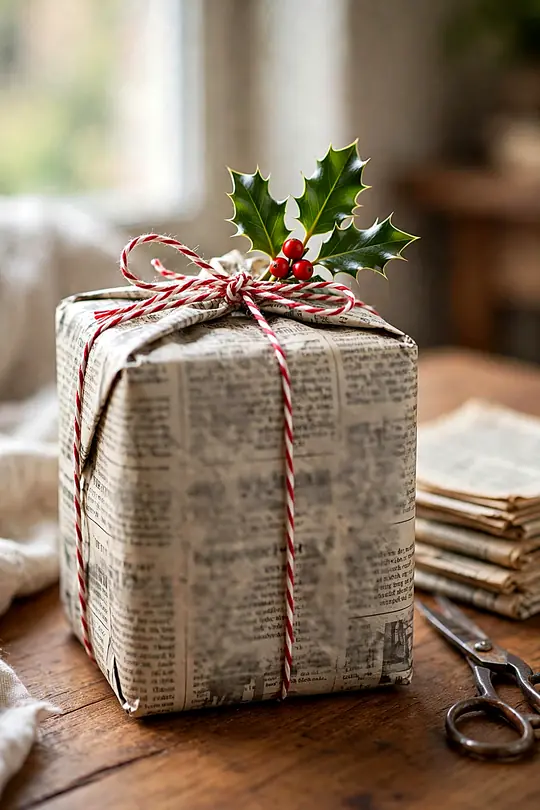
Yesterday’s newspaper wraps a gift with a story already printed on it, and red bakers twine adds the only color it needs. The black and white print looks smart against a green tree, and the whole wrap costs nothing at all. This is the wrap for the reader on your list, and for anyone who hates waste.
- Choose a full newspaper page with no torn edges or dark photos.
- Wrap the gift as you would with paper, keeping the print straight.
- Tie red bakers twine around the box in a cross and knot it on top.
- Tuck a sprig of pine or a candy cane under the twine.
Newsprint smudges, so handle the finished gift by the twine and keep it away from light-colored clothes. A comic page or a crossword makes a playful wrap for a kids’ gift, while the front page suits a grown-up present. Skip the sports section if the ink runs dark, because heavy ink rubs off on hands.
Grab These
- Full newspaper pages
- Red bakers twine
- Scissors and tape
- A sprig of pine or a candy cane
- A gift tag
Newspaper wrapping suits a home styled with these vintage home decor ideas.
15. Glitter-Dipped Gift Box Edges
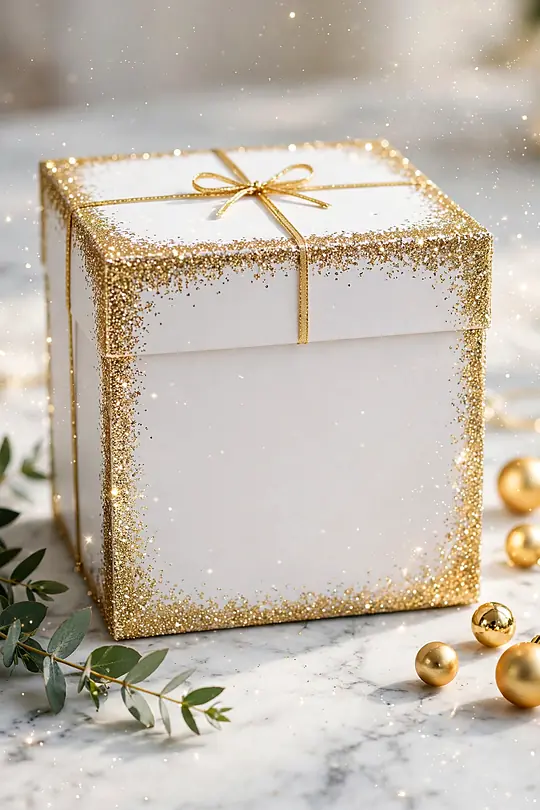
A plain gift box dipped in glitter along its edges looks like it fell out of a snow globe. The sparkle catches the tree lights and turns a simple box into a small piece of theater. This finish works on boxes of any size, and the glitter stays put once the glue dries.
Supplies List
- Plain gift boxes
- Craft glue or decoupage glue
- Fine glitter, gold or silver
- A small paintbrush
- A paper plate
- Newspaper, to catch spills
Fine glitter gives a smooth, even sparkle, while chunky glitter leaves gaps and sheds more. Brush the glue on in a band about an inch wide, then dip the edge into glitter poured on a plate. Tap off the extra glitter over the plate so it falls back for the next box.
- Spread newspaper on the table and pour glitter onto a paper plate.
- Brush craft glue along one edge of the box in a band an inch wide.
- Dip the glued edge into the glitter and press it down gently.
- Tap off the extra glitter, then repeat on the remaining edges.
Let the box dry for a full hour before you stack it or tie ribbon around it, because wet glue smears glitter across the lid. A light coat of clear spray sealer locks the sparkle in place for the whole season. Keep the glitter jar sealed between uses, or it will find its way onto every surface in the house.
Glitter Guide
Glitter on the box pairs with glitter on the hands, so see these Christmas nail ideas.
16. The Drawstring Pouch for Awkward Shapes
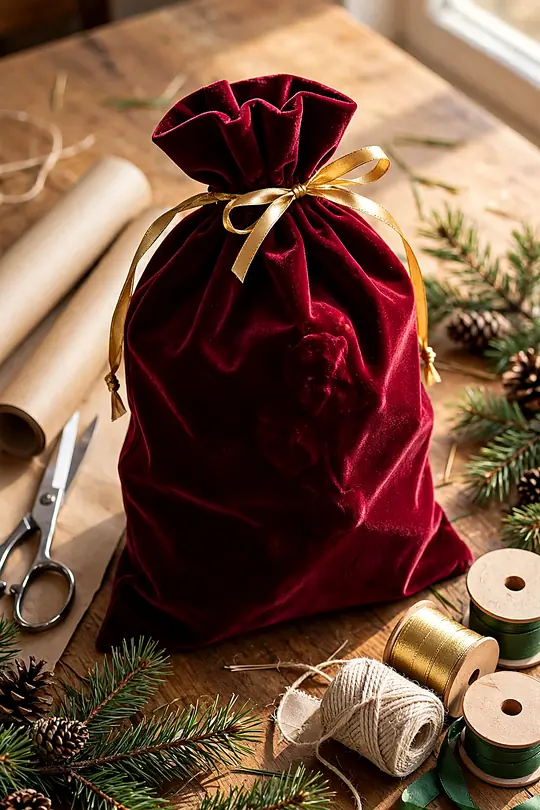
Some gifts refuse to be wrapped: a round ornament, a soft toy, a bottle with no flat side. A drawstring pouch solves all of them in one move, because fabric gathers around any shape and ties shut at the top. The pouch becomes part of the gift, and the recipient can reuse it long after Christmas.
Cut the fabric into a circle at least three times as wide as the gift, so the edges gather high above it. A hemmed channel around the edge holds the drawstring, and a simple running stitch does the job if you have no sewing machine. Felt works well for a no-sew version, and it never frays.
- Cut a circle of fabric three times as wide as the gift.
- Fold the edge over and stitch a channel, leaving a small gap.
- Thread a ribbon through the channel and pull both ends to close the pouch.
- Set the gift inside, pull the ribbon tight, and tie a bow.
What to Grab
- Fabric, 1/2 yard
- Ribbon or cord, 1 yard
- Needle and thread
- Scissors
- A dinner plate, for tracing the circle
- Chalk or a fabric marker
Pouch tip: A dinner plate makes a handy circle template for small pouches, and a mixing bowl works for larger ones. Trace in chalk, then cut just inside the line.
A pouch for keepsakes pairs well with these DIY shadow box ideas.
17. Velvet Box with a Wax Seal and Fresh Rose
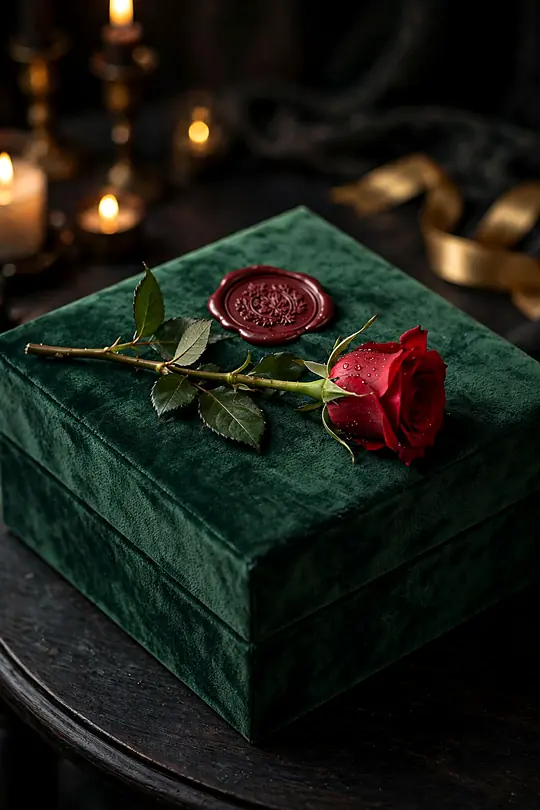
The last wrap on this list is the one the list has been building toward: a velvet box, closed with a wax seal, and crowned with a fresh rose. The box feels heavy in the hand, the seal cracks softly as it opens, and the rose scents the package. This is the wrap for a gift that carries real meaning.
The Kit
- 1 velvet gift box
- Sealing wax and a seal stamp
- A fresh rose
- Satin ribbon
- A lighter or wax melter
- A small water tube for the rose
This is the grandest wrap in the article, and it earns that place with texture alone: soft velvet, hard wax, and a living flower. Among the christmas gift wrapping ideas here, this one takes extra time and care, and it rewards both. Choose a rose that has just opened, because a tight bud looks small against the box.
Melt the wax slowly and let it cool for a few seconds before you press the stamp, or the design will blur. Press the stamp straight down, hold it still for ten seconds, then lift it straight up. A rose in a water tube stays fresh for a day, so add the flower on the morning of the gift exchange.
- Place the gift in the velvet box and tie satin ribbon around it.
- Melt the wax and pour a coin-sized puddle where the ribbon crosses.
- Press the seal stamp straight down and hold it for ten seconds.
- Tuck the fresh rose under the ribbon just before you give the gift.
Wax tip: Sealing wax sticks to velvet if it drips, so pour it over the ribbon crossing only. A stamp chilled in the freezer releases from the wax without a smudge.
Velvet on the gift pairs with velvet in the wardrobe, so see these velvet outfits.
Frequently Asked Questions
How much wrapping paper should I buy for Christmas?
One standard roll covers about eight to ten medium gifts, so count your boxes first and buy one roll per ten gifts, plus a spare for mistakes. Measure your gifts before you shop: a box needs paper roughly twice its width plus twice its height, with a little extra for overlap.
How do I wrap an oddly shaped gift?
Boxes, bags, and pouches solve almost every awkward shape. Slip a round or soft gift into a box first, then wrap the box, or gather fabric or tissue around it and tie the top with ribbon. For a bottle or a toy with no flat side, a drawstring pouch gives a neat finish with no folding at all.
How do I tie a neat bow that stays put?
Use wired ribbon, which holds its shape, and keep your loops the same size by measuring them against your fingers. Tie a firm knot at the center, fluff the loops apart, and trim the tails at an angle. A dot of hot glue under the knot stops the bow from sliding on slick paper.
How can I wrap gifts without wasting paper?
Reusable fabric wraps, newspaper, kraft paper, and paper bags all wrap well and cost little. Skip the tape by tucking and folding, reuse ribbon from last year, and top gifts with greenery from the yard instead of plastic bows. The wrap still looks thoughtful, and nothing goes to the landfill.
Wrap It Up with Style
Seventeen wraps later, the promise from the top of this list holds: the matte black paper at number one still sets the tone, the velvet box at number seventeen really is the finish the whole list builds toward, and the tulle cloud at number nine still earns the gasp. These christmas gift wrapping ideas prove that the paper matters as much as the present inside it.
Pick the wrap that fits the gift, the person, and the time you have, then enjoy the quiet moment before the paper comes off. Happy wrapping, and may every present under your tree look as good as the thought behind it.
Carry the same care from the gifts to the tree with these Christmas decorations.