11 Handmade Christmas Gift Ideas That Feel Personal, Not Store-Bought

There is a particular kind of delight in unwrapping something that was clearly made by hand, just for you. It is not about perfection — a slightly wobbly stitch or a hand-painted mug with one imperfect snowflake is exactly what makes it precious. Handmade gifts say something a shop receipt never can: I thought about you, I sat down, and I made this with my own two hands.
This collection of handmade christmas gift ideas gathers eleven gifts that are genuinely makable in a normal kitchen or living room, with ordinary supplies and a free afternoon. Every idea below comes with a materials list and clear numbered steps, so you can pick one tonight and have a finished, gift-ready present by the weekend. No special workshop, no expensive equipment — just a little time, a little care, and the pleasure of giving something no one else in the world owns.
Table of Contents
- 1. Hand-Poured Candles in Vintage Teacups
- 2. Wood-Slice Photo Ornaments
- 3. Homemade Vanilla Extract
- 4. Chunky Knit Infinity Scarf
- 5. Peppermint Sugar Scrub Jars
- 6. Hand-Stamped Linen Tea Towels
- 7. Dried Orange Slice Garland
- 8. Hot Chocolate Mix Jars
- 9. Embroidered Hoop Art
- 10. Fizzing Bath Bombs
- 11. Hand-Painted Ceramic Mugs
- Frequently Asked Questions
- A Few Last Tips Before You Start Crafting
1. Hand-Poured Candles in Vintage Teacups
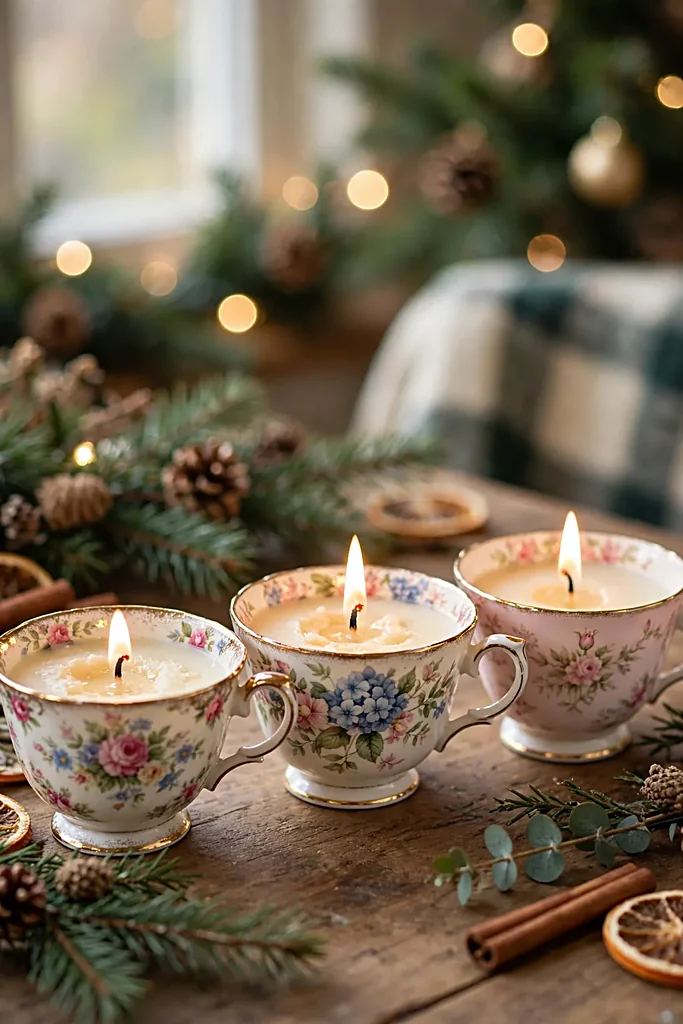
A vintage teacup candle turns a thrift-shop find into something glowing and romantic. The delicate cup, the soft flicker, the scent you chose yourself — it feels like a gift from another, slower era, and it looks beautiful on a bedside table or a mantel long after the holidays end.
Choose a scent that suits the person: calming lavender for a friend who needs rest, warm cinnamon for someone who loves the holidays, fresh pine for a nature lover.
Pair the cup with its saucer and tie a little dried orange slice or cinnamon stick to the ribbon for a finished look.
Makes: 1 candle | Time: about 45 minutes, plus 4 hours setting time
Materials:
- 1 vintage teacup and saucer, clean and dry
- 200 g soy wax flakes
- 1 cotton candle wick with a metal tab
- 1 wooden skewer or chopstick
- 15–20 drops of skin-safe fragrance oil or essential oil
- 1 heatproof jug or old tin can for melting
- A small dab of hot glue or sticky wax
Steps:
- Fix the wick to the centre of the teacup with a dab of hot glue, then rest the skewer across the rim and wrap the top of the wick around it so it stands straight.
- Place the wax flakes in the heatproof jug and set the jug in a saucepan of simmering water to make a double boiler. Never melt wax directly over a flame, and never leave melting wax unattended.
- Stir gently until the wax is fully liquid and clear, then take it off the heat and let it cool for about 2 minutes.
- Stir in the fragrance oil, then pour the wax slowly into the teacup, leaving about 1 cm of space at the top.
- Leave the candle completely undisturbed for at least 4 hours until firm, then trim the wick to about 1 cm.
- Set the cup on its saucer, wrap with tissue paper, and add a small tag with the scent name and a note to never leave a burning candle unattended.
A handmade candle glows best in a dressed-up room — these christmas decorations finish the scene around it.
Candle safety, in one breath: always use a double boiler, keep water out of the wax, and burn the finished candle only on a heatproof surface, away from curtains and draughts. A teacup candle is a treasure — treat its flame with respect and it will glow safely all season.
2. Wood-Slice Photo Ornaments
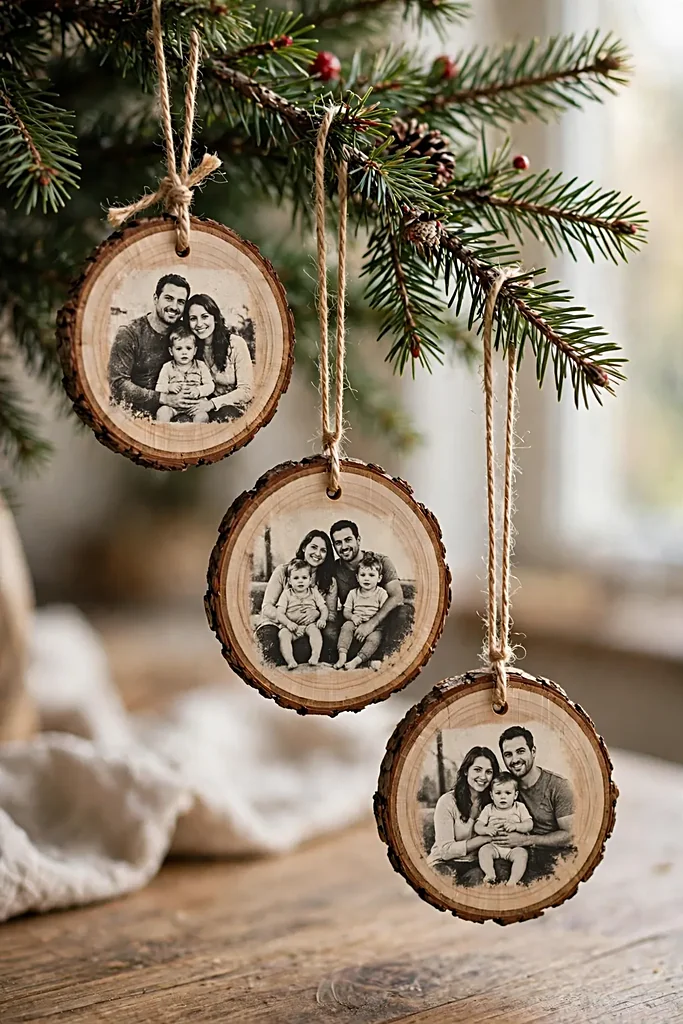
Few gifts make people tear up faster than a favourite photo hanging on the Christmas tree. A wood slice gives that photo a rustic, warm frame, and because you chose the picture — a grandchild’s first steps, a wedding day, a beloved pet — the ornament becomes a keepsake rather than a decoration.
Print the photo slightly smaller than the wood slice so a natural wooden border shows all around it. A matte print works best, as glossy prints can glare under tree lights and may not glue down as smoothly.
Makes: 1 ornament | Time: about 30 minutes, plus drying time overnight
Materials:
The keepsake itself:
- 1 pre-cut wood slice, about 9–10 cm across, with a drilled hole
- 1 printed photo, trimmed to fit the slice
Glue, tools and hanging:
- Clear-drying decoupage glue and a soft brush
- A length of ribbon or twine, about 20 cm
- Fine sandpaper
- Clear varnish or sealant spray (optional)
Steps:
- Lightly sand the flat face of the wood slice until smooth, then wipe away the dust with a dry cloth.
- Brush a thin layer of decoupage glue over the face of the slice and press the trimmed photo into place, smoothing from the centre outward to push out air bubbles.
- Brush one more thin layer of glue over the top of the photo to seal it, and leave it flat to dry for at least 4 hours.
- Once dry, add a second sealing coat if you like, and leave overnight until completely hard.
- Thread the ribbon or twine through the drilled hole and knot it to form a hanging loop.
- Write the year and a short message on the back in permanent pen, then wrap in tissue paper.
Make it a set: three ornaments — one from each decade of a friendship, or one per grandchild — turn a single ornament into a collection the recipient will hang year after year. Number them on the back so the story stays in order.
3. Homemade Vanilla Extract
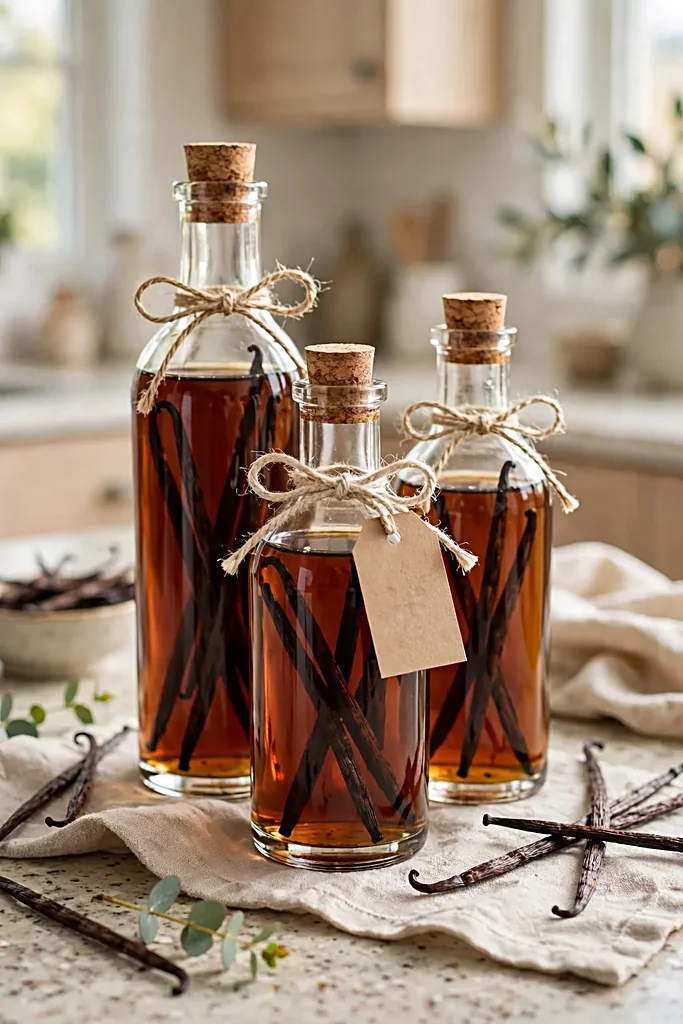
Real vanilla extract is one of those pantry luxuries that bakers genuinely treasure, and the homemade version is richer and more fragrant than anything on a supermarket shelf.
It also happens to be one of the easiest gifts on this list: split beans, pour, wait — and the waiting does most of the work.
Start this one early, ideally eight weeks before Christmas, because the flavour deepens with time.
If you are short on time, a smaller bottle with more beans per volume will still taste lovely after four weeks, and you can note the “ready by” date on the label.
Makes: 1 bottle (about 250 ml) | Time: 15 minutes active, 8 weeks steeping
Materials: 250 ml vodka (at least 35% alcohol) or food-grade glycerine for an alcohol-free version; 4–5 whole vanilla beans; 1 clean glass bottle with a tight stopper or lid; a sharp knife and chopping board; and a paper label and ribbon.
Steps:
- Slit each vanilla bean lengthwise with the knife, leaving the ends joined, so the seeds are exposed.
- Drop the split beans into the clean glass bottle.
- Pour in the vodka until the beans are fully covered, then seal the bottle tightly.
- Shake well and store in a cool, dark cupboard away from sunlight.
- Shake the bottle once a week for eight weeks, watching the liquid turn deep amber.
- Write the start date and the ready date on the label, tie on a ribbon, and add a note suggesting one teaspoon per cake or batch of cookies.
Vanilla extract is the baker’s gift — pair the bottle with these 11 cookie recipes for the full present.
The gift that keeps giving: tell the recipient they can top the bottle up with more vodka as they use it, and the beans will keep flavouring it for a year or more. A gift that refills itself is a rare and wonderful thing.
4. Chunky Knit Infinity Scarf

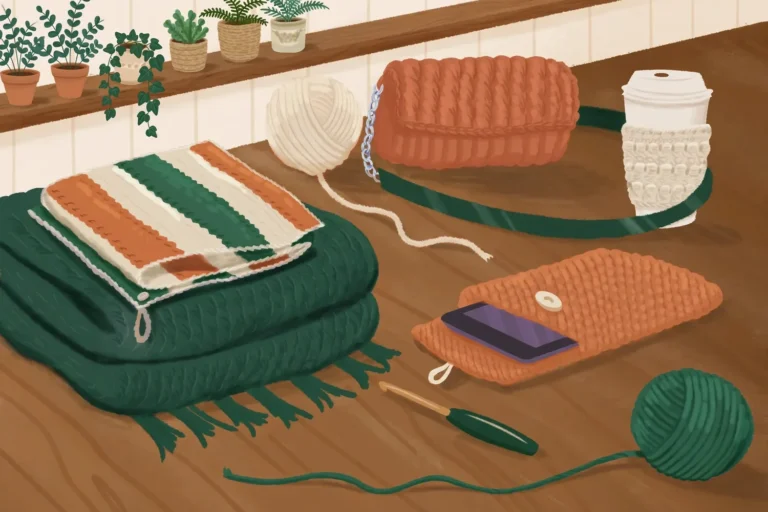
A chunky knit scarf is the cosiest kind of hug you can give someone, and an infinity loop is wonderfully forgiving to knit — no shaping, no buttonholes, just soothing rows of stitches that grow into something warm and beautiful.
Even a confident beginner can finish one in a weekend.
Pick a yarn in the recipient’s favourite colour, or a soft neutral that goes with everything they own. Super-chunky yarn on big needles works up fast, which makes this a perfect last-minute gift that still looks entirely hand-crafted.
Makes: 1 infinity scarf | Time: 6–8 hours of knitting, spread over a weekend
Materials:
- 2 balls of super-chunky yarn (about 200 g total)
- 12 mm circular knitting needles, 60 cm cable
- 1 stitch marker
- 1 tapestry needle for weaving in ends
- Scissors
Steps:
Getting started:
- Cast on 90 stitches using the long-tail cast-on method, and join into a round, taking care not to twist the stitches.
- Place the stitch marker at the join to mark the start of each round.
- Knit every round in stocking stitch (knit all stitches) until the scarf measures about 30 cm in height.
Finishing off:
- To add gentle texture, switch to knit two, purl two rib for the final 5 cm if you like.
- Cast off loosely so the edge stays stretchy, and cut the yarn leaving a 15 cm tail.
- Weave in all loose ends with the tapestry needle, wash gently by hand, lay flat to dry, and fold into a gift box with tissue paper.
A note for new knitters: if your tension is uneven, do not worry — chunky yarn hides a multitude of small wobbles, and a quick hand wash and flat dry will even the stitches out beautifully. The scarf will look shop-bought in the best way: soft, even, and made with love.
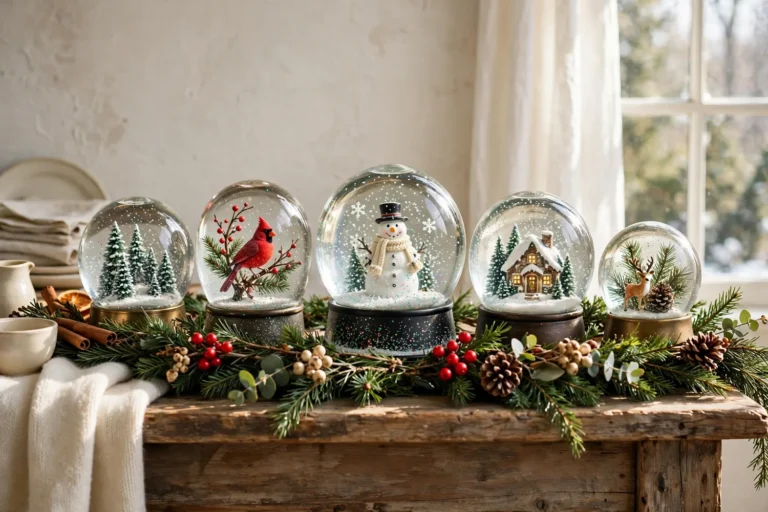
If you love the idea of a handmade winter gift but knitting feels like a stretch, you might also enjoy these DIY Christmas snow globes — another cosy, crafty project that makes a beautiful keepsake.
5. Peppermint Sugar Scrub Jars
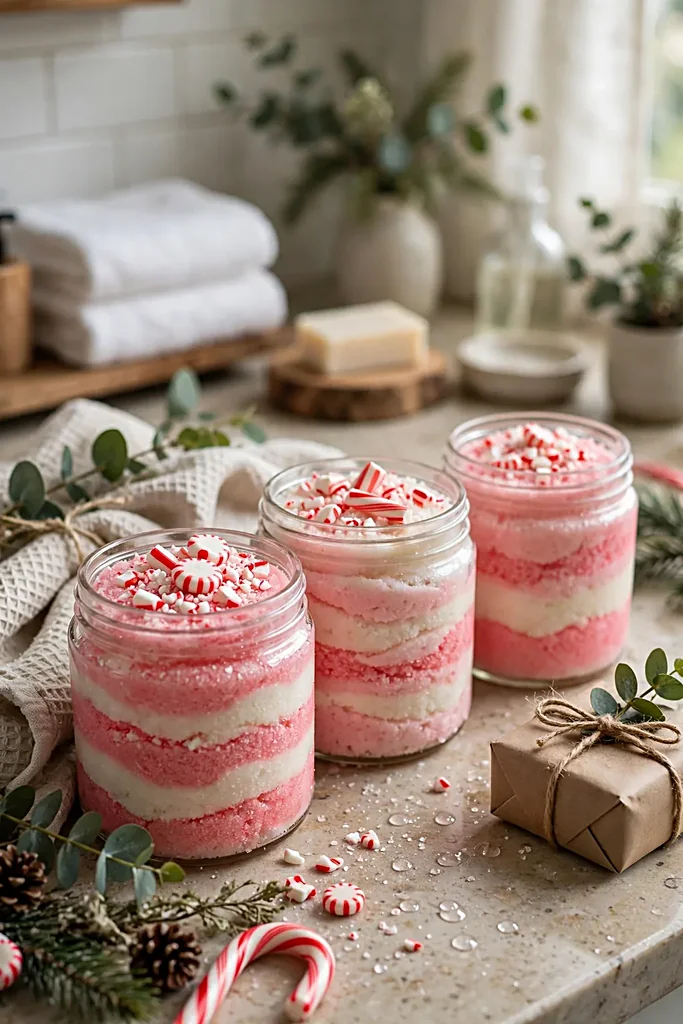
A peppermint sugar scrub is a tiny spa day in a jar. It smells like a candy cane, leaves hands and feet silky soft, and takes about ten minutes to make — which makes it the perfect gift when you need several presents at once, for teachers, neighbours, and colleagues.
Use fine granulated sugar rather than coarse for a gentler scrub, and keep the peppermint scent light rather than overwhelming. A pretty jar, a fabric lid cover, and a handwritten label turn a simple mixture into a gift that looks far more expensive than it was.
Makes: 2 small jars (about 150 ml each) | Time: 15 minutes
Materials:
- 200 g granulated sugar
- 80 ml sweet almond oil or fractionated coconut oil
- 10–12 drops peppermint essential oil
- 1 teaspoon vitamin E oil (optional, skin-safe)
- 2 clean glass jars with lids
- A small spoon for mixing
Steps:
- Pour the sugar into a mixing bowl and drizzle in the carrier oil, stirring until the mixture looks like damp sand.
- Add the peppermint essential oil drop by drop, stirring and sniffing as you go until the scent is fresh but not sharp.
- Stir in the vitamin E oil if using it.
- Spoon the scrub into the clean jars, pressing down gently to remove air pockets, and seal the lids tightly.
To finish, wipe the outside of each jar clean, add a label with the scent and a “use within 3 months” note, and tie a ribbon around the lid. Include a small instruction card: massage a spoonful onto damp skin, rinse, and pat dry.
Sugar scrub for the hands, something sweet for the tin — these 13 christmas cookies complete a teacher or neighbour gift.
| Variation | Swap in | Best for |
|---|---|---|
| Peppermint classic | Peppermint oil, as above | An energising morning scrub |
| Vanilla mint | Half peppermint, half vanilla fragrance oil | A softer, sweeter scent |
| Rosemary mint | Rosemary oil plus a few drops of peppermint | A herbal, grown-up version |
6. Hand-Stamped Linen Tea Towels
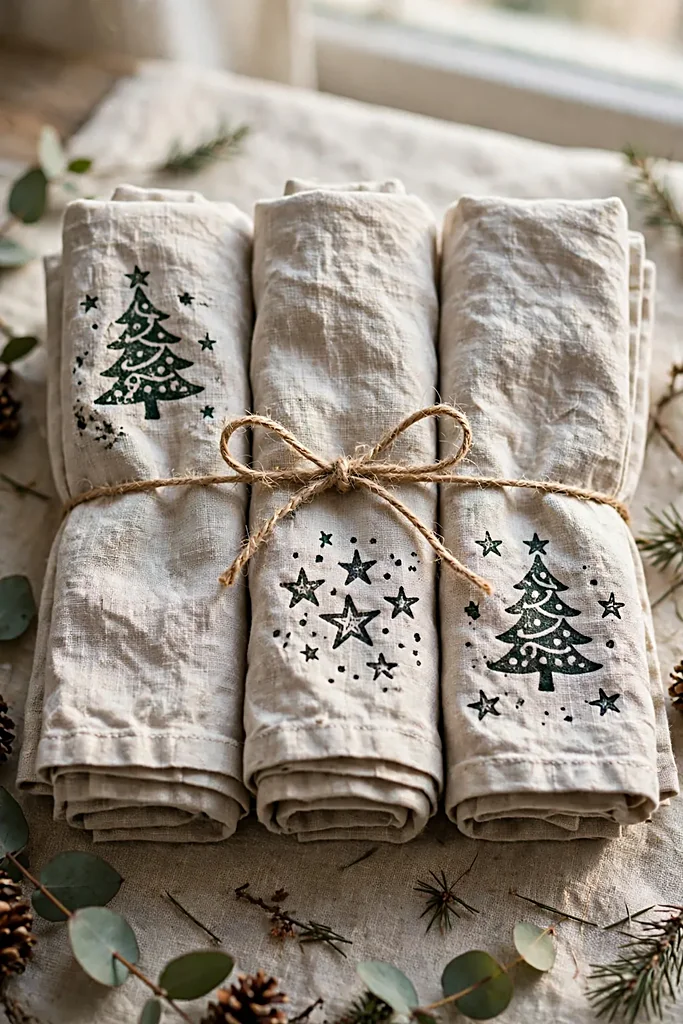
Hand-stamped tea towels bring a little artistry into the most everyday room in the house.
Every time the recipient reaches for one, they will see your sprig of fir, your little star, your imperfectly perfect pattern — and that is a daily reminder of you, far beyond Christmas morning.
Simple shapes stamp best: a fir branch, a star, a snowflake, a little house.
Carve your stamp from a potato for a rustic look, or buy a plain wooden stamp and use it with fabric paint in mulberry and fir green to match a festive kitchen.
Makes: 2 tea towels | Time: about 1 hour, plus 24 hours drying
Materials:
- 2 plain linen or cotton tea towels, pre-washed and ironed
- Fabric paint in fir green and mulberry
- 1 potato (for carving) or 1–2 wooden stamps
- A small paint roller or sponge brush
- Cardboard to place inside each towel while stamping
- An iron for heat-setting
Steps:
- Lay a towel flat on a protected surface with cardboard inside it so paint cannot bleed through to the back.
- If carving a potato stamp, cut the potato in half, draw a simple shape on the cut face, and carefully cut away the background so the shape stands proud.
- Roll or brush a thin, even layer of fabric paint onto the stamp — too much paint blurs the design.
- Press the stamp firmly and evenly onto the towel, lift straight up, and repeat in a scattered or border pattern.
- Let the towels dry flat for 24 hours, then heat-set the paint by ironing on the reverse side for 2–3 minutes, following the paint instructions.
- Fold the towels, tie with twine, and tuck in a sprig of dried greenery.
Practice first: always stamp once on scrap fabric before touching the real towel. One test print tells you whether the paint is too thick, the pressure is uneven, or the design needs simplifying — and it saves a towel from becoming a test piece.
7. Dried Orange Slice Garland

A dried orange garland is Christmas nostalgia made visible: golden translucent slices, the smell of warm citrus, a little greenery tucked between them. It looks stunning draped over a mantel, along a staircase, or across a window, and it costs almost nothing to make.
The secret is low and slow drying — a cool oven and patience will give you slices that stay bright and flat, rather than browned and curled.
Make a long one for a mantel or several short ones to give as individual gifts.
Makes: 1 garland, about 1.5 metres | Time: 3–4 hours in the oven, mostly hands-off
Materials:
The slices and the string:
- 3–4 large oranges
- 2 metres of twine or ribbon
Tools and tasty extras:
- Parchment paper and 2 baking trays
- A sharp knife and chopping board
- Small sprigs of dried greenery, cinnamon sticks, or star anise (optional)
- A large needle or skewer for threading
Steps:
- Heat the oven to 100°C (a low setting) and line the baking trays with parchment paper.
- Slice the oranges as evenly as you can, about 5 mm thick, and gently pat each slice dry with a tea towel.
- Arrange the slices in a single layer on the trays, leaving space between them for air to circulate.
- Dry in the oven for 3–4 hours, turning the slices every hour, until they feel dry and papery but still golden.
- Let the slices cool completely, then thread them onto the twine using the needle, spacing them about 8 cm apart.
- Tuck a sprig of greenery or a cinnamon stick between every few slices, knot the ends into hanging loops, and roll gently for gifting.
An orange garland is decor you can gift — these christmas decor ideas hang it in good company.
Keep them golden: if slices start to darken, your oven is too hot — drop the temperature and give them more time instead. Slightly curled edges are charming; browned, brittle slices are not. Store finished garlands flat in tissue paper until hanging day.
8. Hot Chocolate Mix Jars

There is no cosier gift than a jar of rich hot chocolate mix, layered like a little work of art and ready for a cold evening. The recipient just adds hot milk, and suddenly your gift has become a warm mug, a blanket, and a quiet moment all at once.
Layer the ingredients so the colours show through the glass — dark cocoa, pale sugar, tiny marshmallows on top. A wooden spoon tied to the jar and a tag with the mixing instructions make it feel complete and ready to use.
Makes: 1 jar (about 500 ml, serves 6–8 mugs) | Time: 20 minutes
Materials: 1 clean glass jar, about 500 ml, with a lid; 150 g good-quality cocoa powder; 150 g granulated sugar; 100 g chocolate chips or grated chocolate; 1 teaspoon ground cinnamon; a handful of mini marshmallows; and a pinch of salt.
Steps:
- Whisk the cocoa powder, sugar, cinnamon, and salt together in a bowl until evenly combined.
- Spoon half the cocoa mixture into the jar and press it down gently to make a level layer.
- Add a layer of chocolate chips, then the rest of the cocoa mixture, pressing gently again.
- Top with a generous layer of mini marshmallows and seal the lid tightly.
- Write a gift tag: “Stir 3 tablespoons into a mug of hot milk and enjoy.”
- Tie the tag and a small wooden spoon to the jar with ribbon, and wrap in cellophane if you like.
For the grown-ups: add a tiny separate packet of chilli flakes or a cinnamon stick to the ribbon, with a note suggesting a pinch stirred in for a warming spiced version. It is a small touch that makes the jar feel tailored rather than generic.
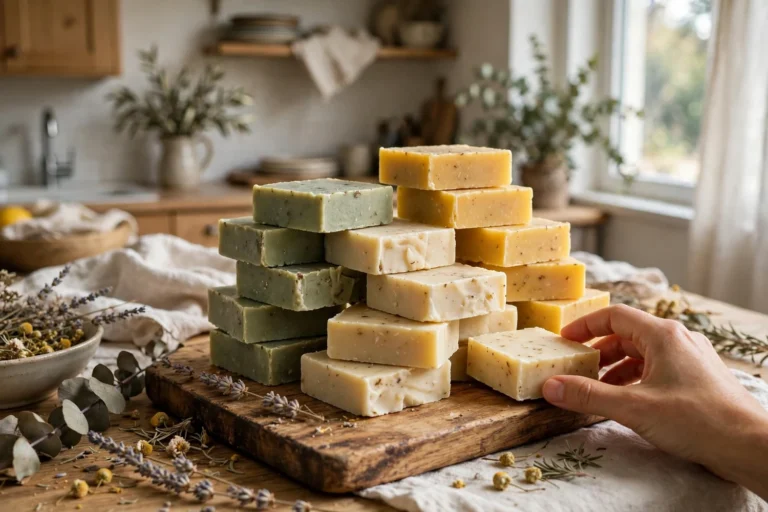
If handmade bath and body gifts are your thing, you may also love learning how to make homemade soap — another lovely, practical present to pair with a scrub or a candle.
9. Embroidered Hoop Art
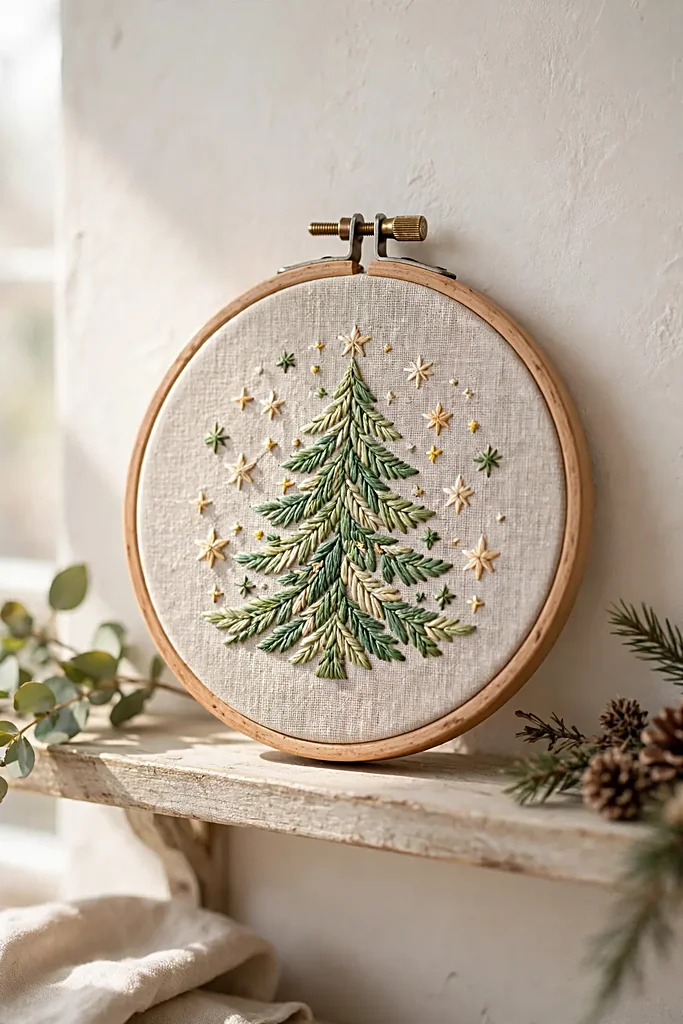
Embroidered hoop art is slow, meditative making at its best — and the result is a piece of wall art that looks far more accomplished than the stitches suggest.
A simple wreath, a word, or a little winter scene in a wooden hoop feels personal in a way no printed picture ever could.
Start simple: a single word in backstitch, or a wreath of French knots and lazy-daisy leaves.
Two or three colours are plenty, and the natural linen background keeps everything looking calm and elegant.
Makes: 1 hoop, about 15 cm | Time: 4–6 hours of stitching
Materials:
- 1 wooden embroidery hoop, 15 cm
- 1 square of plain linen or cotton fabric, about 25 cm
- Embroidery floss in fir green, mulberry, and cream
- 1 embroidery needle
- A water-soluble pen or light pencil for marking the design
- Scissors and felt for backing (optional)
Steps:
Setting up:
- Draw or trace your design lightly onto the centre of the fabric — a wreath circle, a word, or a simple tree shape.
- Place the fabric in the hoop and tighten the screw until the fabric is taut like a drum.
- Thread the needle with two strands of floss and stitch the outline first, using backstitch for lines.
Stitching and finishing:
- Fill leaves with lazy-daisy stitches and add French knots for berries or snow dots.
- When the design is complete, trim the excess fabric to about 2 cm beyond the hoop, fold it to the back, and glue a felt circle over it for a neat finish.
- Hang the hoop from a ribbon loop, or wrap it flat in tissue paper for gifting.
Stitch a message: a single word — “joy”, “peace”, “home”, or the recipient’s name — stitched in mulberry floss on cream linen is striking, simple, and deeply personal. It is often the simplest designs that get hung in pride of place.
10. Fizzing Bath Bombs
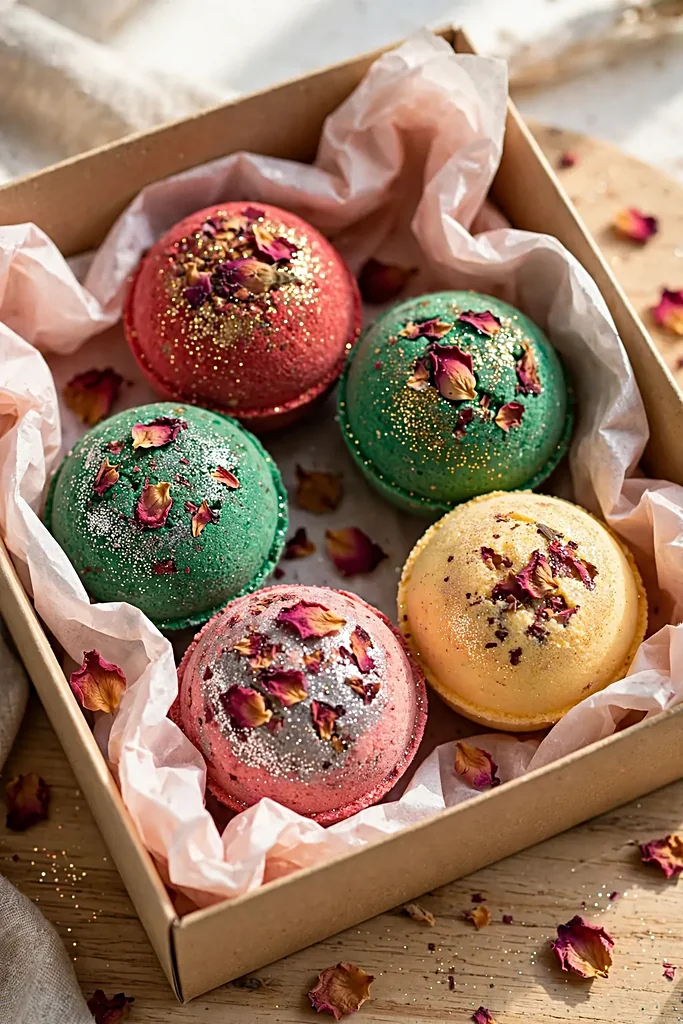
A bath bomb turns an ordinary bath into a small celebration: fizz, colour, fragrance, and soft skin at the end of it.
They look impressive, cost very little, and are surprisingly satisfying to make — the moment the mixture holds together in the mould feels like a tiny bit of kitchen magic.
Work in a dry room and add liquid very slowly, because moisture is what sets the fizzing reaction off early. If the mixture starts to puff up in the bowl, you have added too much liquid — add a spoonful of dry mixture to rescue it.
Makes: 6 medium bath bombs | Time: 30 minutes, plus 24 hours drying
Materials:
- 200 g bicarbonate of soda
- 100 g citric acid
- 100 g cornflour
- 100 g Epsom salts
- 2 tablespoons skin-safe carrier oil (sweet almond or coconut)
- 15–20 drops skin-safe essential oil (lavender or sweet orange)
- A few drops of skin-safe food colouring (optional)
- 1 spray bottle of water or witch hazel
- Round bath bomb moulds
Steps:
- Whisk the bicarbonate of soda, citric acid, cornflour, and Epsom salts together in a large bowl until completely lump-free.
- Stir in the carrier oil and essential oil, then the food colouring a drop at a time until the colour is even.
- Spray the mixture lightly with water, one spritz at a time, mixing well after each spritz, until it holds together when squeezed like damp sand.
- Pack the mixture firmly into both halves of the mould, overfilling slightly, then press the halves together hard.
Tap the mould gently to release the bomb and set it on a lined tray without touching it further. Leave the bombs undisturbed for 24 hours until rock hard; then wrap them individually in tissue paper and pack in a gift box.
A bath bomb is for a slow winter evening — these cozy winter outfits over 50 dress the same cosy mood.
| Problem | Likely cause | Fix |
|---|---|---|
| Bomb crumbles | Too dry, or not packed firmly | One more spritz, then pack harder |
| Bomb fizzes in the bowl | Too much liquid added at once | Stir in extra dry mixture to calm it |
| Bomb expands while drying | Humid room | Dry in a cool, dry spot; wrap once hard |
11. Hand-Painted Ceramic Mugs
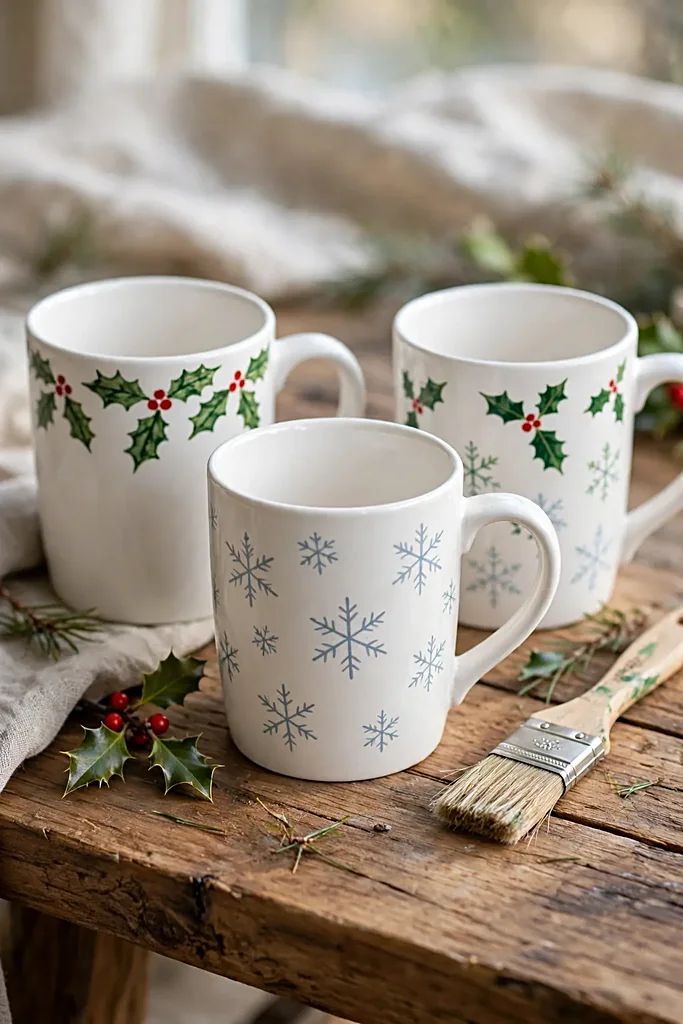
A hand-painted mug is a gift that gets used every single day, which is a rare honour for any present. Morning coffee tastes a little better from a mug that someone painted just for you, complete with its charming wobbles and one-of-a-kind pattern.
Keep the design simple and bold: dots, stripes, sprigs, or a single word. Fine detail is hard on a curved surface, so let the paint do the talking with a few confident shapes rather than a fussy picture.
Makes: 1 mug | Time: about 1 hour painting, plus baking and cooling
Materials:
- 1 plain white ceramic mug, washed and dried
- Ceramic or porcelain paint pens or brush-on ceramic paint
- Rubbing alcohol and a cotton pad for cleaning the surface
- Painter’s tape (optional, for straight lines)
- An oven for heat-setting
Steps:
- Wipe the mug with rubbing alcohol and let it dry completely so the paint grips well.
- Sketch your design lightly in pencil on the mug, or tape off stripes if you want crisp lines.
- Paint the design in thin layers, letting each colour dry before adding the next, and keep paint away from the rim where lips touch.
- Leave the mug to air-dry for 24 hours so the paint sets properly.
- Place the mug in a cold oven, heat to the temperature given on your paint instructions (usually around 160°C), bake for the stated time, then let it cool in the oven.
- Wash gently by hand, fill with a packet of cocoa or tea, and wrap with a ribbon.
A painted mug needs something worth pouring — these non alcoholic thanksgiving punch recipes fill it festively.
Paint like a pro: dots made with the end of a pencil or a cotton bud are perfectly round every time and look beautifully intentional. A mug covered in mulberry and fir dots with one gold star is simple, festive, and impossible to get wrong.
Frequently Asked Questions About Handmade Christmas Gift Ideas
A Few Last Tips Before You Start Crafting
Pick one gift, not eleven, and start there. The joy of handmade giving comes from the making itself — the quiet hour with the radio on, the smell of cinnamon in the kitchen, the satisfaction of tying the final ribbon. If you try to make everything at once, the pleasure disappears, and the gifts start to feel like chores.
And remember: the recipient will not inspect your stitches or measure your candle. They will see the time you gave them, the thought behind the choice, and the love folded into every layer. That is what makes a handmade gift feel personal, not store-bought — and it is something no shop can ever sell.
More from The Glossy Guide
 Fashion and Beauty
11 Holiday Party Outfits That Feel Festive Without Trying Too Hard
December fills up fast: the office party, a friend's open house, dinner at your sister's, a New Year's Eve gathering…
 Fashion and Beauty
12 Scarf Outfits That Turn One Accessory Into the Whole Look
A scarf is the hardest-working piece in any wardrobe. It costs less than a coat, takes up almost no room…
 Fashion and Beauty
13 Winter Fashion Outfits That Make Cold Days Look Effortlessly Chic
Cold weather is not a reason to hide under shapeless layers. With the right coat, a good knit and boots…