12 Cookie Exchange Ideas That Make Your Swap the Sweetest Party of the Season
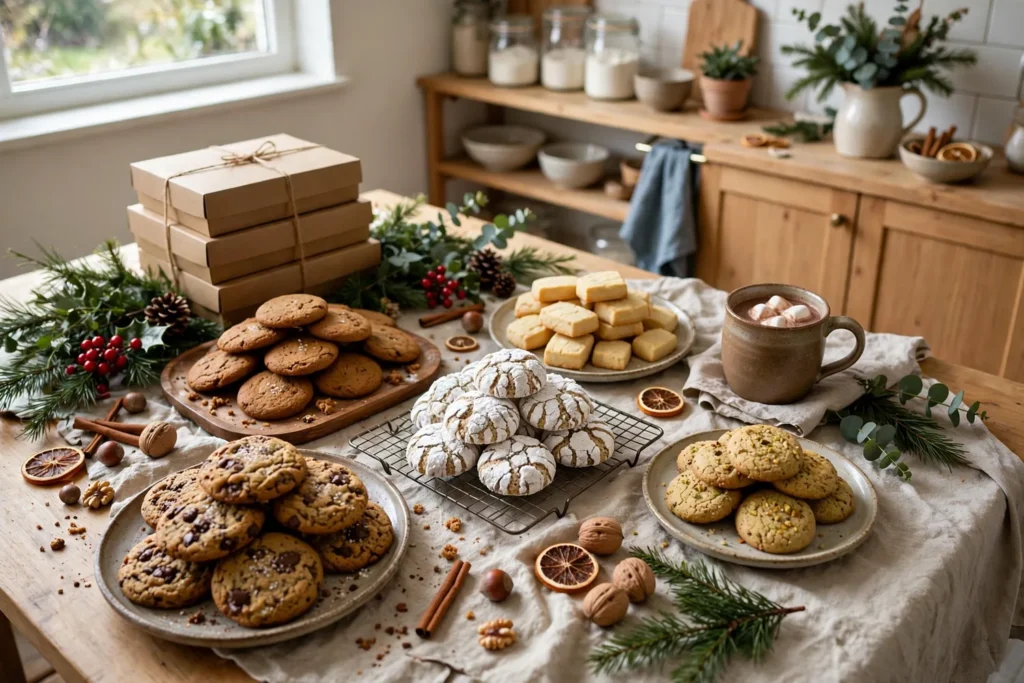
A cookie exchange is the rare party where the guests do most of the cooking and everyone still leaves happy, carrying a box of cookies they did not have to bake themselves. Done well, it is part baking project, part social event, and part holiday tradition, all in one afternoon. Done badly, it is a table full of the same cookie, a few hurt feelings about uneven swaps, and a host frantically washing dishes while guests hover with empty boxes.
The difference comes down to planning, not baking skill. A few clear rules, a sign-up sheet that guarantees variety, a display table that shows the cookies off, and a packaging station that makes taking them home feel like part of the fun will carry the party further than any single perfect recipe. The ideas below cover both halves of a great swap: how to host it, and what to bring to it, with full recipes for every cookie idea so nothing here is guesswork.
Pick the hosting ideas that fit your space and your guest list, choose one or two cookies to bake, and invite your favourite bakers. Whether your group is six friends around a kitchen table or twenty neighbours in a living room, these twelve cookie exchange ideas will help you run a swap that guests ask to repeat next year.
Table of Contents
- 1. Set the Rules That Keep the Swap Fair
- 2. A Sign-Up Sheet That Prevents Six Trays of the Same Cookie
- 3. Build a Swap-Day Display Table Guests Can Browse Like a Bakery
- 4. Add a Tasting Station and a Friendly Vote
- 5. Brown Butter Chocolate Chip Cookies
- 6. Cranberry-Orange Shortbread Wedges
- 7. Chewy Ginger Molasses Cookies
- 8. Set Up a Packaging Station Guests Will Love
- 9. Peppermint Chocolate Crinkle Cookies
- 10. Salted Caramel Thumbprint Cookies
- 11. Lemon Rosemary Butter Cookies
- 12. A Dietary-Friendly Corner Everyone Can Enjoy
- Frequently Asked Questions
- A Swap Worth Repeating
1. Set the Rules That Keep the Swap Fair
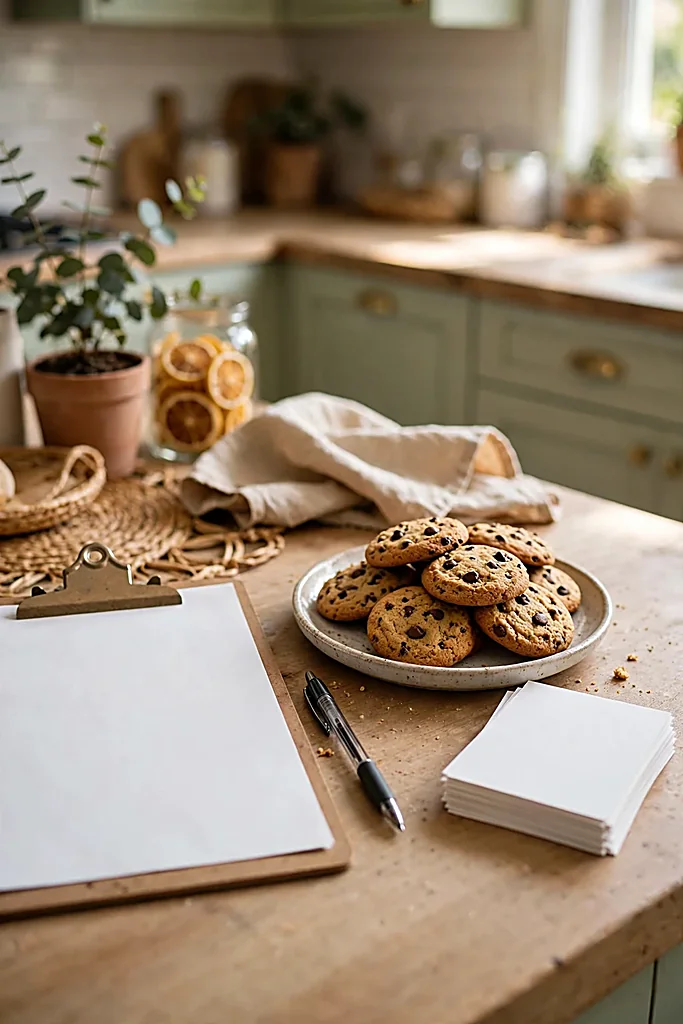
A cookie exchange only feels fun when everyone goes home with roughly what they brought, so set the rules before a single oven is preheated. The classic formula works for a reason: each guest bakes one recipe in bulk, usually 6 dozen cookies, and brings 6 dozen to the party, so every guest leaves with 6 dozen cookies in mixed varieties. For a smaller group of 6 to 8 guests, 4 dozen per person is plenty, and for a crowd over 12, cap it at 3 dozen per person so nobody spends a fortune on butter.
Put the rules in the invitation itself, not in a follow-up message people skim. State the dozen count, the arrival time, whether cookies must be homemade, and whether each guest should bring a printed copy of their recipe.
Ask guests to arrive with their cookies already counted and packed in a container you do not need back, and to bring one extra dozen for tasting at the party, separate from the swap pile, so the swapping itself is never short.
Decide two edge cases in advance and say so: what happens if someone brings fewer cookies than promised, and whether store-bought cookies are welcome. The kindest version is simple: everyone swaps the same number of cookies they brought, and anyone who brings fewer swaps fewer. Write it down, send it once, and the party runs itself.
Fair-Swap Rules at a Glance
- 6 to 8 guests: 4 dozen per person; 9 to 12 guests: 6 dozen; over 12 guests: 3 dozen each.
- One extra dozen per guest, kept aside for tasting, so the swap pile stays full.
- Cookies arrive counted, in a container the host does not need back.
- Everyone swaps the number they brought: fewer in means fewer out, no awkwardness.
2. A Sign-Up Sheet That Prevents Six Trays of the Same Cookie

Nothing deflates a swap faster than opening the boxes to find five trays of chocolate chip cookies and nothing else. A simple sign-up sheet, sent with the invitation, fixes this before it happens. List the cookie categories you want covered, such as chocolate, spiced, citrus, nutty, sandwich, and bar cookies, and let each guest claim one category plus their specific recipe name, first come, first served.
A shared online document works best, because guests can see in real time what is already taken, but a group message thread with a running list works just as well for a small group. Give a sign-up deadline two weeks before the party, and send one gentle reminder at the one-week mark to anyone who has not claimed a slot.
If two guests want the same recipe, the second guest picks a variation, such as a different flavour or a different shape, so the table still looks varied. Keep a backup plan for the guest who forgets to sign up: hold one open category, such as a simple shortbread or sugar cookie, that anyone can claim at the last minute. On the day, print the sign-up list and tape it near the swap table so guests can find each baker’s cookies easily and thank them by name.
Filling the sign-up sheet is easier with candidates — these 11 cookie recipes are the ones guests ask for most.
Sign-Up Sheet Checklist
What goes on it:
- Categories: chocolate, spiced, citrus, nutty, sandwich, and bar cookies, one guest per category to start.
- Each guest writes their exact recipe name, not just the category.
- Deadline two weeks out, one reminder at one week, one open backup category held back.
- Print the final list for the swap table so every tray is easy to find.
Timing and backup:
3. Build a Swap-Day Display Table Guests Can Browse Like a Bakery
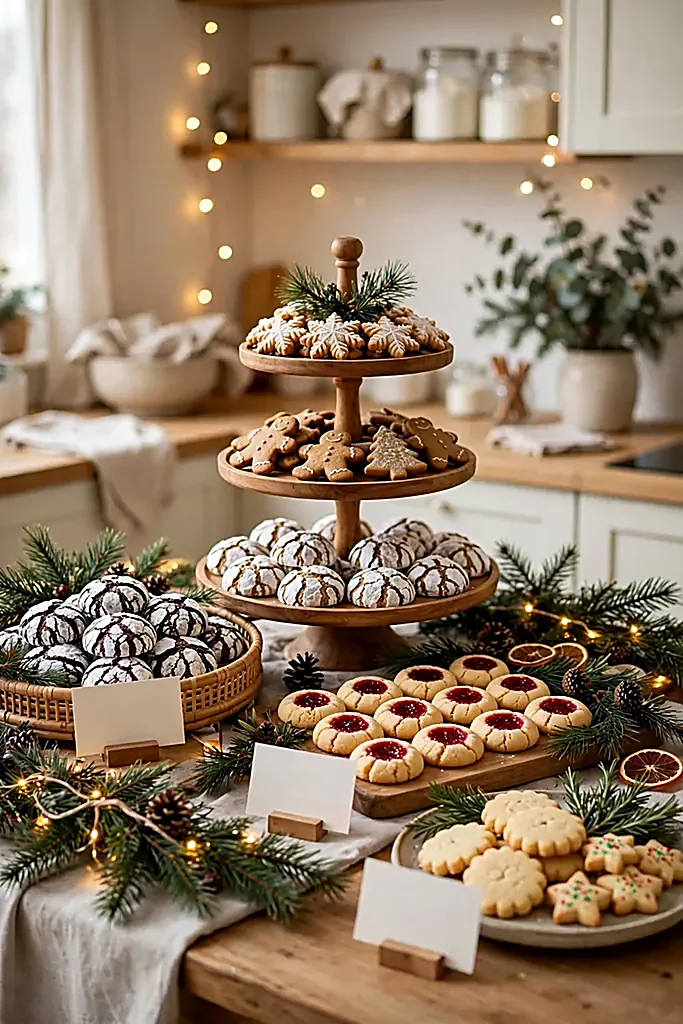
Set the display table up the day before if you can, because a calm host makes a calm party.
Cover one long table, or two card tables pushed together, with a plain tablecloth in a solid colour so the cookies, not the pattern, catch the eye. Place a large tray or cake stand for each guest’s cookies, with a small blank card in front of each tray for the baker’s name and the cookie’s name, written in marker so it reads from two steps back.
Group the trays by category rather than by guest, with all the chocolate cookies together, all the spiced cookies together, and so on, so guests can browse the table the way they would browse a bakery case. Leave a gap of at least 15 centimetres between trays so hands and tongs do not collide, and put a serving utensil, tongs or a small spatula, beside every single tray. A tray without tongs is how cookies get broken and crumbs get everywhere. Keep the table away from the front door and out of direct sun, which melts chocolate and softens butter cookies within an hour. If your party runs longer than two hours, keep half of each guest’s cookies in the kitchen and refill the trays halfway through, so the last guest sees a full table, not a picked-over one.
Display Table Setup, Step by Step
Set one long table with a solid-colour cloth, trays grouped by cookie category rather than by guest, and put a name card and a serving utensil beside every tray, with space between trays for hands.
- Table away from the door and out of direct sun; refill trays halfway through the party.
- Keep a spare tray and a roll of paper towels in the kitchen for quick tidy-ups.
4. Add a Tasting Station and a Friendly Vote

A tasting station turns a swap into a party, because guests get to try everything before they choose what to take home.
Set a smaller side table with one small plate per cookie variety, each holding three or four sample pieces cut or broken into bite-size portions, plus a stack of napkins, a few small cups of water to cleanse the palate, and a pencil for each guest.
For the vote, keep it light and kind: print simple ballot slips with three categories, such as Most Festive, Most Creative, and Best Overall, and let each guest vote for one cookie in each category, excluding their own. Count the votes while guests are packing their boxes, and announce the winners with a small prize, such as a wooden spoon, a jar of sprinkles, or a printed copy of the winning recipe, rather than anything expensive that turns a friendly game into a competition.
Plan the timing so tasting never holds up swapping: allow 30 minutes for arrival and tasting, then open the swap table. Guests who arrive late can taste while others are already swapping, since the swap pile is kept separate from the tasting samples and never runs short.
Tasting Station Kit
- One small plate per variety, with three or four bite-size samples on each.
- Napkins, small water cups, pencils, and printed ballots with three fun categories.
- Votes exclude the voter’s own cookies; winners get a small, light-hearted prize.
- 30 minutes for tasting, then open the swap table while latecomers keep sampling.
If you want even more cookie inspiration for your swap table, these Halloween cookie recipes are full of playful ideas that adapt beautifully to a holiday exchange.
5. Brown Butter Chocolate Chip Cookies

Every swap needs one reliable crowd-pleaser, and brown butter chocolate chip cookies are the safest bet on the table: familiar enough that nobody hesitates, but with a toffee-like depth from the browned butter that makes guests ask for the recipe.
Bake them the day before the party if you like; they stay soft for three days in an airtight tin, and they travel well without crumbling.
Brown the butter in a light-coloured pan so you can watch it turn amber, and let it cool for 20 minutes before mixing, or the warm butter will flatten the cookies. Scoop the dough generously, two tablespoons per cookie, so the edges crisp while the centres stay soft, and pull the tray when the centres still look slightly underdone.
Yield: 24 cookies | Prep: 20 minutes, plus 20 minutes cooling | Bake: 350°F (175°C) for 11 to 13 minutes
Ingredients:
- 1 cup (227 g) unsalted butter
- 1 cup (200 g) light brown sugar, packed
- 1/2 cup (100 g) granulated sugar
- 2 large eggs, at room temperature
- 2 teaspoons vanilla extract
- 2 1/4 cups (280 g) all-purpose flour
- 1 teaspoon baking soda
- 1 teaspoon fine sea salt
- 2 cups (340 g) semi-sweet chocolate chips
- Flaky sea salt, for sprinkling (optional)
Method:
- Melt the butter in a light-coloured saucepan over medium heat, swirling often, until it foams, then turns amber and smells nutty, about 5 to 7 minutes. Pour it into a heatproof bowl, browned bits included, and cool for 20 minutes.
- Whisk the brown sugar and granulated sugar into the cooled butter, then whisk in the eggs one at a time and the vanilla until smooth.
- Stir in the flour, baking soda, and fine sea salt just until no dry streaks remain, then fold in the chocolate chips.
- Scoop 2-tablespoon mounds onto parchment-lined baking sheets, spacing them 2 inches apart, and sprinkle with flaky sea salt if using.
- Bake at 350°F (175°C) for 11 to 13 minutes, until the edges are golden but the centres still look slightly soft.
- Cool on the baking sheet for 10 minutes, then move to a wire rack; the centres set as they cool.
Chocolate chip is the classic; these peanut butter chocolate crunch balls are the no-bake wildcard to swap beside it.
Brown Butter Chocolate Chip Cookies at a Glance
| Step | Detail | Why it matters |
|---|---|---|
| Browning the butter | 5 to 7 minutes, until amber and nutty | Toasts the milk solids for a toffee-like depth |
| Cooling the butter | 20 minutes before mixing | Warm butter melts the sugar and flattens cookies |
| Scoop size | 2 tablespoons per cookie | Crisp edges with soft centres |
| When to pull the tray | Centres still slightly soft | Cookies finish baking on the hot sheet |
6. Cranberry-Orange Shortbread Wedges

Shortbread is the swap guest that never causes trouble: it holds its shape in a box, keeps for a week, and slices into elegant wedges that look far fancier than the effort involved. Dried cranberries and orange zest give this version a festive colour and a bright, citrus edge that cuts through the butter, and the dough needs no rolling pin, just a pan, a press, and a knife.
Press the dough evenly into the pan, right into the corners, and score the wedges before baking so they break apart cleanly later. A light sprinkle of sugar over the top before baking gives a delicate crunch, and the wedges should cool completely in the pan before you lift them out, or they will crumble at the scored lines.
Yield: 16 wedges | Prep: 15 minutes | Bake: 325°F (165°C) for 30 to 35 minutes
Ingredients:
For the dough:
- 1 cup (227 g) unsalted butter, softened
- 1/2 cup (100 g) granulated sugar, plus 1 tablespoon for sprinkling
- 2 cups (250 g) all-purpose flour
- 1/2 teaspoon fine sea salt
For the flavour:
- 3/4 cup (90 g) dried cranberries, roughly chopped
- 1 tablespoon finely grated orange zest
Method:
- Beat the softened butter and 1/2 cup sugar until pale and creamy, about 2 minutes.
- Stir in the flour and salt until a soft dough forms, then fold in the cranberries and orange zest.
- Press the dough evenly into a greased 9-inch round cake pan, right into the corners, and prick the surface all over with a fork.
- Score the dough into 16 wedges with a sharp knife, cutting almost but not quite through.
- Sprinkle with the remaining tablespoon of sugar and bake at 325°F (165°C) for 30 to 35 minutes, until the edges are lightly golden.
- Cool completely in the pan, then re-cut along the scored lines and lift the wedges out.
Shortbread wedges travel well to a decorated house — these christmas decorations set the scene they arrive in.
Shortbread Wedges That Do Not Crumble
Press the dough firmly into the corners so the wedges bake evenly thick. Score before baking and re-cut after cooling; cutting only once invites breakage. Cool completely in the pan: warm shortbread is fragile, cold shortbread is sturdy. Store in an airtight tin for up to one week; the flavour improves by day two.
7. Chewy Ginger Molasses Cookies

Ginger molasses cookies are the smell of the season in edible form, and they are the cookie guests reach for with a cup of tea.
The molasses keeps them soft and chewy for days, which makes them ideal for a swap, because they taste just as good on day three as they did on day one, and they stack without sticking if you let them cool fully first.
Roll the dough balls generously in sugar before baking so they crackle beautifully in the oven, and do not overbake: the cookies should look slightly puffy and soft in the centre when they come out, then settle and wrinkle as they cool.
A pinch of black pepper is the quiet secret here; it warms the spice without making the cookie taste peppery.
Yield: 30 cookies | Prep: 20 minutes, plus 30 minutes chilling | Bake: 350°F (175°C) for 10 to 12 minutes
Ingredients:
- 3/4 cup (170 g) unsalted butter, softened
- 1 cup (200 g) granulated sugar, plus 1/2 cup for rolling
- 1 large egg
- 1/4 cup (80 ml) molasses
- 2 1/4 cups (280 g) all-purpose flour
- 2 teaspoons baking soda
- 1/2 teaspoon fine sea salt
The spice blend stirred through the flour is 2 teaspoons ground ginger, 1 teaspoon ground cinnamon, 1/4 teaspoon ground cloves, and 1/4 teaspoon black pepper.
Method:
- Beat the butter and 1 cup sugar until light and fluffy, about 3 minutes, then beat in the egg and molasses.
- Stir in the flour, ginger, cinnamon, cloves, black pepper, baking soda, and salt until a soft dough forms.
- Chill the dough for 30 minutes so it scoops cleanly and holds its shape.
- Roll tablespoon-size balls in the remaining 1/2 cup sugar and place 2 inches apart on parchment-lined baking sheets.
- Bake at 350°F (175°C) for 10 to 12 minutes, until the edges are set but the centres still look soft and puffy.
- Cool on the baking sheet for 5 minutes, then move to a wire rack; the cookies wrinkle and settle as they cool.
Ginger Molasses Troubleshooting
If the cookies spread flat, the dough was too warm: chill it for the full 30 minutes. If they come out too hard, they baked a minute too long, so pull the next tray while the centres look soft.
- No crackle on top: roll generously in sugar, and check your baking soda is fresh.
- Sticking together in the box: cool completely, then layer with parchment between rows.
8. Set Up a Packaging Station Guests Will Love
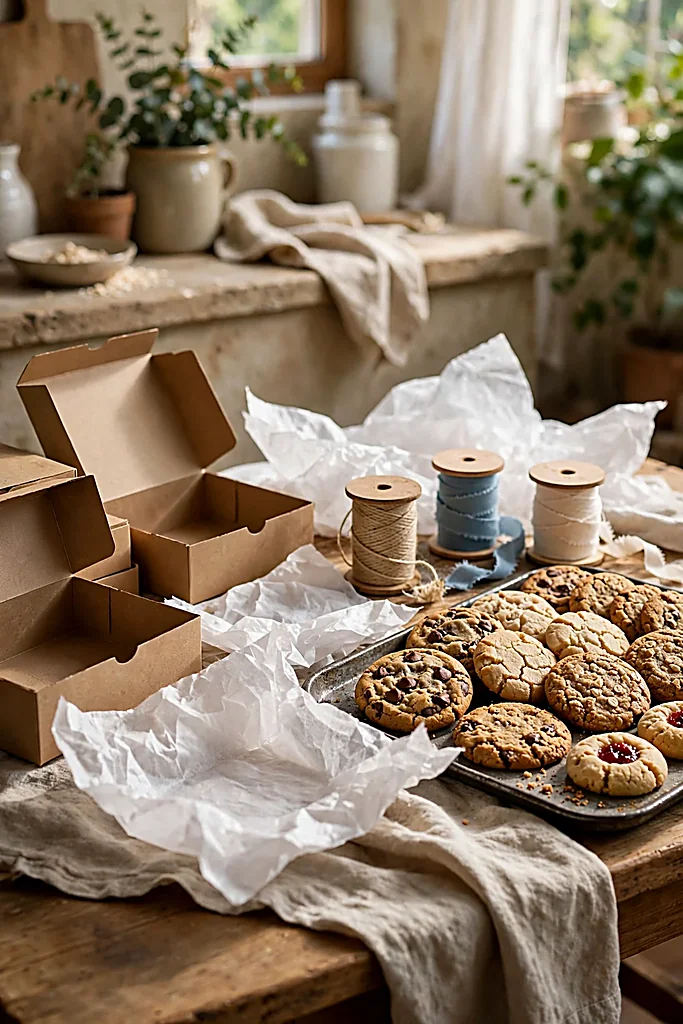
The swap itself is only half the party; the other half is everyone packing a beautiful box to take home. Set up the packaging station on a second table, away from the display table, so packers never block browsers. Stock it before guests arrive: one sturdy box or tin per guest, tissue paper, parchment squares for layering, ribbon, scissors, a marker, and blank gift tags.
Lay out the packing order so it feels natural: boxes first, then tissue, then parchment, then ribbon and tags at the end. Show one finished example box at the start of the station, layered with parchment between rows and a ribbon tied on top, so guests copy a good model instead of guessing. Remind guests to pack heavier cookies at the bottom and delicate ones on top, and to keep strong flavours, such as mint and ginger, in their own small bags so they do not perfume the whole box.
Budget about 15 minutes for packing at the end of the party, and keep a few spare boxes and extra ribbon in the kitchen for the guest who always brings more enthusiasm than containers. If children are attending, add a small corner with stickers and coloured pens so they can decorate their own boxes while the adults pack.
Packaging Station Shopping List
Packing supplies:
- One sturdy box or tin per guest, plus three spares for surprises.
- Tissue paper, parchment squares, ribbon, scissors, a marker, and blank gift tags.
- Small bags for strong flavours like mint and ginger, so they do not scent the whole box.
- One finished example box on display, and a kids’ corner with stickers if children attend.
Thoughtful extras:
Cookies are the stars of a swap, but guests appreciate something savoury alongside them, and these stuffed pigs in blankets make a perfect warm bite to serve while everyone tastes and packs.
9. Peppermint Chocolate Crinkle Cookies
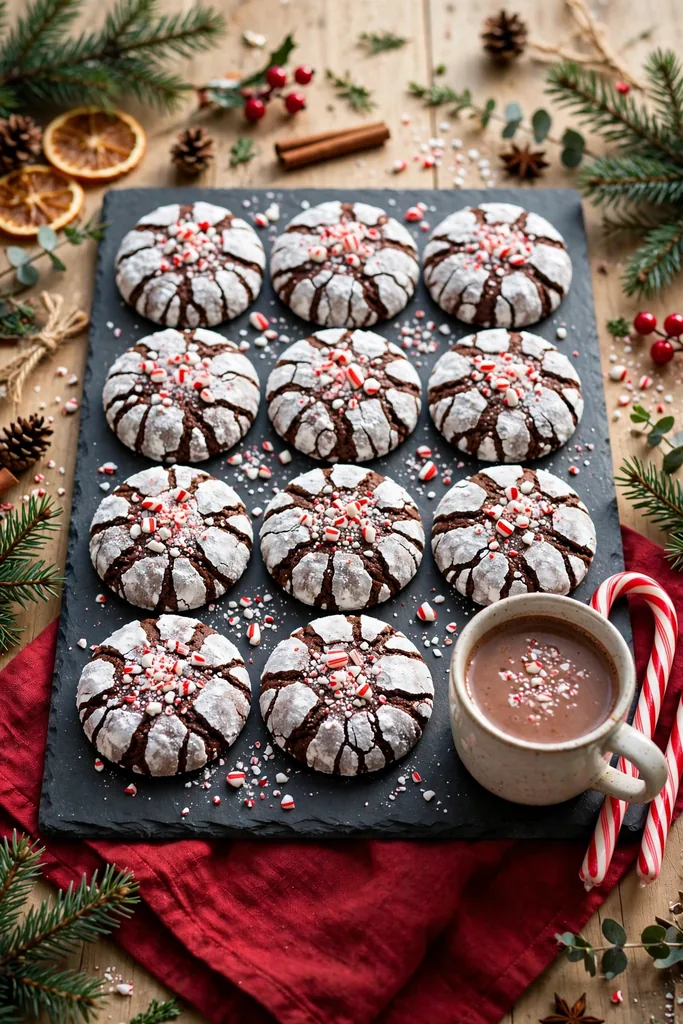
Peppermint crinkles are the prettiest cookie on any swap table: dark chocolate dough rolled in powdered sugar, cracking open in the oven to show a fudgy interior, with a scatter of crushed candy cane for a festive crunch. They look like snow-topped mountains, they taste like a candy cane dipped in hot chocolate, and they hold their shape well in a box.
Chill the dough for at least an hour, because warm chocolate dough is sticky and will not roll cleanly in sugar. Roll each ball first in granulated sugar, then generously in powdered sugar, so the crackle stays bright white instead of soaking into the dough. Bake just until the edges are set; the centres should stay soft and fudgy, and the cookies will firm up as they cool.
Yield: 28 cookies | Prep: 20 minutes, plus 1 hour chilling | Bake: 350°F (175°C) for 10 to 12 minutes
Ingredients:
- 1 cup (200 g) granulated sugar, plus 1/4 cup for rolling
- 1/2 cup (120 ml) vegetable oil
- 2 large eggs
- 1 teaspoon peppermint extract
- 1 cup (120 g) all-purpose flour
- 1/2 cup (50 g) unsweetened cocoa powder
- 2 teaspoons baking powder
- 1/4 teaspoon fine sea salt
- 1 cup (120 g) powdered sugar, for rolling
- 1/4 cup crushed candy cane, for sprinkling
Method:
Make and chill the dough:
- Whisk the 1 cup granulated sugar, oil, eggs, and peppermint extract until smooth.
- Stir in the flour, cocoa powder, baking powder, and salt until a thick, sticky dough forms.
- Chill the dough for at least 1 hour, until firm enough to roll.
Shape, coat, and bake:
- Shape the chilled dough into tablespoon-size balls, give each one a roll in the remaining granulated sugar, then bury it in powdered sugar so the coating is thick and even.
- Place 2 inches apart on parchment-lined baking sheets and sprinkle with crushed candy cane.
- Bake at 350°F (175°C) for 10 to 12 minutes, until the edges are set and the tops have crackled; cool on the sheet for 5 minutes before moving to a rack.
Peppermint belongs on the tree as much as in the tin — these bows on christmas trees tie the look together.
Crinkle Cookies That Stay White
- Double-roll: granulated sugar first, then a thick coat of powdered sugar.
- Chill the dough for a full hour, or the sugar soaks in and the crackle dulls.
- Sprinkle the candy cane on before baking so it sticks; a post-bake sprinkle slides off.
- Store without stacking until fully cool, or the powdered sugar smudges.
10. Salted Caramel Thumbprint Cookies
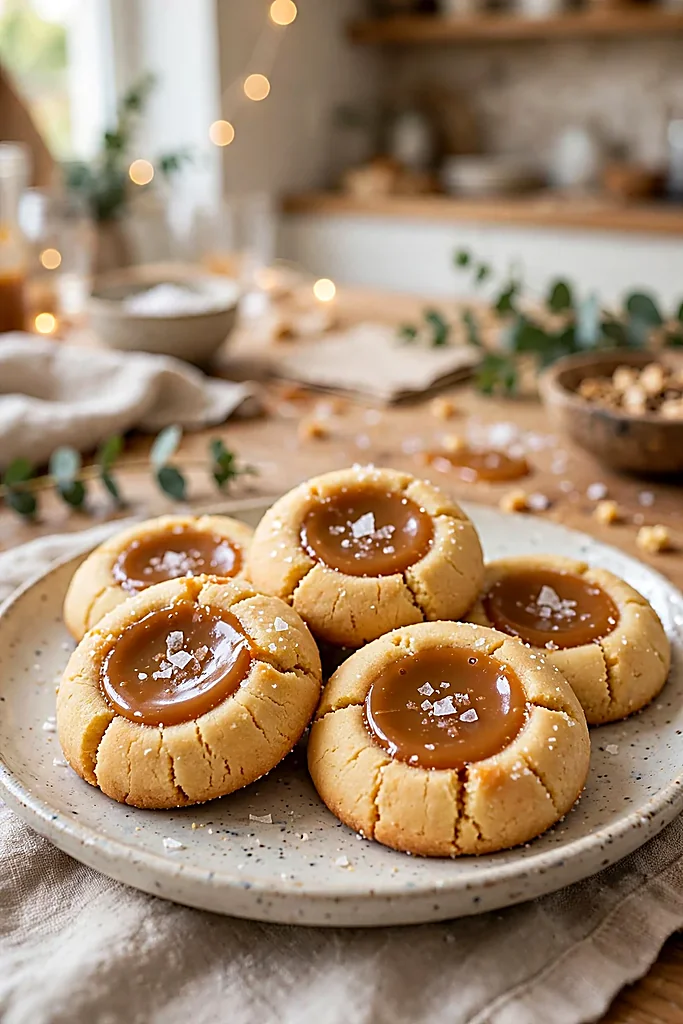
Thumbprints are the cookie that makes guests slow down, because each one is a small, deliberate thing: a buttery round with a glossy caramel centre and a whisper of salt.
They look impressive, they use pantry staples, and they are sturdy enough to travel, provided the caramel is fully set before packing, which takes about 30 minutes at room temperature.
Make the thumbprint with the back of a teaspoon rather than your thumb, so every well is the same size and holds the same amount of caramel.
Fill the wells only after baking, while the cookies are still slightly warm, and let the caramel sit until it no longer sticks to a fingertip. A tiny pinch of flaky salt on each caramel centre, added while the caramel is still soft, is what turns a sweet cookie into a memorable one.
Yield: 30 cookies | Prep: 25 minutes | Bake: 350°F (175°C) for 12 to 14 minutes
Ingredients:
- 1 cup (227 g) unsalted butter, softened
- 2/3 cup (135 g) granulated sugar
- 2 large egg yolks
- 1 teaspoon vanilla extract
- 2 cups (250 g) all-purpose flour
- 1/2 teaspoon fine sea salt
- 3/4 cup (240 g) thick caramel sauce, store-bought or homemade
- Flaky sea salt, for sprinkling
Method:
- Beat the butter and sugar until light and fluffy, about 3 minutes, then beat in the egg yolks and vanilla.
- Stir in the flour and fine sea salt until a soft dough forms; chill for 20 minutes if the dough feels sticky.
- Roll tablespoon-size balls, place 2 inches apart on parchment-lined baking sheets, and press a well into each with the back of a teaspoon.
- Bake at 350°F (175°C) for 12 to 14 minutes, until the edges are lightly golden; re-press the wells gently while the cookies are still warm.
- Spoon about 1 teaspoon of caramel sauce into each well and sprinkle with a pinch of flaky sea salt.
- Cool for at least 30 minutes, until the caramel is fully set, before packing.
Caramel thumbprints have cousins — these pecan pie cake recipes bake the same caramel depth into cake.
Salted Caramel Thumbprints at a Glance
| Step | Detail | Why it matters |
|---|---|---|
| Making the well | Back of a teaspoon, not a thumb | Every well holds the same amount of caramel |
| Filling | After baking, while still slightly warm | Caramel settles smoothly into the well |
| Salting | Pinch of flaky salt while caramel is soft | Salt sticks instead of sliding off |
| Packing | After 30 minutes of cooling | Set caramel will not smear the box |
11. Lemon Rosemary Butter Cookies

Lemon and rosemary sound unusual for a cookie, and that is exactly why they stand out on a swap table full of chocolate and spice.
The lemon zest keeps the butter cookie bright, the finely chopped rosemary adds a piney, savoury note that makes people pause and take a second bite, and the pale golden colour looks beautiful beside darker cookies in a mixed box.
Chop the rosemary very finely, almost to a powder, so no guest bites into a woody needle, and use only the leaves, never the stems. Slice the log of dough while it is cold and firm, straight from the fridge, so the rounds keep clean edges, and bake until just the edges turn golden, since these cookies go from pale to overbaked quickly.
Yield: 36 cookies | Prep: 20 minutes, plus 1 hour chilling | Bake: 350°F (175°C) for 12 to 14 minutes
Ingredients:
- 1 cup (227 g) unsalted butter, softened
- 3/4 cup (150 g) granulated sugar
- 1 large egg yolk
- 1 tablespoon finely grated lemon zest
- 1 tablespoon fresh rosemary leaves, very finely chopped
- 2 cups (250 g) all-purpose flour
- 1/2 teaspoon fine sea salt
- 1 tablespoon lemon juice
Method:
- Beat the butter and sugar until pale and fluffy, about 3 minutes, then beat in the egg yolk, lemon zest, rosemary, and lemon juice.
- Stir in the flour and salt until a soft dough forms; divide in half and shape each half into a log about 2 inches wide.
- Wrap the logs in plastic wrap and chill for at least 1 hour, until firm.
- Slice each log into 1/4-inch rounds and place 1 inch apart on parchment-lined baking sheets.
- Bake at 350°F (175°C) for 12 to 14 minutes, until just the edges turn golden.
- Cool on the baking sheet for 5 minutes, then move to a wire rack.
Lemon Rosemary Tips Use leaves only, chopped almost to a powder, so no woody bits survive into the cookie. Slice the dough cold and firm for clean, round edges that do not spread. Watch the last two minutes closely: pale butter cookies overbake fast. These pair beautifully with tea, so tuck a note about that into the swap box.
12. A Dietary-Friendly Corner Everyone Can Enjoy
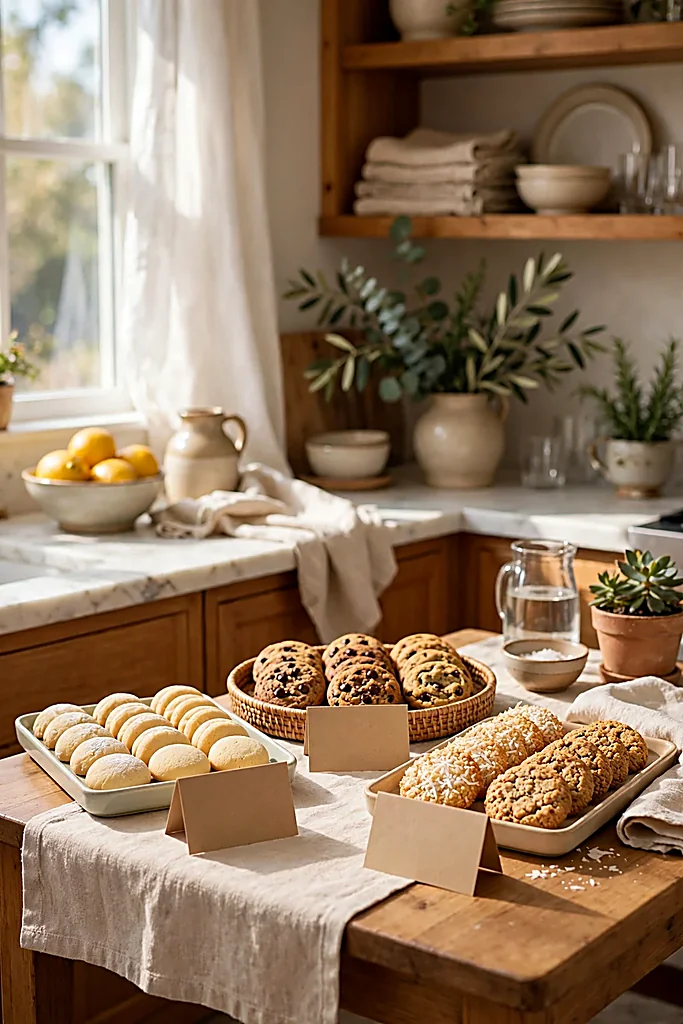
A good swap makes room for every guest, including the ones who eat gluten-free, dairy-free, or nut-free. Set aside one clearly marked corner of the display table, with its own serving utensils, so guests with dietary needs never have to guess or worry about cross-contact. Label every tray in this corner with the cookie’s name and a short note, such as gluten-free, dairy-free, or nut-free, written on the same name cards used for the rest of the table.
Ask for at least two dietary-friendly recipes on the sign-up sheet, and confirm them a week before the party so the corner is never empty. The safest choices are naturally compliant recipes, such as flourless chocolate cookies or coconut macaroons, rather than complicated substitutions that risk a disappointing result. Keep this corner’s tongs separate from the main table’s, and place it at the end of the table, not in the middle, so guests serving themselves from it do not block the main flow. One more kindness costs nothing: ask every baker to list their cookie’s main allergens on their recipe card, even for the main table. Guests with allergies can then swap with confidence, and the host never has to answer the same question twelve times.
Dietary Corner Setup
Give the corner one clearly marked spot at the end of the table, with its own serving utensils, and favour naturally compliant recipes over complicated substitutions, for taste and safety.
- At least two dietary-friendly recipes confirmed on the sign-up sheet a week ahead.
- Every tray labelled with its dietary note; every recipe card lists main allergens.
If you would like a festive extra that doubles as a party favour, a small craft corner is a lovely touch — these DIY Christmas snow globes are simple enough for guests to make between tasting rounds and take home at the end of the night.
Frequently Asked Questions About Cookie Exchange Ideas
A Swap Worth Repeating
A great cookie exchange is not really about the cookies, although the cookies certainly help. It is about a room full of people who baked for each other, tasted each other’s work, and went home with a box that tells the story of the afternoon. Set the rules early, make the table beautiful, give guests a way to pack their treasures home, and the tradition will take care of itself.
Start with one recipe from this list, send the invitations with the rules already in them, and let the first swap be the rehearsal for the one everyone asks about next year. The oven is warm, the guest list is waiting, and the sweetest party of the season is yours to host.
More from The Glossy Guide
 Fashion and Beauty
11 Holiday Party Outfits That Feel Festive Without Trying Too Hard
December fills up fast: the office party, a friend's open house, dinner at your sister's, a New Year's Eve gathering…
 Fashion and Beauty
12 Scarf Outfits That Turn One Accessory Into the Whole Look
A scarf is the hardest-working piece in any wardrobe. It costs less than a coat, takes up almost no room…
 Fashion and Beauty
13 Winter Fashion Outfits That Make Cold Days Look Effortlessly Chic
Cold weather is not a reason to hide under shapeless layers. With the right coat, a good knit and boots…