13 Christmas Cookies That Fill the House with Holiday Cheer
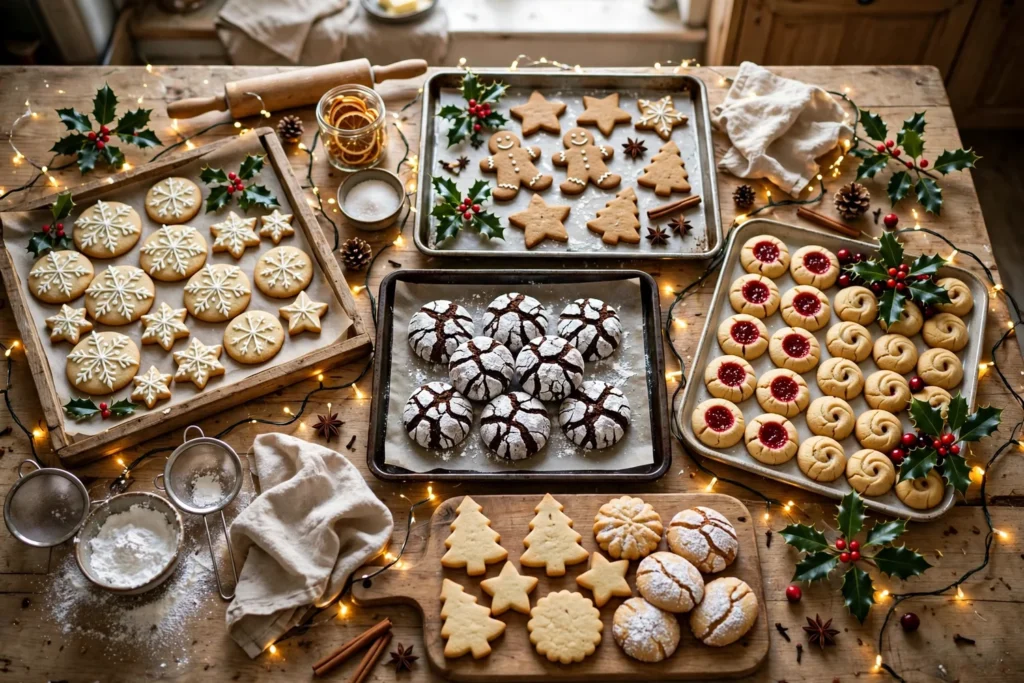
A Christmas cookies tin is a small act of generosity that keeps giving all season: a box dropped off at a neighbour’s door, a plate at the office party, a tray by the tree on Christmas Eve. The thirteen recipes below cover the whole tin, from the cut-outs children love to decorate to the rich spiced classics that make the whole house smell like Christmas, and every single one comes with a full recipe, not just a description.
Bake them in any order, but plan the tin like a baker would. Start with the sturdy cookies that keep well, like shortbread and sandies, then bake the soft ones closer to the day you need them. Most of these cookies freeze beautifully baked or as dough, so a big baking weekend in early December can stock the whole month if you label and date everything.
A few ground rules run through the whole list. Measure flour by spooning it into the cup and levelling it off, never scooping from the bag, which packs in far too much. Chill dough when the recipe says to, and bake one test cookie first when you try a new recipe, so you can adjust the time for your oven before committing a full tray. With those habits, every cookie here turns out the way it should.
Table of Contents
- 1. Classic Cut-Out Sugar Cookies with Royal Icing
- 2. Spiced Gingerbread People
- 3. Peppermint Chocolate Crinkle Cookies
- 4. Cranberry Orange Shortbread Fingers
- 5. Eggnog Snickerdoodles
- 6. Raspberry Almond Thumbprints
- 7. Salted Caramel Chocolate Cookies
- 8. Pistachio Cardamom Butter Cookies
- 9. Brown Butter Pecan Sandies
- 10. Hot Cocoa Cookies with Toasted Marshmallow
- 11. Maple Walnut Oatmeal Cookies
- 12. Red Velvet White Chocolate Chip Cookies
- 13. Coconut Snowball Cookies
- Frequently Asked Questions
- A Cookie Tin Worth Repeating
1. Classic Cut-Out Sugar Cookies with Royal Icing
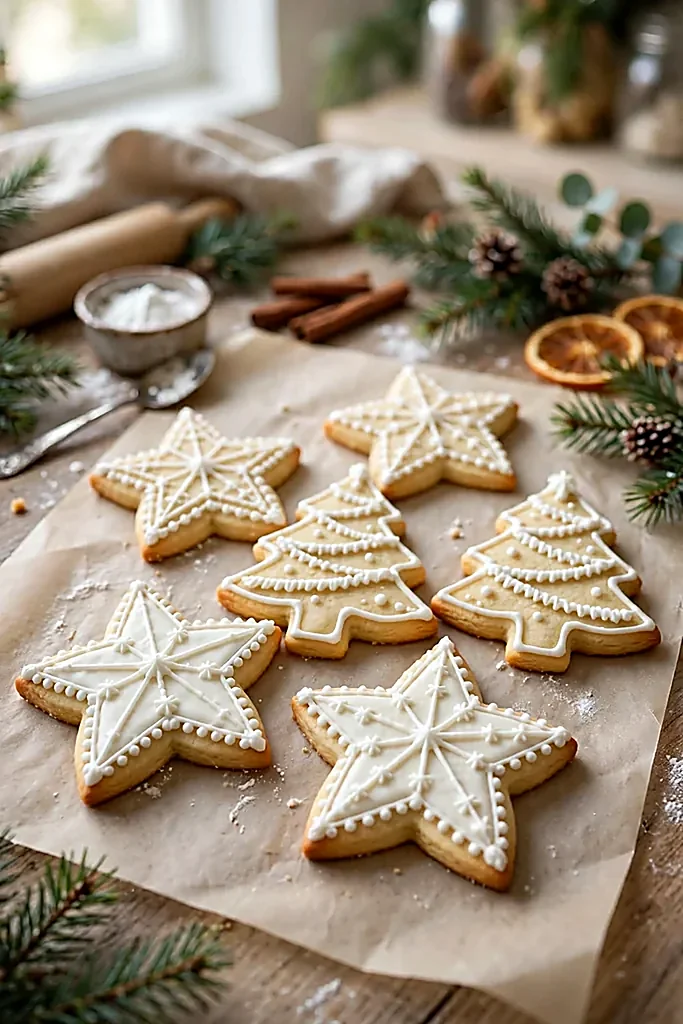
There is no Christmas cookie quite as versatile as the cut-out sugar cookie. It holds its shape in the oven, takes icing beautifully, and turns an afternoon of baking into a decorating session the whole household can join. This dough is deliberately firm and low-spread, so stars stay stars and trees stay trees instead of melting into blobs.
Chill the dough well and work with one disc at a time, keeping the rest in the fridge. Warm dough is the single biggest cause of puffy, spreading cut-outs, so if the shapes start to soften on the tray, slide the whole tray back into the fridge for ten minutes before baking.
Makes about 36 cookies | Prep: 30 minutes, plus 1 hour chilling | Bake: 10 to 12 minutes per batch
Ingredients:
For the cookies:
- 3 cups all-purpose flour, plus more for rolling
- 1 teaspoon baking powder
- 1/2 teaspoon fine salt
- 1 cup unsalted butter, softened
- 1 cup granulated sugar
- 1 large egg, at room temperature
- 2 teaspoons vanilla extract
- 1/2 teaspoon almond extract (optional)
For the royal icing:
- 2 cups powdered sugar
- 2 tablespoons meringue powder
- 3 to 4 tablespoons water
- Food colouring as desired
Steps:
- Whisk the flour, baking powder, and salt in a medium bowl.
- Beat the butter and sugar until pale and fluffy, about 3 minutes, then beat in the egg, vanilla, and almond extract.
- Mix in the flour mixture on low speed just until a dough forms. Divide in half, flatten into discs, wrap, and chill for at least 1 hour.
- Heat the oven to 350°F (175°C) and line baking sheets with parchment.
- Roll one disc on a floured surface to 1/4 inch thick, cut shapes, and place 1 inch apart on the sheets. Re-roll scraps once only.
- Bake for 10 to 12 minutes, until the edges are just set and barely golden. Cool on the sheet for 5 minutes, then move to a rack.
- For the icing, beat the powdered sugar, meringue powder, and water until stiff peaks form, adding water a teaspoon at a time for flooding consistency. Pipe outlines, flood, and let set for at least 8 hours.
Start the season here, then keep baking — these 11 cookie recipes carry the cookie tin through the rest of winter.
Cut-Outs That Keep Their Shape
Roll the dough a touch thicker than you think, a full 1/4 inch, and chill the cut shapes on their trays for 15 minutes before they go in the oven. Thick, cold dough spreads far less, and the cookies come out with crisp edges that are much easier to ice.
2. Spiced Gingerbread People

Gingerbread people are the smell of Christmas in cookie form: molasses, ginger, cinnamon, and cloves filling the kitchen while the oven does its work.
This version is sturdy enough to stand up to decorating and to hang on the tree, but still soft in the centre if you pull it at the right moment.
Molasses matters here, so use regular unsulphured molasses rather than blackstrap, which turns bitter in this quantity. If you want a darker, spicier cookie, add an extra half teaspoon of ginger rather than more molasses.
Makes about 24 cookies | Prep: 25 minutes, plus 1 hour chilling | Bake: 9 to 11 minutes
Ingredients:
- 3 1/4 cups all-purpose flour
- 1 tablespoon ground ginger
- 1 teaspoon ground cinnamon
- 1/4 teaspoon ground cloves
- 1/2 teaspoon baking soda
- 1/2 teaspoon fine salt
- 3/4 cup unsalted butter, softened
- 3/4 cup packed dark brown sugar
- 2/3 cup molasses
- 1 large egg
- 1 teaspoon vanilla extract
- Royal icing and small candies, for decorating
Steps:
- Whisk the flour, ginger, cinnamon, cloves, baking soda, and salt together.
- Beat the butter and brown sugar until fluffy, then beat in the molasses, egg, and vanilla.
- Mix in the flour mixture until a soft dough forms. Divide in half, flatten into discs, wrap, and chill for at least 1 hour.
- Heat the oven to 350°F (175°C) and line baking sheets with parchment.
- Roll one disc to 1/4 inch thick on a floured surface, cut people shapes, and place 1 inch apart on the sheets.
- Bake for 9 to 11 minutes, until the edges are set and the centres look just done. Cool completely before decorating with icing buttons, eyes, and smiles.
Gingerbread people bake while the tree goes up — these flocked tree decorating ideas make the backdrop worthy of the tray.
Soft Centres, Sturdy Edges
For soft gingerbread people, bake the smaller cutters for 9 minutes and the large ones for 11, and take them out while the centres still look slightly soft. They firm up as they cool, and overbaked gingerbread goes crisp all the way through within a day.
3. Peppermint Chocolate Crinkle Cookies
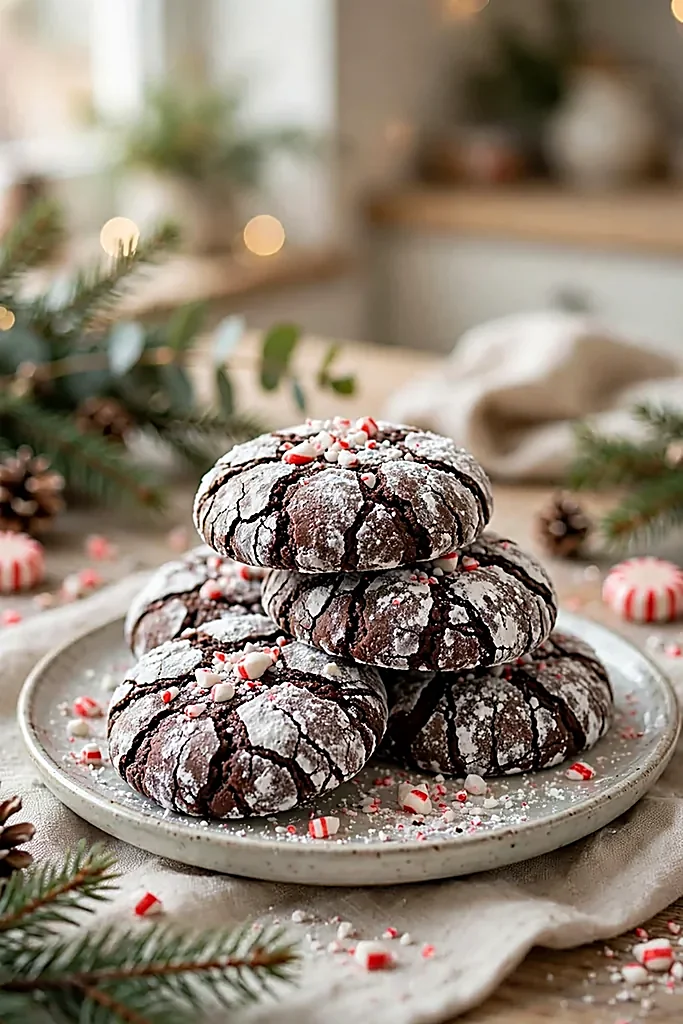
Crinkle cookies earn their name in the oven: the tops crack open as they bake, showing dark chocolate beneath a snowy coat of powdered sugar.
A little peppermint in the dough and crushed candy cane on top turns them into the cookie equivalent of a candy cane dipped in hot chocolate.
Roll the dough balls generously in powdered sugar, twice if you like a thick white coat, and do not flatten them before baking.
The cracks form as the cookies spread and rise, and a flattened ball crinkles far less.
Makes about 30 cookies | Prep: 20 minutes, plus 1 hour chilling | Bake: 11 to 13 minutes
Ingredients:
- 1 cup all-purpose flour
- 1/2 cup unsweetened cocoa powder
- 1 teaspoon baking powder
- 1/4 teaspoon fine salt
- 1/2 cup unsalted butter, melted and slightly cooled
- 1 cup granulated sugar
- 2 large eggs
- 1 teaspoon vanilla extract
- 1/2 teaspoon peppermint extract
- 1/2 cup powdered sugar, for rolling
- 1/4 cup crushed peppermint candies, for topping
Steps:
Make the dough:
- Whisk the flour, cocoa, baking powder, and salt in a bowl.
- Whisk the melted butter and sugar, then whisk in the eggs, vanilla, and peppermint extract until smooth.
- Stir in the flour mixture until just combined. Cover and chill for at least 1 hour, until firm enough to scoop.
Roll and bake:
- Heat the oven to 350°F (175°C) and line baking sheets with parchment.
- Scoop tablespoon-sized balls, roll each in powdered sugar until thickly coated, and place 2 inches apart.
- Sprinkle with crushed peppermint, then bake for 11 to 13 minutes, until the tops are cracked and the edges are set. Cool on the sheet for 5 minutes before moving to a rack.
Peppermint crinkles are tree-trimming fuel — a plate of them beside these bows on christmas trees keeps decorators going.
The Double Sugar Roll
Roll each ball in powdered sugar, let it sit for a minute, then roll it a second time. The first coat soaks into the dough and the second stays put, which is how you get that bright white, deeply cracked finish instead of a thin, patchy dusting.
4. Cranberry Orange Shortbread Fingers
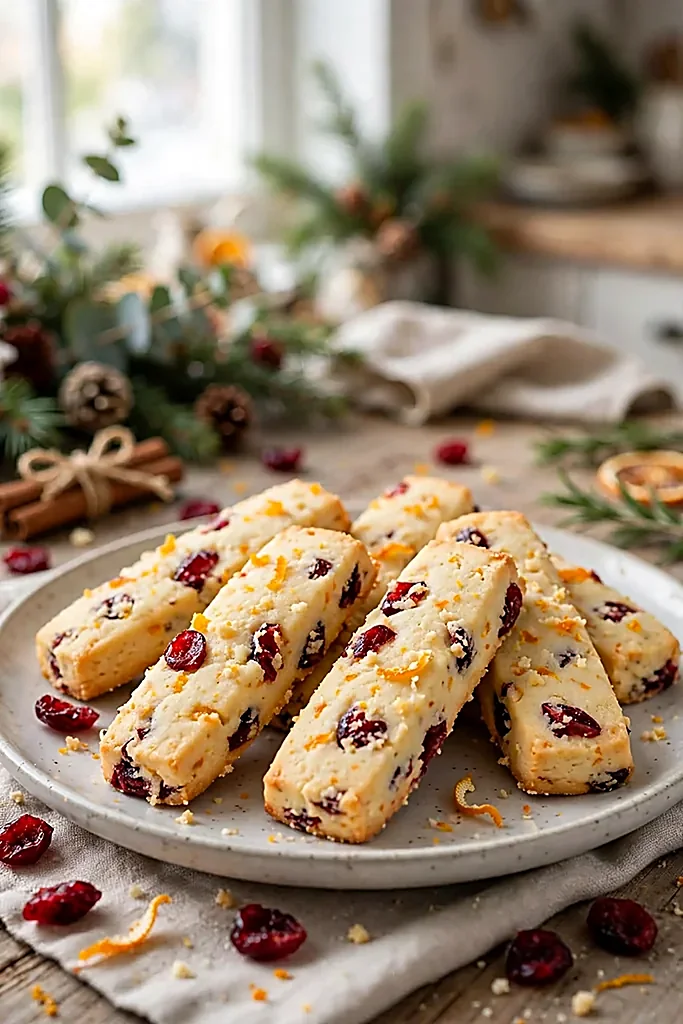
Shortbread is the quiet star of the Christmas tin: just butter, sugar, and flour, done well. Dried cranberries and orange zest lift it out of plain territory without making it fussy, and the fingers shape is easy to cut, easy to stack, and easy to dip in chocolate if you want to dress them up.
Good butter is the whole recipe here, so use the best unsalted butter you have and keep it cool rather than soft and greasy. The dough should feel like firm play dough, not sticky batter, and that is exactly right.
Makes about 32 fingers | Prep: 20 minutes, plus 30 minutes chilling | Bake: 18 to 20 minutes
Ingredients:
- 2 cups all-purpose flour
- 1/2 cup powdered sugar
- 1/4 teaspoon fine salt
- 1 cup cold unsalted butter, cut into cubes
- 3/4 cup dried cranberries, chopped
- 1 tablespoon finely grated orange zest
- 1 teaspoon vanilla extract
- 2 tablespoons granulated sugar, for sprinkling
Steps:
Whisk the flour, powdered sugar, and salt in a large bowl. Rub the cold butter into the flour with your fingertips until the mixture looks like coarse crumbs. Stir in the cranberries, orange zest, and vanilla, then press the mixture together into a dough. Do not overwork it. Press the dough into a lined 8-inch square pan, prick all over with a fork, and chill for 30 minutes. Heat the oven to 325°F (165°C). Sprinkle with granulated sugar and bake for 18 to 20 minutes, until just golden at the edges. Cut into fingers while still warm, then cool completely in the pan before lifting out.
Why Shortbread Must Stay Cool
If your kitchen is warm, chill the pressed dough for a full hour rather than 30 minutes, and bake straight from the fridge. Cold butter melts slowly in the oven, which keeps shortbread tender and crumbly instead of greasy and flat.
If cookie baking is your favourite part of the season, these Halloween cookies recipes are worth bookmarking too — the same cut-out and decorating skills carry straight over to Christmas shapes.
5. Eggnog Snickerdoodles
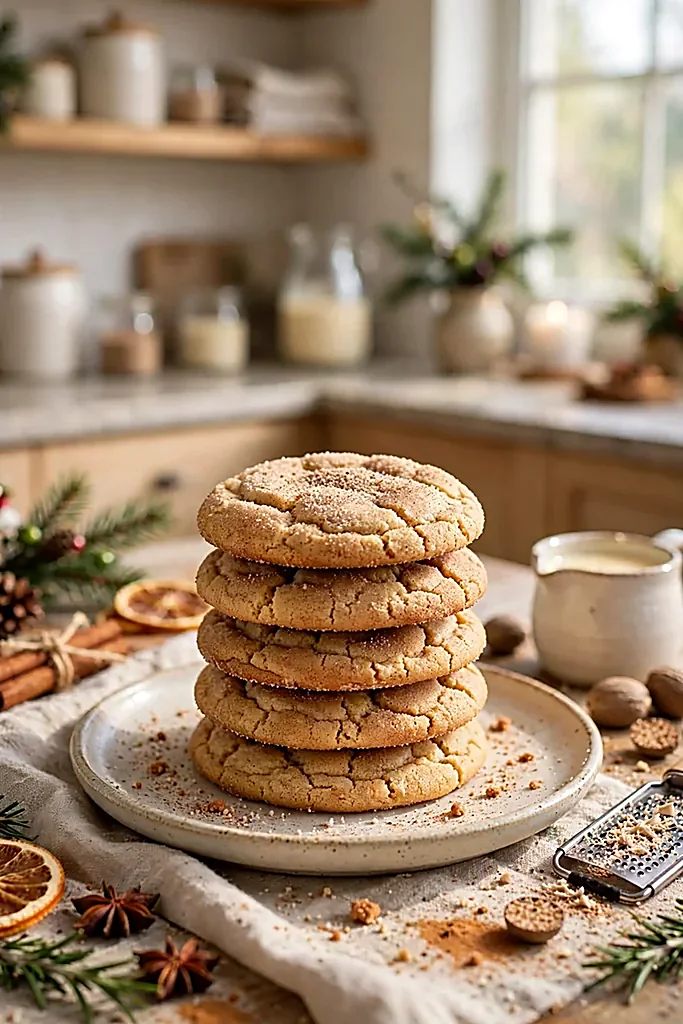
Snickerdoodles are already a comfort cookie, and a splash of eggnog in the dough plus a grating of fresh nutmeg makes them taste unmistakably like the holidays.
They bake up puffy, crackled on top, and soft inside, with the cinnamon-sugar coat doing the crisp work around the edges.
Use full-fat eggnog from a carton for the most reliable result; homemade eggnog varies too much in thickness and sweetness for a dough like this.
If your eggnog is very sweet, cut the sugar in the dough by two tablespoons.
Makes about 30 cookies | Prep: 20 minutes, plus 30 minutes chilling | Bake: 10 to 12 minutes
Ingredients:
2 3/4 cups all-purpose flour; 1 teaspoon cream of tartar; 1 teaspoon baking soda; 1/2 teaspoon fine salt; 1/2 teaspoon ground nutmeg, plus more for dusting; 3/4 cup unsalted butter, softened; 1 1/4 cups granulated sugar; 2 large egg yolks; 1/3 cup eggnog; 1 teaspoon vanilla extract; and For rolling: 1/4 cup granulated sugar mixed with 1 tablespoon ground cinnamon.
Steps:
- Whisk the flour, cream of tartar, baking soda, salt, and nutmeg together.
- Beat the butter and sugar until light and fluffy, then beat in the egg yolks, eggnog, and vanilla.
- Mix in the flour mixture just until combined. Chill the dough for 30 minutes so it scoops cleanly.
- Heat the oven to 350°F (175°C) and line baking sheets with parchment.
- Roll tablespoon-sized balls in the cinnamon sugar and place 2 inches apart.
- Bake for 10 to 12 minutes, until the edges are set and the centres still look soft. Dust lightly with nutmeg while warm and cool on the sheet for 5 minutes.
Eggnog cookies ask for a festive glass — these non alcoholic thanksgiving punch recipes pour something spiced to match.
Eggnog Snickerdoodles at a Glance
| Step | What to do | Why it matters |
|---|---|---|
| Dough | Chill 30 minutes before scooping | Cold dough puffs instead of spreading thin |
| Coat | Roll generously in cinnamon sugar | The coat is the crisp contrast to the soft centre |
| Bake | Pull while centres look soft | They set as they cool and stay chewy for days |
| Store | Airtight tin, up to 5 days | A slice of bread in the tin keeps them soft |
6. Raspberry Almond Thumbprints

Thumbprint cookies are the prettiest low-effort cookie in the tin: a tender butter cookie, a thumb-shaped well, and a jewel of jam in the middle.
Raspberry is the classic filling because its tartness cuts the richness of the butter dough, and a few sliced almonds on the edge add crunch and a finished look.
Fill the wells after baking, not before, if you want the jam to stay bright and glossy. Jam baked inside the cookie dulls and sinks, while jam spooned into a warm cookie sets into a smooth, jewel-like centre.
Makes about 28 cookies | Prep: 25 minutes | Bake: 14 to 16 minutes
Ingredients:
For the cookies:
- 2 cups all-purpose flour
- 1/2 teaspoon fine salt
- 1 cup unsalted butter, softened
- 2/3 cup granulated sugar
- 2 large egg yolks
- 1 teaspoon vanilla extract
- 1/2 teaspoon almond extract
For the filling and edges:
- 1/2 cup seedless raspberry jam
- 1/2 cup sliced almonds, lightly crushed
Steps:
- Whisk the flour and salt together.
- Beat the butter and sugar until fluffy, then beat in the egg yolks, vanilla, and almond extract.
- Mix in the flour until a soft dough forms. Roll tablespoon-sized balls, press a thumb or the back of a teaspoon into the centre of each, and press almonds around the edges.
- Heat the oven to 350°F (175°C) and line baking sheets with parchment. Place the cookies 1 1/2 inches apart.
- Bake for 14 to 16 minutes, until the edges are lightly golden. Re-press the wells gently while warm if they have puffed up.
- Spoon about 1/2 teaspoon of jam into each warm well and cool completely so the jam sets.
Thumbprints are apron-over-comfy-clothes baking — these cozy winter outfits over 50 are made for the same slow December days.
Jam That Stays Bright
Warm the jam briefly so it spoons smoothly, and fill each well only to the brim, not over it. Overfilled thumbprints run in the tin and stick to everything, while a level fill sets into a clean, glossy jewel.
7. Salted Caramel Chocolate Cookies
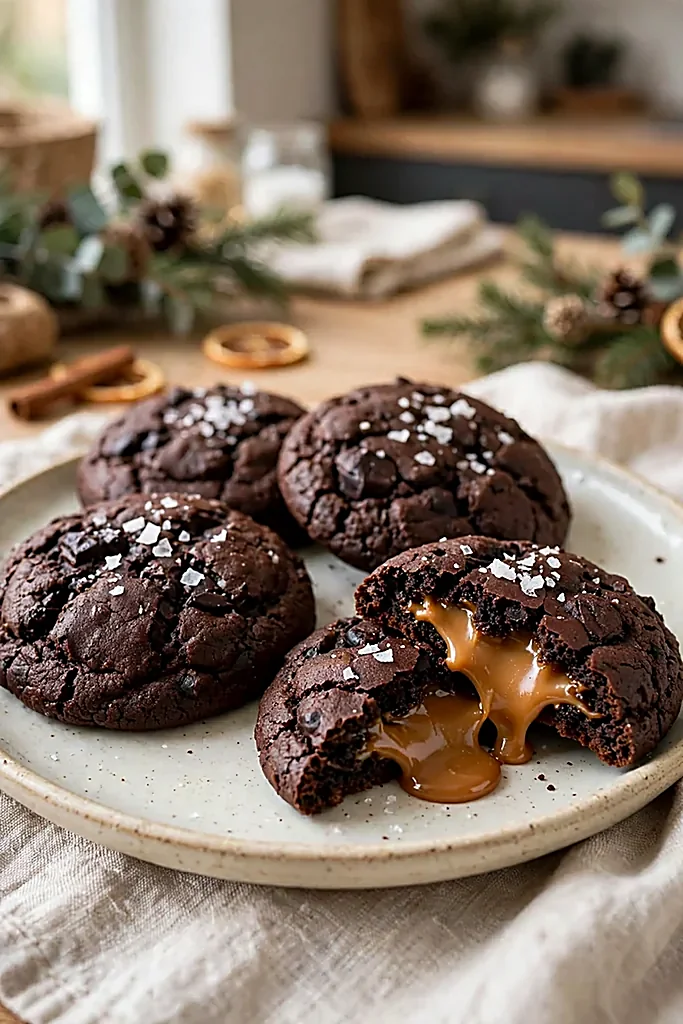
These are the grown-up cookies of the tin: dark, thick, and fudgy, with a molten caramel centre and a pinch of flaky salt on top. They look like bakery cookies and taste like them too, but the whole trick is just a frozen caramel disc tucked inside each dough ball before baking.
Freeze the caramel discs solid before you wrap the dough around them. Soft caramel leaks in the oven and welds itself to the baking sheet, while a frozen disc melts slowly and stays in the middle where it belongs.
Makes about 20 cookies | Prep: 30 minutes, plus 30 minutes freezing | Bake: 11 to 13 minutes
Ingredients:
- 1 3/4 cups all-purpose flour
- 3/4 cup unsweetened cocoa powder
- 1 teaspoon baking soda
- 1/2 teaspoon fine salt
- 3/4 cup unsalted butter, softened
- 1 cup packed brown sugar
- 1/2 cup granulated sugar
- 2 large eggs
- 2 teaspoons vanilla extract
- 20 soft caramel candies, unwrapped and flattened into discs
- Flaky sea salt, for topping
Steps:
- Flatten each caramel into a disc on parchment and freeze for 30 minutes.
- Whisk the flour, cocoa, baking soda, and salt together.
- Beat the butter and both sugars until fluffy, then beat in the eggs and vanilla.
- Mix in the flour mixture just until combined, then chill the dough for 20 minutes so it handles cleanly.
- Heat the oven to 350°F (175°C) and line baking sheets with parchment.
- Wrap about 2 tablespoons of dough around each frozen caramel disc, seal well, and place 2 inches apart. Sprinkle with flaky salt.
- Bake for 11 to 13 minutes, until the edges are set and the centres still look soft. Cool on the sheet for 10 minutes — the caramel is very hot at first.
Salted caramel runs deep in this kitchen — these pecan pie cake recipes bake the same caramel mood into cake.
Seal Every Seam
Pinch the dough closed underneath each cookie and roll it smooth before baking. Even a small gap lets the caramel escape, and a fully sealed ball is the difference between a molten centre and a sticky baking sheet.
8. Pistachio Cardamom Butter Cookies

Cardamom is the spice that makes people ask what is in the cookie, and pistachios give these butter cookies their colour and crunch.
The pair is common in Scandinavian baking, where cardamom belongs in everything sweet, and it feels festive without tasting like every other Christmas spice blend.
Buy cardamom already ground for this recipe unless you grind your own fresh; pre-ground cardamom loses strength fast, so check the date on the jar and add an extra pinch if it has been open for months.
Makes about 36 cookies | Prep: 20 minutes, plus 1 hour chilling | Bake: 12 to 14 minutes
Ingredients:
- 2 1/4 cups all-purpose flour
- 1 teaspoon ground cardamom
- 1/2 teaspoon fine salt
- 1 cup unsalted butter, softened
- 3/4 cup powdered sugar
- 1 large egg yolk
- 1 teaspoon vanilla extract
- 3/4 cup shelled pistachios, finely chopped
- 2 tablespoons granulated sugar, for the tops
Steps:
Make and chill the dough:
- Whisk the flour, cardamom, and salt together.
- Beat the butter and powdered sugar until smooth and creamy, then beat in the egg yolk and vanilla.
- Mix in the flour mixture until just combined, then stir in half the pistachios.
Slice and bake:
- Shape the dough into a log about 2 inches wide, roll it in the remaining pistachios and the granulated sugar, wrap, and chill for at least 1 hour.
- Heat the oven to 350°F (175°C) and line baking sheets with parchment.
- Slice the log into 1/4-inch rounds and place 1 inch apart. Bake for 12 to 14 minutes, until the edges are lightly golden. Cool on the sheet for 5 minutes.
Slice-and-Bake, Done Right
Use a sharp, thin knife and a gentle sawing motion, and rotate the log a quarter turn every few slices so it does not flatten on one side. If the log softens while slicing, pop it back in the fridge for ten minutes rather than forcing ragged slices.
A sweet cookie tray always lands better with something savoury beside it — these stuffed pigs in blankets are the easy savoury bite that balances a whole table of Christmas cookies.
9. Brown Butter Pecan Sandies

Brown butter is a small step that changes a cookie completely: cooking the butter until it smells nutty and turns amber adds a toffee depth that plain melted butter never reaches.
Combined with toasted pecans, it makes a short, crumbly sandie that tastes like the best part of pecan pie in cookie form.
Watch the butter closely as it browns, because it goes from nutty to burnt in under a minute.
As soon as the milk solids at the bottom turn golden brown and it smells like toffee, pour it into a cool bowl so it stops cooking.
Makes about 30 cookies | Prep: 25 minutes, plus 30 minutes cooling | Bake: 14 to 16 minutes
Ingredients:
- 1 cup unsalted butter
- 2 cups all-purpose flour
- 1/2 teaspoon fine salt
- 1 cup toasted pecans, finely chopped
- 1/2 cup granulated sugar
- 1/4 cup packed brown sugar
- 1 teaspoon vanilla extract
- 1/2 cup powdered sugar, for dusting
Steps:
Melt the butter in a light-coloured pan over medium heat, swirling often, until it foams, then turns amber and smells nutty, about 6 to 8 minutes. Pour into a bowl and cool for 30 minutes. Whisk the flour and salt, then stir in the pecans. Whisk the cooled brown butter with both sugars and the vanilla until smooth. Mix in the flour mixture just until a crumbly dough forms. If it will not hold together, press it firmly — sandie dough is drier than most. Heat the oven to 350°F (175°C) and line baking sheets with parchment. Roll tablespoon-sized balls, flatten slightly, and place 1 inch apart. Bake for 14 to 16 minutes, until set and lightly golden. Dust generously with powdered sugar while warm, then dust again once cool for a snowy finish.
Nutty and buttery wins the season — these peanut butter chocolate crunch balls bring the same crunch in candy form.
Toast the Pecans First
Toast raw pecans in a dry pan for 3 to 4 minutes, shaking often, until they smell fragrant, then cool before chopping. Untoasted pecans taste flat inside a cookie, while toasted ones carry the whole flavour of the sandie.
10. Hot Cocoa Cookies with Toasted Marshmallow

If hot cocoa were a cookie, it would be this one: a rich chocolate base, a soft marshmallow melted on top, and a drizzle of chocolate to finish.
The marshmallow goes on halfway through baking so it puffs and toasts instead of melting into a puddle, and a quick pass under the broiler at the end gives it that campfire colour.
Cut large marshmallows in half with oiled kitchen scissors and place them cut-side down on the cookies. Whole marshmallows roll off, and the flat cut side grips the cookie as it softens.
Makes about 24 cookies | Prep: 20 minutes | Bake: 12 to 14 minutes
Ingredients:
1 1/2 cups all-purpose flour; 1/2 cup unsweetened cocoa powder; 1 teaspoon baking soda; 1/2 teaspoon fine salt; 1/2 cup unsalted butter, softened; 3/4 cup granulated sugar; 1/2 cup packed brown sugar; 1 large egg; 1 teaspoon vanilla extract; 12 large marshmallows, halved; and 1/3 cup chocolate chips, melted, for drizzling.
Steps:
- Whisk the flour, cocoa, baking soda, and salt together.
- Beat the butter and both sugars until fluffy, then beat in the egg and vanilla.
- Mix in the flour mixture just until combined.
- Heat the oven to 350°F (175°C) and line baking sheets with parchment.
- Scoop tablespoon-sized balls, place 2 inches apart, and bake for 8 minutes.
- Press a marshmallow half, cut-side down, onto each cookie and return to the oven for 4 to 6 minutes, until the marshmallows are puffed.
- Optional: broil for 30 to 60 seconds, watching constantly, until the marshmallows are lightly toasted. Cool, then drizzle with melted chocolate.
Hot cocoa cookies belong where friends gather — these friendsgiving table settings show the table they land on.
Hot Cocoa Cookies at a Glance
| Step | What to do | Why it matters |
|---|---|---|
| Base | Bake 8 minutes before adding marshmallow | A set base holds the topping instead of sinking |
| Topping | Marshmallow half, cut-side down | The flat side grips; whole marshmallows roll off |
| Toast | Broil 30 to 60 seconds, watched closely | Marshmallows go from toasted to burnt in seconds |
| Finish | Chocolate drizzle once cool | Warm cookies melt the drizzle into a smear |
11. Maple Walnut Oatmeal Cookies

Oatmeal cookies get a bad reputation from dry, worthy versions, but this one is chewy, buttery, and full of maple flavour. Real maple syrup in the dough and a thin maple glaze on top make it taste like a winter morning, and walnuts add the crunch that keeps a soft cookie interesting.
Use old-fashioned rolled oats, not quick oats, for the best chew. Quick oats turn mushy in the dough and make the cookie cakey, while rolled oats stay distinct and give the cookie its texture.
Makes about 30 cookies | Prep: 20 minutes, plus 20 minutes chilling | Bake: 11 to 13 minutes
Ingredients:
For the cookies:
- 1 1/2 cups old-fashioned rolled oats
- 1 1/4 cups all-purpose flour
- 1 teaspoon baking soda
- 1/2 teaspoon fine salt
- 1 teaspoon ground cinnamon
- 3/4 cup unsalted butter, softened
- 3/4 cup packed brown sugar
- 1/4 cup granulated sugar
- 1 large egg
- 1/3 cup pure maple syrup
- 1 teaspoon vanilla extract
- 1 cup walnuts, toasted and chopped
For the glaze:
- 1/2 cup powdered sugar
- 2 tablespoons maple syrup
Steps:
- Whisk the oats, flour, baking soda, salt, and cinnamon together.
- Beat the butter and both sugars until fluffy, then beat in the egg, maple syrup, and vanilla.
- Mix in the oat mixture just until combined, then stir in the walnuts. Chill for 20 minutes.
- Heat the oven to 350°F (175°C) and line baking sheets with parchment.
- Scoop 2-tablespoon balls, place 2 inches apart, and flatten slightly.
- Bake for 11 to 13 minutes, until the edges are golden and the centres still look soft. Cool on the sheet for 5 minutes, then drizzle with the maple glaze once cool.
Maple and walnut are old-fashioned flavors — these apple pie biscuits bake in the same cozy tradition.
Chewy, Not Cakey
Pull these cookies while the centres still look underdone and let them finish on the hot baking sheet. Oatmeal cookies that look fully baked in the oven always turn dry and cakey by the time they cool.
12. Red Velvet White Chocolate Chip Cookies

Red velvet in cookie form keeps the cocoa depth and the tang of the cake, but skips the frosting in favour of white chocolate chips that melt into sweet pockets.
They are the most striking cookie in the tin, deep red against the white chips, and they photograph beautifully on a Christmas cookie tray.
A teaspoon of vinegar in the dough is not a mistake; it reacts with the baking soda and sharpens the cocoa flavour, which is what makes red velvet taste like red velvet rather than just red chocolate.
Makes about 28 cookies | Prep: 20 minutes, plus 30 minutes chilling | Bake: 10 to 12 minutes
Ingredients:
- 2 1/4 cups all-purpose flour
- 1/4 cup unsweetened cocoa powder
- 1 teaspoon baking soda
- 1/2 teaspoon fine salt
- 3/4 cup unsalted butter, softened
- 3/4 cup granulated sugar
- 3/4 cup packed brown sugar
- 2 large eggs
- 1 tablespoon red food colouring
- 1 teaspoon white vinegar
- 1 teaspoon vanilla extract
- 1 1/4 cups white chocolate chips
Steps:
- Whisk the flour, cocoa, baking soda, and salt together.
- Beat the butter and both sugars until fluffy, then beat in the eggs, food colouring, vinegar, and vanilla.
- Mix in the flour mixture just until combined, then stir in the white chocolate chips. Chill for 30 minutes.
- Heat the oven to 350°F (175°C) and line baking sheets with parchment.
- Scoop 2-tablespoon balls and place 2 inches apart.
- Bake for 10 to 12 minutes, until the edges are set and the centres still look soft. Cool on the sheet for 5 minutes, then move to a rack.
Keep the Red, Lose the Spread
Chill this dough for the full 30 minutes and bake on a cool baking sheet, not one just out of the oven from the last batch. Warm dough and a hot sheet are the two things that turn thick red velvet cookies into thin red discs.
Cookies and a Christmas display go together — these DIY Christmas snow globes make a pretty centrepiece for the table where the cookie tin sits.
13. Coconut Snowball Cookies
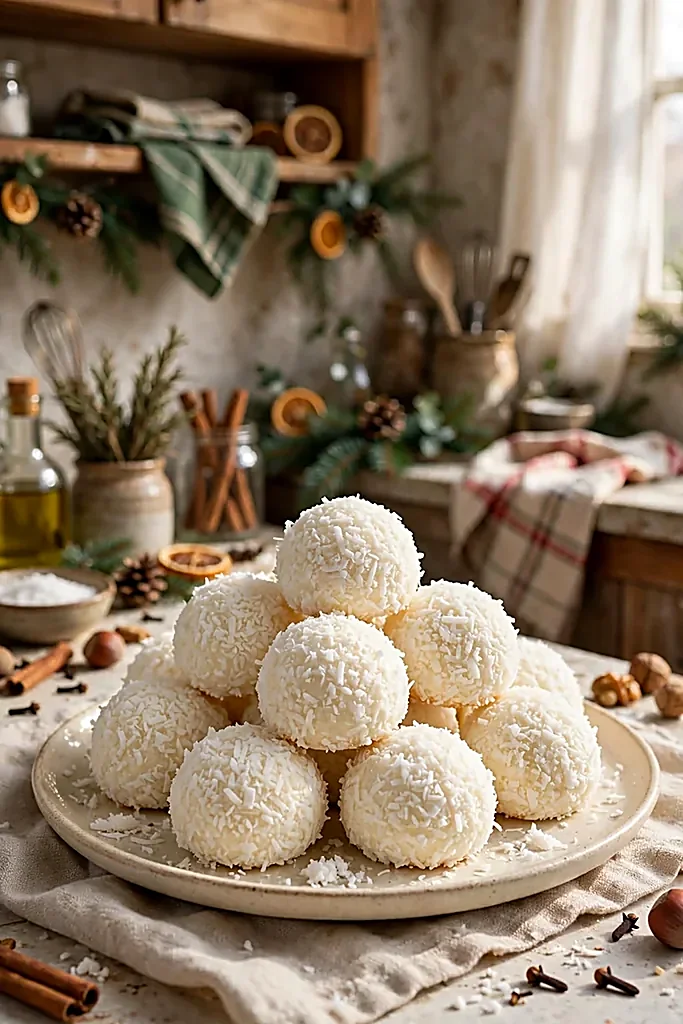
Snowball cookies look like they were rolled in fresh snow, and the coconut version leans into that completely: a tender butter cookie rolled twice in shredded coconut so the coating is thick, white, and unmistakable.
They are also one of the easiest cookies here, with no icing and no decorating at all.
Use sweetened shredded coconut for the coating, not desiccated coconut, which is too fine and dry to cling well.
The longer shreds catch the light and give the snowball look, while fine coconut disappears into the cookie.
Makes about 28 cookies | Prep: 20 minutes | Bake: 14 to 16 minutes
Ingredients:
- 2 cups all-purpose flour
- 1/2 teaspoon fine salt
- 1 cup unsalted butter, softened
- 1/2 cup powdered sugar, plus more for dusting
- 1 teaspoon vanilla extract
- 1/2 teaspoon coconut extract (optional)
- 1 cup sweetened shredded coconut, plus 1 cup more for rolling
Steps:
Make the dough:
- Whisk the flour and salt together.
- Beat the butter and powdered sugar until creamy, then beat in the vanilla and coconut extract.
- Mix in the flour just until combined, then stir in 1 cup of the shredded coconut.
Roll and bake:
- Heat the oven to 350°F (175°C) and line baking sheets with parchment.
- Roll tablespoon-sized balls, then roll each in the remaining shredded coconut, pressing gently so it sticks. Place 1 inch apart.
- Bake for 14 to 16 minutes, until the bottoms are lightly golden and the tops are still pale. Cool on the sheet for 5 minutes, then dust lightly with powdered sugar if you like.
Snowball cookies match a frosted room — these christmas decorations dress the house as white as the plate.
Roll While Warm, Roll Again When Cool
Roll the cookies in coconut once before baking and, if the coating looks thin after baking, roll the warm cookies in coconut a second time. The warmth makes the second coat stick, and the double coat is what gives a true snowball finish.
Frequently Asked Questions
A Cookie Tin Worth Repeating
The best Christmas cookie tin is not the one with the most cookies in it, but the one with a little of everything: something crisp, something soft, something chocolate, something spiced, and one showpiece that makes people stop and look. This list gives you all of those, and each recipe is written to work the first time, not just the third.
Pick five or six for this year, bake them well, and save the rest for next December. A tin built slowly, one good recipe at a time, is how a family baking tradition starts — and it is a much better plan than trying to bake all thirteen in one weekend.
More from The Glossy Guide
 Fashion and Beauty
11 Holiday Party Outfits That Feel Festive Without Trying Too Hard
December fills up fast: the office party, a friend's open house, dinner at your sister's, a New Year's Eve gathering…
 Fashion and Beauty
12 Scarf Outfits That Turn One Accessory Into the Whole Look
A scarf is the hardest-working piece in any wardrobe. It costs less than a coat, takes up almost no room…
 Fashion and Beauty
13 Winter Fashion Outfits That Make Cold Days Look Effortlessly Chic
Cold weather is not a reason to hide under shapeless layers. With the right coat, a good knit and boots…