Top 12 Stunning Clay Bag Charms That Turn Any Bag Into a One-of-a-Kind Treasure
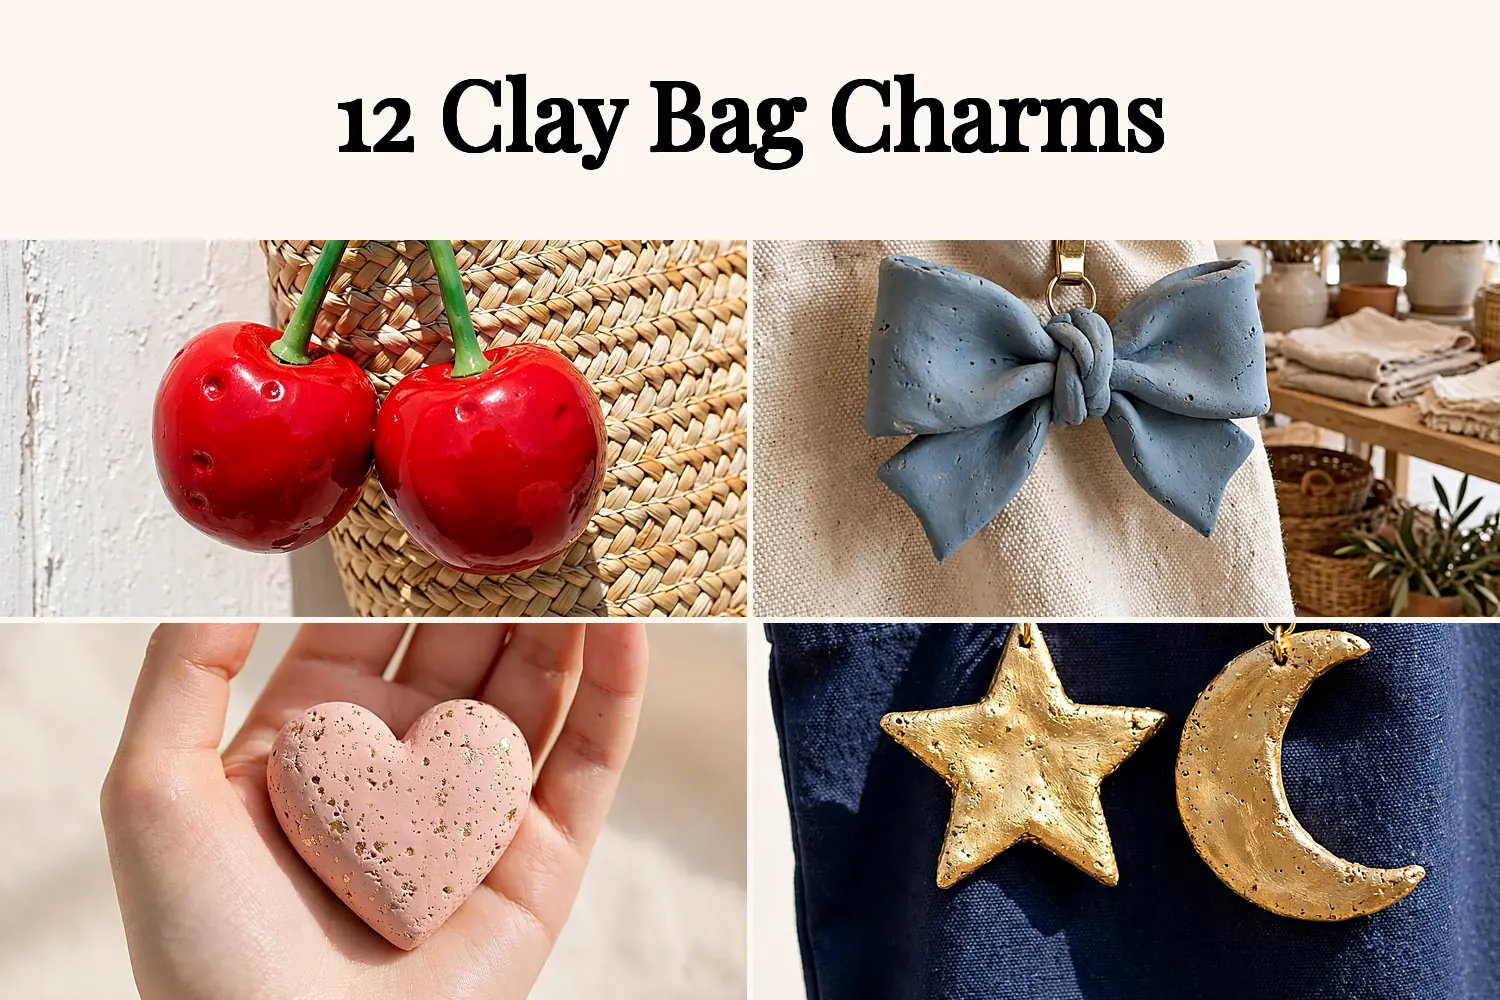
A plain tote gets a whole new personality from one small handmade charm. These 12 clay bag charms are easy weekend projects, and each one hangs on a bag, a backpack, or a set of keys.
The list mixes polymer clay and air-dry clay, so you can pick the kind you already own. Food charms sit beside animals, flowers, letters, and a little night sky, and every idea lists its materials and steps.
Number 6 is a blush heart flecked with gold, and number 12 closes the list with a star and moon set that looks far harder to make than it is.
Table of Contents
- 1. The Strawberry Charm That Looks Good Enough to Eat
- 2. A Daisy You Can Shape in One Sitting
- 3. The Tiny Cat Face Every Bag Needs
- 4. Your Initial, Rolled and Ready to Hang
- 5. The Little Red-Cap Mushroom
- 6. A Gold-Flecked Heart for Everyday Bags
- 7. A Cherry Pair With a Glossy Finish
- 8. The Mini Bow That Dresses Up a Tote
- 9. A Bumblebee With Hand-Painted Stripes
- 10. The Rainbow Charm Kids Love to Make
- 11. A Tiny Coffee Cup for Morning People
- 12. The Star and Moon Set Worth the Wait
- Frequently Asked Questions
- Carry Something You Made
1. The Strawberry Charm That Looks Good Enough to Eat
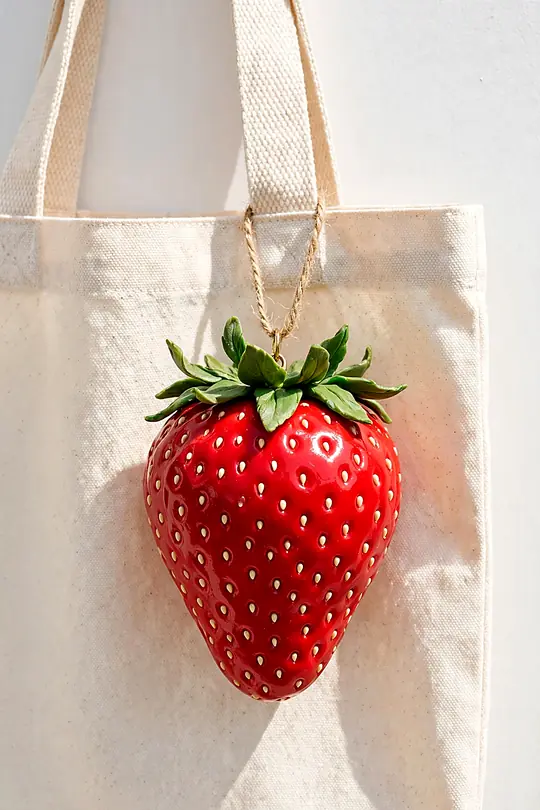
A ripe strawberry might be the sweetest of these clay bag charms. Roll a ball of red polymer clay, pinch one end into a soft point, and press tiny cream dots into the surface with a toothpick for seeds. A small green star on top finishes the berry.
Gather These
- 1 block red polymer clay
- 1 small piece green polymer clay
- 1 toothpick
- 1 eye pin
- 1 jump ring and lobster clasp
Bake it low and slow: Polymer clay hardens in a regular oven at the package temperature. Let the charm cool fully before adding the jump ring, or the warm clay can dent.
This charm suits a canvas tote or a market bag, and it makes a sweet gift topper too. Seal the finished berry with a thin coat of clear varnish so the color stays bright through daily use, rain, and plenty of handling.
A strawberry charm pairs well with sweet bakes, so try these easy cookie recipes for your next kitchen afternoon.
2. A Daisy You Can Shape in One Sitting
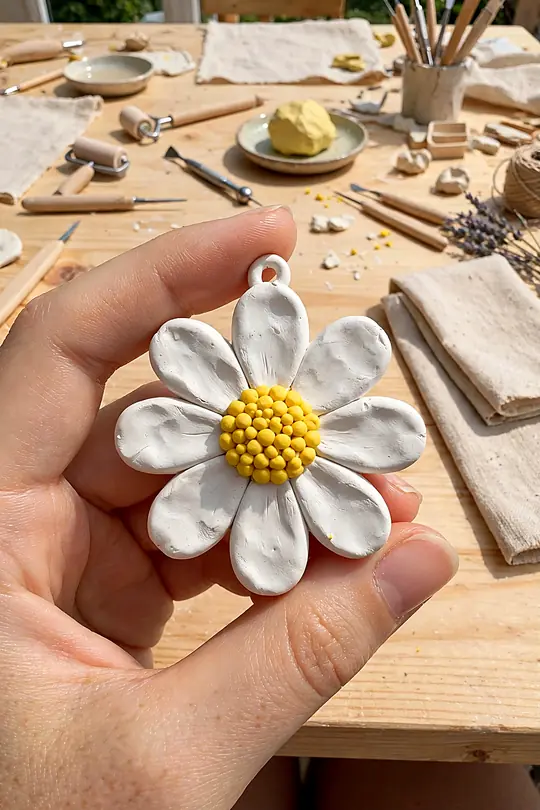
A daisy is a friendly first project on this list. Roll a small yellow ball for the center, flatten a ring of white petals around it, and press the whole flower gently so the petals join. Air-dry clay needs no oven, just patience.
Keep the petals thick enough to survive a bag. Roll each petal to about the thickness of a coin so it dries strong instead of snapping at the edge. A short drying rest between shaping and painting keeps the colors clean.
- Shape the petals on wax paper so they lift off cleanly
- Let the flower dry 24 hours before painting
- Add a small jump ring through the top petal while the clay is still soft
If you enjoy shaping small things by hand, these easy DIY wall art projects use the same patient approach on a bigger scale.
3. The Tiny Cat Face Every Bag Needs
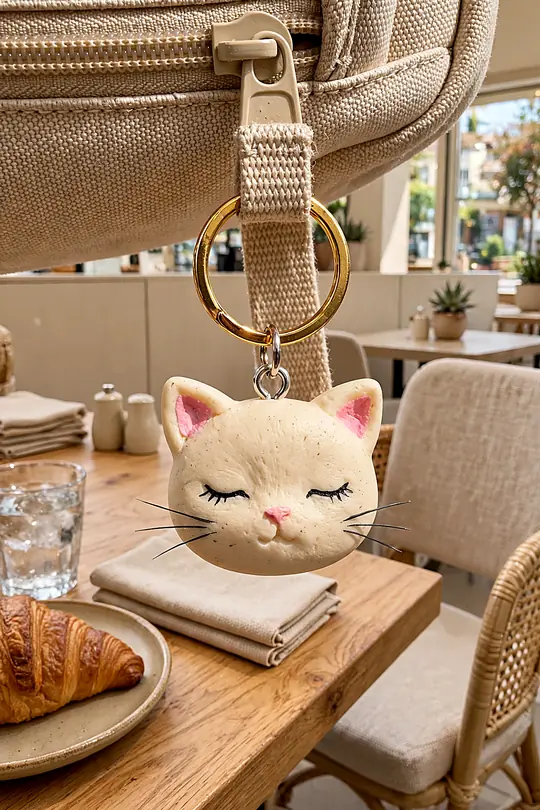
Cat lovers will reach for this one first. Shape a round cream face, pinch two small triangle ears on top, and paint on whiskers and a tiny pink nose after baking. The ears are the only tricky part, and a toothpick helps set them straight.
Cat Face at a Glance
Keep the face simple and let the ears do the talking. Paint the whiskers with the tip of a toothpick instead of a brush, since the fine point gives you thin, even lines. A dab of blush pink on the cheeks adds warmth.
Handmade hobbies pair well together, so these beginner crochet patterns make a natural next project.
4. Your Initial, Rolled and Ready to Hang
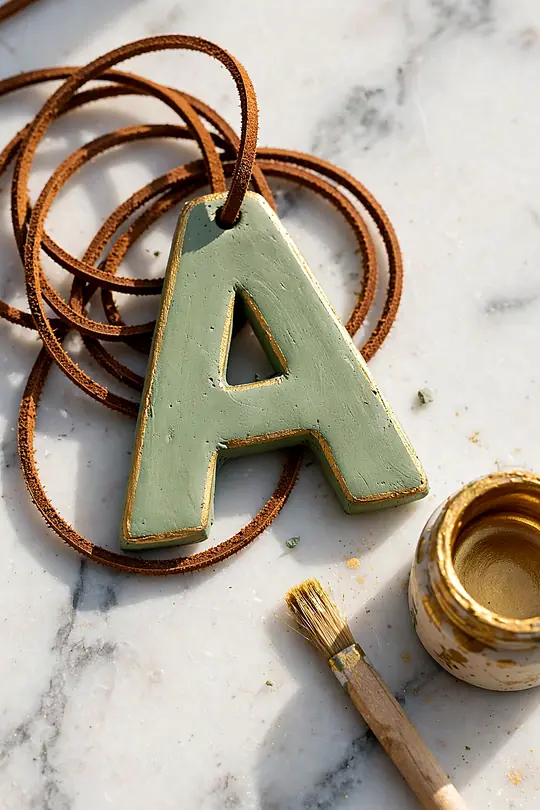
One letter says more than a whole charm collection sometimes. Roll a flat slab of air-dry clay, cut your initial with a craft knife, and smooth the edges with a damp fingertip. Paint it any color you like once it dries.
Gather These
- 1 pack air-dry clay
- 1 craft knife
- 1 small paintbrush
- Acrylic paint in your color
- 1 jump ring and cord
The letter reads clearly when it stays chunky. Cut the slab about a quarter inch thick so the finished charm feels solid in the hand and holds its shape on a bag. A thin gold edge along one side turns a simple letter into a keepsake.
- Paint the front one color and the edge gold
- Stamp a tiny star into a corner before drying
- Thread it on leather cord for a grown-up look
A personal piece like this belongs with other handmade touches, such as this DIY sunburst mirror for the hallway.
5. The Little Red-Cap Mushroom
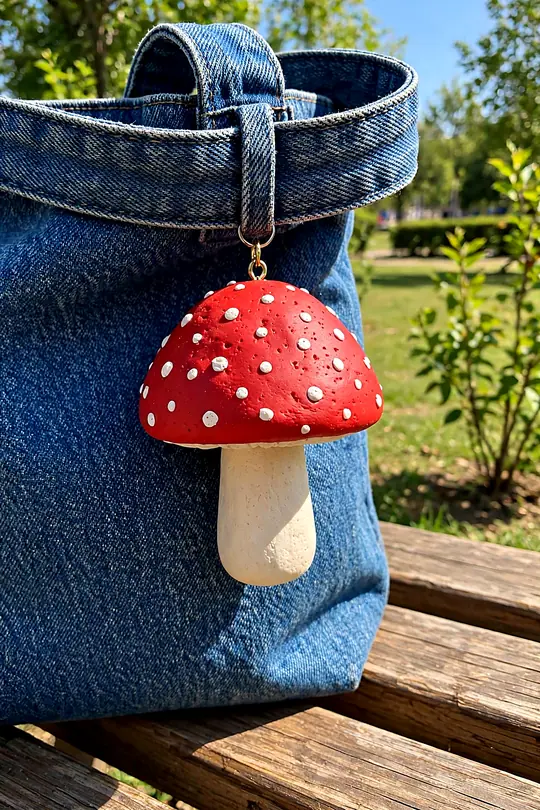
Woodland charm fans will love this little red cap. Shape a dome of red polymer clay, press on tiny white dots, and join it to a short cream stem. The shape is forgiving, which makes it a good second project after the strawberry.
Dots that stay put: Press each white dot into the cap instead of resting it on top. The clay grips the dot as it bakes, so nothing pops off later.
A mushroom charm looks right at home on a denim tote or a hiking backpack. Varnish the cap twice for a soft shine that keeps the red rich, and let each coat dry fully before the next one goes on.
Nature-inspired crafts make a good set, so try how to make soap with herbs and oats next.
6. A Gold-Flecked Heart for Everyday Bags
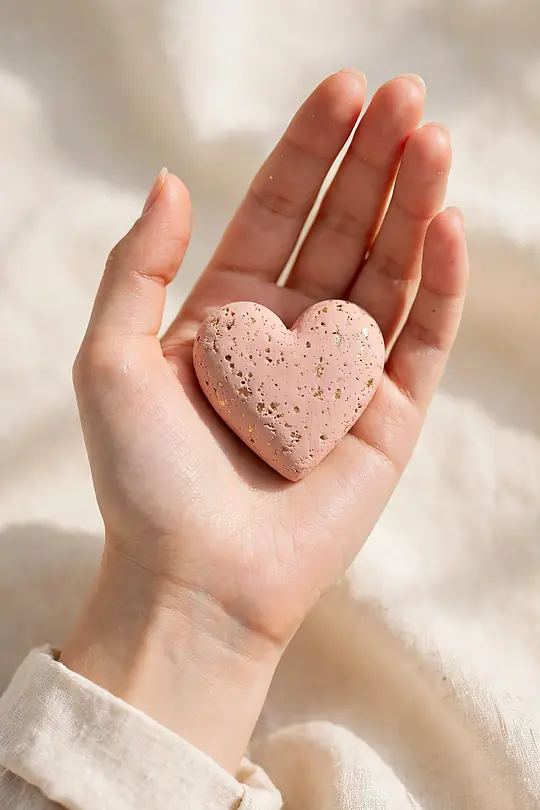
Here is the charm this whole list quietly builds toward. A blush heart with gold flecks looks delicate, yet air-dry clay makes it sturdy enough for daily use. Roll the heart thick, press in a few gold flakes, and smooth the edges while the clay is still soft.
Gold leaf can tear if you press too hard. Lay each flake down with a dry brush and tap it once, then leave it alone. The flakes catch the light beautifully when they sit slightly uneven, so skip the urge to smooth them flat.
Keep the gold on: Seal gold flecks with two thin coats of clear varnish, letting the first coat dry fully. One thick coat can lift the flakes and leave bare patches.
Heart Charm at a Glance
A soft heart charm finishes a look the way a good accessory should, like these scarf outfits do.
7. A Cherry Pair With a Glossy Finish
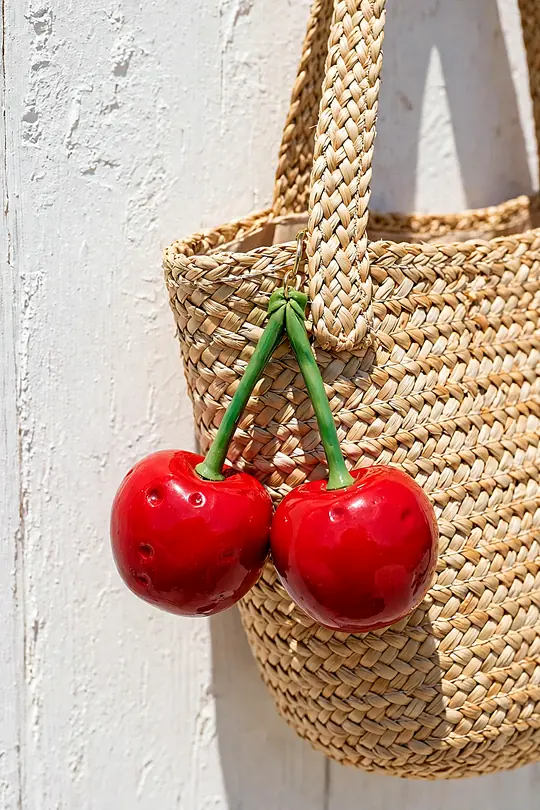
Two cherries beat one, every time. Roll two small red balls, join them with a twisted green stem, and bake the pair as one piece so the stems hold. A glossy varnish at the end gives the fruit its fresh-picked shine.
Gather These
- 1 block red polymer clay
- 1 small piece green polymer clay
- 1 eye pin
- Clear gloss varnish
- 1 jump ring and clasp
The shine is what sells this charm. Brush the varnish on in one smooth stroke and resist going back over it, since a second pass while it is wet leaves streaks. Two thin coats, fully dry between them, give a rich gloss.
Glossy red is a classic for a reason, and it pairs well with cat eye chrome nails for a polished finish.
8. The Mini Bow That Dresses Up a Tote
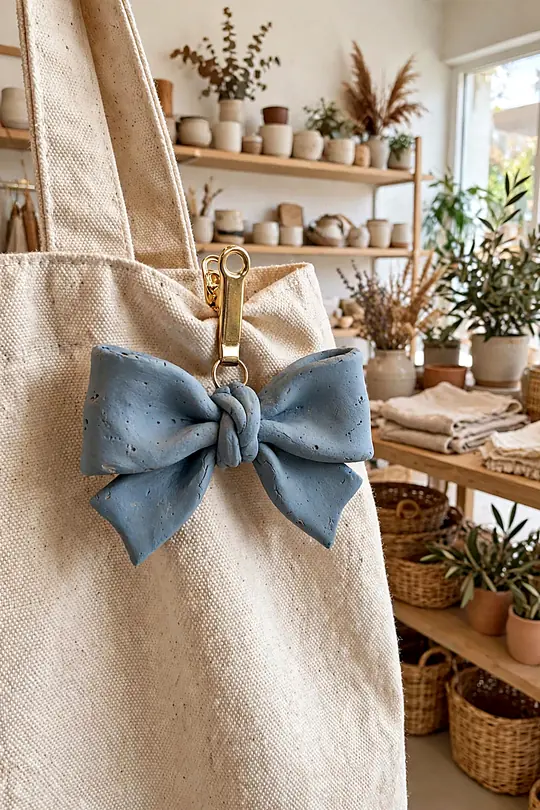
A tiny bow turns an ordinary tote into something that looks styled on purpose. Pinch a small rectangle of air-dry clay in the middle, wrap a thin strip around the pinch, and let it dry before you paint it dusty blue.
- Pinch from the sides, not the top, for even loops
- Roll the center strip thinner than the bow body
- Support the loops on a small ball of foil while drying
Scale matters here. Keep the bow under two inches wide so it reads as a charm, not a hair accessory that wandered onto your bag. A matte finish suits the dusty blue, while a gloss coat makes brighter colors pop.
Dry it standing up: Lean the bow against a small jar while it dries so both loops hold their curve. A bow dried flat loses its shape and looks pressed, not perky.
Small bold details change a whole outfit, which is the spirit behind dressing bold after 50.
9. A Bumblebee With Hand-Painted Stripes
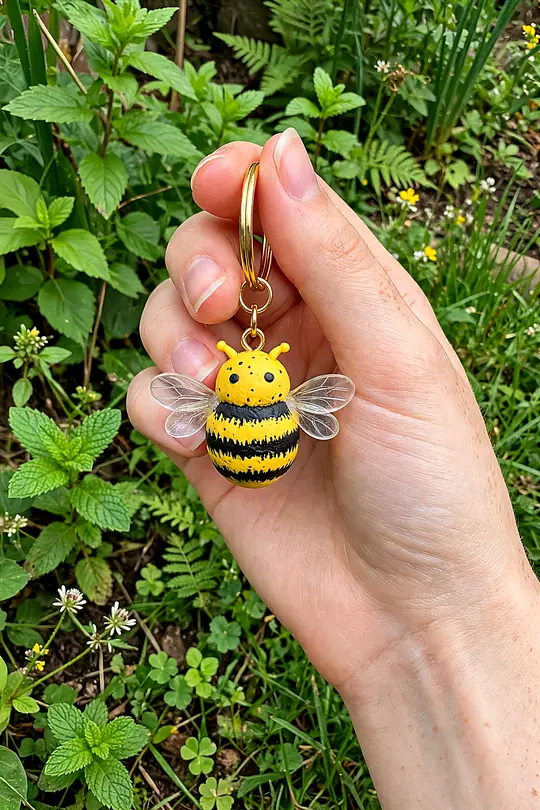
Stripes are easier than they look when you paint them after baking. Shape a plump yellow oval, bake it, then add black stripes and two tiny white wings with a fine brush. The wings go on last, once the stripes are fully dry.
A bee charm brings a smile to a work bag. Paint the stripes with short, steady strokes and let the brush do the work instead of pressing down. If a stripe wobbles, wait for it to dry, then paint over it with yellow and try again.
Gather These
- 1 block yellow polymer clay
- Black and white acrylic paint
- 1 fine paintbrush
- 1 eye pin
- Clear varnish
Tiny handmade pieces deserve a good display spot, like these DIY shadow box ideas for the wall.
10. The Rainbow Charm Kids Love to Make
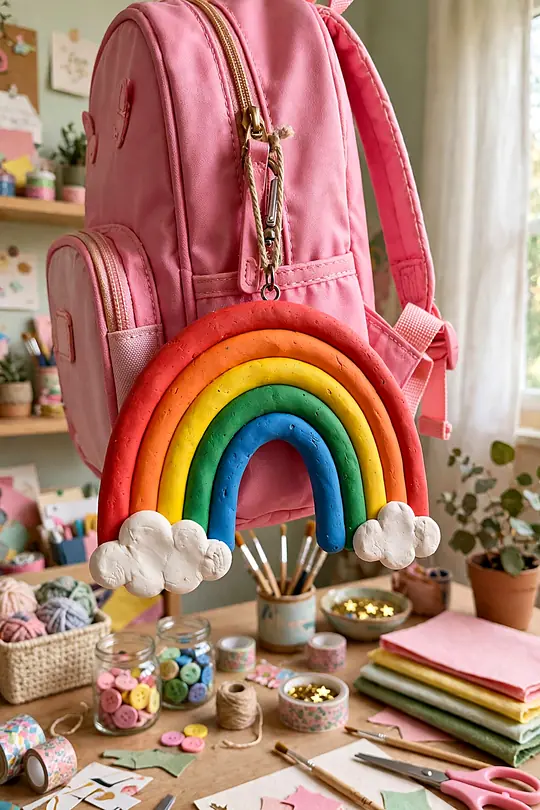
Kids light up when the rainbow takes shape. Roll five thin ropes of air-dry clay in rainbow colors, bend them into arches, and stack them largest to smallest. Two small white clouds at the base hide the joins and finish the picture.
Kid-friendly setup: Let kids roll the ropes and stack the arches while an adult handles the knife and the jump ring. Keep a damp cloth nearby, as little hands dry out clay fast.
- Red, orange, yellow, green, blue
- Add purple for a six-stripe rainbow
- White clouds at each end
This charm hangs well on a school backpack or a lunch bag. Paint the stripes after the clay dries for crisp color lines, and use a small brush so each stripe stays inside its own arch without bleeding into the next one.
A rainbow afternoon calls for snacks, so set out a spread from these bring a board night ideas.
11. A Tiny Coffee Cup for Morning People
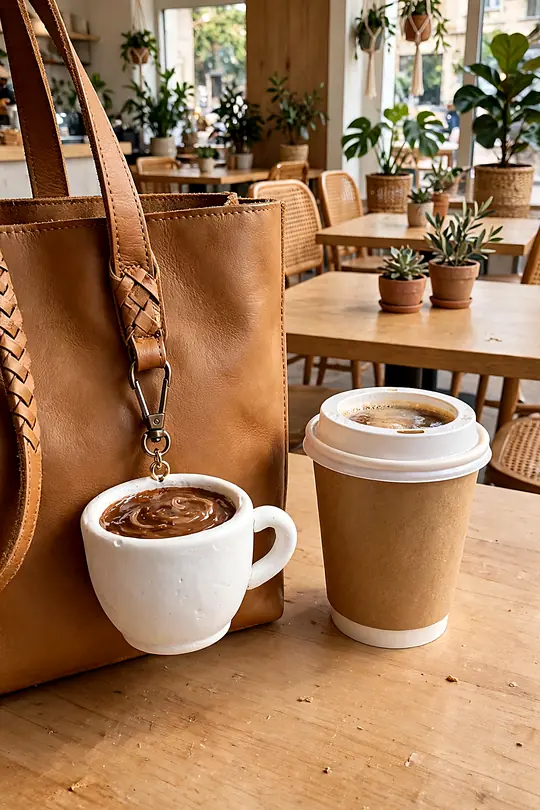
Coffee lovers will recognize this one at a glance. Shape a tiny white cup, add a small curved handle, and fill the top with brown clay for the coffee. A sprinkle of cinnamon-colored dots on top sells the fresh-brewed look.
Coffee Cup at a Glance
Handle with care: Roll the handle as one thin rope and press both ends firmly into the cup wall. A handle joined lightly snaps off, so press until the clay merges.
A coffee charm and a fresh bake go together, so try these apple pie bakes with your morning cup.
12. The Star and Moon Set Worth the Wait
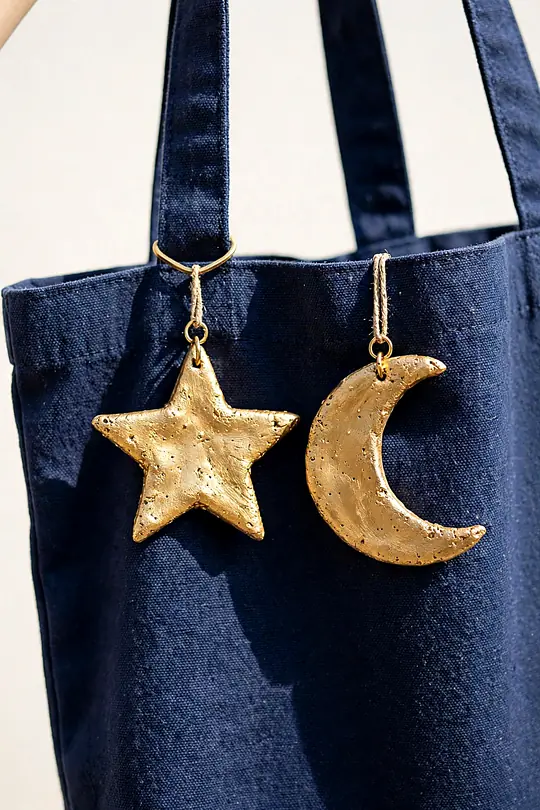
The finale is a pair, not a single charm. Cut a five-point star and a crescent moon from one slab of air-dry clay, paint both gold, and hang them side by side from the same ring. They catch the light together and read as one little night sky.
Gather These
- 1 pack air-dry clay
- Star and moon cookie cutters
- Gold acrylic paint
- 1 small paintbrush
- 2 jump rings and 1 split ring
Gold that glows: Paint two thin coats of gold, letting the first dry fully so the second sits evenly. A single heavy coat looks streaky, while two light coats give a smooth shine.
These two clay bag charms close the list because they reward patience. Sand the edges lightly with fine sandpaper after drying so the points feel smooth in the hand. Hang the star above the moon, or let both dangle at the same length for a balanced look.
Star and Moon at a Glance
A gold star and moon bring a little glamour to any bag, much like these 80s luxury outfits do.
Frequently Asked Questions
Carry Something You Made
Twelve ideas later, the promise from the top of this list holds: the sweetest strawberry at number one still sets the tone, the gold-flecked heart at number six still proves how simple air-dry clay can be, and the star and moon at number twelve are the finish the whole list builds toward.
Pick the charm that fits your bag, your time, and the clay you already own, then enjoy the small joy of carrying something you made yourself. These clay bag charms take a single afternoon, and they turn a plain tote into a bag with a story.
If you like making things for your home as much as for your bag, these vintage home decor ideas carry the same handmade spirit.