Top 18 Stunning Retro Christmas Aesthetic Ideas That Bring Back the Magic
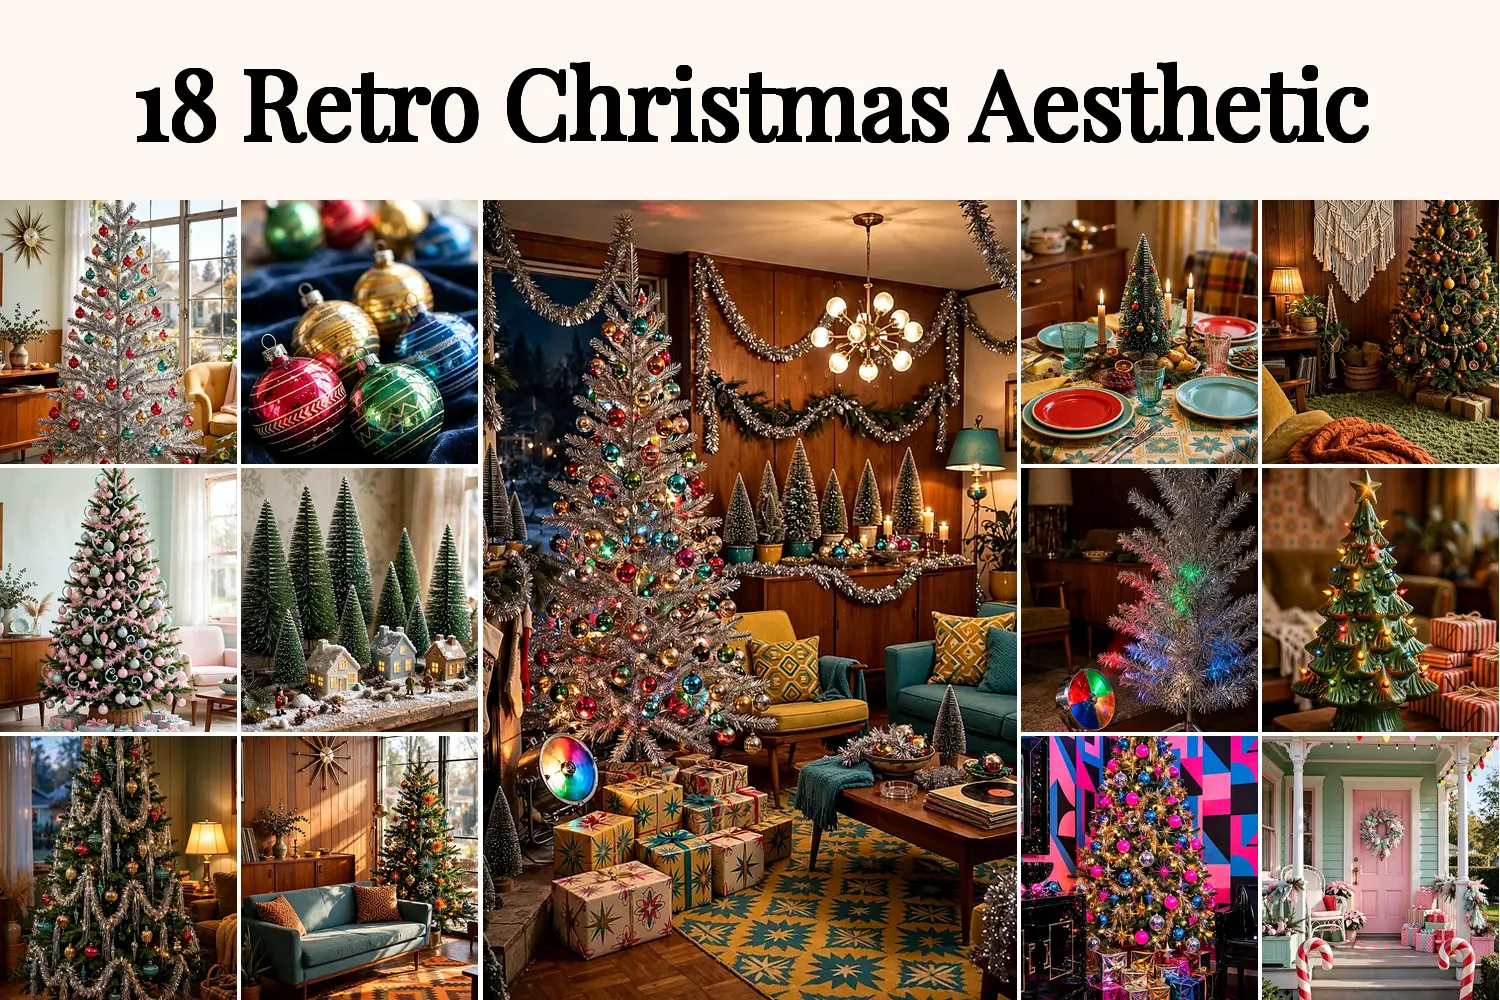
The pin promised a living room full of retro Christmas charm, and this list delivers exactly that: eighteen looks pulled from the silver trees, tinsel, and candy colors of decades past, each one styled for a modern home. It is the retro christmas aesthetic in full color, and every idea below tells you what to find and how to put it together.
Some looks lean on one hero piece, a silver tree or a ceramic village, while others mix thrifted finds with new pieces in vintage colors. Every idea keeps the palette tight and the clutter low, so the room reads cheerful instead of crowded.
Number nine turns the den into a 1970s hideaway, and number eighteen gathers every era into the grandest room of the list.
Table of Contents
- 1. The Silver Aluminum Tree
- 2. Shiny Brite Baubles in Jewel Tones
- 3. A Pastel Pink and Aqua Palette
- 4. A Bottle-Brush Tree Village
- 5. Silver Tinsel, Hung with Care
- 6. The Mid-Century Living Room
- 7. Thrifted Treasures from the Flea Market
- 8. A Retro Table Set for Dinner
- 9. 1970s Earth Tones in the Den
- 10. The Rotating Color Wheel
- 11. The Ceramic Tree with Tiny Lights
- 12. 1980s Bold, Bright, and Metallic
- 13. A Candy-Colored Porch
- 14. A Tinsel Curtain Backdrop
- 15. A 1990s Nostalgia Shelf
- 16. A Retro Gift Wrap Station
- 17. Flocked Ornaments and Felt Stockings
- 18. The Grand Retro Christmas Room
- Frequently Asked Questions
- A Bright Old-Fashioned Ending
1. The Silver Aluminum Tree
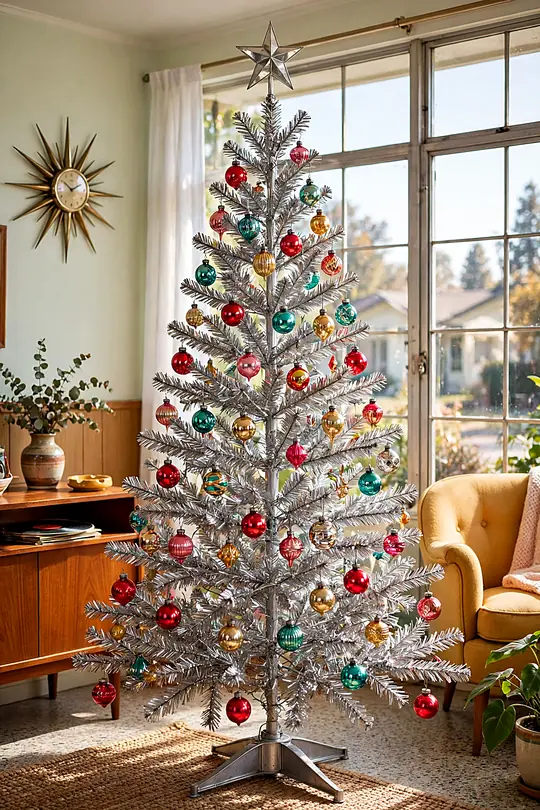
The silver aluminum tree opens this list because no other piece says vintage Christmas quite like it. Its shimmering branches catch the light in every corner of the room, and a few jewel-toned ornaments are all it needs. This is the retro christmas aesthetic in its classic form, bright, bold, and wonderfully simple.
What You Need
- 1 silver aluminum tree, 4 to 6 feet tall
- 1 rotating color wheel or a warm spotlight
- 12 to 18 jewel-toned glass ornaments
- 1 box of silver icicle tinsel
- 1 vintage-style tree topper
- 1 plain white or silver tree skirt
- 1 pair of white cotton gloves, for handling the branches
Set the tree against a plain wall so the silver branches stand out, and keep the floor around it clear. Hang ornaments with thin wire hooks instead of thick ribbon, because heavy trim bends the delicate branches. A color wheel on the floor does the rest, washing the tree in pink, blue, and green.
- Assemble the tree branch by branch, starting from the bottom.
- Space the ornaments evenly, with the bigger ones near the base.
- Hang the tinsel one strand at a time, straight from the branch tips.
- Place the color wheel three feet from the tree for even color.
Branch tip: Aluminum branches crease easily and never spring back, so handle each one by the metal sleeve. Store the tree flat in its original box between seasons, stacked with care.
Pair the tree with more ideas from these Christmas decorations.
2. Shiny Brite Baubles in Jewel Tones

Glass baubles in deep ruby, emerald, and sapphire turn a plain tree into a jewel box. Shiny Brite ornaments, with their striped and indented designs, carry a mid-century charm that new ornaments rarely match. Mix the jewel tones with a few gold baubles so the tree glows instead of looking flat.
Gather These
- 18 to 24 glass baubles in jewel tones
- 6 gold baubles, for contrast
- 1 spool of thin gold wire hooks
- 1 velvet-lined box, for storage
- 1 soft cloth, for polishing
- 2 yards of gold ribbon, for the topper
- 1 clear glass bowl, for spare baubles
- Sort the baubles by color before you hang a single one.
- Hang the dark ornaments deep inside the branches for depth.
- Place the gold baubles near the lights so they catch and reflect the glow.
- Keep two or three spare baubles in a bowl on the mantel.
Old glass ornaments chip if they knock together, so hang them with space between each one and keep the tree away from doorways. If a bauble loses its cap, a dab of craft glue holds a new wire hook in place. Check thrift stores in January, when holiday boxes sell for a fraction of their December price.
Jewel Tone Pairings
Finish the tree with these bows on Christmas trees.
3. A Pastel Pink and Aqua Palette
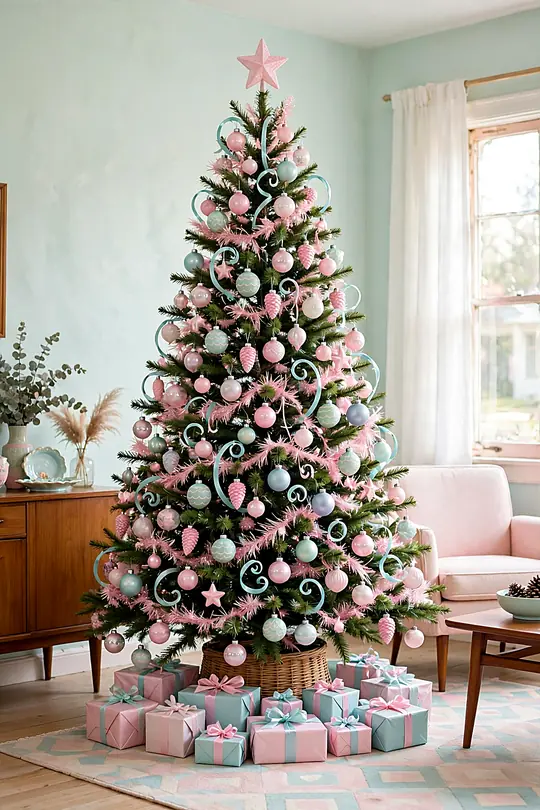
Pastel pink and aqua bring a soft, candy-colored side to the holidays, the palette of 1950s Christmas cards and department store windows. The two colors sit gently together, pink warming the room while aqua cools it down. White and silver accents keep the look fresh instead of sugary.
Start with the tree: pink and aqua ornaments in equal numbers, with white lights and a white tree skirt. Then carry the palette into the room with two or three matching pieces, a pink throw, an aqua vase, a set of pastel candles. Stop there, because a fourth color would break the calm.
What to Find
- 12 pink glass ornaments
- 12 aqua glass ornaments
- 1 string of white fairy lights
- 1 pink throw blanket
- 1 aqua ceramic vase
- 4 pastel taper candles
- Keep pink and aqua in equal numbers so neither color takes over.
- Use white as the third color everywhere, tree skirt, candles, and ribbon.
- Test the palette in daylight before you commit to a full room of pastels.
- Add silver only in small touches, a star topper or a few icicles.
Carry the pink palette into your makeup with these dusty rose blush looks.
4. A Bottle-Brush Tree Village
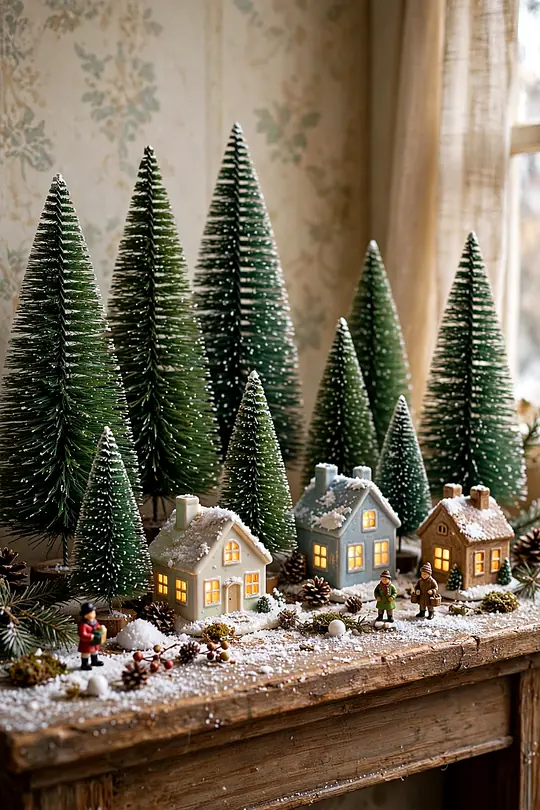
Bottle-brush trees in every size turn a mantel or sideboard into a tiny winter village. The bristly little trees come in green, white, pink, and even glittered gold, and a cluster of them looks like a forest pulled from a snow globe. Set them on a white runner so the village reads as one scene.
For the Village
- 9 bottle-brush trees, assorted sizes
- 1 white table runner
- 1 bag of fake snow
- 3 tiny ceramic houses
- 1 string of battery fairy lights
- 1 small mirror, for a frozen pond
- Cotton balls, for snowdrifts
- Place the tall trees at the back and the short ones in front.
- Tuck a tiny house between the trees, with a light glowing inside.
- Sprinkle fake snow along the base so the trees sit in drifts, not on bare wood.
- Leave one open patch for the mirror pond, ringed with cotton snow.
Village tip: Odd numbers look more natural than even rows, so group the trees in threes and fives. Step back after each group and check the skyline before you add the next tree.
Build a matching scene with these DIY Christmas snow globes.
5. Silver Tinsel, Hung with Care
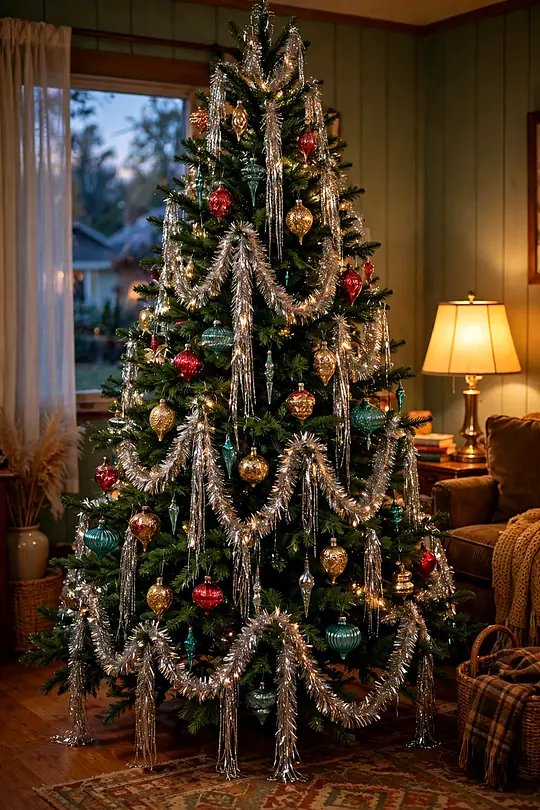
Silver tinsel is the detail that separates a retro tree from a modern one: long, shimmering strands that catch the light and move with the air. Draped well, it looks like frost on the branches. Draped carelessly, it turns into a tangled mat that hides the ornaments.
The secret is patience: hang the tinsel strand by strand, one at a time, straight over the branch tips. Work from the top of the tree down, and keep each strand the same length. A tree dressed this way takes an hour, and the result looks like the trees in old holiday photographs.
For the Tree
- 2 boxes of silver icicle tinsel
- 1 pair of white cotton gloves
- 1 small step stool
- 1 trash bag, for stray strands
- 1 lint roller, for cleanup
- Hang tinsel only after the ornaments are in place.
- Use short strands near the top and longer ones near the base.
- Never toss tinsel in handfuls, because clumps tangle and dull the shine.
- Save the leftover strands in a bag for next year.
Tinsel by Tree Size
Let the tinsel glow beside these Christmas fireplace decor ideas.
6. The Mid-Century Living Room
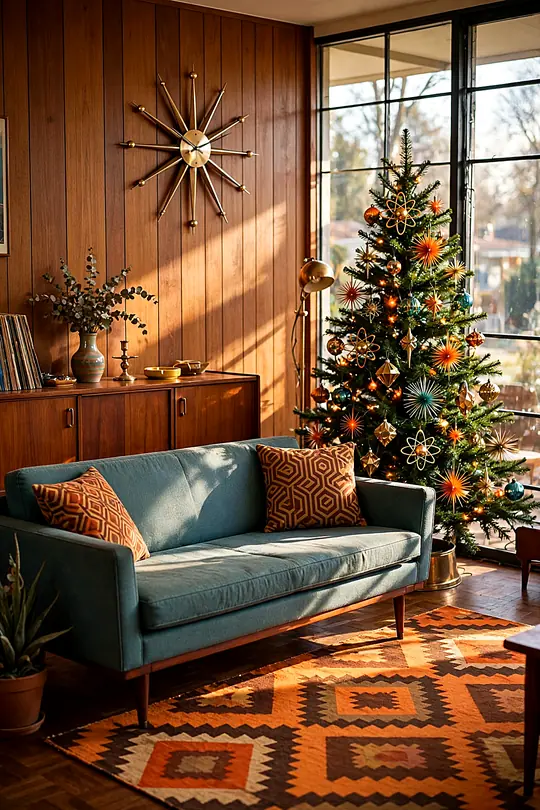
A mid-century living room does retro Christmas with clean lines and warm wood: a low sofa, a starburst clock on the wall, and a tree trimmed in red, gold, and green. The style is calm and collected, with each piece given room to breathe. Nothing crowds the space, and every ornament earns its place.
For the Room
- 1 low wooden credenza or sideboard
- 1 starburst wall clock
- 6 red and gold glass ornaments
- 1 tapered-leg coffee table
- 2 mustard or rust throw pillows
- 1 brass candle holder
- 1 green ceramic vase
- 1 vintage-style record player
Keep the tree simple: glass ornaments in three colors, white lights, and no garland at all. The furniture carries the retro feeling, so the tree can stay quiet. A record playing holiday music on the sideboard completes the room, and the warm wood tones tie the whole scene together.
- Choose one wood tone for the room and repeat it in every piece.
- Let the tree sit in a corner so the furniture stays the focus.
- Limit the tree to three ornament colors so the room keeps its calm.
- Add a single brass accent, a candle holder or a star, for warmth.
Style the whole room with these Christmas living room decorations.
7. Thrifted Treasures from the Flea Market
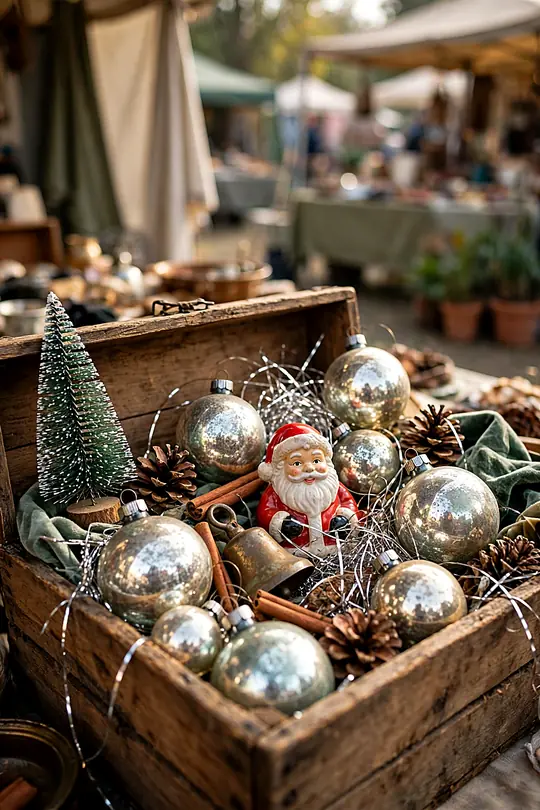
The flea market is where a retro Christmas starts for real: glass ornaments in faded boxes, ceramic Santas with chipped paint, and tinsel garlands sold by the yard. Each piece carries a story, and a room built from thrifted finds feels collected over years instead of bought in a day.
What to Hunt For
- Glass ornaments in original boxes
- Ceramic Santa or snowman figures
- Vintage tinsel garlands
- Old holiday greeting cards
- A brass or copper tree stand
- Retro cookie tins, for storage
- Felt stockings with sequins
- A secondhand color wheel
- Go early, because the good boxes sell within the first hour.
- Check every ornament for chips and loose caps before you pay.
- Ask the seller about the piece, because a known story adds to its charm.
- Carry a small box with tissue paper so fragile finds ride home safe.
Set a budget before you walk in, because a table full of shiny boxes tempts anyone to overspend. Buy the pieces that fit your palette and leave the rest, even the pretty ones. A thrifted room grows slowly, and the hunt is half the fun of the season.
Turn spare finds into these handmade Christmas gift ideas.
8. A Retro Table Set for Dinner
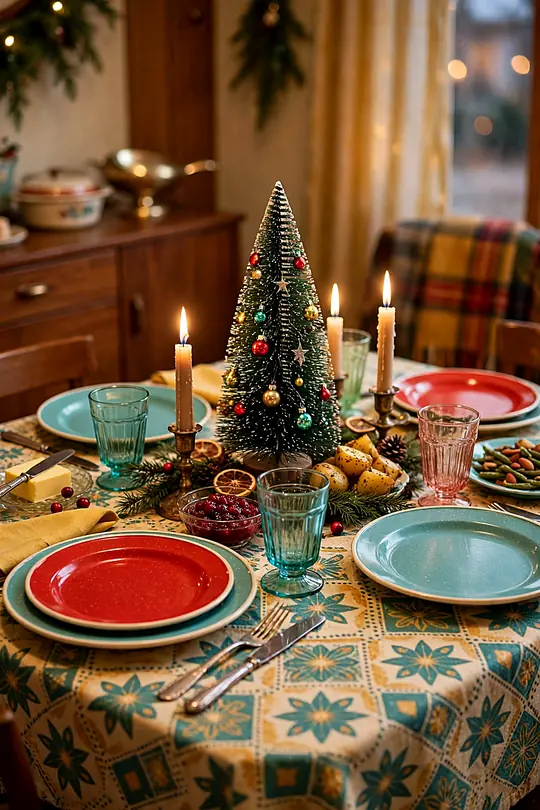
A retro Christmas table mixes old and new: vintage plates with gold rims, colored glass goblets, and a centerpiece of pine branches and red candles. The table sets the mood before anyone sits down, and a little shine goes a long way. Keep the place settings simple so the glassware can sparkle.
Layer the table in three steps: a white or red cloth first, then a runner in gold or green, then the plates and glasses. A small ornament at each place setting works as a party favor and a place marker at once. Tie it to the napkin with a short piece of ribbon.
For the Table
- 1 white or red tablecloth
- 1 gold or green table runner
- 6 vintage-style plates with gold rims
- 6 colored glass goblets
- 6 small ornaments, for place markers
- 2 yards of ribbon
- 4 red taper candles
- 1 pine branch centerpiece
- 6 linen napkins
Candles set the glow, but keep the flames away from pine branches and paper decorations. Battery candles work well inside the centerpiece, where real flames would sit too close to the greens. Light the tapers just before dinner, and the table will glow through the whole meal.
- Set the table the night before so Christmas morning stays calm.
- Mix two glass colors, red and green, instead of matching every piece.
- Put the tall candles in the center so guests can see across the table.
- Leave room for serving dishes between the place settings.
Dress the table further with these Christmas table decorations.
9. 1970s Earth Tones in the Den
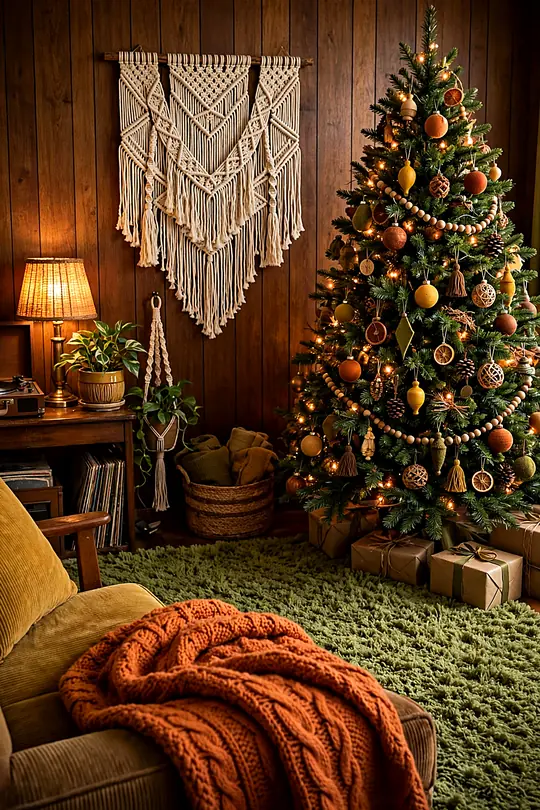
Halfway through the list, the palette turns warm: rust orange, avocado green, and harvest gold, the colors of a 1970s den. This look trades sparkle for warmth, with wood paneling, woven textures, and a tree trimmed in earth tones. It feels like a cabin holiday, cozy without a single snowflake in sight.
What You Need
- 6 rust orange ornaments
- 6 avocado green ornaments
- 1 harvest gold tree skirt
- 2 woven throw pillows
- 1 macrame wall hanging
- 1 wood candle lantern
- 1 plaid wool throw
- Pick three earth tones and repeat them across the whole room.
- Use warm white lights, never cool blue, on an earth-tone tree.
- Add one natural texture per surface, wood, wool, or woven fiber.
- Keep metallics to a minimum, one brass piece is enough.
Earth-tone tip: Brown and orange can turn muddy in low light, so add one bright accent, a gold star or a cream candle. The accent keeps the palette warm instead of dark.
The den suits this look because the room is warm and closed in, with shelves and soft chairs close together. A small tree on a wooden crate fits the scale better than a tall one, and a stack of old holiday records on the shelf adds to the mood. Keep the lights low and let the candles do the work.
Small rooms shine too, so see these Christmas apartment decor ideas.
10. The Rotating Color Wheel
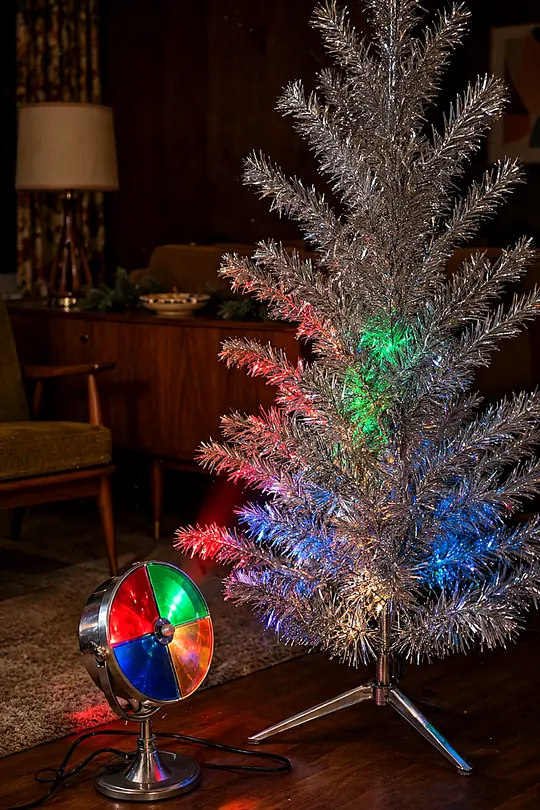
The rotating color wheel is the gadget that made the aluminum tree famous: a spotlight with a spinning disc of colored plastic that washes the tree in pink, blue, green, and gold. The colors drift slowly across the branches, and the room changes with them. No string of lights does quite the same thing.
For the Setup
- 1 rotating color wheel, vintage or new
- 1 silver aluminum tree
- 1 extension cord, rated for indoor use
- 1 small rug, to hide the cord
- 1 dimmer plug, for softer light
- 1 spare bulb, matched to the wheel
- Place the wheel on the floor, three feet from the tree.
- Aim the light at the middle of the tree, not the top.
- Dim the room lights so the wheel colors show up clearly.
- Let the wheel run for an hour, then check that the motor stays cool.
Color Wheel Care
Vintage wheels turn up at flea markets and online auctions, and new reproductions work just as well for a first tree. Check the cord for cracks before you plug in an old wheel, and replace any bulb that flickers. A wheel that hums quietly is normal; a wheel that grinds needs a rest.
Playful color belongs in these whimsical Christmas decor ideas.
11. The Ceramic Tree with Tiny Lights
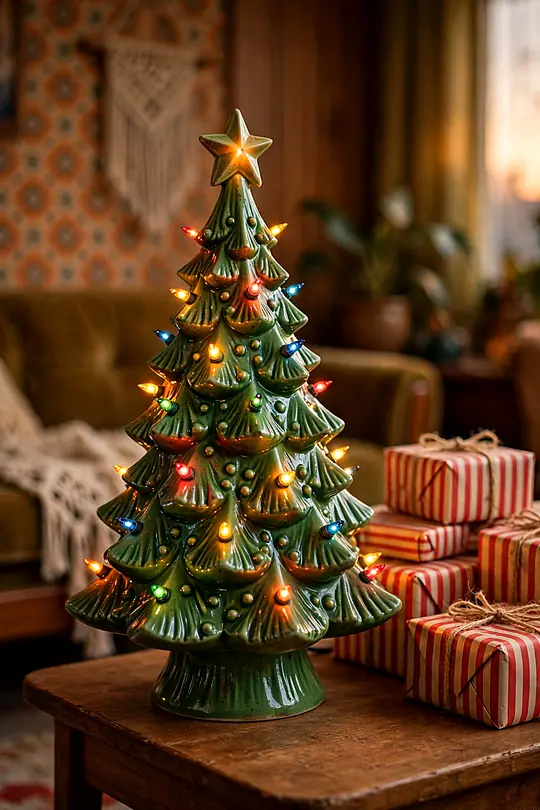
The ceramic Christmas tree is a small wonder: a green glazed tree dotted with tiny colored lights, glowing on a side table or a kitchen counter. It comes from the craft tables of the 1960s and 70s, when families painted their own. One tree lights a whole corner with a soft, warm glow.
Place the tree where people gather, the kitchen counter, the entry table, or beside the bed. The glow is gentle enough for a bedroom and bright enough to read by in a hallway. A second, smaller tree beside it makes a pair, and the pair looks better than one tree alone.
For the Corner
- 1 ceramic tree, 12 to 18 inches tall
- 1 set of spare plastic light pegs
- 1 spare bulb, matched to the tree
- 1 small doily or lace mat
- 1 pine sprig, for the base
- 1 soft cloth, for dusting
- Keep spare light pegs on hand, because the tiny bulbs pop out easily.
- Dust the tree with a dry cloth, never a wet one.
- Set the tree on a lace mat so the glaze does not scratch the table.
- Unplug it at night to keep the bulb cool.
Ceramic tip: A chipped tree still glows beautifully, so a small chip is no reason to pass one up. Check the socket and cord first, because those parts matter more.
Hang a handmade frame around it with this DIY Christmas wreath.
12. 1980s Bold, Bright, and Metallic
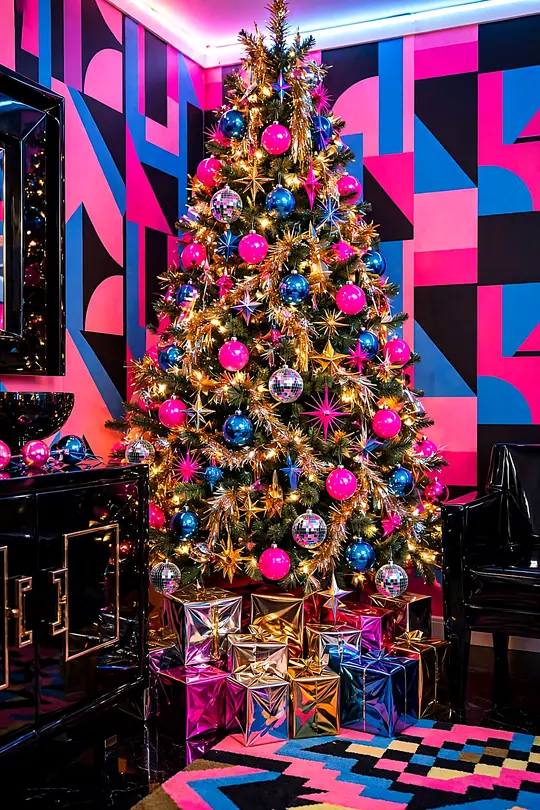
The 1980s did Christmas loud: hot pink, electric blue, and gold, all of it shiny. This look pairs metallic ornaments with neon accents and a tree that glitters from every angle. It is the decade of big hair and bright lights, and the tree should match that energy.
For the Look
- 12 metallic ornaments in pink and gold
- 6 neon ornaments in blue and green
- 1 string of multicolor lights
- 1 gold tinsel garland
- 1 metallic star topper
- 2 yards of hot pink ribbon
- 1 mirrored tree skirt
- 1 pair of glitter snowflake picks
- Mix metallic and neon ornaments in equal numbers.
- Wrap the garland loosely so the lights shine through it.
- Keep the tree skirt simple and shiny so it reflects the lights upward.
- Add one mirrored ornament near the top to catch the room light.
Match the decade head to toe with these 80s luxury outfits.
13. A Candy-Colored Porch
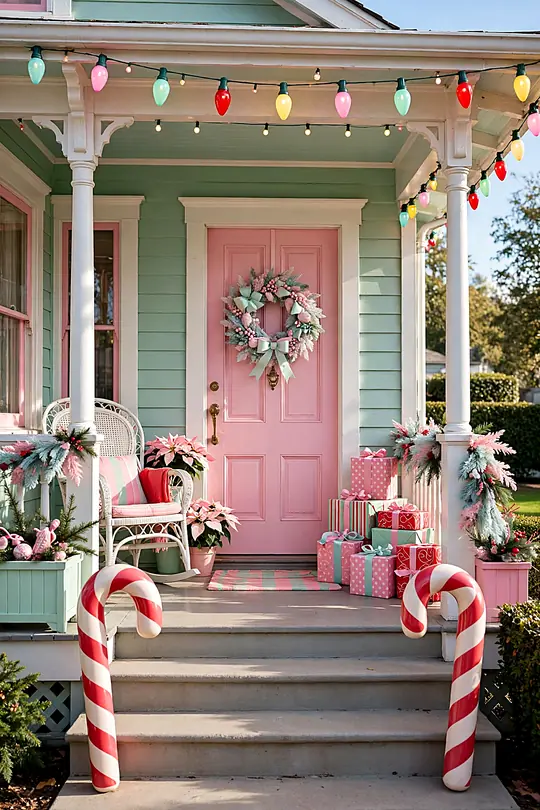
A candy-colored porch turns the front of the house into a holiday card: pink and mint lights along the railing, a wreath tied with a big striped bow, and planters filled with red and white candy canes. The colors read clearly from the street, and the whole house looks cheerful before anyone reaches the door.
Start with the lights, because they set the palette for everything else. Pink and mint bulbs along the roofline and the railing give the porch its candy look, and white lights in the wreath keep it from turning garish. Add the planters last, once the lights are up and glowing.
For the Porch
- 2 strings of pink outdoor lights
- 1 string of mint outdoor lights
- 1 wreath with a striped bow
- 2 planters with candy canes
- 1 outdoor-safe extension cord
- 1 doormat in red and white
- 2 lanterns with battery candles
- 1 roll of outdoor ribbon
Outdoor pieces take a beating from wind and rain, so check the labels for outdoor use before you buy. Tie the wreath to the door with wire instead of a hook, because a gust can lift a hook clean off. Bring the planters inside during a storm, and the candy canes will last the season.
- Use outdoor-rated lights only, never indoor strings on a porch.
- Space the candy canes evenly so the planters look full, not crowded.
- Secure every light clip before the first windy night arrives.
- Add a red doormat last to tie the palette together.
Porch tip: Pink lights look pale in daylight, so check the porch at dusk before you call it done. If the pink reads washed out, swap in a few deeper red bulbs.
Take the color further with these outdoor Christmas decor ideas.
14. A Tinsel Curtain Backdrop
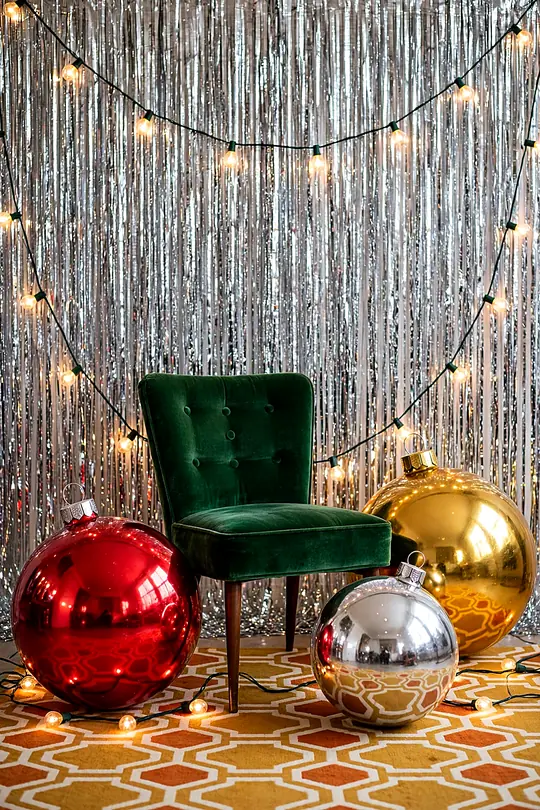
A tinsel curtain turns a blank wall into a photo backdrop: hundreds of silver strands hanging from a rod, shimmering every time someone walks past. It is a quick party trick in this list, and it photographs beautifully. Hang it behind the dessert table or the gift pile for instant sparkle.
For the Backdrop
- 2 tinsel curtain panels
- 1 tension rod or curtain rod
- 1 pack of clear adhesive hooks
- 1 string of warm fairy lights
- 1 small step stool
- 1 pair of scissors
Hang the rod first, then clip the panels in place and let the strands fall straight. A string of fairy lights behind the curtain adds depth, and the light catches the tinsel from behind. Trim any strands that drag on the floor, because uneven lengths look messy in photos.
- Hang the curtain where guests gather, not in a dark corner.
- Layer two panels for a fuller curtain with no gaps.
- Tape the bottom of the strands if kids or pets walk through often.
- Store the panels rolled, never folded, to avoid creases.
Curtain Sizing
Carry the shimmer into the kitchen with these kitchen Christmas decor ideas.
15. A 1990s Nostalgia Shelf
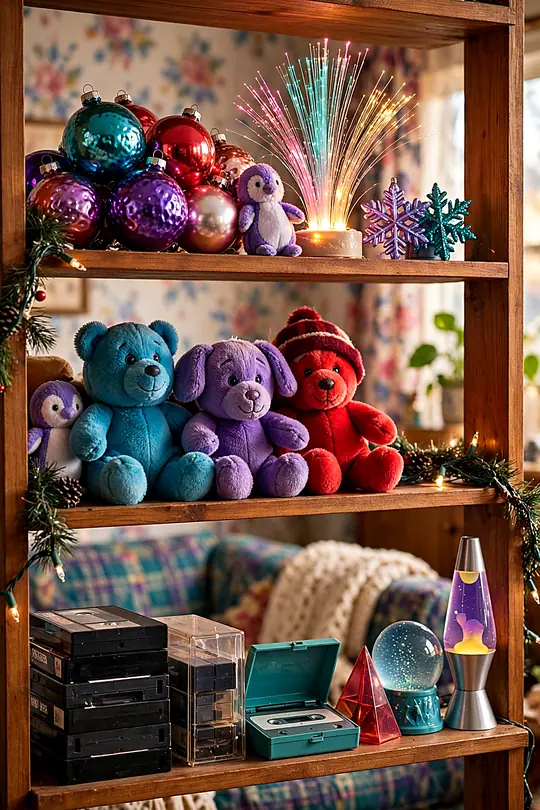
The 1990s shelf is a time capsule: a plush toy in a Santa hat, a VHS tape of a holiday movie, and a string of chunky multicolor lights along the edge. The pieces are small and personal, and the shelf works because it feels like a memory instead of a display. Keep it playful and a little messy.
For the Shelf
- 1 plush toy in a Santa hat
- 1 VHS tape of a holiday movie
- 1 string of chunky multicolor lights
- 3 old holiday greeting cards
- 1 photo frame with a 90s snapshot
- 1 small stack of holiday books
- 1 tin of retro candy
The shelf needs one rule: every piece must mean something to someone in the house. A random old toy reads as clutter, but a toy from a childhood Christmas reads as a story. Ask the family which pieces they remember, and let the shelf grow from their answers instead of a shopping list.
Shelf tip: Three layers keep the shelf from looking flat: tall pieces at the back, mid-size pieces in the middle, and one piece in front. Leave empty space so the eye can rest.
Add a handmade touch with these salt dough Christmas ornaments.
16. A Retro Gift Wrap Station
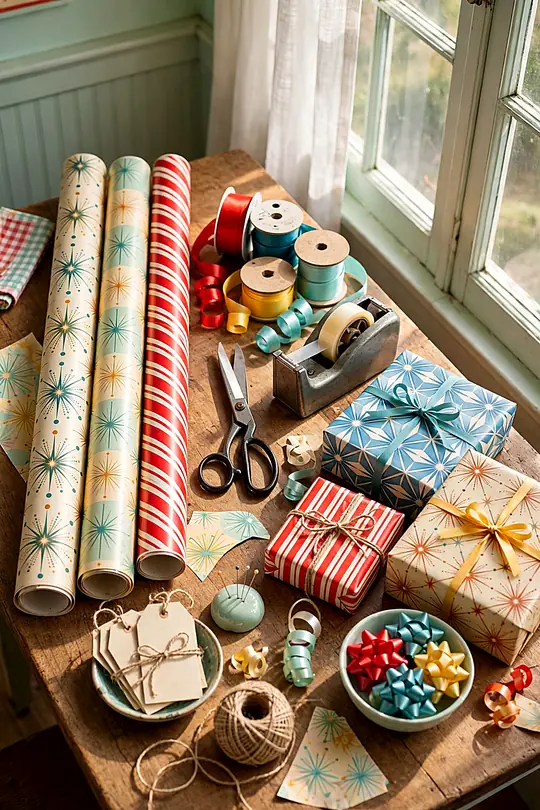
A gift wrap station turns a side table into a lively corner of the house: rolls of vintage-style paper, spools of ribbon, and a jar of candy canes for tying onto packages. The station keeps the wrapping mess in one place, and it looks festive even when nobody is wrapping. Set it up early and leave it out all season.
Pick two papers and one ribbon color so the gifts under the tree match each other. Kraft paper with red ribbon reads classic, while candy-striped paper with green ribbon reads playful. A small tag on each gift, handwritten in ink, finishes the look better than a printed label.
What You Need
- 2 rolls of vintage-style wrapping paper
- 3 spools of ribbon in red and green
- 1 roll of clear tape
- 1 pair of sharp scissors
- 12 blank gift tags
- 1 pen, for handwritten tags
- 1 jar of candy canes
- 1 roll of twine
- 1 small basket, for scraps
- Cut the paper on the table, never on the floor, for straight edges.
- Wrap one gift at a time so the station stays tidy.
- Tie a candy cane to each package for a sweet retro touch.
- Keep the scissors and tape in one spot so they never wander off.
The station works in any spare corner, a hallway table, a desk, or a cleared shelf in the den. If space is tight, a tray on the coffee table holds the paper and ribbon just as well. The point is one place for everything, so wrapping a gift takes minutes instead of a hunt through the closet.
Fill the boxes with these Christmas gift ideas for mom.
17. Flocked Ornaments and Felt Stockings

Flocked ornaments and felt stockings bring texture to a retro Christmas: soft, snowy surfaces that catch the light without any shine. The flocked baubles look dusted with fresh snow, and the felt stockings hang soft and quiet on the mantel. Together they soften a room full of tinsel and glass.
For the Mantel
- 12 flocked ornaments in white and red
- 4 felt stockings with sequin trim
- 1 bag of fake snow
- 2 stocking holders, brass or wood
- 1 lint roller, for flock fibers
- 1 small brush, for dusting
- 1 roll of red ribbon
- Hang flocked ornaments away from the lights, because heat loosens the flock.
- Stuff the stockings lightly so they hold their shape on the mantel.
- Brush the flocked baubles gently after the season to lift off the dust.
- Store flocked ornaments in separate tissue wraps so the flock does not rub off.
Felt stockings take well to personal touches: a name stitched on the cuff, a small bell sewn to the toe, or a sprig of pine tucked inside. Keep the additions small, because a stocking loaded with trim loses its soft shape. One detail per stocking is enough to make it feel personal.
Flock tip: Flocked ornaments shed a little when new, so hang them over a sheet the first year and shake off the fibers. After one season the flock settles and the shedding stops.
Make matching pieces with these DIY felt Christmas ornaments.
18. The Grand Retro Christmas Room
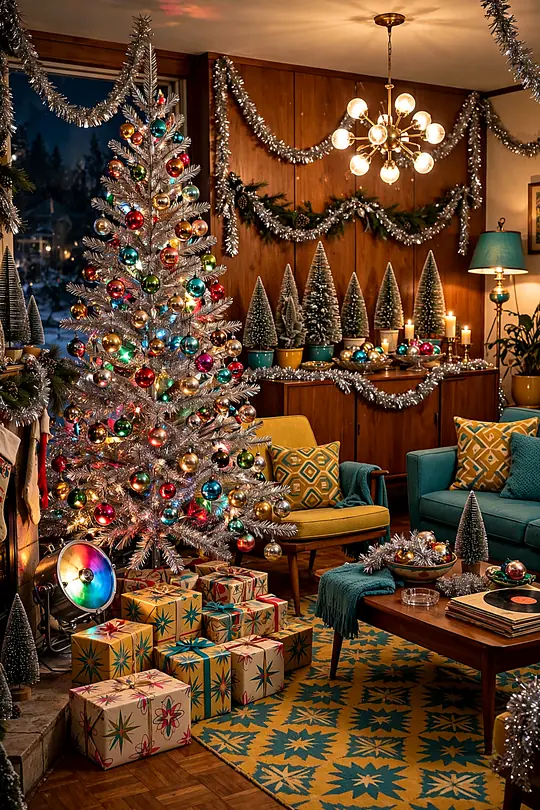
The finale gathers every era into one room, and it is the grandest look of the list. A silver tree in the corner, a ceramic tree on the side table, tinsel on the mantel, and earth tones in the den beyond. This is the retro christmas aesthetic at full strength, every decade in one warm, glowing room.
The trick is one thread that ties the eras together: pick a single color, silver or gold, and repeat it in every corner. The silver tree, the gold star, the tinsel curtain, and the brass candle holders all share that thread. Without it, the room reads as a jumble; with it, the decades sit side by side.
What to Gather
- 1 silver aluminum tree
- 1 ceramic tree with lights
- 2 tinsel garlands
- 1 rotating color wheel
- 6 jewel-toned ornaments
- 4 felt stockings
- 1 bottle-brush village set
- 2 brass candle holders
- 1 plaid wool throw
- Start with the tree, then build the room outward from it.
- Repeat your chosen metal in every corner of the room.
- Step back after each addition and check that the room still breathes.
- Stop when the room feels full, not when every surface is covered.
Leave one quiet corner in the room, a chair with a throw and no decorations at all. The eye needs a resting place, and guests need a spot to sit with a mug of cocoa away from the sparkle. A room that breathes feels festive longer than a room packed to the edges.
The Room at a Glance
Finish with a flourish from these luxury Christmas decor.
Frequently Asked Questions
Where can I find real vintage Christmas decorations?
Flea markets, estate sales, and thrift stores are a good starting point for real vintage pieces, especially in January when holiday boxes sell cheap. Online marketplaces carry a wider range, but check photos closely for chips and missing caps. Buy from sellers who describe the condition honestly, and start with one or two pieces before you commit to a full room.
Can I mix decorations from different decades?
Yes, and mixing eras is the heart of the retro look. Pick one thread that ties them together, a repeated color like silver or gold, or a shared material like glass. Keep the palette tight, repeat the thread in every corner, and let one era lead while the others play supporting roles. The room will read collected, not cluttered.
How do I care for old glass ornaments?
Handle old glass ornaments with clean, dry hands and store each one wrapped in tissue paper, never loose in a box where they can knock together. Dust them with a soft cloth, and never wash them, because water seeps under the paint and lifts it. Check the wire caps each year and replace any that feel loose before you hang the ornament.
Are vintage color wheels safe to use?
A vintage color wheel is safe when its cord and bulb are in good shape, so inspect both before you plug it in. Look for cracked insulation, loose plugs, and flickering bulbs, and replace anything worn. Run the wheel for a few hours at a time rather than all day, and keep it away from curtains. When in doubt, a new reproduction gives the same glow with a fresh cord.
A Bright Old-Fashioned Ending
These eighteen looks run from the silver aluminum tree at number one to the full-room finale at number eighteen. Pick the era that speaks to you, start with one hero piece, and let the rest of the room grow around it through the season.
A retro christmas aesthetic works because it mixes memory with color: the tinsel, the candy pastels, the warm glow of a color wheel. Gather the pieces you love, hang them with care, and enjoy a Christmas that feels like a page from a favorite old catalog.
Take the retro feeling to the kitchen with these Christmas cookies.