
21 Amazing DIY Wood Advent Calendar Ideas That Look Truly Gorgeous
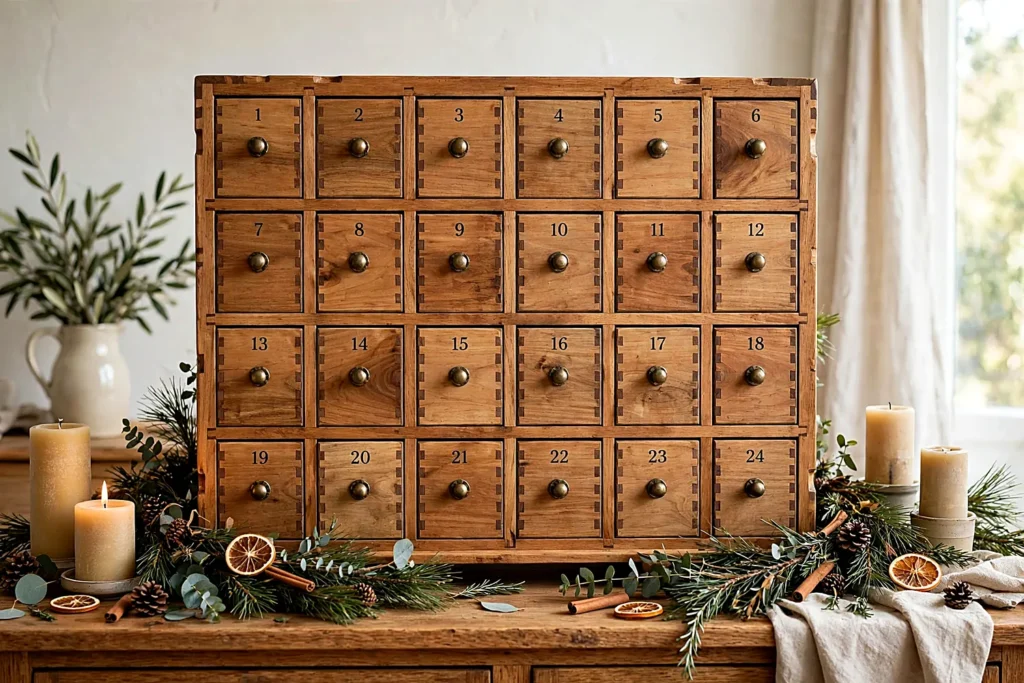
A wooden advent calendar is the countdown that becomes an heirloom: built once, filled twenty-five different ways across the years, and eventually argued over by grandchildren.
These diy wood advent calendar ideas range from a proper twenty-four-drawer cabinet to a garland of numbered wood slices — every one of them sturdier than anything cardboard can dream of being. Some are an afternoon’s work; some are a weekend’s pride, and all of them are built to be refilled for decades.
Every design here comes with its materials and build steps, honest notes on difficulty, and suggestions for filling. You do not need a workshop, either: most of these diy wood advent calendar projects ask for a saw, a drill and one free weekend. Build it in November, and by December 1st your diy wood advent calendar is already the most photographed thing in the house.
Table of Contents
- The Classic 24-Drawer Cabinet
- Miniature House Village Calendar
- Ladder Calendar with Hanging Tins
- Branch and Peg Hanging Calendar
- Wooden Tree Board with Hooks
- Picture Frame Calendar with Tiny Doors
- Repurposed Drawer Calendar
- Stacked Crates Pyramid Calendar
- Wooden Truck Calendar
- Arched Window Calendar
- Sliding Barn Door Calendar
- Wood Slice Garland Calendar
- Toolbox Caddy Calendar
- Tree Pegboard with Felt Ornaments
- Book-Style Hinged Calendar
- Santa’s Post Office Calendar
- A-Frame Tent Calendar
- Numbered Wooden Block Tower
- House with Lit Windows
- Treasure Chest Calendar
- Wooden Train Calendar
- Frequently Asked Questions
- Final Thoughts: Built Once, Loved for Decades
The Classic 24-Drawer Cabinet
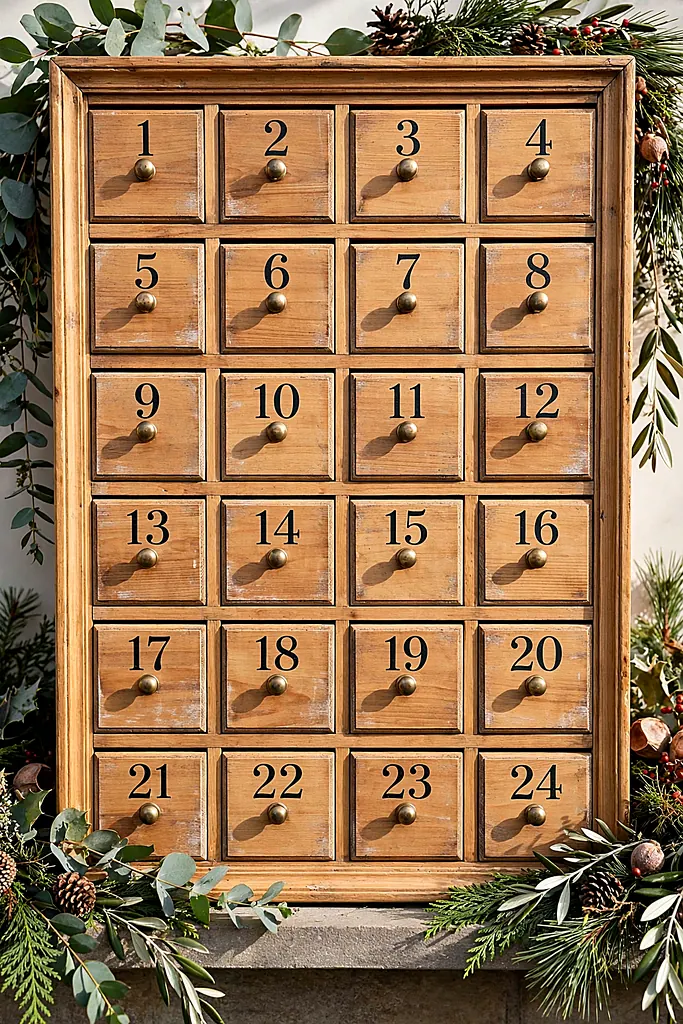
The forever calendar: a wooden cabinet with twenty-four small drawers, each with its own knob and number, sized for a chocolate, a note, or a tiny treasure. It is the most ambitious build on this list and the one most likely to be handed down — furniture-grade December, built in a weekend and filled for a lifetime.
Buy the drawers ready-made in craft packs if joinery is not your joy; the cabinet frame is simple butt joints and glue. As diy wood advent calendar projects go, this is the flagship — the one families photograph every single year in the same spot. It is also the diy wood advent calendar most likely to be handed down twice.
What You Need
- Plywood or pine boards for the cabinet frame
- 24 small wooden drawers (ready-made craft drawers are fine)
- 24 small knobs or pulls
- Wood glue, screws and sandpaper
- Number stickers, stencils or a paint pen
- Wood stain or paint and a clear finish
How to Make It
- Cut the frame: two sides, top, bottom and three shelves sized to your drawers, with dividers between columns.
- Assemble the box with glue and screws; sand every edge smooth.
- Fit the dividers so each drawer slides freely — snug drawers in November are stuck drawers in December.
- Stain or paint the cabinet and let it dry fully.
- Number the drawer fronts 1–24 in a pleasing muddle, not in rows — hunting is half the fun.
- Fit the knobs, fill the drawers, and take the first of many annual photos. The cabinet is the diy wood advent calendar other calendars get measured against.
Drawers and keepsakes belong together — display the overflow in these diy shadow box ideas.
Miniature House Village Calendar
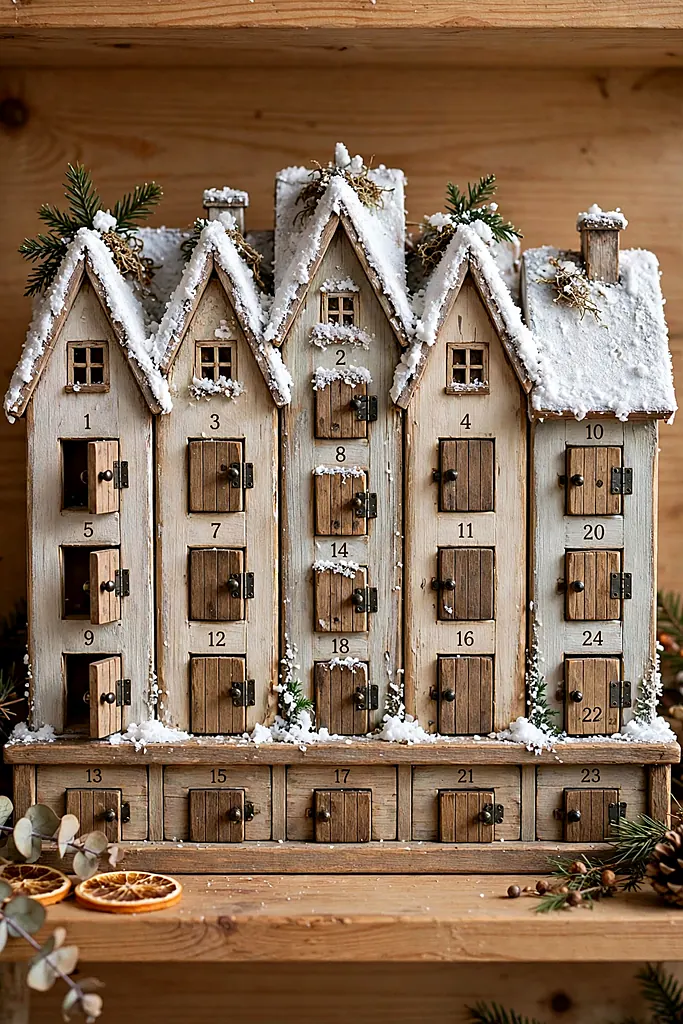
A row of little wooden houses — each with a door that opens on a treat — turns the countdown into a village that lights the mantel all month. Vary the rooflines, paint doors in different colors, and hide the 24th behind the biggest house, the one with the wreath.
What You Need
- Wooden house blocks or thick balsa/basswood
- A saw and drill
- Small hinges or fabric tape hinges
- Acrylic paints in house colors
- Number stickers or a fine paint pen
- Fake snow (white paint or flocking) for roofs
Cut or buy house shapes in three sizes. As diy wood advent calendar designs go, the village is the most expandable of all. For each, either drill a treat cavity behind a hinged door, or cheat handsomely: glue the house front to a small box so the ‘door’ opens into real storage.
Paint the houses in a village palette — cream, sage, brick, navy — and snow the roofs white. Number the doors, not the roofs. A village diy wood advent calendar lets you add one new house each year, which is how villages, and traditions, actually grow. A village diy wood advent calendar also forgives a wobbly roofline or two.
Door hinges: Tiny metal hinges look best, but a strip of linen tape glued inside the door lasts just as long and never rusts, squeaks or needs a toothpick-sized screwdriver.
The village needs the big room ready — set it with these christmas living room decorations.
Ladder Calendar with Hanging Tins
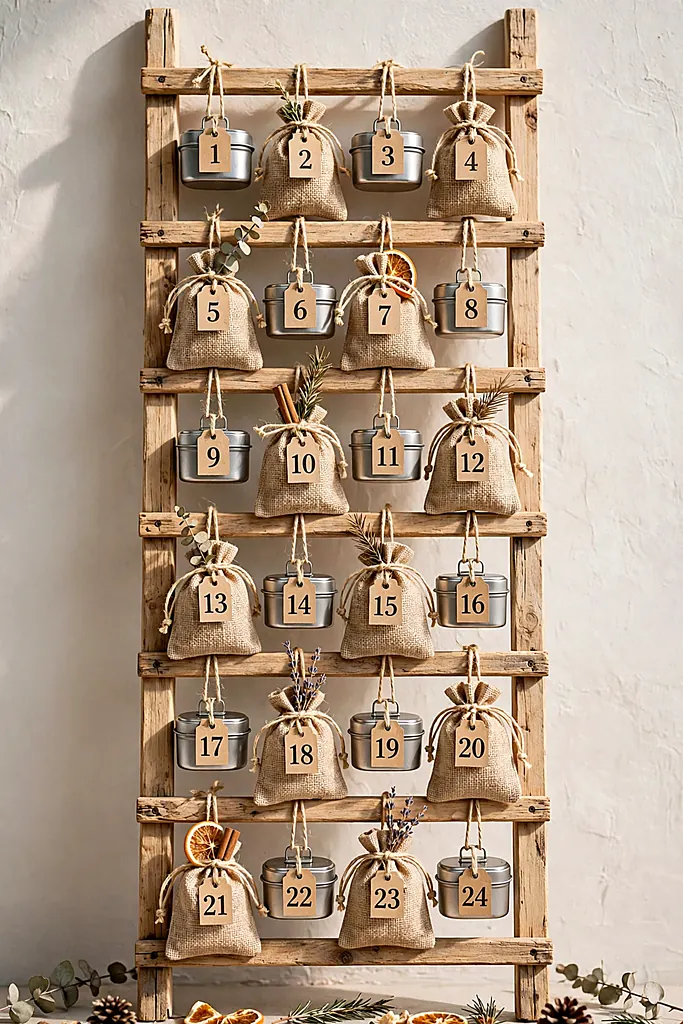
A small wooden ladder — the blanket-ladder kind, shrunk — with twenty-four numbered tins and pouches hanging from its rungs. It leans against the wall, takes zero floor space beyond its lean, and refills in minutes because nothing needs opening with tools or patience. A ladder diy wood advent calendar also stores flat against the wall all January.
Mix the containers: tins for chocolates, muslin bags for notes, tiny buckets for the big days. The ladder is the most forgiving diy wood advent calendar design here — rustic is not a flaw in it, it is the whole aesthetic.
What You Need
- A small wooden ladder or two rails plus dowel rungs
- 24 small tins, buckets or muslin bags
- Twine or ribbon for hanging
- Number tags or a paint pen
- Sandpaper and optional wood stain
- S-hooks or small pegs
How to Make It
- Build or buy the ladder; sand and stain it if you like.
- Number the tins and bags 1–24.
- Hang them across the rungs in a pleasing muddle of heights.
- Fill, lean, and let the hunting begin. The ladder is the diy wood advent calendar for small spaces and big Decembers.
At a Glance
Ladders and wreaths share the rustic gene — hang both with these diy christmas wreath ideas.
Branch and Peg Hanging Calendar
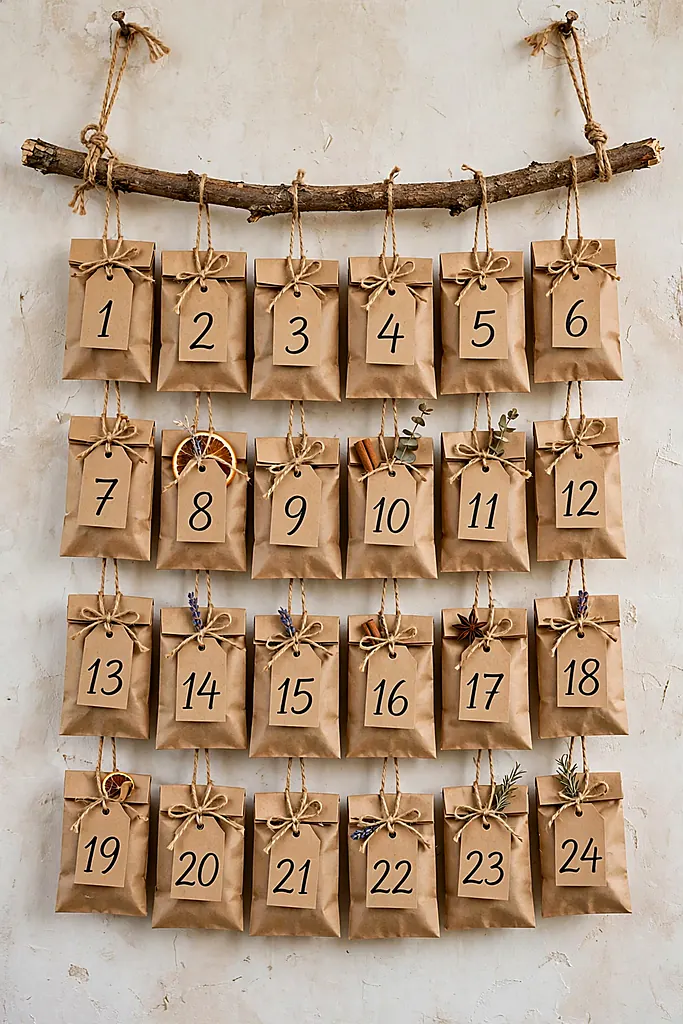
The simplest wooden calendar that still counts as woodwork: one beautiful branch, mounted on the wall or hung from two hooks, carrying twenty-four numbered pouches on twine. Sand the branch, keep its character, and let the bags do the decorating — kraft for rustic, velvet for glamorous, one branch for every taste. As diy wood advent calendar builds go, the branch is the gentlest start of all.
What You Need
- One sturdy branch, about 1 m, sanded
- 24 small pouches or envelopes
- Twine
- Number stamps or tags
- Two wall hooks or a hanging cord
- Optional: wooden pegs or mini clothespins
How to Make It
- Sand the branch smooth and seal it if it will live indoors for years.
- Number the pouches and tie them along the branch at varied lengths of twine.
- Fill each pouch with a treat, note or activity.
- Hang the branch level, step back, and adjust the muddle until it looks artful.
- Refill nightly or all at once — the branch does not judge. A branch is the diy wood advent calendar that costs almost nothing to start, and the one renters hang with two pins.
Branches belong all over a decorated house — more in these christmas decorations.
Wooden Tree Board with Hooks
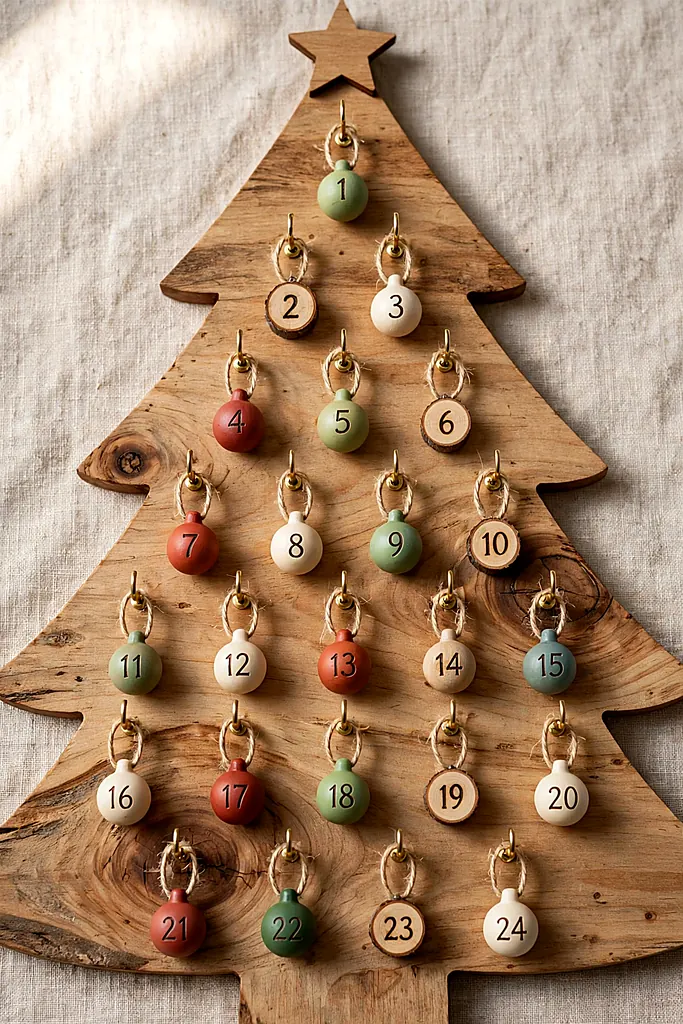
A flat Christmas-tree silhouette cut from plywood, fitted with twenty-four small hooks or pegs, each holding a numbered mini stocking, bag or ornament hiding the day’s treat. It hangs on a door or wall, stores flat in January, and becomes the tree before the tree. A tree board is the diy wood advent calendar for the kitchen door.
Cut the silhouette with a jigsaw or order it pre-cut. Paint it green for the classic read, or stain it and let the little bags bring the color — the stained version suits grown-up houses that still take December seriously.
What You Need
- Plywood sheet (or a pre-cut tree silhouette)
- Jigsaw and sandpaper
- 24 small hooks, pegs or cup hooks
- 24 mini bags, stockings or tins
- Paint or wood stain
- Number tags
Cut and sand the tree shape; round every edge so little hands stay safe. Mark a grid of twenty-four hook positions — staggered, following the branches — and drill pilot holes.
Screw in the hooks, hang the numbered containers, and fill. Tree-board diy wood advent calendar designs store flat all January. A tree-board diy wood advent calendar on the kitchen door turns breakfast into a ceremony for twenty-four straight days.
The real tree can echo the theme — see these flocked tree decorating ideas.
Picture Frame Calendar with Tiny Doors
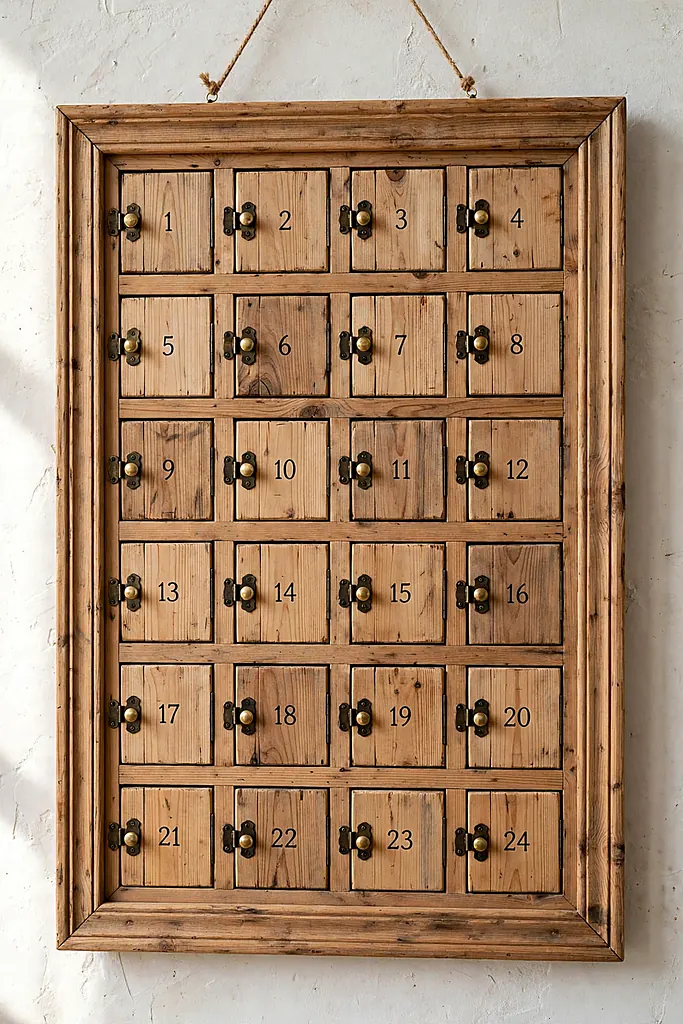
An oversized wooden picture frame, its opening filled with a grid of twenty-four tiny doors — behind each, a treat, a joke, or a photo from a past December. Hung on the wall, it reads as art for eleven months and as pure temptation for one. The photo variation, a memory per day, is the version grandparents request. Frames are the diy wood advent calendar for photo people — and a picture-frame one hangs happily in a hallway, too.
What You Need
- A large wooden picture frame (about 50×70 cm)
- Thin plywood or balsa for the door grid
- Small hinges or tape hinges
- A fine saw and craft knife
- Paint and number stickers
- Tiny magnets or hook-and-loop dots to keep doors shut
How to Make It
- Measure the frame opening and cut a backing board to fit.
- Cut twenty-four doors and arrange them in a grid on the backing, with shallow compartments behind.
- Hinge each door and add a magnet or dot to keep it closed.
- Number the doors, paint the frame, and hang it where December foot traffic is highest. A frame is the diy wood advent calendar that doubles as wall art.
Door discipline: Cut all twenty-four doors from one sheet, sanding them as a batch. Doors cut on different days drift in size, and a grid shows every millimetre of drift.
Frames hold other tiny worlds too — these diy christmas snow globes are their cousins.
Repurposed Drawer Calendar
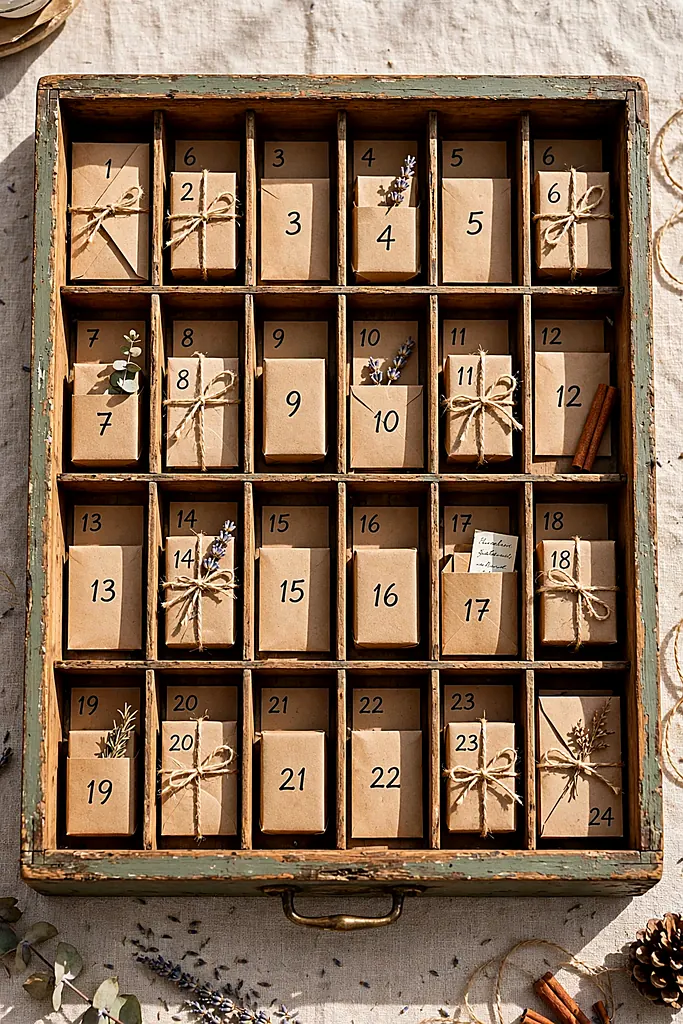
One vintage drawer, rescued from a flea market, becomes a calendar when you stand it on end and fill it with twenty-four small boxes, jars and envelopes in a beautiful muddle. No cutting at all if the drawer cooperates — the whole build is arranging, numbering, and resisting the urge to over-tidy. A drawer diy wood advent calendar is the flea market’s gift to December.
Line the drawer back with festive paper if the wood is tired. This is the diy wood advent calendar for people who love the look of woodwork and the schedule of not doing any.
What You Need
- One old wooden drawer with a good front
- 24 small boxes, jars, tins or envelopes
- Number tags or stickers
- Festive paper or fabric for lining (optional)
- Twine and mini clothespins
- A knob or handle if the drawer lacks one
How to Make It
- Clean the drawer and line the back if you like.
- Arrange the containers inside in a pleasing muddle of sizes.
- Number everything 1–24.
- Fill, stand the drawer where it will be seen, and prop a little greenery on top.
- Re-muddle annually — the arrangement is the tradition. The drawer is the diy wood advent calendar with zero sawing required.
Drawer hunt: The best calendar drawers come from old sewing tables and apothecary cabinets — shallow, divided, and already full of stories. Check the drawer slides freely before you fall in love.
Old drawers suit old-souled rooms — more in these vintage home decor ideas.
Stacked Crates Pyramid Calendar
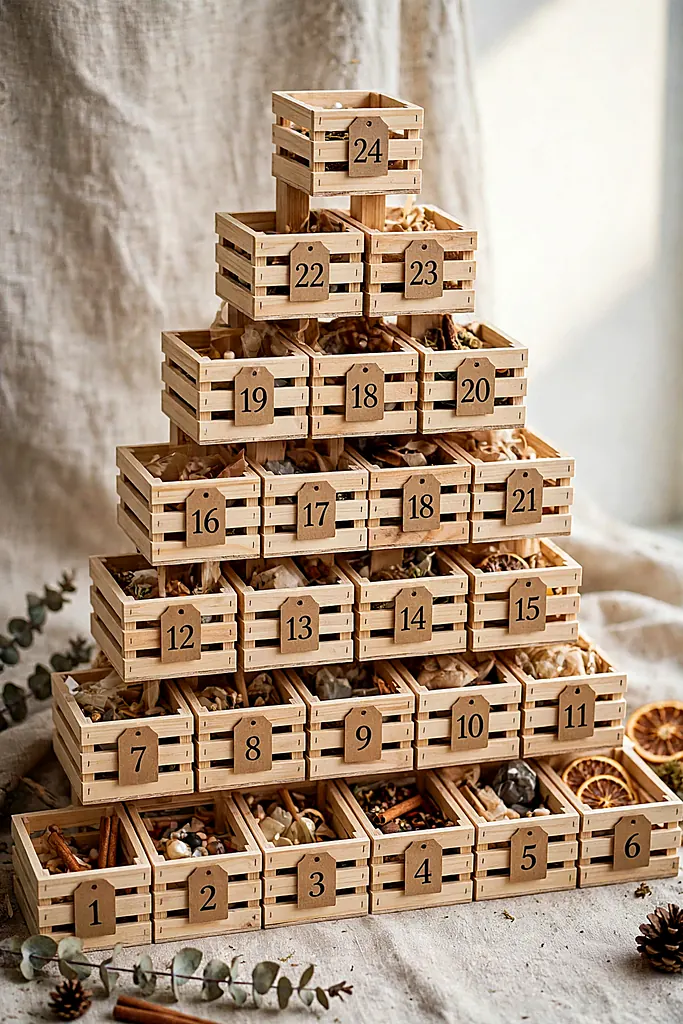
Small wooden crates stacked into a pyramid — wide at the base, one proud crate at the top for the 24th — each holding its day’s surprise behind a numbered tag. The pyramid builds in an afternoon, stores nested in January, and doubles as the season’s most useful shelf while it stands.
What You Need
- Small wooden crates (about 24, or fewer larger ones with dividers)
- Wood screws or zip ties for stability
- Number tags
- Treat bags or tissue for filling
- Optional paint in a festive palette
- A star or bow for the top crate
Stack the crates in a stable pyramid on the floor or a sturdy table, screwing or tying the layers together — a pyramid of treats will be climbed by someone small; build for the climb. A pyramid is the diy wood advent calendar that restacks into January storage.
Number the crates and fill each with its bagged surprise.
The top crate, the 24th, earns the star and the best gift. Crates make the most flexible diy wood advent calendar of all: next year, restack them as a bookshelf village or a different pyramid entirely. A crate diy wood advent calendar is also the easiest to re-theme — red one year, natural the next.
Pyramids greet guests beautifully — stage the base with these hallway table decor looks.
Wooden Truck Calendar

A big red wooden toy truck whose trailer carries twenty-four tiny numbered boxes: the calendar children would design if consulted, and they should be. The truck parks on the mantel or under the tree, and each morning’s box comes off the trailer — a delivery, daily, from the North Pole logistics division.
Buy a plain wooden truck and paint it, or build the simple version from blocks and dowel wheels. Either way, paint it RED; a tasteful beige truck is a missed opportunity and everyone at the photos will know.
What You Need
- A large wooden toy truck with a flat trailer (or blocks and dowels to build one)
- 24 tiny boxes or matchboxes
- Red paint plus black and gold details
- Number stickers
- Glue and sandpaper
- A tiny wreath for the truck’s grille
How to Make It
- Sand and paint the truck red; add black wheels and gold headlights.
- Number the twenty-four tiny boxes.
- Load the trailer in a cheerful muddle, biggest box as the 24th at the back.
- Park it somewhere photogenic and start deliveries. The truck is the diy wood advent calendar children ask for by name — and a beige one is a crime against December.
Paint order: Paint the truck before numbering the boxes. Red first, details second, boxes last — a numbered box painted over is just a box with a secret.
At a Glance
The truck’s cargo pairs with baking — load it beside these christmas cookies.
Arched Window Calendar
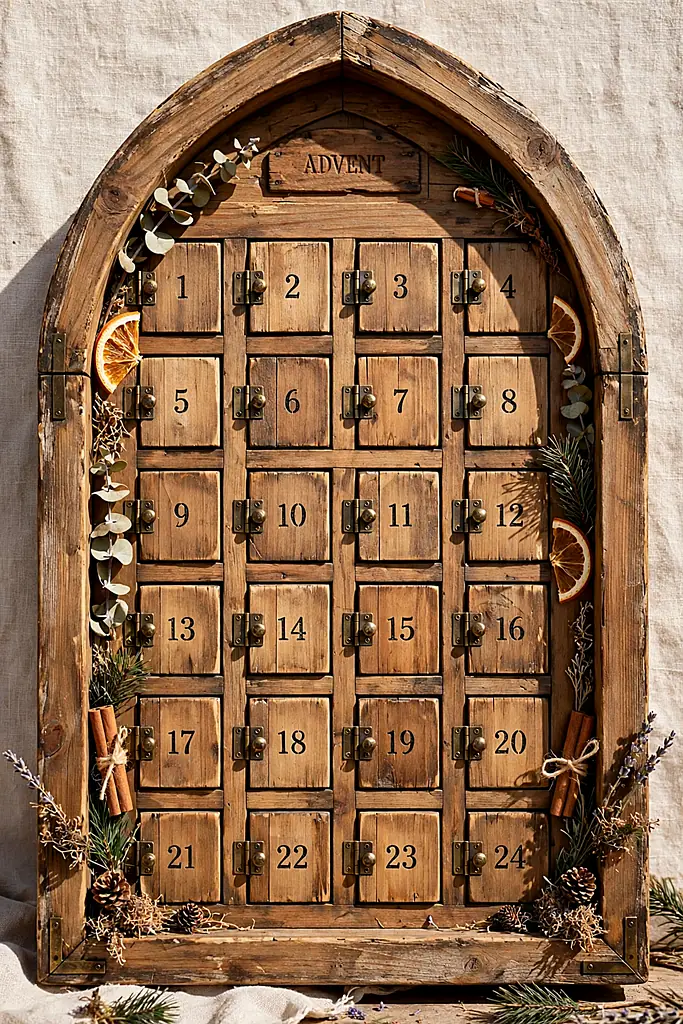
For the house with church-window taste: a tall arched wooden frame divided into twenty-four small doors, like a piece of ecclesiastical furniture that wandered home and got festive. It is the most elegant build here — the one that reads as decor first and calendar second, which is exactly why adults love it. The arch is the diy wood advent calendar that reads as furniture, and an arched one suits a dining room especially well.
What You Need
- Plywood for the arched frame and backing
- Jigsaw, drill and sandpaper
- Thin wood for the doors, with tiny hinges
- Paint in cream, sage or deep green
- Number stickers in a serif style
- A hanging bracket rated for the weight
How to Make It
- Cut the arch silhouette and its backing; sand both smooth.
- Build the shallow compartment grid inside the arch.
- Fit and hinge the twenty-four doors; number them in the serif stickers.
- Paint, hang it securely, and fill. An arched window is the diy wood advent calendar for grown-up hallways.
At a Glance
Arches set a decorated tone — build the room around these christmas decor ideas.
Sliding Barn Door Calendar
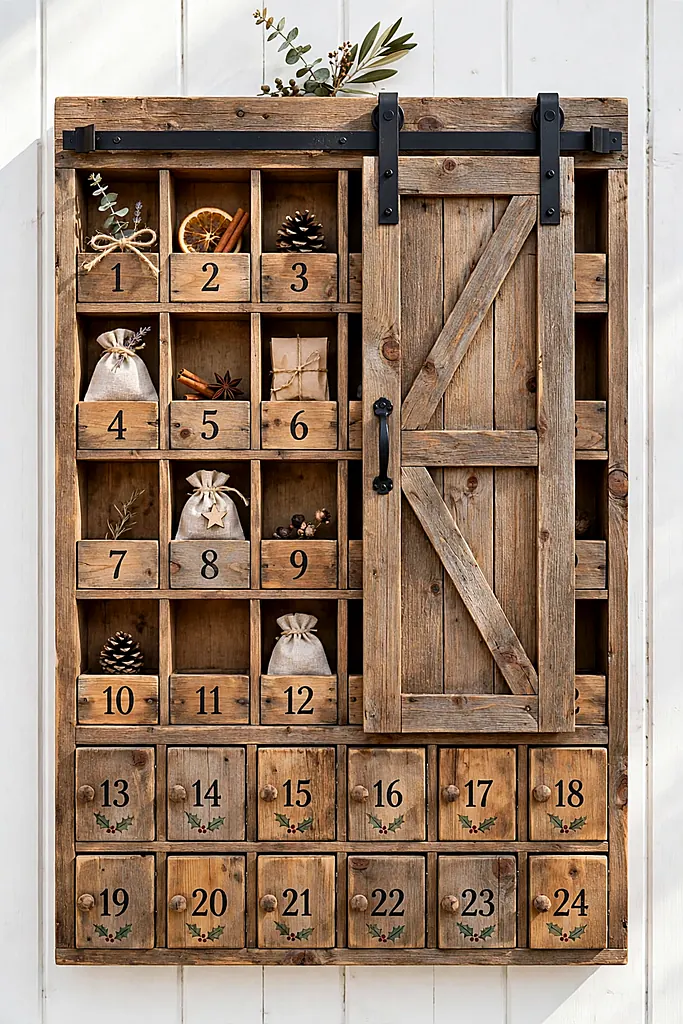
Farmhouse drama in miniature: a wooden board of twenty-four numbered compartments hidden behind one sliding barn door on a little rail — each day, you slide the door to reveal only today’s square, and the rest of December stays secret behind the wood. The mechanism is simple; the suspense is theatrical.
The rail is a strip of wood with a groove, or a length of small metal track from the hardware store. Either way, the door must glide — a sticking door on December 9th at 6 a.m. tests the whole family’s Christmas spirit.
What You Need
- A plywood board and frame pieces
- A sliding door panel (thin plywood)
- A small rail or grooved wood strip
- Compartment dividers (thin balsa strips)
- Paint or stain in farmhouse colors
- Number stickers and a tiny door handle
Build the compartment board first: a frame, a backing, and a grid of twenty-four squares sized for small treats. A barn-door diy wood advent calendar keeps December’s secrets properly. Number the squares along their tops so the open door frames today’s number.
Mount the rail, hang the door, and slide it a hundred times before December — it should travel with one finger. A barn-door diy wood advent calendar turns opening day into a daily reveal ceremony, applause optional but common.
Glide test: Wax the groove with a candle stub. Wood-on-wood slides silently and smoothly after waxing, and the door will still be gliding when this calendar is inherited.
Sliding panels are wall art the rest of the year — browse these diy wall art projects.
Wood Slice Garland Calendar
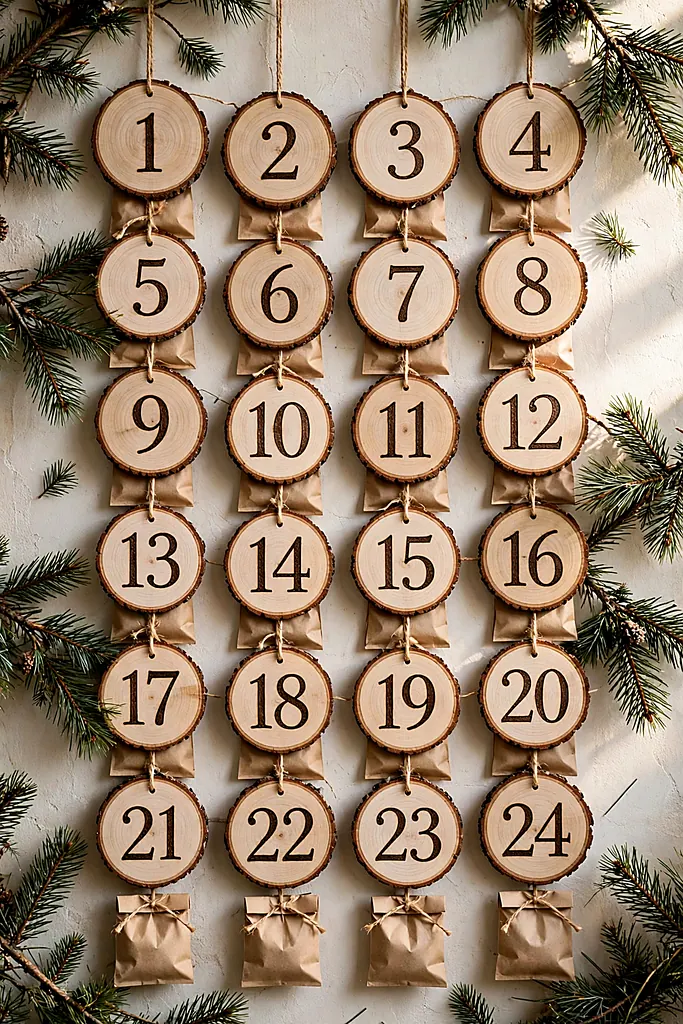
Twenty-four wood slices, each drilled, numbered and strung on twine with a small treat bag tied beneath — hung as a garland across the mantel or a window. It is the lightest build in wood on this list, the fastest to store (one small box), and the one renters can hang with two pins and a clear conscience. Garlands are the diy wood advent calendar to hang over a window.
What You Need
- 24 wood slices, about 7–9 cm across
- A drill with a small bit
- Twine or jute string
- Number stamps, a wood burner or a paint pen
- 24 tiny treat bags
- Optional: pinecones or felt stars between slices
How to Make It
- Drill a hole near the top of each slice.
- Number the slices — a wood burner looks best, a paint pen is fastest.
- Thread them on twine in scrambled order, tying a filled treat bag beneath each.
- Hang across the mantel and untie one bag per day. The slice garland is the lightest diy wood advent calendar you will ever hang — and the one to make with a scout troop.
Garlands partner with bows — coordinate using these bows on christmas trees.
Toolbox Caddy Calendar
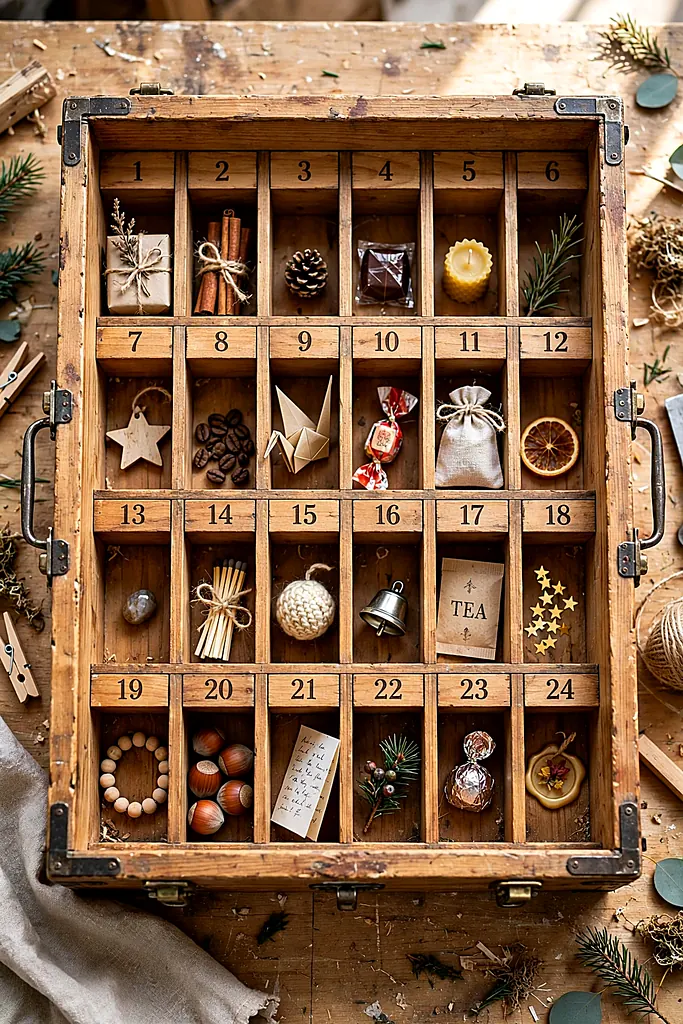
A wooden toolbox caddy — handle on top, honest joinery — divided into twenty-four slots. It carries like a lunchbox, sits on the kitchen counter like it works there, and lets the countdown travel: to grandparents’ houses, to holiday rentals, wherever December happens. The most portable heirloom on this list.
Divide the interior with balsa strips rather than building twenty-four true compartments; the strips read as compartments and weigh nothing. Number the slot edges, not removable cards — cards get lost by December 4th in every documented household. The caddy diy wood advent calendar is also the easiest of all to refill standing up.
What You Need
- A wooden toolbox caddy (ready-made or a simple build)
- Balsa strips for dividers
- Wood glue
- Number stickers or a paint pen
- Sandpaper and a finish coat
- Small wrapped treats sized to the slots
How to Make It
- Sand the caddy and apply a finish coat.
- Measure and cut the balsa dividers to form twenty-four slots.
- Glue the dividers in and let them set overnight.
- Number the slot edges.
- Fill the slots, carry it to its December post, and begin. A toolbox is the diy wood advent calendar that travels to grandparents under its own handle.
Slot sizing: Cut one divider set, then test-fit your largest planned treat before gluing anything. Advent calendars fail in December for treats measured in November optimism.
A caddy of small gifts travels well — fill it from these handmade christmas gift ideas.
Tree Pegboard with Felt Ornaments
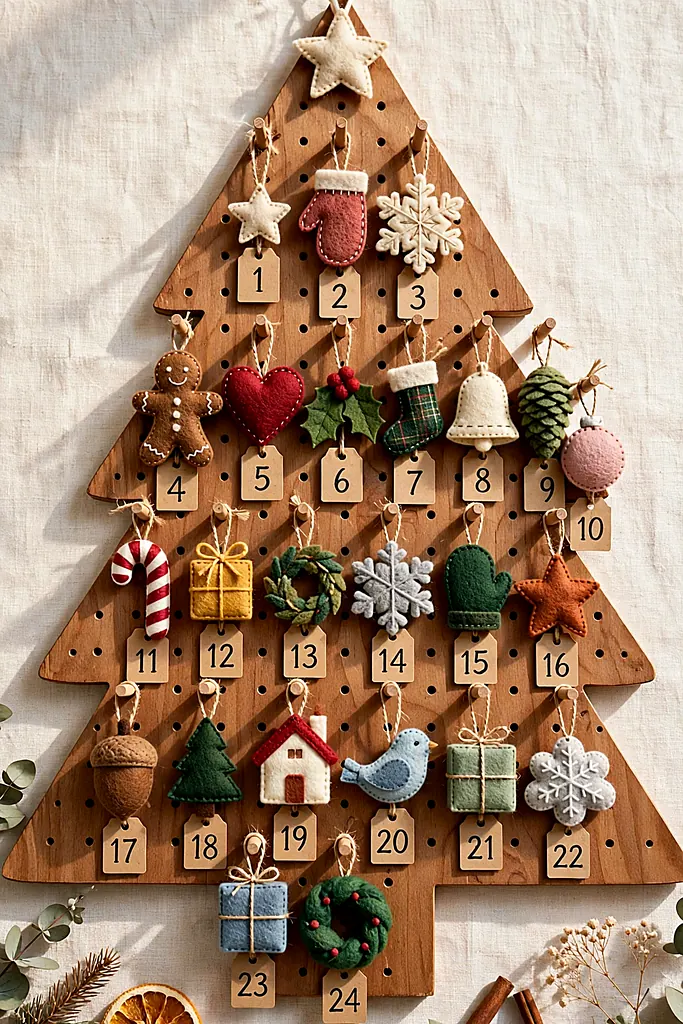
A tree-shaped pegboard where every peg holds a numbered felt ornament with a tiny pocket or pouch behind it — the softest, most child-safe calendar here, and the prettiest to photograph. Each day, one ornament comes down, its treat is claimed, and by the 24th the tree stands bare and the ornaments begin their second career on the real tree.
What You Need
- Pegboard and pegs, or a drilled plywood tree board
- 24 small felt ornaments with pockets (or mini pouches)
- Number tags
- Paint for the board
- A saw if cutting the tree shape
- Ribbon for hanging ornaments
Cut or buy the tree board and paint it a deep green or a calm cream. A pegboard tree is the diy wood advent calendar toddlers can use safely. Fit the pegs in a branch-following pattern, twenty-four of them, spaced for ornaments that will grow plumper when filled.
Hang one numbered ornament per peg, treat tucked inside. The genius of this diy wood advent calendar is the hand-off: nothing is thrown away on the 25th — the whole calendar migrates onto the tree as decorations.
This calendar needs its ornament army — make them from these diy felt christmas ornaments.
Book-Style Hinged Calendar
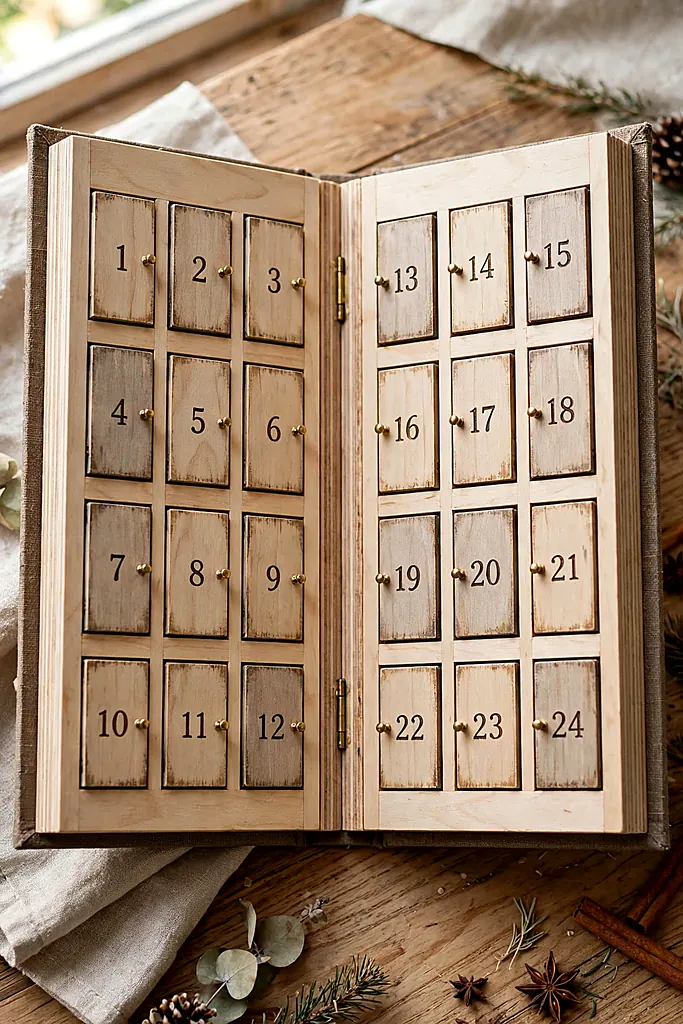
Two wooden panels hinged like a book, opening to reveal twelve doors on each side — it stands on a shelf like a storybook, closes flat for storage, and opens each morning with a small ceremony. Paint a cover title on the front (‘The December Book’ is traditional in at least one house) and it becomes a prop in the family’s mythology.
Use shallow boxes behind each ‘page’ so treats have real room. Of all the diy wood advent calendar designs, this one charms bookish households most, and it is also the easiest to gift: it wraps like a book, because it insists it is one. A book-style diy wood advent calendar also makes the best wrapped gift on this entire list.
What You Need
- Two plywood panels, about 30×40 cm each
- Two small hinges
- Thin wood or card for twelve doors per side
- Shallow box compartments (balsa builds fast)
- Paint and a gold pen for the cover title
- A ribbon tie or small clasp
How to Make It
- Build a shallow compartment grid on the inner face of each panel.
- Fit twelve small doors per side; number them across the spread.
- Hinge the panels together and add the ribbon tie.
- Paint the cover, title it in gold, fill the compartments, and shelve it proudly. The book is the diy wood advent calendar that shelves like a story.
Fill the book with tiny bakes — these salt dough christmas ornaments fit its pages.
Santa’s Post Office Calendar
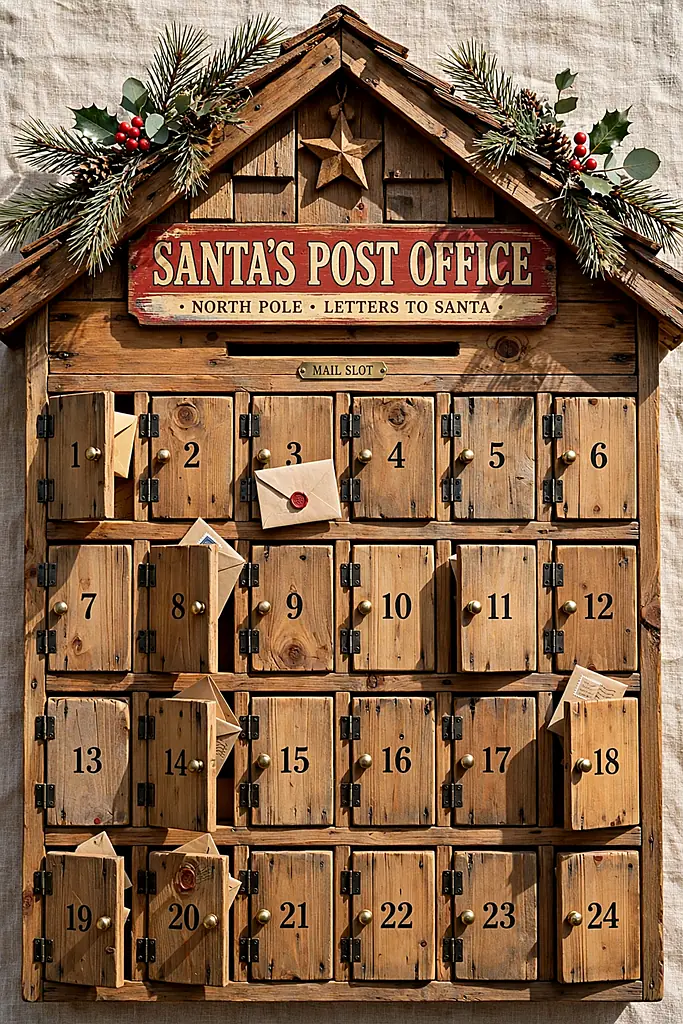
A wooden post office front — twenty-four little mailbox doors with brass-colored slots — where each day delivers a tiny letter along with the treat: a joke, a memory, a mission (‘post a compliment to a neighbor’). It is the most narrative calendar here; by the 24th, the family has a correspondence, not just a countdown.
What You Need
- Plywood for the post office facade and boxes
- Thin wood for twenty-four small doors
- Gold paint for slots and numbers
- Small hinges or tape hinges
- Red paint for the post-box trim
- Tiny envelopes and letter cards
How to Make It
- Build the facade with a grid of twenty-four mailbox openings and shallow boxes behind.
- Fit the doors with their gold slots painted on.
- Number the doors and paint the trim a proper post-office red.
- Write the tiny letters, load each box with a letter and a treat, and open for business. A post office is the diy wood advent calendar with a plot.
Letter bank: Write all twenty-four tiny letters in one sitting in November — jokes, memories, missions. December-you, at 6 a.m. with a child asking, will be profoundly grateful.
Post offices thrive on party season — deliver yours during these friendsmas party ideas.
A-Frame Tent Calendar
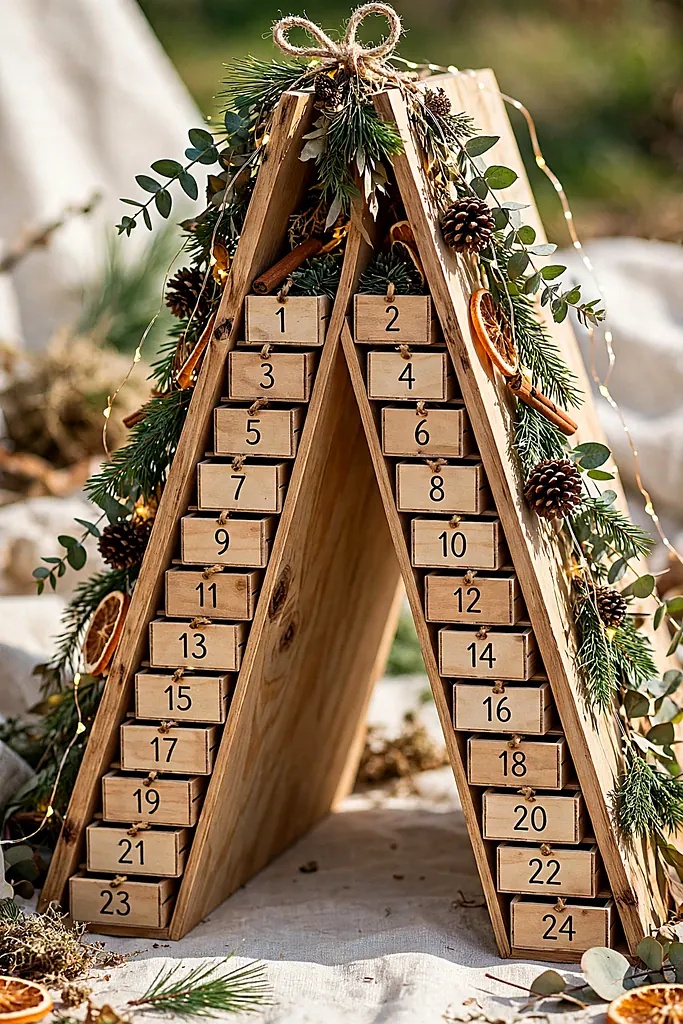
Two boards hinged at the top into an A-frame tent, drawers or pouches marching down both slopes, fairy lights along the ridge. It stands on a sideboard like a tiny chalet, glows after dark, and folds flat in January — the most architectural small build here, and the coziest under lights.
What You Need
- Two plywood boards, about 40×60 cm
- A piano hinge or two butt hinges for the ridge
- Small drawers, boxes or pouches for both slopes
- A chain or cord to set the tent’s spread
- Fairy lights (battery)
- Paint or stain and number stickers
Hinge the boards at the top and set the spread with a short chain on each side so the tent stands at a friendly angle. Attach drawers or pouches in rows down both slopes, twelve per side. An A-frame diy wood advent calendar takes less wall than any cabinet on this list.
Run the fairy lights along the ridge and number everything. An A-frame is the diy wood advent calendar that glows after dark. An A-frame diy wood advent calendar at dusk, glowing on the sideboard, is the single most saved photo of any December in houses that have built one.
Ridge lights: Run the fairy lights along the hinge line, not down the slopes — the glow pools at the peak like lamplight in a chalet, and the drawers stay easy to open.
A glowing chalet belongs in a cozy room — build the rest from these cozy winter living room decor ideas.
Numbered Wooden Block Tower
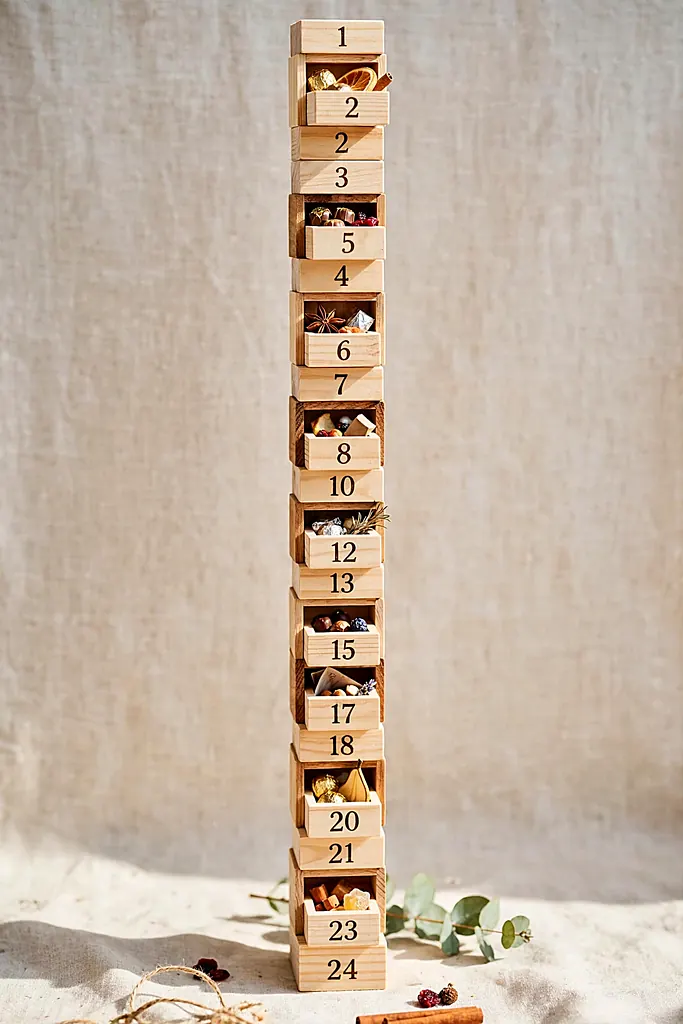
Twenty-four chunky wooden blocks, each numbered and each hollowed (or paired with a tiny drawer block) to hold its day’s prize, stacked into a tower the children dismantle one block per day. A tower is the diy wood advent calendar that visibly shrinks toward Christmas. By Christmas Eve the tower is gone and the blocks begin their second life in the toy box — the only calendar here that appreciates in usefulness after December.
What You Need
- 24 wooden blocks, about 6 cm cubes (some hollow or lidded)
- A drill and Forstner bit for hollowing (or buy lidded boxes)
- Number stencils and paint, or a wood burner
- Sandpaper — blocks get handled by small hands
- Non-toxic finish
- A star topper block for the 24th
How to Make It
- Hollow or prepare the blocks so each holds a small treat.
- Sand every block until it would pass a toddler inspection.
- Paint or burn the numbers 1–24, star on the last block.
- Stack the tower in scrambled order on a tray.
- Remove, open and restack nothing — the shrinking tower is the countdown made visible.
- On the 25th, hand the blocks over to the toy box with ceremony. Blocks are the diy wood advent calendar that become toys on the 25th — and the easiest to expand next year.
Blocks pair with other handmade fillers — see how to make soap for a grown-up slot prize.
House with Lit Windows
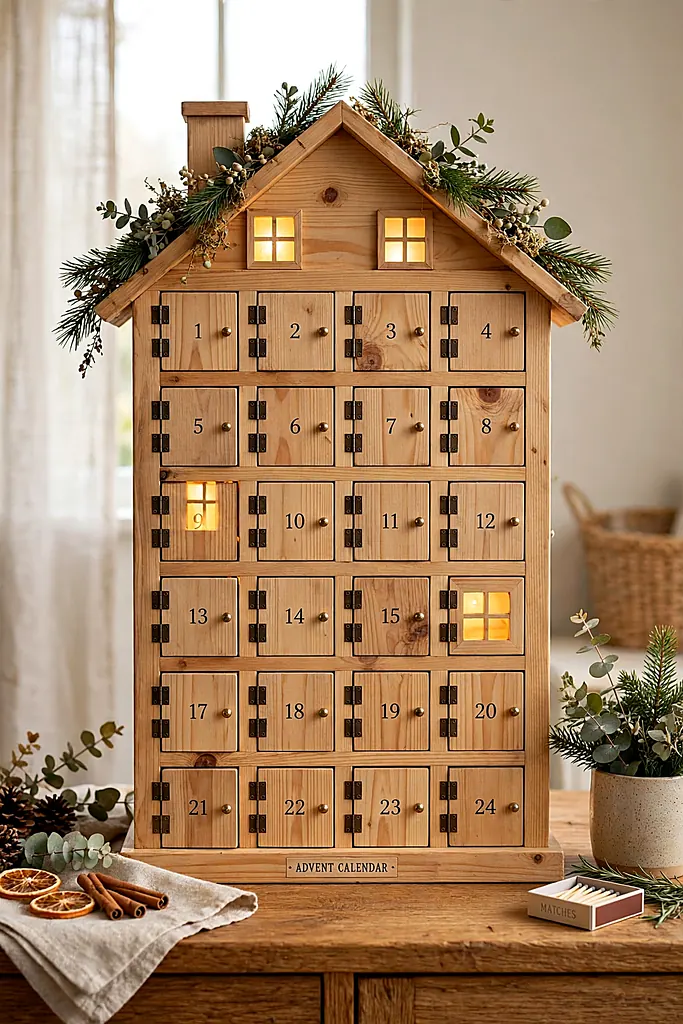
The showpiece: a wooden house whose twenty-four ‘windows’ are little doors, backlit by a warm LED strip so the whole house glows like someone is home — because someone is: December. The lit house is the diy wood advent calendar that stops hallway traffic after dark. Building it takes a weekend and some wiring courage; the result stops guests in the hallway.
Keep the electrics simple and safe: one battery LED strip behind frosted window film, no mains wiring anywhere near the treats. A lit-house diy wood advent calendar becomes the house’s nightlight, hearth and countdown in one object.
What You Need
- Plywood for the house shell and roof
- Thin wood for twenty-four window doors
- A battery LED strip and frosted film or vellum
- Paint in a storybook palette
- Small hinges and number stickers
- Glue, screws and sandpaper
How to Make It
- Build the house shell with a window grid cut into the front.
- Fit the frosted film behind the grid and the LED strip behind that.
- Door each window and number them.
- Paint the house, install the roof, and switch on December. A lit house is the diy wood advent calendar guests photograph first.
Light safety: Battery LEDs only, and keep the strip clear of the treat compartments. Warm-white light reads as lamplight; cool-white reads as a fridge — choose warm, always.
A glowing house deserves grand surroundings — take cues from these luxury christmas decor ideas.
Treasure Chest Calendar
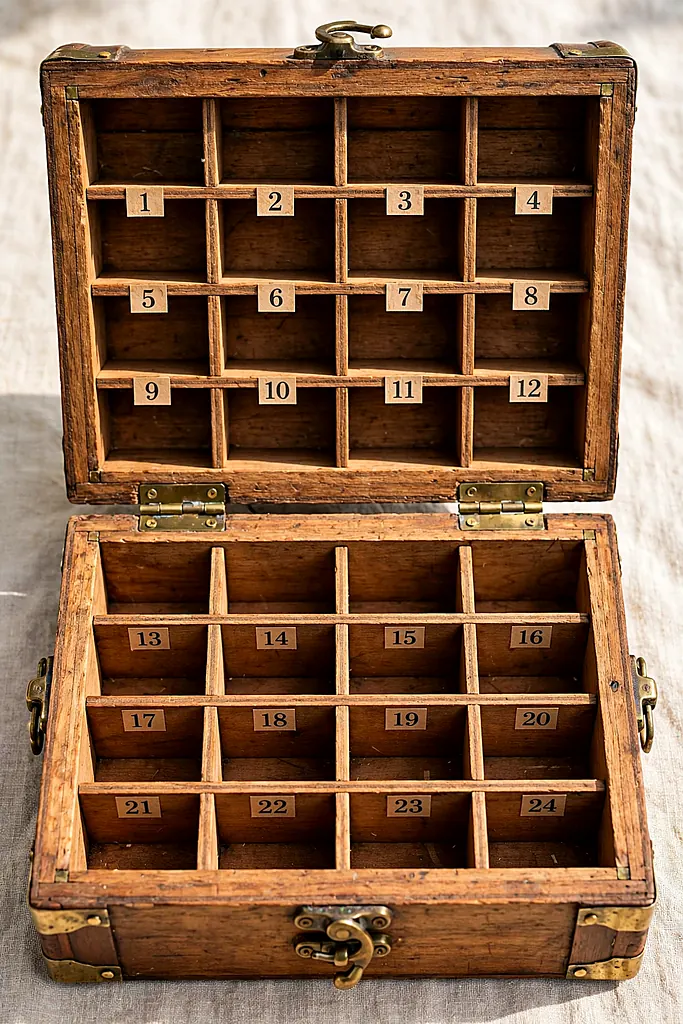
A wooden chest — curved lid, iron-look hardware — whose inside holds twenty-four numbered compartments or scroll-tied parcels. It lives at the foot of the tree like buried treasure raised for the season, and the daily opening of that creaky lid is a sound December should make in every house.
What You Need
- A wooden chest or the boards to build one
- Compartment dividers or 24 small parcels
- Number tags
- Dark stain and metal-look hardware
- A hasp and small padlock (optional, theatrical)
- Red or green felt to line the inside
Line the chest with felt, build or arrange the twenty-four compartments inside, and number the lids or tags. A treasure chest is the diy wood advent calendar with a plot twist built in. The chest does the theatrical work — your joinery can stay simple. A chest is the diy wood advent calendar that guests ask to open.
A treasure-chest diy wood advent calendar invites a story: a map on the lid’s underside, a ‘key’ hidden in an early December slot. Children do not forget a calendar with a plot. A chest is the diy wood advent calendar that stores itself.
At a Glance
Treasure suits the hardest giftee — more ideas in these christmas gift ideas for mom.
Wooden Train Calendar
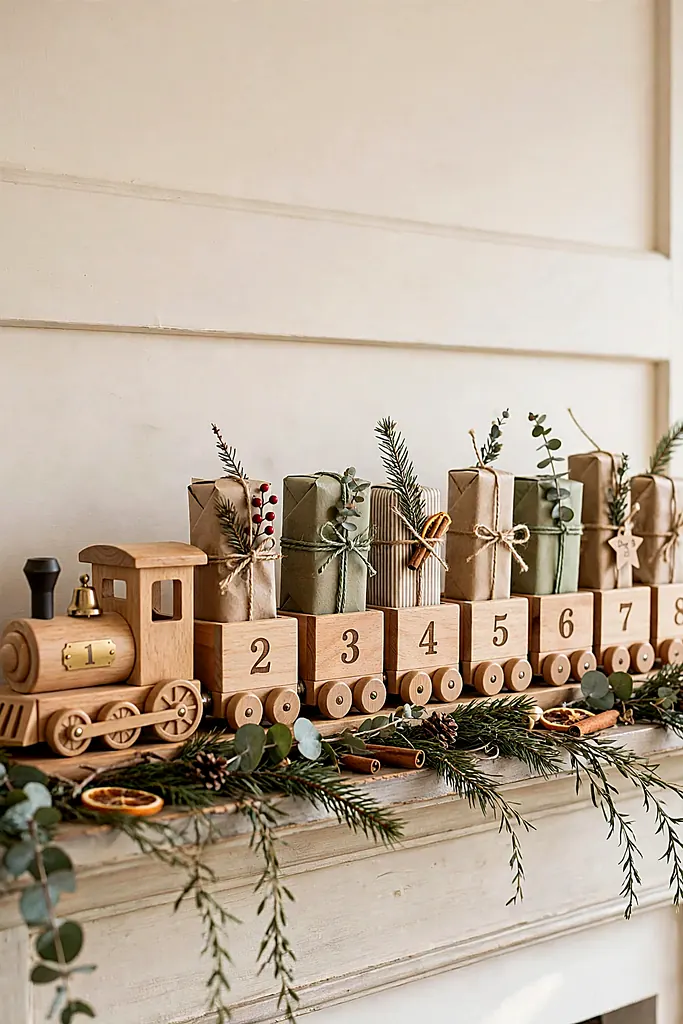
Close the list with motion: a wooden locomotive pulling carriages that carry the days — numbered little wagons, one per day or a few days per wagon, parked along the mantel in a line that shortens as Christmas approaches. Each morning a wagon is uncoupled and emptied; by the 24th, only the engine remains, whistle figuratively blown. A train diy wood advent calendar suits a long mantel better than any other design here.
Build the train from blocks and dowel wheels, or dress up a bought wooden train with number tags. The train is the diy wood advent calendar that turns the countdown into a journey, and journeys are what December is secretly about.
What You Need
- A wooden toy train with several carriages (or blocks, dowels and wheels to build one)
- Number tags or stickers for the wagons
- Small treat boxes sized to the carriages
- Paint in engine green or classic red
- Tiny coupling hooks or magnets
- A star for the engine’s front
How to Make It
- Paint the engine in its livery; add the star to its front.
- Number the carriages and their treat boxes 1–24.
- Couple the full train along the mantel or under the tree.
- Uncouple and empty one wagon per day until only the engine remains. The train is the diy wood advent calendar that turns counting into a journey — the one for mantels with mileage.
Track tip: A strip of dark felt or a painted ‘track’ runner under the train makes the mantel display look deliberate — and stops runaway wagons during enthusiastic uncoupling.
The train’s cargo manifest starts with cookies — plan it at a cookie exchange.
Frequently Asked Questions
How long does a diy wood advent calendar take to build?
The simple designs here — the branch, the wood-slice garland, the repurposed drawer — take an afternoon. Furniture builds like the 24-drawer cabinet, the arched window and the lit house take a full weekend. Start in November: a diy wood advent calendar built in a rush on November 30th at midnight is a tradition too, but not the relaxing kind.
What wood is best for an advent calendar?
Pine and plywood are the friendly choices: cheap, light, easy to cut and paint. Balsa makes doors and dividers that weigh nothing. Whatever you choose, sand it well — a diy wood advent calendar is handled by small hands twenty-four mornings in a row, and splinters are not on the gift list.
What can I put inside besides chocolate?
Notes and jokes, tiny toys, coins, craft supplies, Lego pieces, hair clips, seeds for spring, and activity promises — a film night, a baking hour, a drive to see the lights. Most families mix: chocolate on weekdays, an activity at weekends, and something genuinely special behind the 24th door of their diy wood advent calendar.
How do I number the doors and drawers?
Stencils and paint give the most crafted look; number stickers are fastest; a wood burner is the heirloom option. Number in a muddle, never in neat rows — hunting for today’s number is half the game, and a diy wood advent calendar in strict numerical order spoils its own fun.
Can I make one without power tools?
Yes. The branch calendar, slice garland, drawer and crate designs need at most a drill. Pre-cut craft drawers, boxes and house shapes are sold everywhere, which means a diy wood advent calendar is really an assembly-and-finishing project for most people — the sawing is optional, the sanding is not.
How do I store it for the rest of the year?
Empty it, dust it, and store it flat or nested in a labeled box with the decorations. Wood’s whole advantage is that it waits patiently: a well-made diy wood advent calendar comes out of storage every November looking exactly like the heirloom it is becoming. That patience is the whole point of choosing a diy wood advent calendar in the first place.
Final Thoughts: Built Once, Loved for Decades
Twenty-one ways to count December in wood — drawers, doors, tins, trains and one glowing house. Cardboard calendars last a season; a wooden one lasts a childhood, then starts on the grandchildren. That is the whole argument for building yours: the countdown stops being packaging and starts being furniture for your family’s memory. That is what a diy wood advent calendar does that cardboard never will — built once, it gets filled twenty-five different ways.
Pick the build that matches your weekend honestly — the branch has charmed more children than many a cabinet — and start in November. Every diy wood advent calendar on this list was somebody’s first woodworking project once, and every December since, it has been the first thing the family asks about. Build yours, fill it well, and let the hunting begin.
More from The Glossy Guide
 Fashion and Beauty
22 Stunning Christmas Dresses for Women Over 50 That Flatter Every Figure
There comes a point where the best Christmas dress is not the tightest or the trendiest — it is the…
 DIY & Craft
23 Amazing DIY Felt Christmas Ornaments That Look Absolutely Adorable
There is a reason felt ornaments never go out of style: they are soft, unbreakable, and forgiving of beginner stitches…
 DIY & Craft
24 Stunning Salt Dough Christmas Ornaments That Look Store-Bought
Every December, the best ornaments on the tree are the ones nobody bought. Salt dough — flour, salt and water…