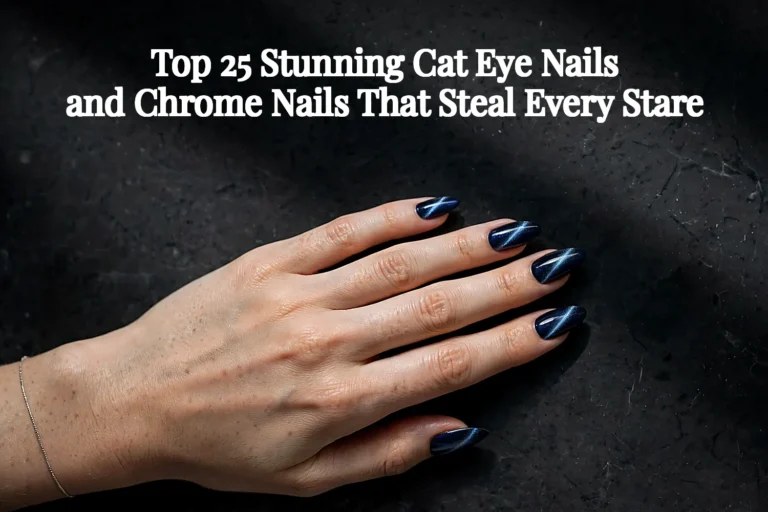
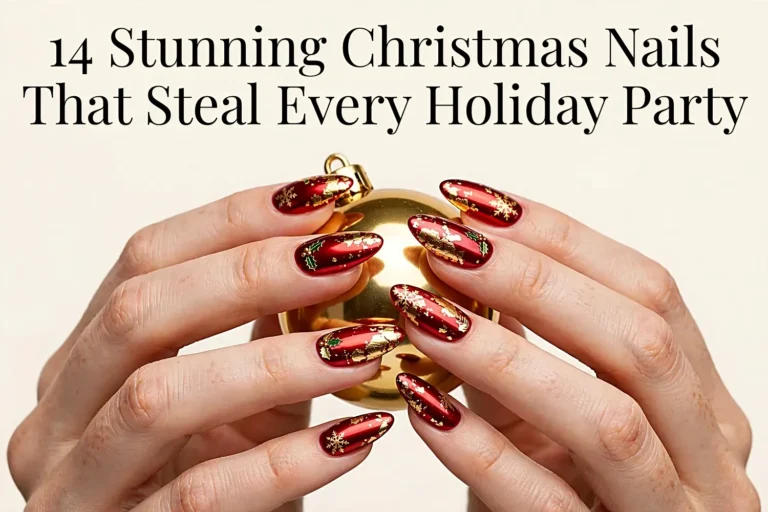
50 Stunning Christmas Nails That Turn Your Hands Into Holiday Magic

December turns hands into part of the outfit. Between gift wrapping, party photos, and holding a warm mug, nails get noticed more in the holiday season than at any other time of year.
These christmas nails cover every mood of the season: classic crimson, deep green velvet, candy cane stripes, gold foil, and icy chrome. Each design comes with the exact shades, the tools, and the steps, so nothing is left to guesswork.
Fifty ideas follow, arranged from timeless reds through greens, metallics, and winter blues. Pick one for the office party, another for Christmas morning, and save the boldest for New Year’s Eve.
Table of Contents
- Classic Crimson Red
- Deep Burgundy Wine
- Ruby Glitter Full Cover
- Red Velvet Matte
- Candy Cane Stripes
- Peppermint Swirl Tips
- Red and White Polka Dots
- Red French with a Gold Line
- Emerald Green Velvet
- Forest Green and Gold
- Pine Needle Green
- Deep Green Cat Eye
- Matte Evergreen
- Green French with Holly
- Holly Berry Accent
- Mistletoe Kiss Accent
- Gold Foil on Nude
- Rose Gold Chrome
- Champagne Glitter Fade
- Gold Leaf on Burgundy
- Silver Snowfall Dots
- Frosted Silver Glitter
- Icicle Blue Tips
- Midnight Blue Starry Night
- Frozen Ice Blue Chrome
- Snowflake White on Navy
- White Winter French Tips
- Snowy White Almond
- Snow Globe Accent
- Snowman Accent Nail
- Tiny Christmas Tree Art
- Negative Space Christmas Tree
- Christmas Lights String Art
- Ornament Bauble Art
- Gift Bow Accent
- Poinsettia Flower Art
- Wreath Ring Accent
- Reindeer Nose Art
- Plaid Flannel Nails
- Tartan Check Accent
- Cozy Fair Isle Pattern
- Sweater Knit Texture
- Gingerbread Brown
- Hot Cocoa Shimmer
- Sugar Plum Shimmer
- Cranberry Glitter
- Blush and Gold Minimal
- Confetti Party Nails
- Black Tie Gold Sparkle
- Midnight Countdown Glitter
- Frequently Asked Questions
- Time to Pick Your Favourite
Classic Crimson Red

A true crimson red never goes out of style at Christmas, and it flatters nearly every skin tone without trying too hard. Two thin coats of a blue-based red give the deepest colour, and a glossy top coat keeps the shine through a full week of parties.
What You Need
Shape: Short oval | Finish: High gloss | Time: 30 minutes
- Base coat
- Blue-based crimson polish
- Glossy top coat
- Cuticle oil
- Nail file (180 grit)
- Lint-free wipes
How to Do It
- File nails into a short oval and push back the cuticles.
- Wipe each nail with remover to clear oil from the surface.
- Apply one thin base coat and let it dry for two minutes.
- Paint two thin coats of crimson, capping the free edge each time.
- Seal with top coat and add cuticle oil once dry.
Short nails wear this shade best, because a long crimson nail can look dramatic in daylight. Keep the cuticle line tidy with a small brush dipped in remover, and reapply top coat on day three to stop the tips from wearing down.
A classic red pairs beautifully with sparkle, and these winter gel nail designs keep the shine going all season long.
Deep Burgundy Wine
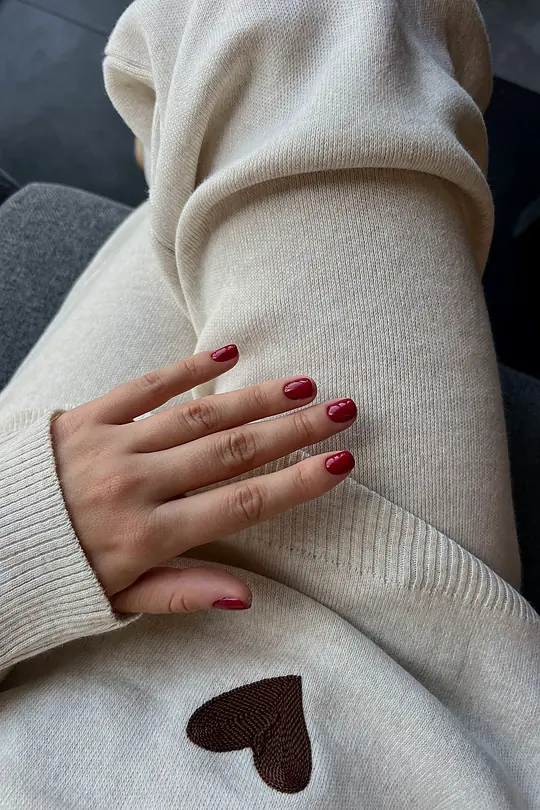
Burgundy sits between red and plum, and that in-between shade is exactly what makes it feel grown up. On short nails it reads elegant, on long nails it turns dramatic, and the wine tone suits pale and deep skin equally well.
Dark polish shows every slip, so slow down around the cuticle and keep the brush strokes straight down the centre first, then along each side. A peel-off base coat saves scrubbing later, because burgundy stains the nail plate surprisingly fast.
Your Kit
Shape: Short squoval | Finish: High gloss | Time: 35 minutes
- Peel-off base coat
- Deep burgundy polish
- Glossy top coat
- Cleanup brush
- Pure acetone
- Cuticle oil
The Method
- Shape nails into a short squoval and clean the cuticle area.
- Apply peel-off base coat and wait until it turns clear.
- Paint two thin coats of burgundy, capping each free edge.
- Clean any slip with a small brush dipped in acetone.
- Finish with top coat and let the nails dry for ten minutes.
At a Glance
Wear time runs about a week with a good top coat, and chips show as pale lines on such a dark shade. Keep a small bottle in the handbag for a quick touch-up, and wrap the polish over the tip to protect the edge.
Deep wine nails look striking beside a smoky eye, and these Christmas eye makeup ideas finish the pairing perfectly.
Ruby Glitter Full Cover
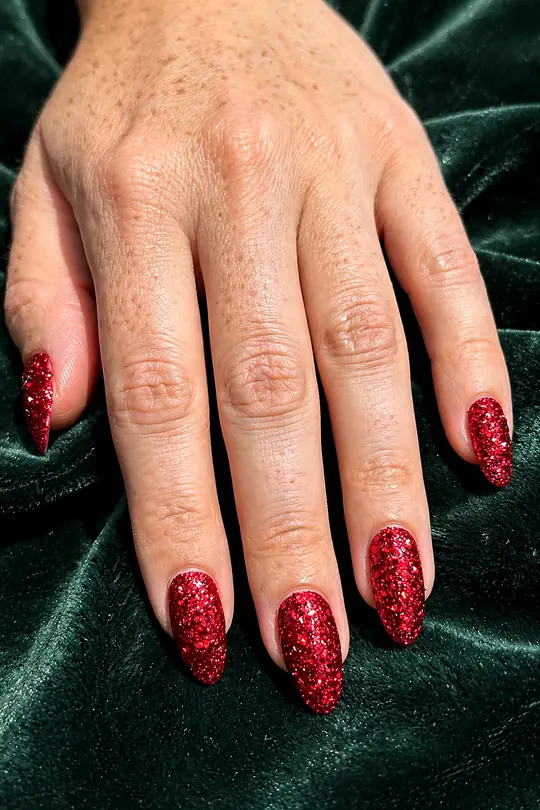
Full-cover ruby glitter catches the light with every hand movement, which makes it the loudest design in this collection. A dense glitter polish needs only two coats, while a sparse one needs three, so check the bottle carefully before starting.
The Lineup
Shape: Medium almond | Finish: Sparkling gloss | Time: 40 minutes
- Base coat
- Ruby glitter polish
- Glossy top coat
- Acetone
- Cotton pads
- Cuticle oil
Step by Step
- Apply base coat to protect the nail from glitter staining.
- Paint the first glitter coat thinly and let it set.
- Add a second coat, pressing the brush to spread the glitter evenly.
- Seal with two coats of glossy top coat for a smooth finish.
- Clean the skin around each nail with acetone on a cotton bud.
Glitter removal: soak a cotton pad in acetone, press it on the nail for one minute, then slide it off toward the tip. Scrubbing dry glitter tears the nail surface.
Of all the christmas nails in this roundup, this is the one that photographs best at a party. Glitter hides small chips better than cream polish, and the sparkle reads festive in daylight as well as under warm evening lights.
Glitter nails love a polished face to match, and these makeup tips that lift your whole look pair beautifully with ruby sparkle.
Red Velvet Matte

Matte red has a soft, velvety look that glossy polish never quite reaches. The trick is a matte top coat over a regular red cream, which gives the suede effect without buying a separate matte shade, and the finish suits both short and medium nails.
At a Glance
Shopping List
Shape: Short round | Finish: Velvet matte | Time: 30 minutes
- Base coat
- True red cream polish
- Matte top coat
- Lint-free pads
- Cuticle oil
- Nail file (180 grit)
Application
- File nails short and round, then push back the cuticles.
- Apply base coat and let it dry fully.
- Paint two thin coats of red cream, capping the free edge.
- Apply one even coat of matte top coat.
- Avoid hand cream for an hour so the matte stays clean.
Matte finishes show fingerprints and smudges more than gloss, so handle the nails gently for the first hour. A quick wipe with a lint-free pad restores the velvet look, and a fresh matte coat on day four revives the finish.
Velvet nails and velvet clothes belong together, and these velvet outfits make the pairing feel complete.
Candy Cane Stripes
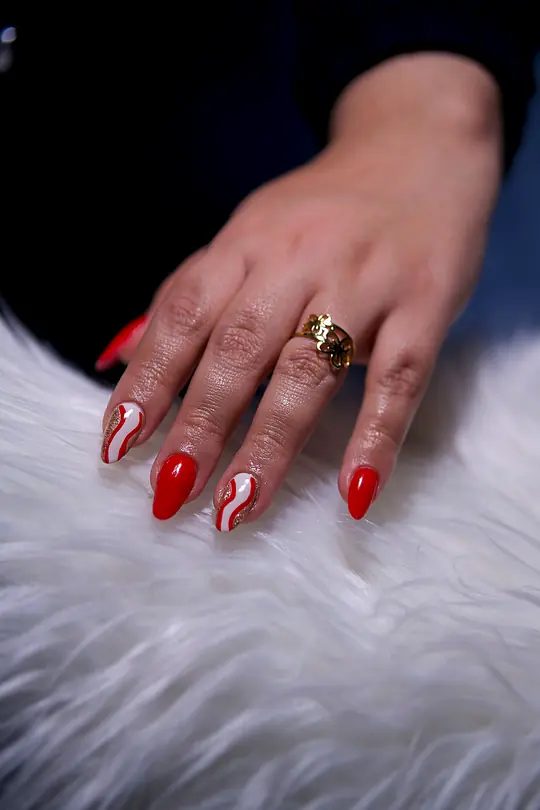
Diagonal red and white stripes turn a plain manicure into a candy cane in minutes. The easiest method is a striping brush over a white base, drawing each line from the cuticle toward the tip at the same angle every time.
Supplies
Shape: Medium square | Finish: High gloss | Time: 45 minutes
- Base coat
- White cream polish
- Red cream polish
- Striping brush
- Glossy top coat
- Cleanup brush
How to Apply
- Paint two coats of white and let them dry completely.
- Load the striping brush with red and wipe off the excess.
- Draw diagonal lines starting at the cuticle, spacing them evenly.
- Repeat on every nail, keeping the angle the same.
- Seal with glossy top coat once the stripes are dry.
Uneven stripes are the common mistake here, and they happen when the brush is overloaded. Wipe the brush on the bottle neck before each line, and keep the hand resting on a table so the strokes stay steady across the whole design.
A quicker alternative is striped nail stickers, which give clean lines without a steady hand. Press them on firmly, trim the excess at the tip, and seal with two coats of top coat so the edges never lift or peel.
Striped nails look sweet beside a cookie plate, and these Christmas cookies make the whole table feel festive.
Peppermint Swirl Tips
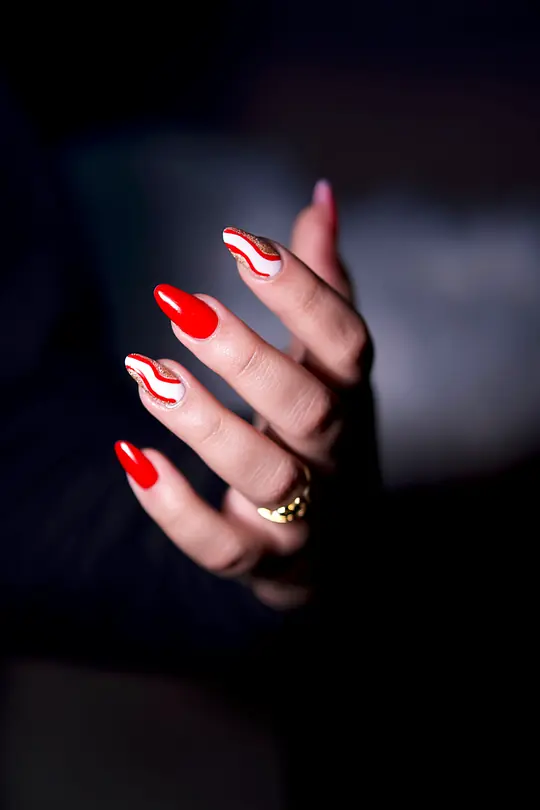
Swirled red and white tips give the candy cane idea a softer, more playful finish. A dotting tool drags the two colours together while both are still wet, which is how the swirl stays smooth and marbled instead of turning muddy.
This design suits a medium almond shape, where the tip has enough room for the swirl to show. Work one nail at a time, because the polish must stay wet for the drag, and a dried base will not blend. A sheer pink base under the swirl keeps the look soft.
Gather These
Shape: Medium almond | Finish: High gloss | Time: 50 minutes
- Base coat
- Sheer pink polish
- Red cream polish
- White cream polish
- Dotting tool
- Glossy top coat
The Technique
- Paint a sheer pink base on every nail and let it dry.
- Add a small dot of red and a small dot of white at each tip.
- Drag the dotting tool through both dots in a gentle curve.
- Repeat the swirl on each nail, wiping the tool between nails.
- Seal with glossy top coat once the swirls are set.
Swirl tip: use barely any pressure with the dotting tool, and wipe it clean between nails. Heavy pressure drags the colours into soft pink streaks instead of crisp, defined swirls.
Peppermint nails pair well with something sweet to sip, and these Christmas mocktails keep the party merry without the alcohol.
Red and White Polka Dots

At a Glance
Polka dots bring a cheerful, retro feel to a red manicure, and they are one of the easiest patterns to paint freehand. Vary the dot sizes slightly, because perfectly uniform dots can look printed rather than hand painted, which loses the charm.
The Essentials
Shape: Short round | Finish: High gloss | Time: 35 minutes
- Base coat
- Red cream polish
- White cream polish
- Dotting tool
- Glossy top coat
- Cleanup brush
How to Do It
- Paint two coats of red and let them dry completely.
- Dip the dotting tool in white polish and test the dot size.
- Place dots in neat rows, reloading the tool for each dot.
- Add smaller dots between the rows if the look needs filling.
- Seal with glossy top coat once the dots are dry.
These holiday nails suit short nails especially well, since the dots fill the space without crowding it. Space them evenly with a dotting tool, and let the red base dry fully first, or the white dots will smear into pink smudges.
Dots and coffee go hand in hand at Christmas, and these Christmas coffee drinks are made for slow December mornings.
Red French with a Gold Line

A red French tip already feels festive, and a thin gold line under the smile line turns it into something special. The gold needs a fine liner brush and a steady hand, so rest the painting hand on the table.
Your Nail Kit
Shape: Medium squoval | Finish: High gloss | Time: 45 minutes
- Base coat
- Nude pink polish
- Red cream polish
- Gold metallic polish
- Fine liner brush
- Glossy top coat
The smile line should follow the natural curve of the tip, not sit straight across the nail. Paint the red tip first, let it dry, and then draw the gold line just below it in one smooth stroke across the tip.
The Method
- Paint a nude base on every nail and let it dry.
- Paint the red tips freehand, following the natural curve.
- Let the red dry fully before touching the gold.
- Draw a thin gold line just below each red tip.
- Seal with glossy top coat, capping the free edge.
This design looks best on medium nails with a square or squoval tip, where the gold line has room to show. A nude base keeps the focus on the tip, and a glossy finish makes the gold shine in evening light.
Gold-lined tips deserve a party outfit to match, and these holiday party outfits carry the same festive shine.
Emerald Green Velvet
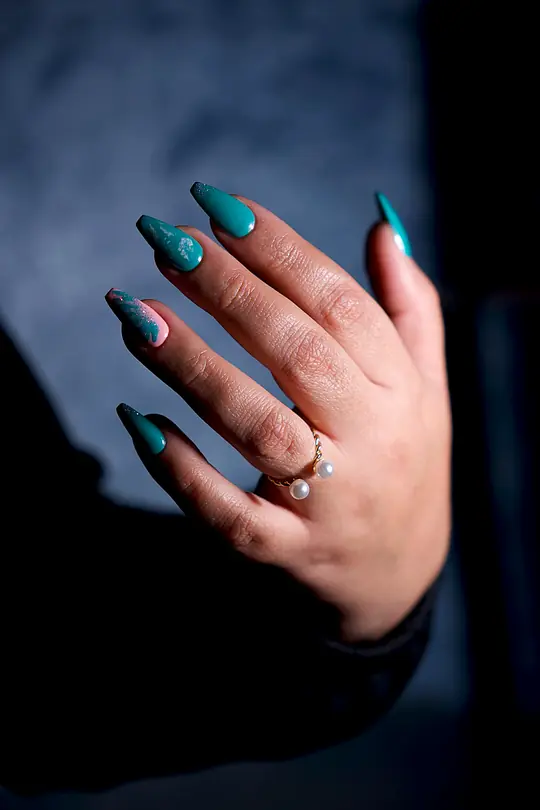
Emerald green is the season’s quiet showstopper, rich enough to stand beside red without competing with it. A deep emerald cream looks best in two thin coats, with a matte top coat for the velvet effect that gives this design its name.
What You Need
Shape: Short oval | Finish: Velvet matte | Time: 30 minutes
- Base coat
- Emerald green cream polish
- Matte top coat
- Cuticle oil
- Nail file (180 grit)
- Lint-free wipes
Step by Step
- File nails into a short oval and clean the cuticles.
- Apply two thin coats of base coat, letting each dry.
- Paint two thin coats of emerald, capping the free edge.
- Apply one even coat of matte top coat.
- Add cuticle oil once the matte finish is fully dry.
Green polish can stain the nail plate yellow, so a good base coat is not optional here. Apply it right to the edges, and keep the polish off the skin, because dark green marks show clearly on pale fingers for days.
Stain guard: double up the base coat on pale nails, and remove green polish within a week. Left longer, the colour sinks into the nail plate and needs buffing to shift.
Emerald nails look lovely at a candlelit dinner, and these Christmas dinner recipes make the evening feel complete.
Forest Green and Gold
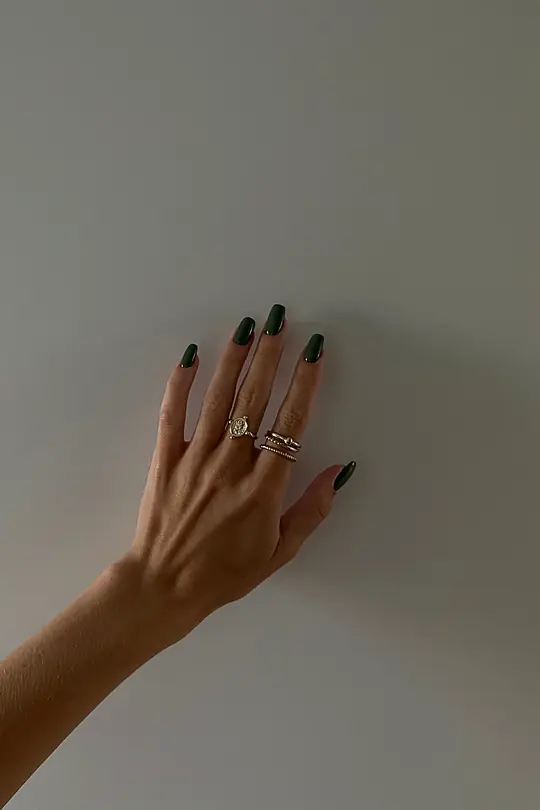
Forest green with gold is the most elegant pairing in this collection, and it suits a formal dinner as easily as a casual party. The gold works best as an accent, on one or two nails, so the green stays the star.
Your Kit
Shape: Medium almond | Finish: High gloss | Time: 40 minutes
- Base coat
- Forest green cream polish
- Gold metallic polish
- Gold foil flakes
- Tweezers
- Glossy top coat
Application
- Buff each nail gently to smooth the surface.
- Paint the green nails in two thin coats.
- Paint one accent nail gold in two thin coats.
- Press gold foil flakes onto the accent nail with tweezers.
- Seal every nail with glossy top coat.
A gold accent nail needs a smooth base, because metallic polish shows every ridge. Buff the nail gently first, then paint the gold in two thin coats, and add the gold foil only once the base is tacky, not wet.
At a Glance
Green and gold nails match a dressed table beautifully, and these Christmas table decorations complete the scene.
Pine Needle Green
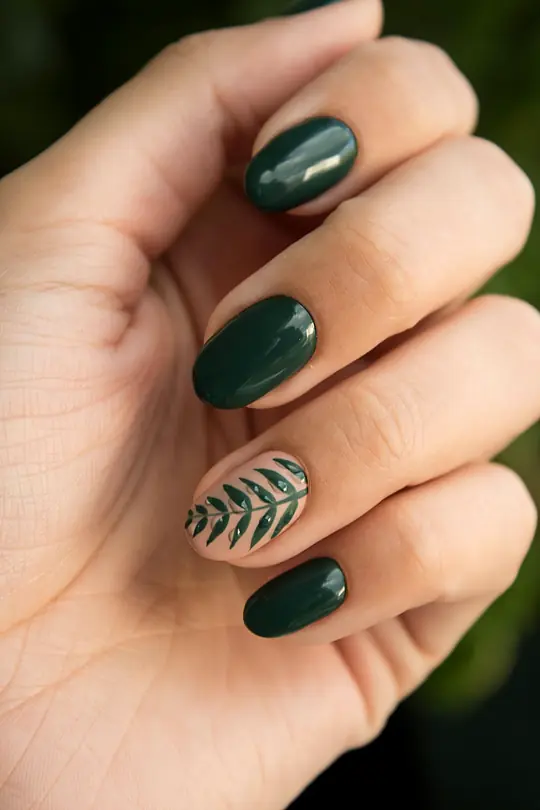
Edge rule: cap the free edge with base coat, colour, and top coat alike. Skipping that step is the fastest way to see chips appear by day three on green polish.
Pine needle green is softer than emerald and lighter than forest, a fresh shade that suits daytime wear. It looks especially good on short nails, where the colour stays neat and the shape stays practical for everyday tasks like typing and cooking.
The Lineup
Shape: Short oval | Finish: High gloss | Time: 35 minutes
- Base coat
- Pine green cream polish
- Gold glitter polish
- Glossy top coat
- Cuticle oil
- Nail file (180 grit)
How to Apply
- File nails into a short oval and push back the cuticles.
- Apply base coat, capping the free edge.
- Paint two thin coats of pine green on every nail except the ring finger.
- Paint the ring finger with two coats of gold glitter.
- Seal all nails with glossy top coat.
A single accent nail in gold glitter lifts the whole hand without making the design loud. Paint the accent on the ring finger, and keep the other nails plain, so the sparkle reads deliberate rather than accidental, and the green stays the focus.
Chips show quickly on mid-green polish, so cap the free edge with every coat, including the base. A top coat refresh on day four keeps the colour looking new through the second week, and it takes only a few minutes.
Pine green nails feel right beside handmade decor, and this DIY wood advent calendar brings the same natural charm to the season.
Deep Green Cat Eye
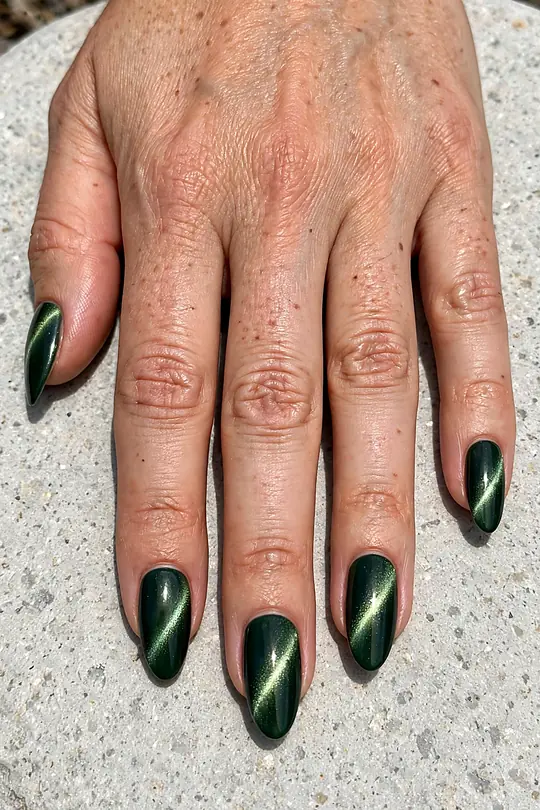
Cat eye polish holds tiny magnetic particles that shift into a glowing line when a magnet passes over the wet coat. The effect looks like light moving across the nail, and deep green shows it better than any other shade.
Shopping List
Shape: Medium almond | Finish: Magnetic gloss | Time: 40 minutes
- Base coat
- Deep green cat eye polish
- Cat eye magnet
- Glossy top coat
- Cuticle oil
- Lint-free wipes
Magnet tip: hold the magnet about five millimetres above the wet polish, never touching it. A magnet that grazes the surface leaves a dent that no top coat hides completely.
The Technique
- Apply base coat and let it dry fully.
- Paint one nail with a thin coat of cat eye polish.
- Hold the magnet above the wet polish for ten seconds.
- Repeat nail by nail, curing or drying each one before moving on.
- Seal with glossy top coat once the lines are set.
Among this season’s christmas nails, cat eye is the one that needs the least decoration, because the shifting line does the work alone. Hold the magnet close for ten seconds, and keep the hand still until the coat sets fully.
A magnetic green shimmer has a touch of drama, and these spooky Halloween nail designs carry that drama even further.
Matte Evergreen
Supplies
Shape: Short squoval | Finish: Velvet matte | Time: 30 minutes
- Base coat
- Evergreen cream polish
- Matte top coat
- Cuticle oil
- Nail file (180 grit)
- Lint-free wipes
How to Do It
- File nails into a short squoval and clean the cuticles.
- Apply base coat and let it dry fully.
- Paint two thin coats of evergreen, capping the free edge.
- Apply one even coat of matte top coat.
- Keep hand cream off the nails for an hour after finishing.
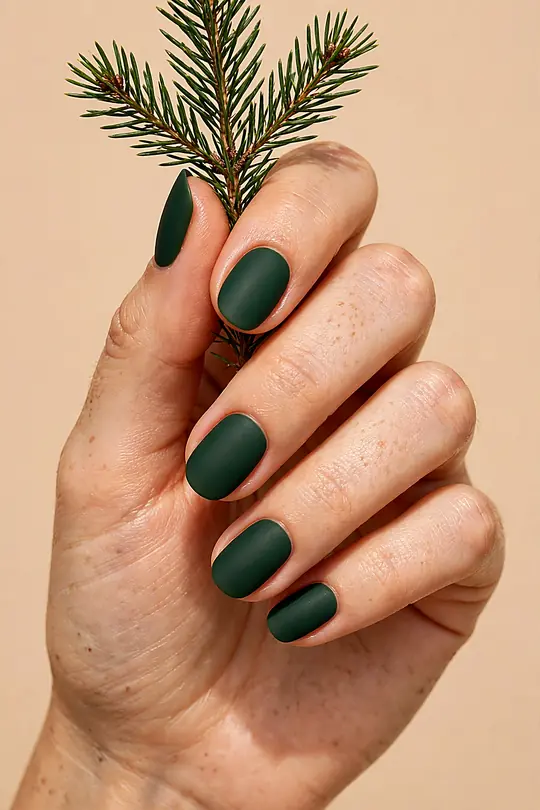
Evergreen matte is the most understated design in this collection, and that restraint is the point. The flat finish makes the deep green look like velvet, and the look suits a quiet Christmas at home as well as a formal dinner.
Matte top coat wears faster than gloss, so expect four to five days of perfect finish before the shine creeps back at the tips. A second matte coat revives the look in minutes, and hand cream stays off the nails while it dries.
At a Glance
Quiet evergreen nails suit a cosy home, and these cozy winter bedroom ideas bring the same calm to the season.
Green French with Holly

A green French tip with a tiny holly leaf painted on one nail is a gentle nod to the season. The holly needs only a dotting tool and two dots of green, plus three red dots for berries, so the art stays simple.
Keep the holly to the ring finger, and paint the other tips plain green, so the design reads festive without looking busy. A glossy top coat protects the tiny dots, which can catch and lift without a seal over them.
Holly on the nails pairs beautifully with holly on the door, and this DIY Christmas wreath is a lovely weekend project.
Holly Berry Accent
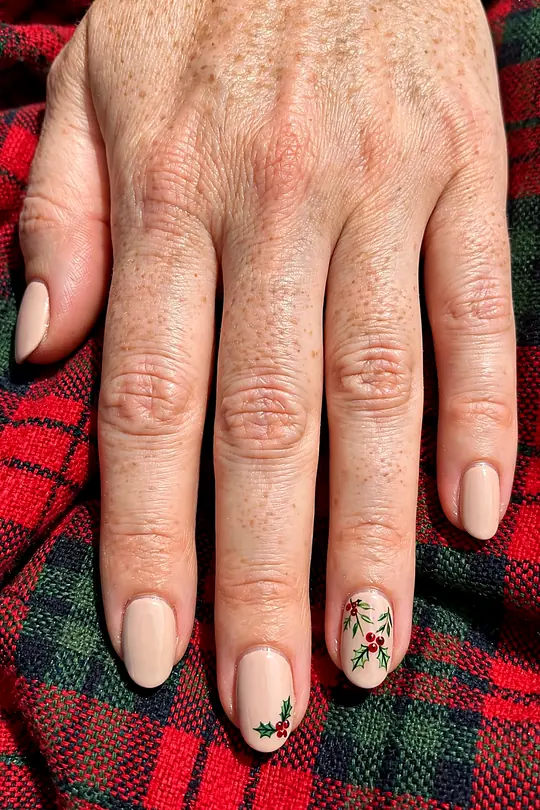
Three small red berries on a nude nail say Christmas in the quietest possible way. The accent works on any nail length, and it suits people who want a festive touch without a full festive manicure on every nail this season.
A dotting tool makes the berries round and even, and a toothpick works in a pinch. Place the three dots in a small triangle, add two tiny green leaves beside them, and let the art dry before the top coat.
Nude polish underneath keeps the accent the focus, and a sheer pink base flatters warm skin tones best. The berries last about a week under top coat, and a chip on one dot is easy to repaint with the same dotting tool.
Berry nails and cranberry dishes share a colour, and these cranberry recipes bring the same red to the table.
Mistletoe Kiss Accent
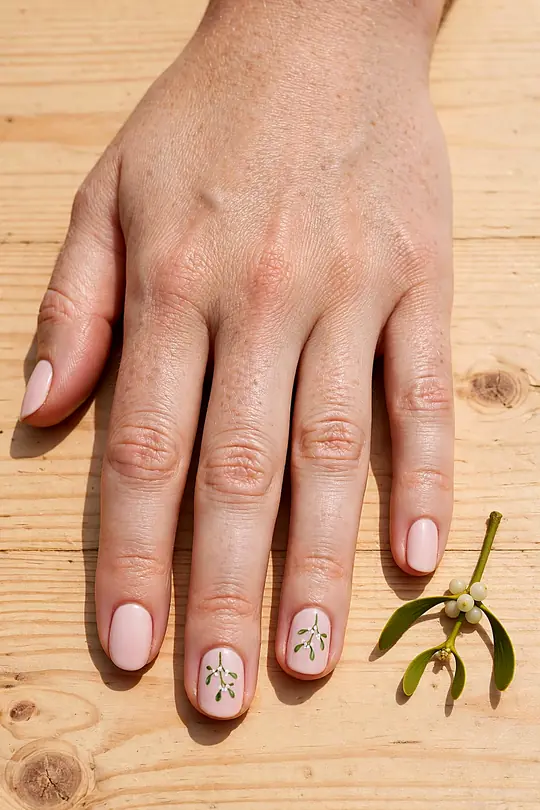
Mistletoe painted on one nail is a playful party detail, and it starts more conversations than any plain colour. Two green leaves and three white berries are all the art needs, painted with a dotting tool on a nude base.
Party tip: paint the mistletoe the night before the party, not the morning of it. Fresh nail art smudges easily, and an overnight dry keeps every tiny berry perfectly round.
The accent sits best on the ring finger, where it shows in photos without taking over the hand. Keep the other nails a soft nude or pale pink, so the mistletoe stays the talking point all evening at the party.
Mistletoe nails are made for a friends gathering, and these friendsmas party ideas make the evening one to remember.
Gold Foil on Nude

Torn gold foil on a nude base looks expensive and takes almost no skill. The foil sticks to a tacky coat of polish, so the only timing that matters is waiting until the base is sticky but not wet to the touch.
Tear the foil into small irregular pieces with tweezers, and press each piece down gently, leaving gaps of nude showing between them. A thick top coat smooths the edges, so the foil never catches on fabric or hair through the week.
Foil fix: if a piece lifts after a day, press it back down with a drop of top coat and seal again. Replacing one flake beats repainting the whole nail.
Gold foil nails make a lovely gift-season look, and these Christmas gift ideas for mom pair beautifully with a manicure treat.
Rose Gold Chrome

Chrome care: cap the free edge twice with top coat, because chrome lifts from the tips first. Avoid hot water for a few hours after application, while the seal sets.
Rose gold chrome turns nails into polished metal, with a warm pink shine that suits every skin tone. The mirror effect comes from chrome powder rubbed over a tacky gel base, then sealed under a glossy top coat for lasting shine.
Smooth nails are essential here, because chrome shows every ridge and bump. Buff the surface gently, wipe away the dust, and apply the powder with a silicone applicator for the most even mirror finish on every nail without streaks or patches.
Rose gold nails glow beside warm candlelight, and this luxury Christmas decor sets the same golden mood at home.
Champagne Glitter Fade

A champagne glitter fade starts dense at the tip and melts into a nude base, like frost settling on glass. The gradient needs a makeup sponge, dabbed gently, because a brush leaves hard lines where the glitter stops abruptly at the edge.
At a Glance
These holiday nails suit a New Year’s party as well as Christmas Day, since champagne gold works across the whole season. Build the fade in thin layers, letting each one dry, so the glitter stays smooth and never clumps at the tip.
Champagne nails call for champagne snacks, and these New Year’s Eve appetizers are made for the countdown.
Gold Leaf on Burgundy

At a Glance
Gold leaf scattered over deep burgundy looks like candlelight on velvet, and the contrast is the whole point of the design. Keep the leaf pieces small and sparse, with plenty of dark polish showing between them for depth and drama.
This is one of those christmas nails designs that look far harder than they are. Press the leaf onto a tacky coat with tweezers, seal with two coats of top coat, and the gold stays put for a week or more.
Burgundy and gold nails love a velvet dress, and these velvet gowns carry the same rich colour story.
Silver Snowfall Dots
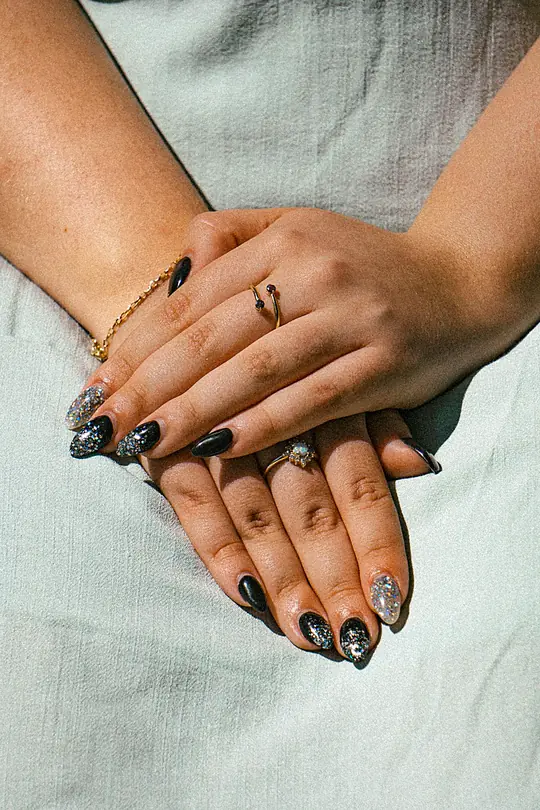
Tiny silver dots scattered over a pale blue base look like snow falling against a winter sky. The dots need a dotting tool in two sizes, so the snowfall looks natural instead of stamped on in a grid like a pattern.
Random placement is the secret, and it takes more care than neat rows. Scatter the dots unevenly, leave some nails nearly bare, and add a few larger dots for the flakes that catch the eye first. A matte top coat makes the snow look soft, while gloss makes it sparkle.
At a Glance
Snowfall nails pair well with a winter wardrobe refresh, and these winter hairstyles finish the cold-weather look.
Frosted Silver Glitter

Frosted silver glitter looks like ice crystals catching the morning light. A fine silver glitter over a pale grey base gives the frosted effect, while chunky glitter reads more like a disco ball than a cold winter morning in December.
Gather These
Shape: Short oval | Finish: Sparkling gloss | Time: 35 minutes
- Base coat
- Pale grey polish
- Fine silver glitter polish
- Glossy top coat
- Cuticle oil
- Lint-free wipes
Silver glitter flatters cool skin tones best, and it pairs with grey, navy, and white outfits without clashing. Two coats of top coat smooth the glitter texture, so the nails feel as polished as they look, with no rough edges.
Frosted nails love cold weather, and this winter skincare routine for dry skin keeps hands soft through the season.
Icicle Blue Tips
The Essentials
Shape: Medium almond | Finish: High gloss | Time: 45 minutes
- Base coat
- Clear polish
- Pale blue polish
- Silver glitter polish
- Makeup sponge
- Glossy top coat
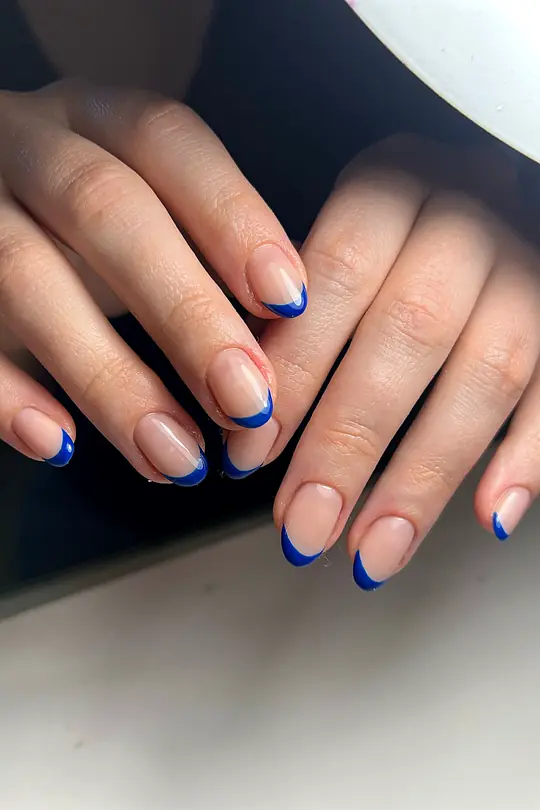
Icicle blue tips fade from a clear base into a pale frosty blue, like ice forming on glass. The gradient needs a makeup sponge and patience, with thin layers building the colour slowly toward the tip, never in one thick coat.
A tiny silver dot at the base of each nail adds a frozen sparkle, and it takes only a minute with a dotting tool. Keep the rest of the nail clear, so the blue tips stay the focus of the design.
Icicle nails look striking with a winter coat and boots, and these winter boots outfits complete the cold-weather look.
Midnight Blue Starry Night
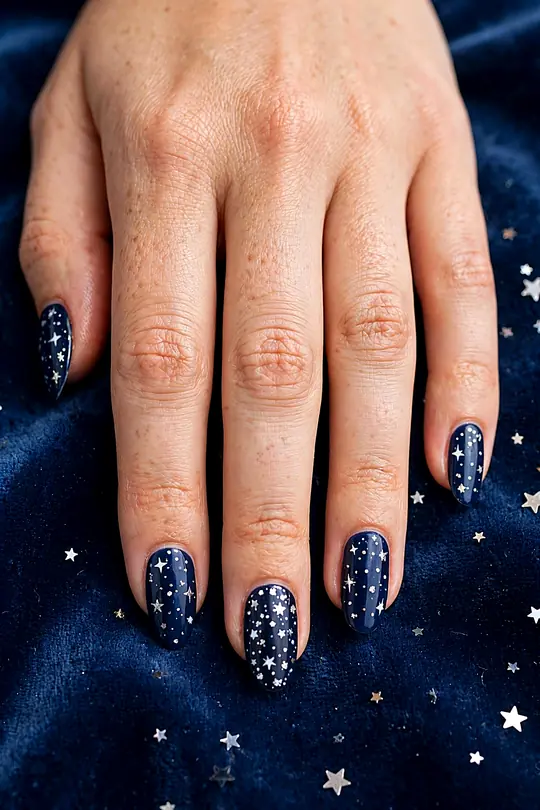
Midnight blue with tiny gold stars turns nails into a clear December night sky. The stars need a fine liner brush or a toothpick, and a few dots of gold in different sizes read as stars better than one neat pattern.
Dark blue stains the nail plate, so a thick base coat is essential, and removal needs an acetone soak rather than a quick wipe. The design lasts about a week, and the gold dots hide small chips well on dark polish.
Your Nail Kit
Shape: Medium almond | Finish: High gloss | Time: 40 minutes
- Base coat
- Midnight blue polish
- Gold metallic polish
- Fine liner brush
- Glossy top coat
- Acetone
Starry nails suit a night in by the tree, and these Christmas living room decorations make the whole house glow.
Frozen Ice Blue Chrome

Ice blue chrome looks like a frozen lake under winter sun, cool and bright and impossible to miss. The mirror finish comes from chrome powder over a pale blue base, sealed with a glossy top coat for a lasting mirror shine.
The Method
- File nails into a medium almond shape and buff the surface smooth.
- Apply base coat and two thin coats of pale blue polish.
- Rub chrome powder over the tacky blue with a silicone applicator.
- Brush away loose powder with a soft fan brush.
- Seal with glossy top coat, capping the free edge twice.
Chrome powder needs a smooth base, so buff the nails gently and wipe away every trace of dust first. Apply the powder with a silicone applicator, rubbing in small circles until the mirror effect appears across the whole nail evenly.
Ice blue chrome nails finish a winter look with a cool shine, and these Christmas decor ideas bring the same frosty sparkle indoors.
Snowflake White on Navy
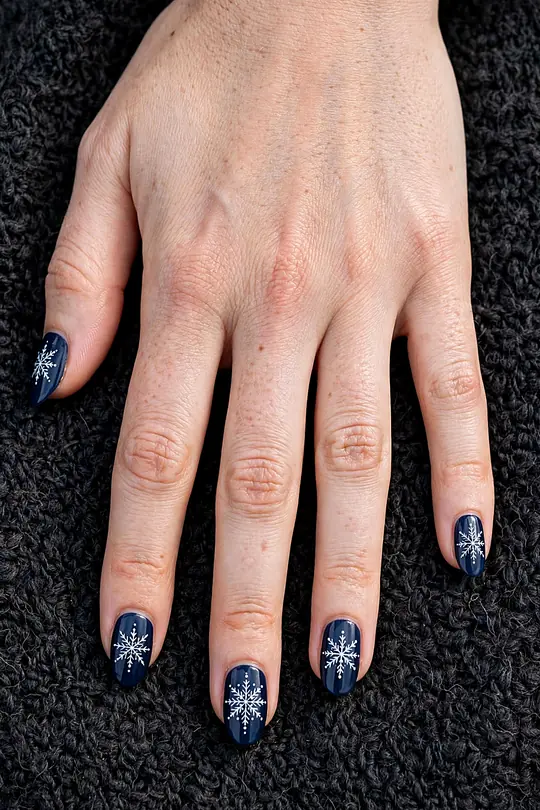
Step by Step
- Paint two coats of deep navy polish, letting each coat dry fully before the next.
- Stamp or hand-paint one white snowflake on each ring finger with a fine detail brush.
- Add tiny white dots around the snowflake for a falling-snow effect.
- Seal the art with a glossy top coat, capping the free edge to stop chips.
- Clean up the cuticles with a brush dipped in acetone for a neat finish.
Deep navy polish turns a white snowflake into something worth looking at twice. The dark base makes the fine lines read crisp, even on shorter nails, and a single snowflake on each ring finger keeps the set wearable for work as well as parties.
Two coats of navy give full coverage without streaking, and a glossy top coat keeps the white art from yellowing at the tips. This set pairs easily with silver jewellery and dark knitwear, and it survives a full week of typing and washing up with a top coat refresh on day four.
Pair the set with Christmas decorations in the same navy and white palette for a coordinated holiday look.
White Winter French Tips
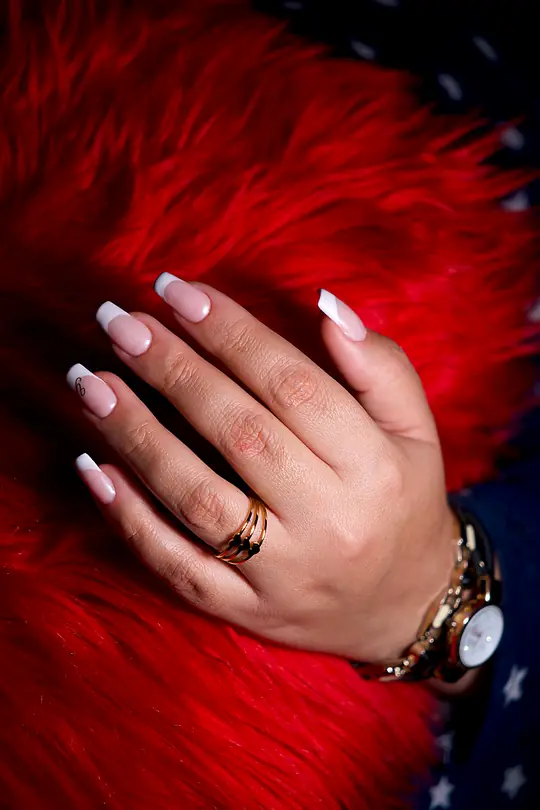
A French tip in soft white looks freshly done for longer than a full white nail, because regrowth hides at the cuticle instead of showing at the tip, and the pale base flatters every skin tone. A touch of shimmer in the white keeps the tips from looking flat under indoor light.
Square or soft square nails carry this design best, because the straight tip line stays visible and the white reads clean. Keep the white band narrow, about a fifth of the nail, or the look turns heavy on short nails. A matte top coat on the base with a glossy tip adds quiet contrast.
Application
- Shape the nails into a soft square and push the cuticles back gently.
- Apply a sheer nude base coat and let it dry completely.
- Paint the white tip with a steady hand, or use tip guides for a straight line.
- Finish with top coat, then add a thin line of silver glitter under the white for sparkle.
A slow morning suits this look, and these Christmas breakfast ideas make the most of one.
Snowy White Almond

Almond nails and snowy white polish suit each other, because the tapered shape keeps a pale shade from looking chalky. The trick is two thin coats rather than one thick one, which stops the white from pooling at the cuticle and leaving ridges.
How to Apply
- File the nails into a smooth almond shape, keeping both sides even.
- Apply a ridge-filling base coat to smooth the nail surface.
- Paint two thin coats of snowy white, drying each coat fully.
- Add a glossy top coat and cap the free edge to prevent tip wear.
White shows every chip, so keep a matching polish in a handbag for quick touch-ups on the free edge. This shade suits short to medium almond nails best; very long nails make the white read stark. It pairs neatly with cream knitwear and gold rings.
What You Need
Shape: Almond | Finish: High gloss | Time: 30 to 45 minutes
- Ridge-filling base coat
- Snowy white polish
- Glossy top coat
- Almond nail file
- Cuticle oil
White nails and a warm room go together, and these cozy winter living room ideas make staying in feel like a treat.
Snow Globe Accent
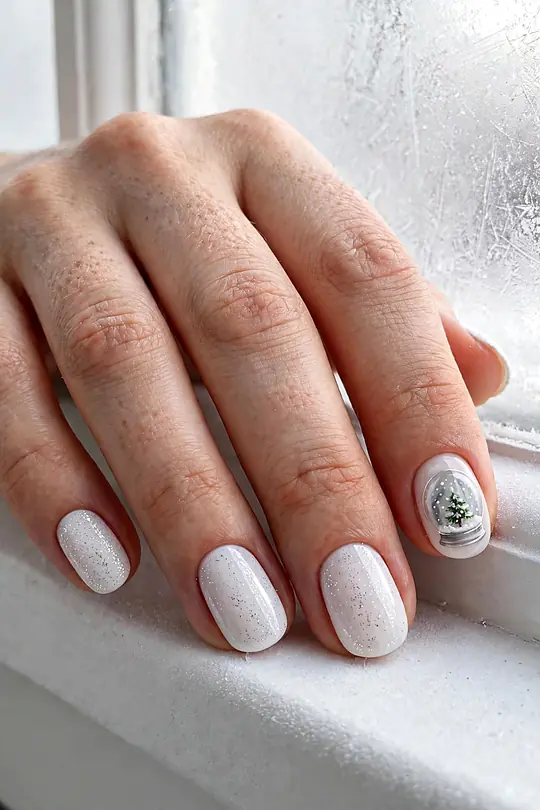
A snow globe on one nail turns a plain manicure into a conversation piece, and the rest of the nails stay simple so the accent has room to shine. Paint the globe on the ring finger, where it catches the eye without getting in the way of typing or cooking.
Globe tip: paint the globe base first, let it dry, then add the dome and the tiny tree inside, or the colours will bleed together and the scene turns muddy.
At a Glance
Glitter polish inside the dome reads as falling snow and hides small mistakes in the painting. Keep the other nails in a soft grey or pale blue so the accent stays the focus, and seal everything with two layers of top coat for a glassy finish.
The nail art pairs sweetly with the real thing, and these DIY Christmas snow globes make lovely gifts too.
Snowman Accent Nail

One snowman face on the ring finger brings a smile every time hands appear, and the design stays cute rather than childish when the other nails keep a deep red or forest green. The face needs only two black dots, a carrot nose, and a tiny smile.
At a Glance
Face tip: paint the carrot nose as one short triangle, not a line, and place it slightly low, or the snowman reads as surprised instead of smiling every time hands move.
Short nails suit this accent best, because the face fits the nail bed without squeezing the features together. A dotting tool keeps the eyes even, and a matte top coat over the snowman nail makes the face look like frosted glass.
Cute nails and party food belong together, and these Christmas appetizers are made for a gathering.
Tiny Christmas Tree Art
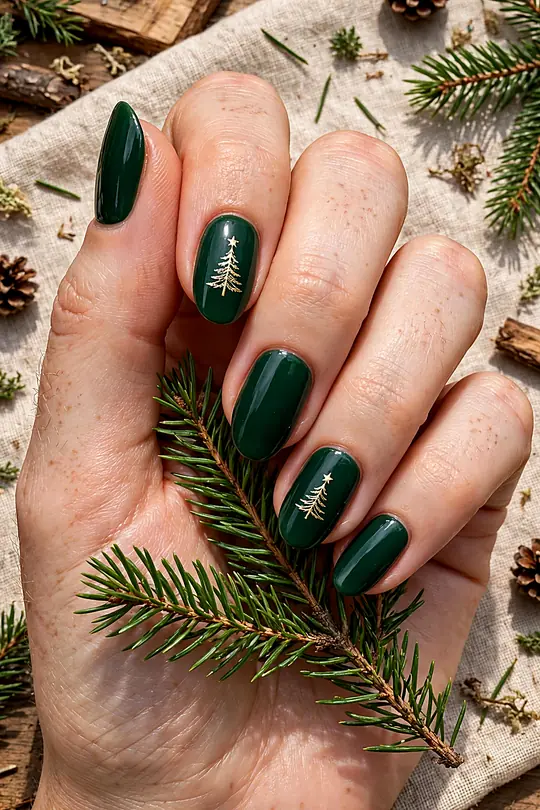
Tree tip: build the tree in three short horizontal strokes, widest at the bottom, and leave a gap of bare nail between each layer so the shape reads clearly at a glance.
At a Glance
A tiny tree on a deep green or midnight base looks festive without shouting, and the design works on nails of almost any length. Gold dots stand in for baubles, and a single star at the top finishes the picture in seconds.
Keep the tree on the ring finger only if the other nails carry glitter, or the two compete and the set looks busy. A fine liner brush gives straighter branches than a toothpick, and the whole design takes about ten minutes once the base is dry.
A tiny tree on the nails goes well with a big one at home, and these flocked tree decorating ideas dress it beautifully.
Negative Space Christmas Tree
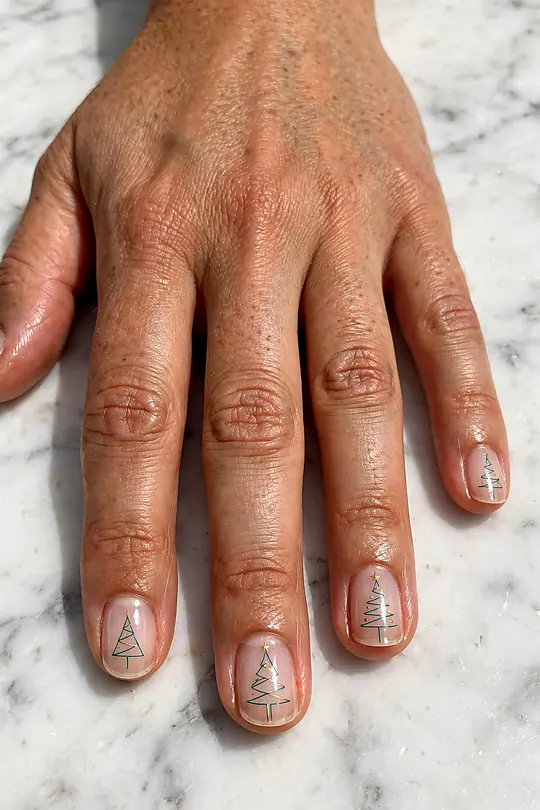
Negative space turns a Christmas tree into a modern design, with the bare nail forming the tree and the polish filling everything around it. The look suits short nails especially well, because the empty shape keeps the design light instead of crowded.
Tape or nail vinyls make the straight edges far easier than freehand painting, and the tape comes off while the polish is still tacky for the cleanest line. A deep red or pine green surround reads most festive, while black keeps the set sleek for evening.
Edge tip: press the tape down firmly at the corners, or polish creeps underneath and the tree outline blurs, and no top coat can rescue a ragged edge once the polish sets.
At a Glance
Trees this pretty deserve a dressed one nearby, and these bows on Christmas trees add the finishing touch.
Christmas Lights String Art
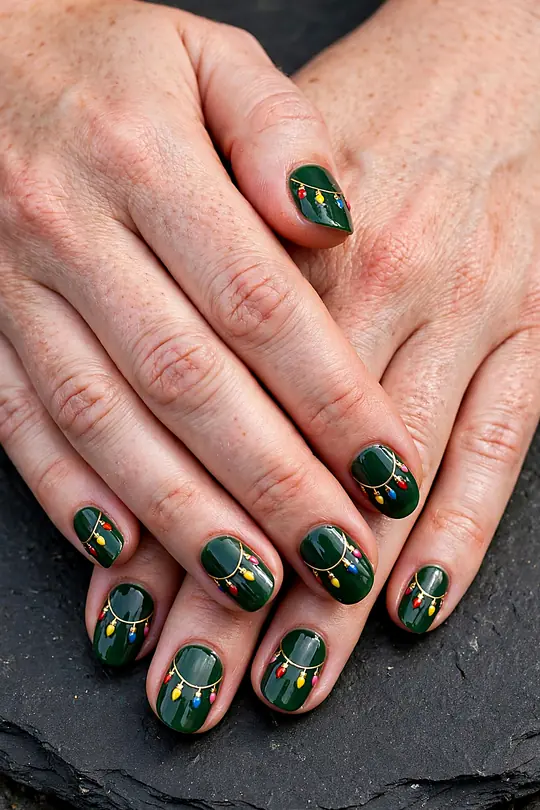
Few designs capture the season as quickly as this one, and it is the kind of christmas nails idea that gets compliments before anyone notices the outfit. The bulbs are just colourful dots joined by a thin curved line, so the art stays easy even for a first attempt.
Your Kit
Shape: Any | Finish: High gloss | Time: 45 to 60 minutes
- Dark green or black base polish
- Red, gold, blue and green dotting polishes
- Fine liner brush
- Dotting tool
- Glossy top coat
Bulb tip: vary the bulb sizes slightly and stagger the string height on each nail, or the lights line up like a fence and the playful, hand-painted effect disappears entirely.
Longer nails show the string best, because the curve has room to dip and rise across the nail. Keep the bulbs small and the spacing uneven, and the design survives a week of wear with a top coat refresh halfway through.
Lights on the nails call for something sweet on the table, and these cookie exchange ideas fill it nicely.
Ornament Bauble Art
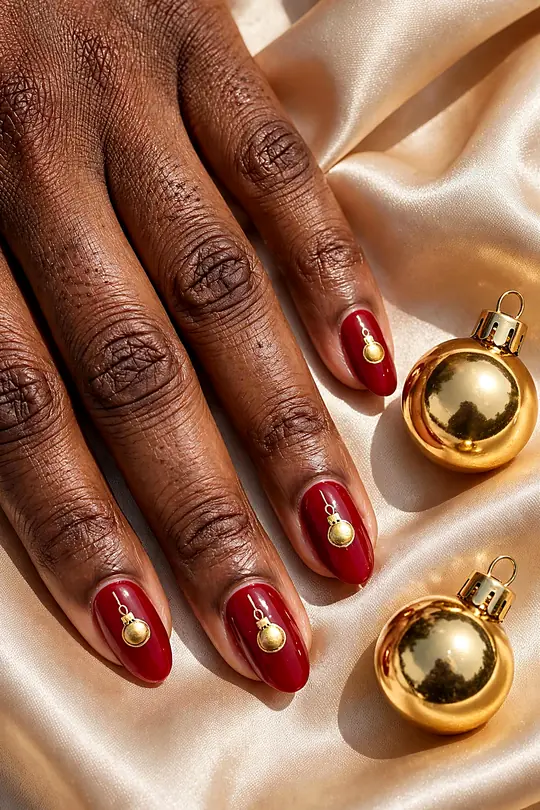
Baubles painted on the nails look like tiny ornaments hanging in a row, and the trick is a glossy highlight dot that makes each circle read round. One bauble per nail keeps the set elegant, while two or three turn it playful.
Bauble tip: add the highlight dot while the bauble polish is still wet, or it sits on top like a bump instead of melting into the shine for a glassy round look.
The Lineup
Shape: Oval | Finish: High gloss | Time: 40 to 55 minutes
- Deep red and gold polishes
- Thin liner brush
- Dotting tool
- Glossy top coat
- Silver striping polish
Oval nails give each bauble the most room, and a thin gold line above each circle reads as the hanging string. This design pairs beautifully with velvet dresses and gold jewellery, and it photographs well in warm evening light at parties.
Handmade ornaments match this mood, and these handmade Christmas gift ideas carry it further.
Gift Bow Accent
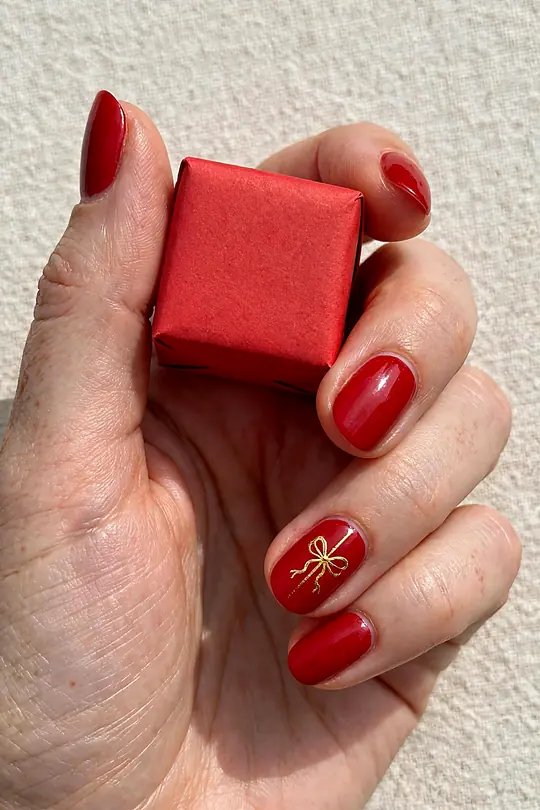
Bow tip: paint two small triangles for the loops and one dot for the knot, then stop, because extra strokes turn a neat bow into a scribble fast on short nails.
A gift bow on the ring finger turns a red manicure into something gift-ready, and the rest of the nails stay plain so the bow has the spotlight. Gold ribbon lines work best, because they read festive without needing a steady hand for tiny details.
Shopping List
Shape: Squoval | Finish: High gloss | Time: 35 to 50 minutes
- Classic red polish
- Metallic gold striping polish
- Fine liner brush
- Dotting tool
- Glossy top coat
Squoval nails suit this accent, because the straight sides give the ribbon lines a clean path down the nail. The design wears well for a week, and the gold lines hide small chips better than a plain red manicure ever could.
A bow on the nails suits a handmade gift, and these DIY shadow box ideas make presents worth keeping.
Poinsettia Flower Art

Poinsettia petals painted in deep red with a gold centre look like a small flower pressed onto the nail, and the design suits the season without a single snowflake. The petals are just five teardrop strokes around a dot, so the flower comes together quickly.
Supplies
Shape: Almond | Finish: High gloss | Time: 45 to 60 minutes
- Deep red polish
- Gold polish for the centre
- Dark green polish for leaves
- Fine detail brush
- Glossy top coat
Almond nails give the petals room to spread, and one flower per hand keeps the set refined rather than busy. The common mistake is painting the petals too large, which crowds the nail and hides the shape, so keep each petal short and let the centre do the work.
Petal tip: paint each petal from the centre outward in one stroke, lifting the brush at the end, or the edges turn blunt and the flower loses its shape entirely.
Real poinsettias sit near the tree, and these DIY felt Christmas ornaments keep the handmade mood going.
Wreath Ring Accent
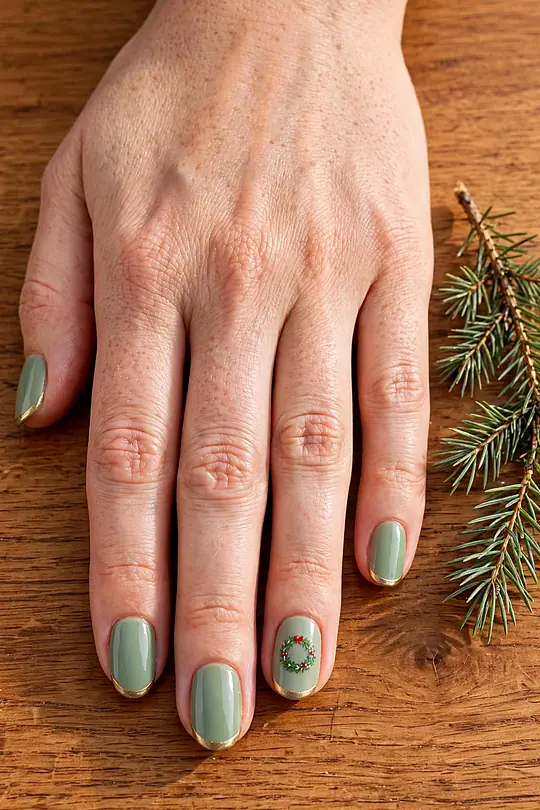
A miniature garland circling the base of one nail is the idea here, and the ring finger is its natural home, sitting close to the cuticle where it frames the nail. Deep green leaves with red berries keep the colours classic and easy to wear.
The Technique
- Paint the nails in a sheer nude base and let it dry fully.
- Dot a ring of deep green leaves around the base of the ring finger.
- Add tiny red dots between the leaves for berries.
- Seal with a glossy top coat, capping the free edge.
Wreath tip: keep the ring narrow and close to the cuticle, or it creeps halfway up the nail and the wreath reads as a blob instead of a neat garland.
Short nails carry this design well, because the wreath sits at the base and needs little length. The rest of the nails stay in the same nude shade, which makes the set office-friendly and lets the wreath stay the single festive note.
A wreath on the nails pairs with one on the door, and these salt dough Christmas ornaments add more handmade charm.
Reindeer Nose Art

One red nose on the ring finger is the whole joke, and it works because the rest of the nails stay in a quiet brown or taupe. The nose is a single glossy red dot, slightly larger than a bauble dot, and it catches the eye every time hands move.
Nose tip: place the red dot dead centre on the nail, slightly toward the tip, or it drifts sideways and the joke lands as a random red spot instead of a reindeer nose.
How to Do It
- Paint the nails in a warm taupe or soft brown base.
- Add a single glossy red dot to the centre of each ring finger.
- Dot two tiny antler strokes above the nose with a liner brush if wanted.
- Seal with top coat for a shiny, polished finish.
This design suits short nails and busy hands, because nothing delicate can chip and the single dot is easy to touch up. It pairs well with camel coats and chunky knitwear, and it stays fun right through to New Year without feeling tired.
Playful nails suit a home with character, and these vintage home decor ideas bring the same warmth indoors.
Plaid Flannel Nails
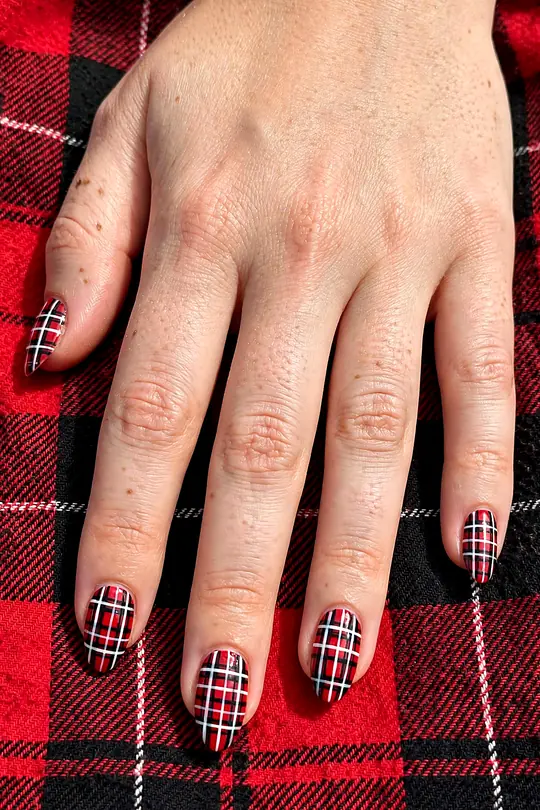
Plaid reads cosy the moment it appears, and a red and green flannel check on the nails works like a favourite shirt for the hands. The lines need not be perfect, because flannel plaid is forgiving, and slightly uneven stripes look more like fabric than machine-straight ones.
Gather These
Shape: Square | Finish: Matte | Time: 40 to 55 minutes
- Deep red base polish
- Forest green striping polish
- White striping polish
- Thin liner brush
- Matte top coat
At a Glance
Square nails carry plaid best, because the straight edges frame the check neatly. A matte top coat sells the flannel effect far better than gloss, and the design hides chips well, since a small nick reads as part of the pattern rather than damage.
Plaid nails and winter layers go hand in hand, and these winter fashion outfits complete the picture.
Tartan Check Accent
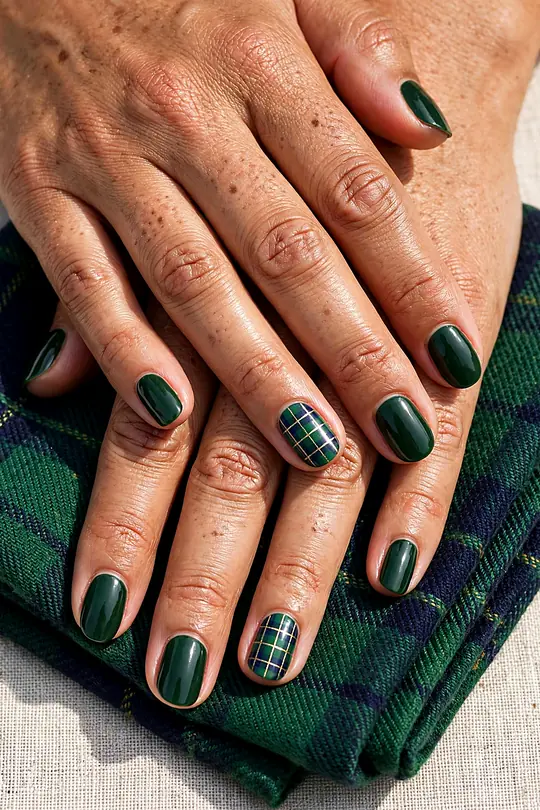
Tartan on two accent nails gives the set a Scottish warmth without turning every nail into a pattern, and the remaining nails stay in the tartan’s deepest shade. Red and navy tartan reads classic, while green and black leans a little more modern.
At a Glance
The Essentials
Shape: Oval | Finish: High gloss | Time: 45 to 60 minutes
- Navy or deep red base polish
- White and gold striping polishes
- Thin liner brush
- Glossy top coat
- Nail tape for straight lines
Nail tape makes the crossing lines far straighter than freehand work, and the tape lifts while the polish is tacky for crisp edges. Keep the tartan on the ring and middle fingers only, or the pattern overwhelms the hand and the set looks busy.
Tartan nails love a soft scarf, and these scarf outfits show how to wear one well.
Cozy Fair Isle Pattern
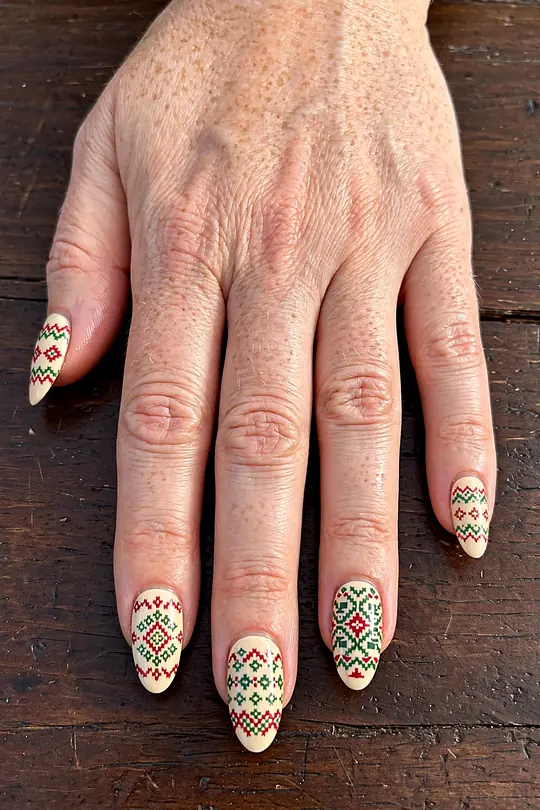
Fair Isle knitting translates to nails as small repeating diamonds and dots, and the pattern looks impressively detailed even though it is mostly dotting. Cream, red, and green stay true to the knitwear original, and the set feels like a favourite jumper for the hands.
The Method
- Paint a cream base coat and let it dry completely.
- Dot a row of small red diamonds across the centre of each nail.
- Add green dots between the diamonds and a thin line above and below.
- Seal with a matte top coat for a knitted wool effect.
At a Glance
Medium nails show the repeat best, because very short nails squeeze the diamonds into dots. A matte top coat sells the knitted look, and the design pairs naturally with chunky knit jumpers and wool coats for a full winter outfit.
Fair Isle nails belong with a proper winter wardrobe, and this winter capsule wardrobe builds one simply.
Sweater Knit Texture
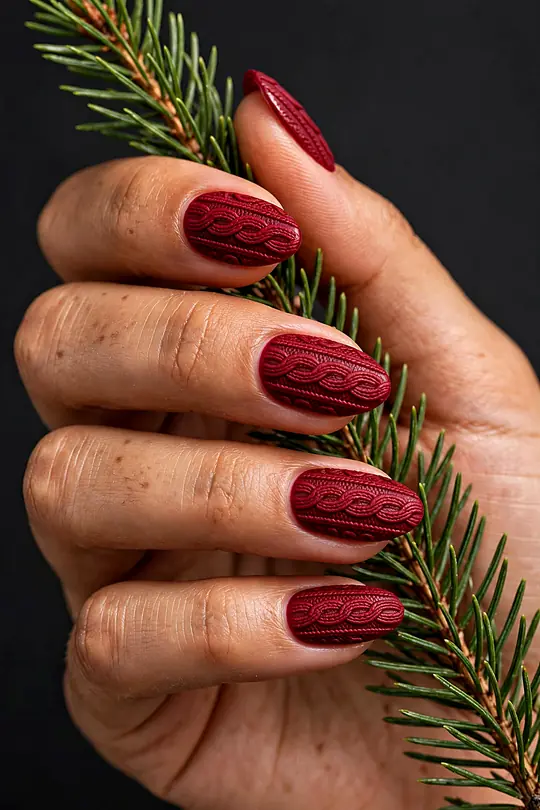
Sweater knit nails use raised polish to mimic cable stitches, and the texture catches light in a way flat polish never does. Cream and dusty pink show the ridges best, while dark shades hide the texture and lose the effect.
At a Glance
Step by Step
- Paint two coats of cream polish and let them dry fully.
- Draw raised cable lines with a thick gel polish or 3D nail art pen.
- Let the texture set completely before touching the nails.
- Finish with a matte top coat to mimic wool.
The common mistake is rushing the texture layer, which smudges the cables into a lumpy mess. Let each raised line set before adding the next, and keep the design on two accent nails if the full set feels too heavy for everyday wear.
Knit texture on the nails matches the real thing, and these crochet patterns for beginners start the hobby gently.
Gingerbread Brown
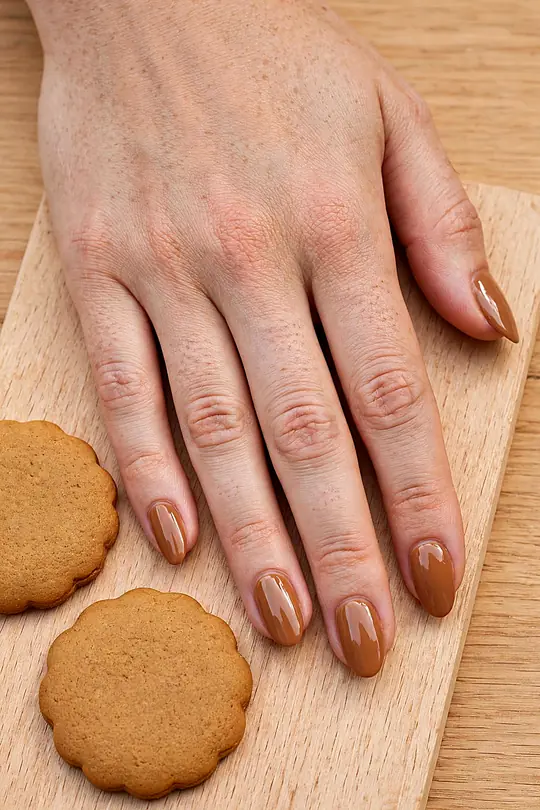
Gingerbread brown is the warmest neutral of the season, and it flatters every skin tone without the harshness of black or the starkness of white. A single coat of a rich caramel brown reads expensive, and two coats give a deep, cookie-like finish.
White icing dots along the cuticle turn a plain brown manicure into a gingerbread house detail, and the dots are easy enough for a first attempt at nail art. This is the kind of christmas nails look that works all December and still feels right at New Year.
Your Nail Kit
Shape: Squoval | Finish: High gloss | Time: 30 to 40 minutes
- Rich gingerbread brown polish
- White dotting polish
- Dotting tool
- Glossy top coat
- Cuticle oil
Application
- Paint two coats of gingerbread brown polish, drying each coat fully.
- Dot small white icing dots along the cuticle line.
- Add a tiny white cross on one nail for a gingerbread button.
- Seal with a glossy top coat for a fresh-baked shine.
Gingerbread nails and real gingerbread go together, and these cookie recipes are worth baking.
Hot Cocoa Shimmer

Hot cocoa shimmer is brown polish with a warm golden glow, and it looks like a mug of cocoa held up to the light. The shimmer hides small ridges and chips far better than a flat brown, which makes it a forgiving choice for nails that work hard.
What You Need
Shape: Round | Finish: Shimmer | Time: 25 to 35 minutes
- Warm cocoa brown shimmer polish
- Base coat
- Glossy top coat
- Cuticle oil
- Nail file
How to Apply
- Shape the nails into a soft round and push the cuticles back.
- Apply a base coat to stop the brown staining the nail.
- Paint two coats of cocoa shimmer polish, drying each coat fully.
- Finish with a glossy top coat for a warm, lit-from-within glow.
Shimmer tip: stir the bottle gently instead of shaking it, or air bubbles form in the polish and the shimmer settles in streaks across the nail that no top coat can smooth out.
At a Glance
Short round nails suit this shade best, because the shimmer reads as a warm glow rather than a statement. It pairs easily with camel, cream, and burgundy outfits, and it suits the office and a dinner party alike without a single change.
Cocoa nails and slow cooking suit cold evenings, and these crockpot recipes make dinner easy.
Sugar Plum Shimmer
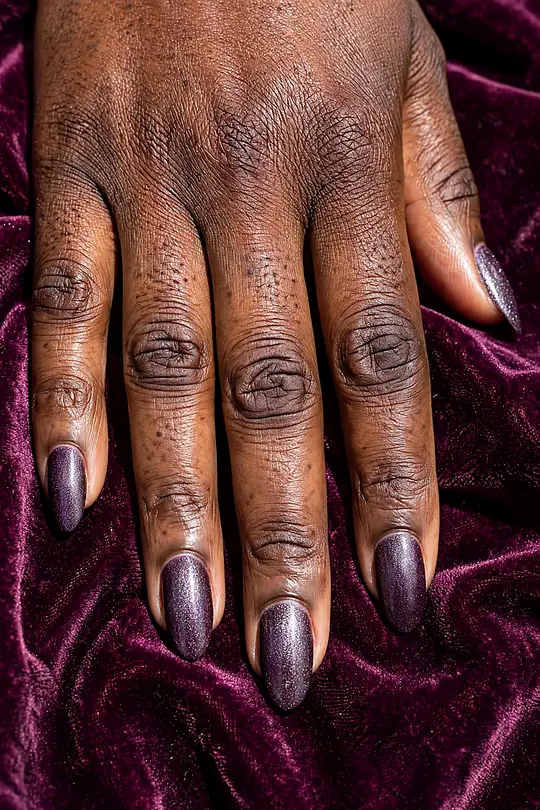
Sugar plum is a deep purple with a sugary sparkle, and it reads festive without touching red or green at all. The shade suits medium to long nails best, where the shimmer has room to shift colour as hands move through the light.
At a Glance
Two thin coats give the best colour, because one thick coat dries uneven and the shimmer pools at the cuticle. A glossy top coat deepens the purple and keeps the sparkle bright, while a matte top coat turns the same shade moody and modern.
Your Kit
Shape: Almond | Finish: Shimmer | Time: 25 to 35 minutes
- Sugar plum shimmer polish
- Base coat
- Glossy top coat
- Nail file
- Cuticle oil
The Technique
- File the nails into a smooth almond shape.
- Apply a base coat to protect the nail from staining.
- Paint two thin coats of sugar plum shimmer, drying each coat.
- Seal with a glossy top coat and cap the free edge.
Sugar plum nails and a warm bowl suit winter evenings, and these winter soup recipes make them cosier.
Cranberry Glitter
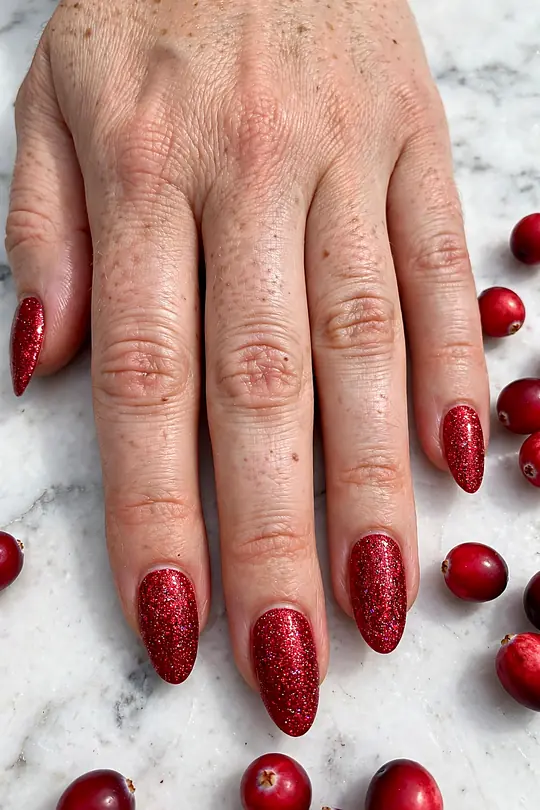
Cranberry glitter is the boldest red in this collection, and it earns its place at the party table. The deep berry shade flatters warm and cool skin tones alike, and the fine glitter catches candlelight in a way plain red never manages.
Fine glitter wears longer than chunky glitter, because the small particles sit flat and resist catching on fabric. Two coats over a matching red base give full coverage without the gritty feel that three coats of glitter alone can leave behind.
Removal is the part to plan for, because glitter clings to the nail and rubs the skin raw if scrubbed dry. Soak a cotton pad in remover, hold it on the nail for a full minute, and the glitter lifts away in one piece instead of scattering.
The Lineup
Shape: Squoval | Finish: Glitter | Time: 35 to 50 minutes
- Deep red base polish
- Fine cranberry glitter polish
- Glossy top coat
- Peel-off base coat (optional)
- Acetone remover and cotton pads
Bold nails and a lighter table balance each other, and these healthy Thanksgiving side dishes keep dinner fresh.
Blush and Gold Minimal

Blush and gold is the quietest of these holiday nails, and sometimes quiet is exactly right. A soft blush base with one thin gold line near the tip looks polished without trying, and it suits hands that type, cook, and wrap gifts all day.
Short nails carry minimal designs best, because the clean lines stay visible and the gold does not overwhelm the nail. Keep the gold line thin, about a millimetre wide, or the set tips from minimal into flashy and the blush loses its softness.
This set lasts well, because a small chip in a blush base barely shows and the gold line can be redrawn in seconds. It pairs with a grey jumper as easily as a silk dress, which makes it the easiest set here to wear every day.
How to Do It
- Shape the nails short and round, then push the cuticles back.
- Paint two coats of soft blush polish, drying each coat fully.
- Draw one thin gold line near the tip with a striping brush.
- Seal with a glossy top coat for a clean, polished finish.
Minimal nails suit a calm beauty routine, and this skincare routine for women in their 50s keeps skin glowing too.
Confetti Party Nails

Confetti nails throw every colour onto the nail at once, and the result is pure party energy. Multi-coloured dots over a clear or nude base look like confetti caught mid-air, and no two nails need to match, which takes the pressure off completely.
The easiest way to place confetti is a dotting tool loaded with three or four colours, dabbed at random across the nail. Vary the dot sizes and leave some bare nail showing, or the colours merge into a muddy wash and the confetti effect disappears.
This design suits a New Year party best, when the dress code allows colour and the nails can match the mood. It wears well for a week, and a glitter top coat over the dots adds sparkle without hiding the confetti underneath.
Confetti tip: use three colours at most on each nail, even if the bottle collection is bigger, or the dots crowd together and the confetti reads as clutter instead of celebration.
Confetti nails were made for New Year, and these New Year’s Eve outfits match the energy.
Black Tie Gold Sparkle

Black and gold is the most formal pairing in this collection, and it suits a black-tie evening better than any red. A glossy black base with gold glitter at the tips reads like jewellery, and the set needs no other decoration to look finished.
Long almond or coffin nails carry this design best, because the length gives the gold gradient room to fade gradually toward the cuticle. Keep the gold dense at the tip and sparse near the cuticle, or the gradient reads as a solid block instead of a fade.
Black polish shows every ridge, so a ridge-filling base coat matters more here than with lighter shades. The set pairs with gold jewellery and a black dress, and it stays elegant long after the party ends, which makes it worth the extra prep.
At a Glance
Black tie nails deserve a black tie outfit, and these New Year’s Eve outfits for women over 50 dress the part.
Midnight Countdown Glitter
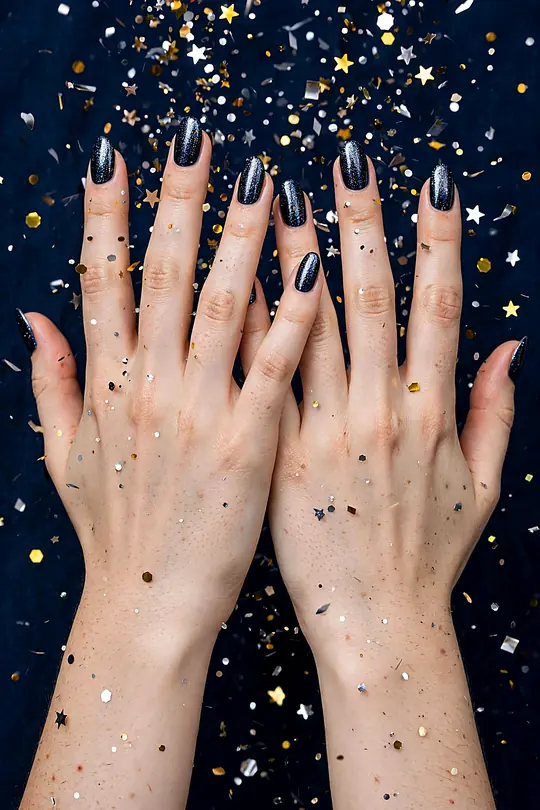
Midnight glitter is the loudest set in this collection, and it saves its best moment for the countdown. A deep navy base covered in silver and gold glitter looks like fireworks over a night sky, and the sparkle reads from across the room.
Layer the glitter over a matching navy base rather than painting glitter alone, because two coats of glitter on bare nails leave gaps and a gritty finish. A sponge helps here: dab the glitter on with a makeup sponge for dense, even coverage.
This set is the one to wear to the party and keep for the first week of January, because the deep navy base still looks smart once the glitter starts to wear. A top coat refresh on day three keeps the sparkle bright through the celebrations.
Shopping List
Shape: Almond | Finish: Glitter | Time: 40 to 55 minutes
- Deep navy base polish
- Silver and gold glitter polishes
- Makeup sponge
- Glossy top coat
- Peel-off base coat (optional)
The Method
- Paint two coats of deep navy polish and let them dry fully.
- Dab silver glitter onto the tips with a makeup sponge.
- Add gold glitter over the silver, concentrating it at the very tip.
- Seal with two layers of glossy top coat for a smooth finish.
Glitter tip: work one nail at a time and seal it before moving on, or the glitter dries patchy and the second coat drags the first one off, leaving bare navy showing through.
At a Glance
After the countdown comes a fresh start, and these healthy meal prep recipes make January easier.
Frequently Asked Questions
How long does a festive manicure last?
A regular polish manicure lasts about five to seven days with a good base and top coat, while gel lasts two to three weeks. Capping the free edge with every coat adds days to either finish, and gloves for washing up protect the polish from water damage.
Do these designs work on short nails?
Yes, most of these designs suit short nails, and some look better on them. Solid colours, polka dots, and simple accents all work beautifully at a short length. Save the detailed art, like stripes and gradients, for medium nails, where the extra space lets the pattern show.
How do you remove glitter polish without damaging nails?
Soak a cotton pad in acetone, press it onto the nail, and wrap the fingertip in foil for five minutes. The glitter lifts away with the pad, with no scrubbing needed. Peeling glitter off by hand tears the top layer of the nail, so the soak is always worth the wait.
Should you choose gel or regular polish for the holidays?
Gel lasts longer and resists chips better, which suits a busy holiday week. Regular polish is easier to remove at home and kinder to weak nails. For a one-night party, regular polish is plenty; for two weeks of events, gel is the safer choice.
How often should you reapply top coat?
A fresh top coat every two to three days keeps the shine high and seals the tips against chips. Apply it thinly, cap the free edge, and let it dry fully before handling anything. This small habit can add three or four extra days to a manicure.
Time to Pick Your Favourite
Fifty designs is a lot to choose from, and the right one is usually the set that matches the week ahead rather than the fanciest picture on the page. A quiet blush set suits a busy work week, while full glitter earns its place at the party, and both are right in their own moment.
These christmas nails ideas cover every mood of the season, whether the week ahead calls for something quiet and minimal or full sparkle for the countdown, and the right choice is the one that fits the days ahead. Paint it slowly, cap the free edge, and the set will still look fresh when the new year begins.
Holiday nails are a small pleasure that lasts well past the party, a detail that catches the eye every time hands appear, long after the decorations come down. Pick the set that feels right, paint it slowly, and enjoy every day of wearing it.